

Three Story Table
Actually, it’s not a “table”, it’s a sabang-t’akja. But, unless you speak Korean, that name can be a mouthful and maybe that’s why it has been translated into so many aliases over the years. Anyway, this Project is my own translation of the classic sabang-t’akja. Please come along.
I’ll admit that it’s hard to nail down the exact English definition of the Korean “sabang-t’akja”. The t’akja part is easy, generally translated as “open-shelved stand”. But when preceded by sabang, a word that in Korean can variously mean: 1. four sides; 2. in all directions; or 3. everywhere, this two-word noun literally translates to “ a shelf that is opened in four ways”. And I have seen that exact “name” for this item online, however, my furniture books tend to rely on real world function when they refer to it as a “book storage and display stand”. We’ll go with that one for now as use defines meaning. Astute readers may also recall that “storage and display” was the purpose of a hallway hutch, recently completed under the Red Top. One can contemplate the structures of these Eastern and Western furniture items and marvel at the products of convergent evolution underway in opposite hemispheres of the earth.
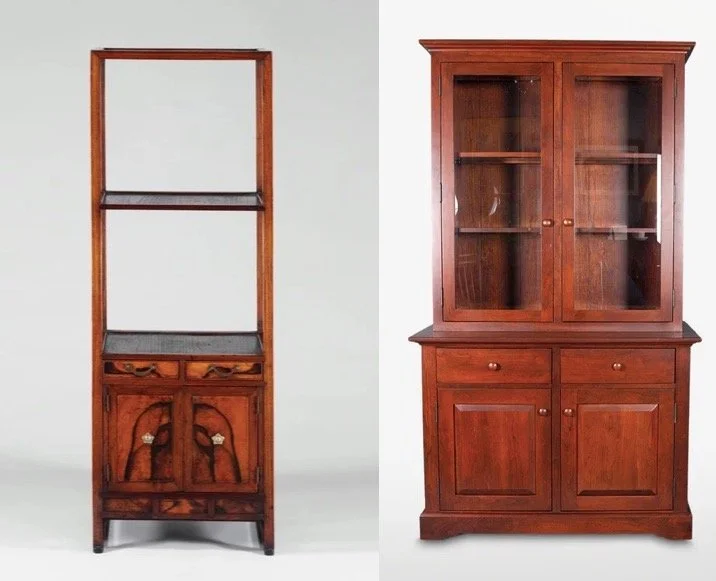
Examples of a Korean sabang-t’akja and American country style hutch found online
In the late Joseon Period (1392-1897), when sabang-t’akja were popular, they were furnishings found in the Master’s room (sarangbang) of a Korean home (hanok), what today we might call a study, where book storage and the display of “manly” objects was its function. I visited the Namsangol Hanok Village museum in Seoul during a visit in 2016 and saw many sabang-t’akja among the furnishings in their collection. This picture of a sarangbang scene was snapped there.
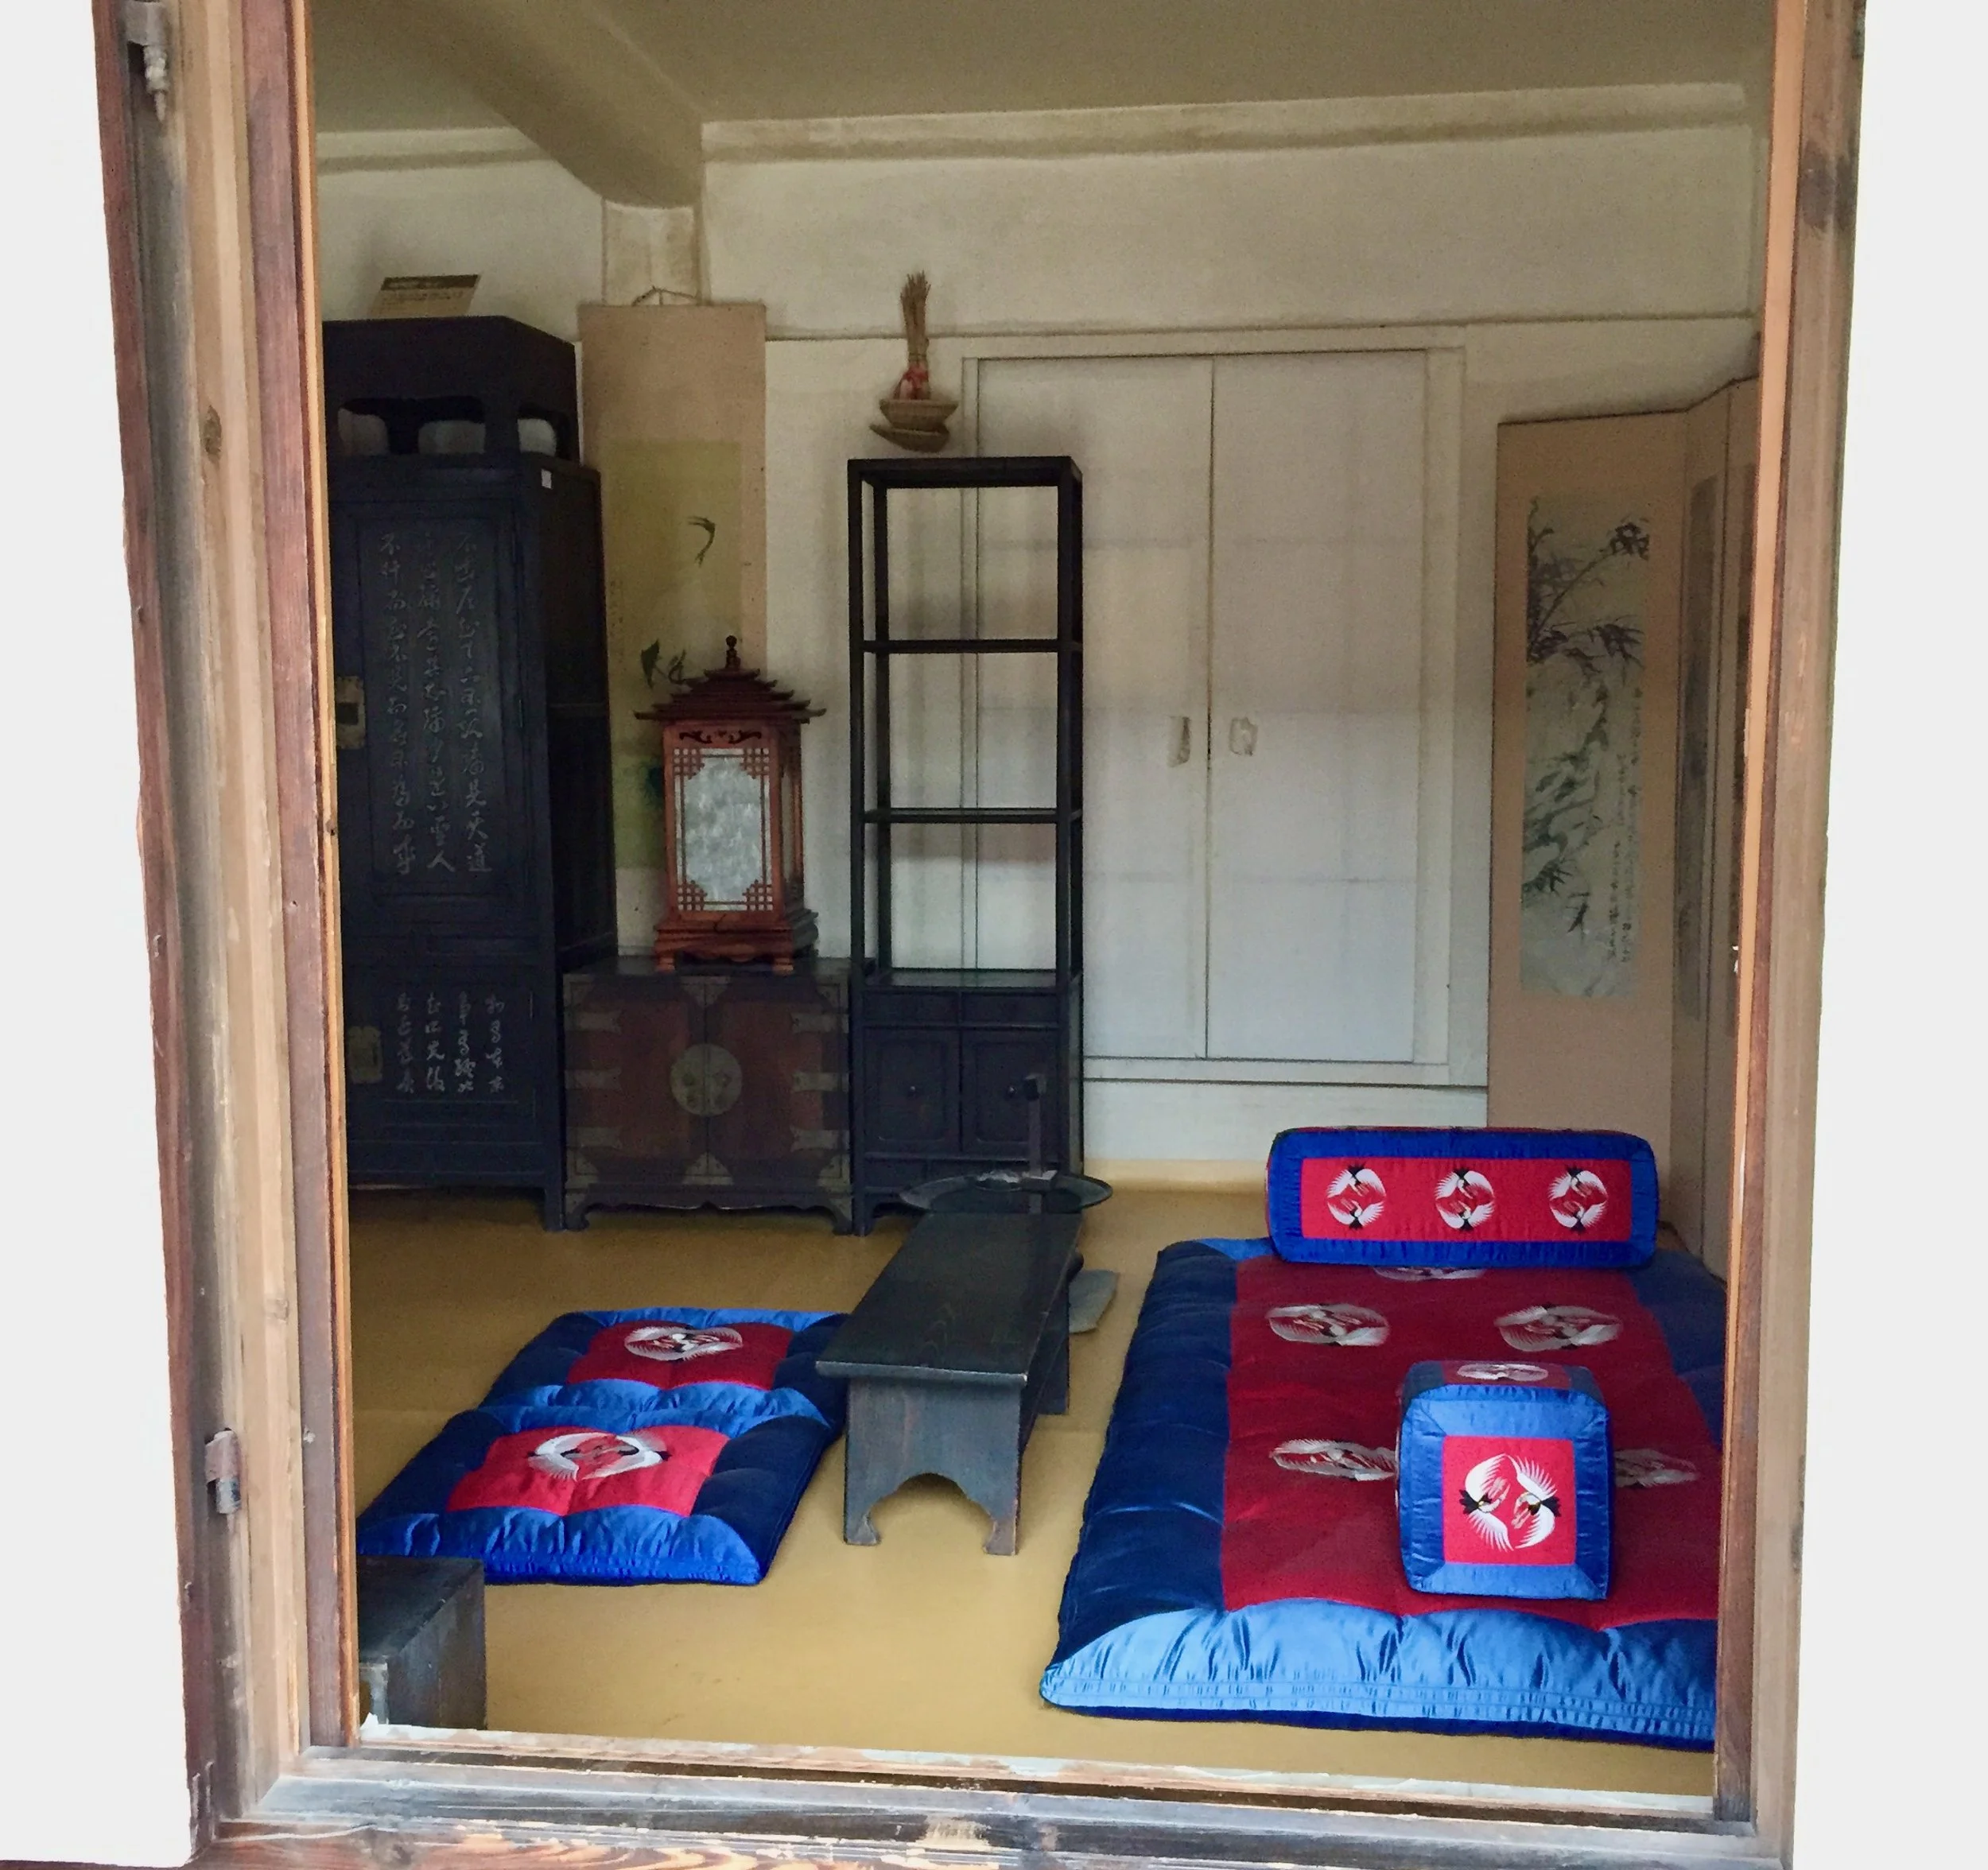
Book storage and display stand (sabang-t’akja) in the sarangbang
The sabang-t’akja Project described here is different - it’s for my wife, Joung. You see, she is becoming quite the knitter and has accumulated many skeins and needles in the process. She deserves a proper place to store these and to display some of her favorite things. I aim to please.
Design
It was easy to choose the version of a “storage and display stand” for this build as I have had my eye on it ever since the 2016 Korea trip. During that visit I picked-up a nice little book called Making Traditional Wooden Furniture and was smitten with the dainty version described in the back section where some construction plans could be found. Oh, and according to Google Translate, they give it a new name: “Three Story Table”.

“Chapter 7
Making a Three Story Table”
The construction plan was carefully rendered on page 105 and dimensioned in millimeters, a language almost as foreign to me as the accompanying Hangul write-up. No worries, I have apps on my phone that can translate both!
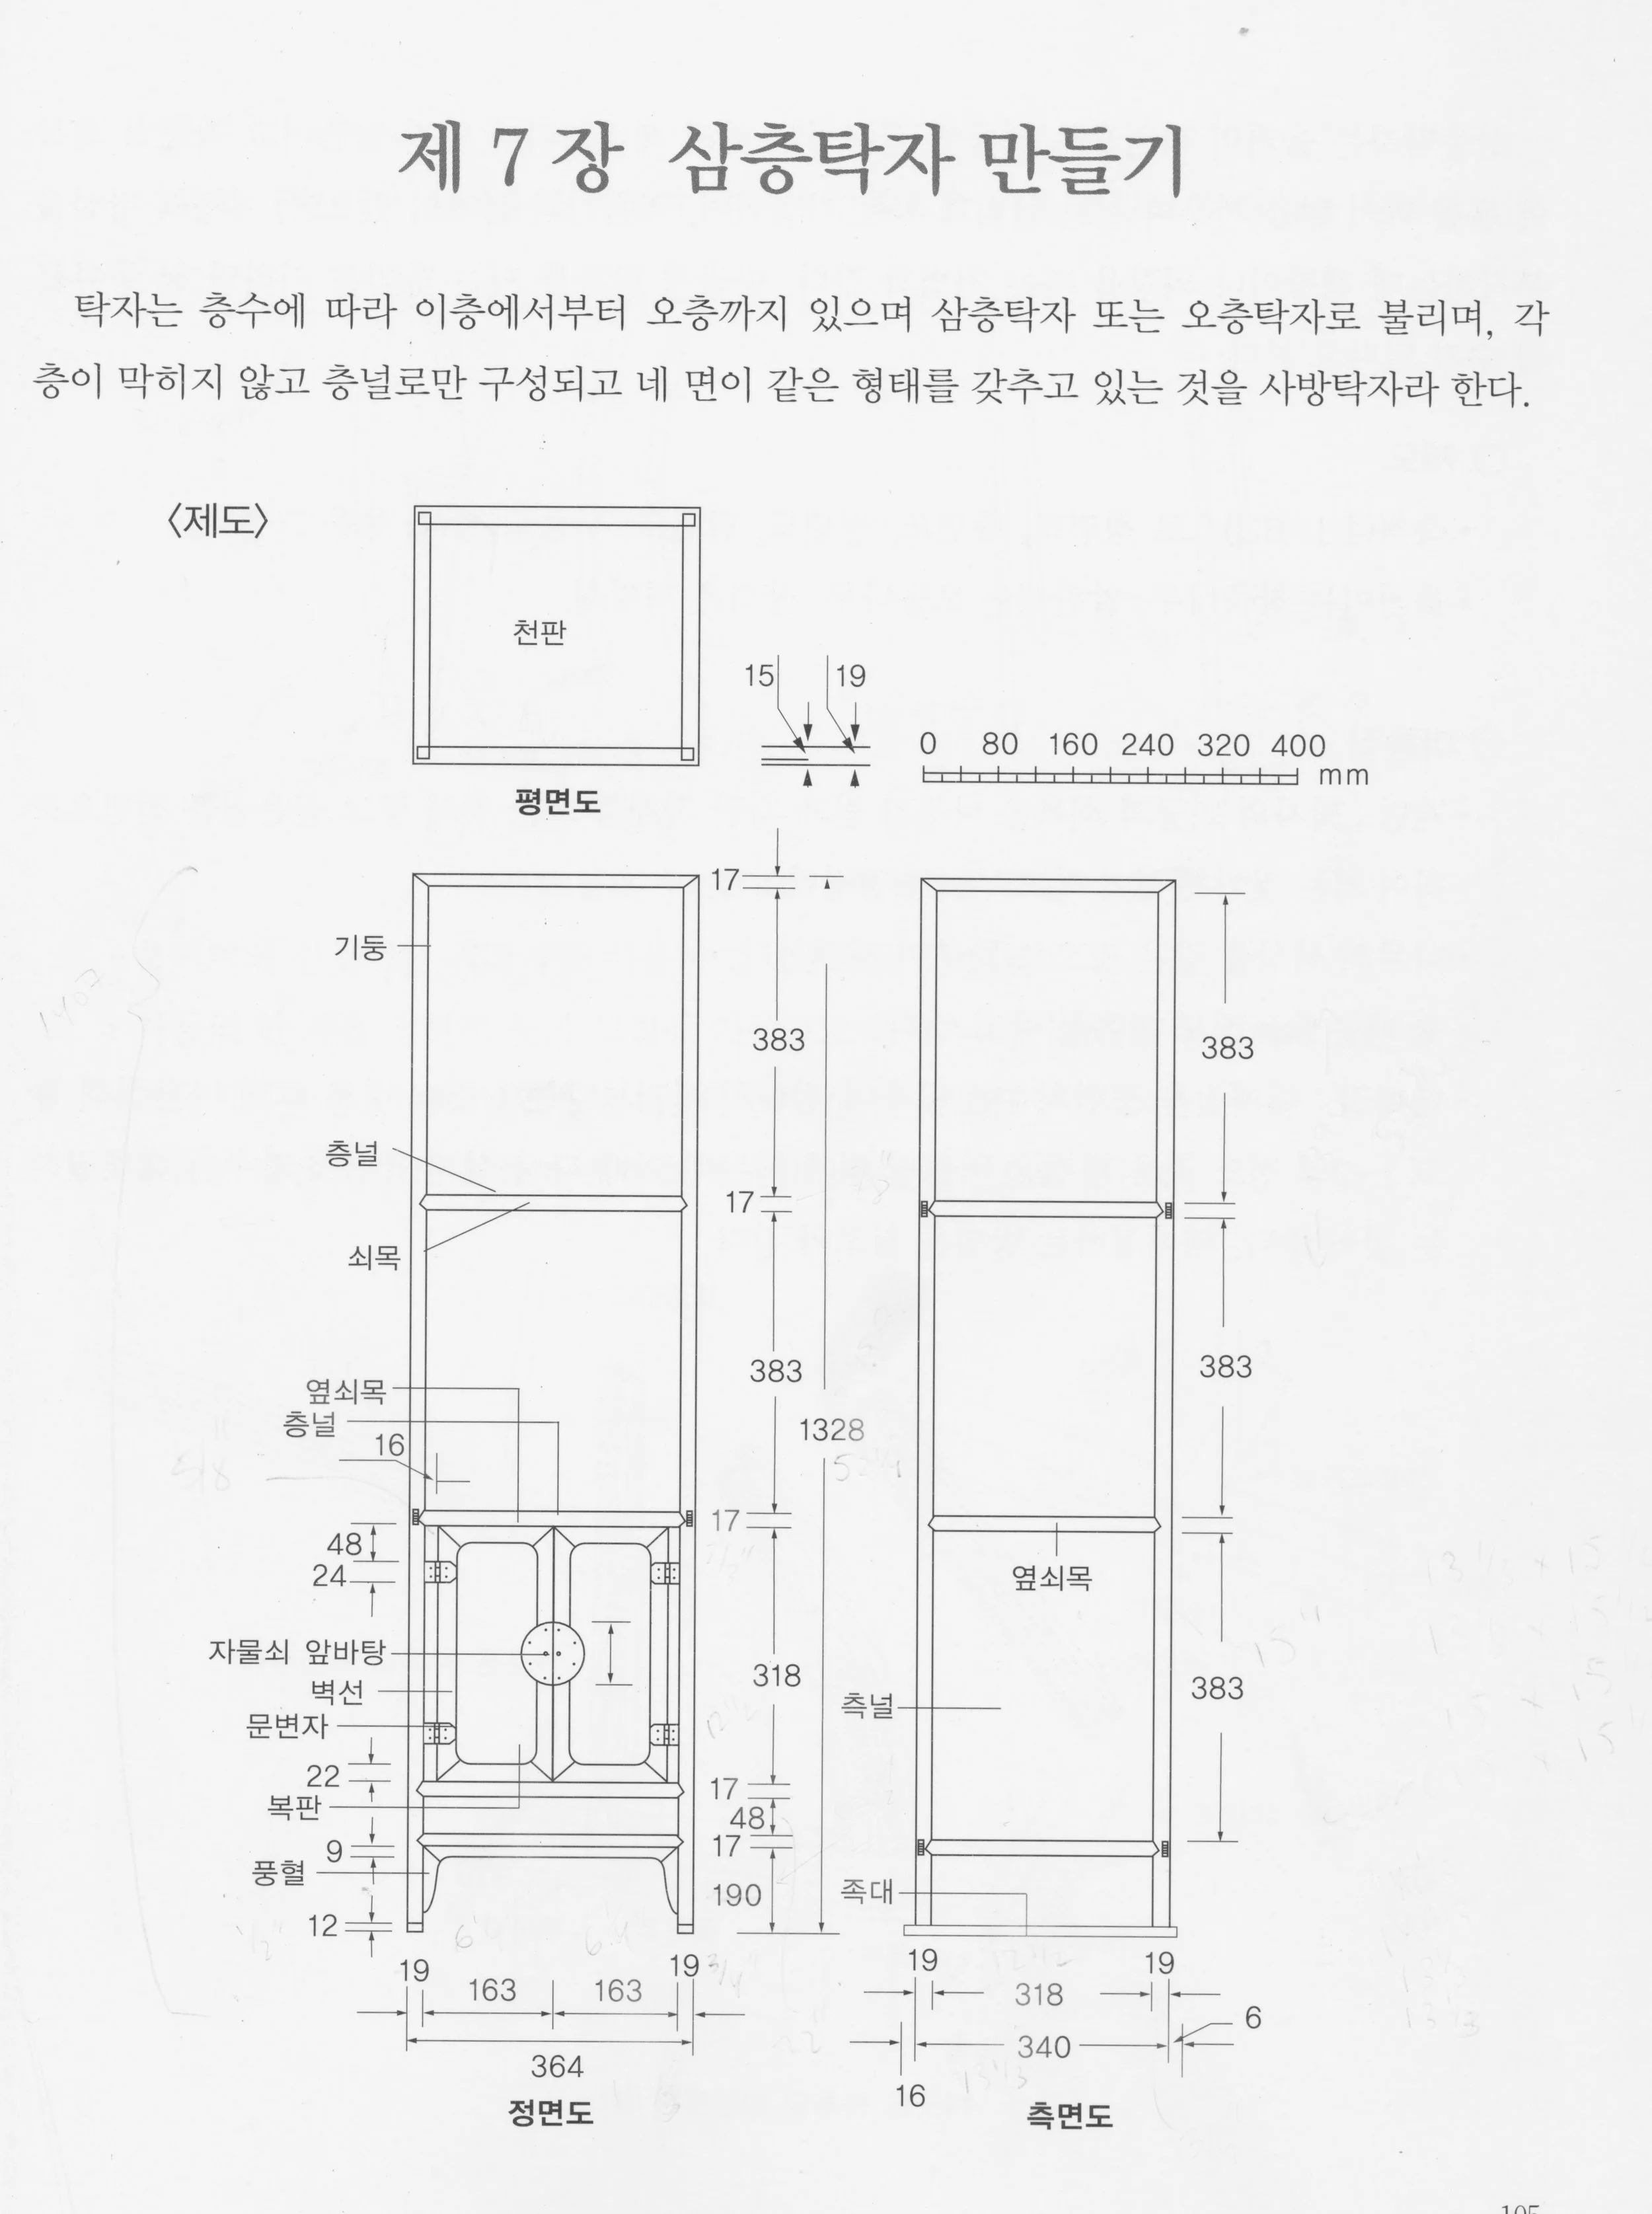
Three Story Table plans (original)
I converted the mm spans into inches and then encountered a problem: at a finished height of just over 4 feet, the piece described would be too short. A “three story table” of that height might be perfect for a floor-sitting Korean lifestyle, but it would not blend well with the other furnishings in our living room. No worries, I figured I could apply a 1.3x scaling factor to every number and enlarge the item proportionally. That works fine in “decimal land” but it gets cumbersome when translating things back to inches, the language of my workshop tools. (One millimeter = 197/5,000th of an inch). I was about to begin the tedious conversions, rounding numbers up or down to the nearest 1/16th of an inch, when I recalled I had essentially made this furniture piece two years ago: the Korean Stand. For that Project I had divined the measurements from a small photograph and used those plans to produce a beautifully proportioned set of open shelves. I could essentially use the same part dimensions for this one, tweak a few details to add the cabinet section and make a respectable version of the sabang-t’akja depicted in the plans above. Reduce, reuse, recycle (and stay sane)!
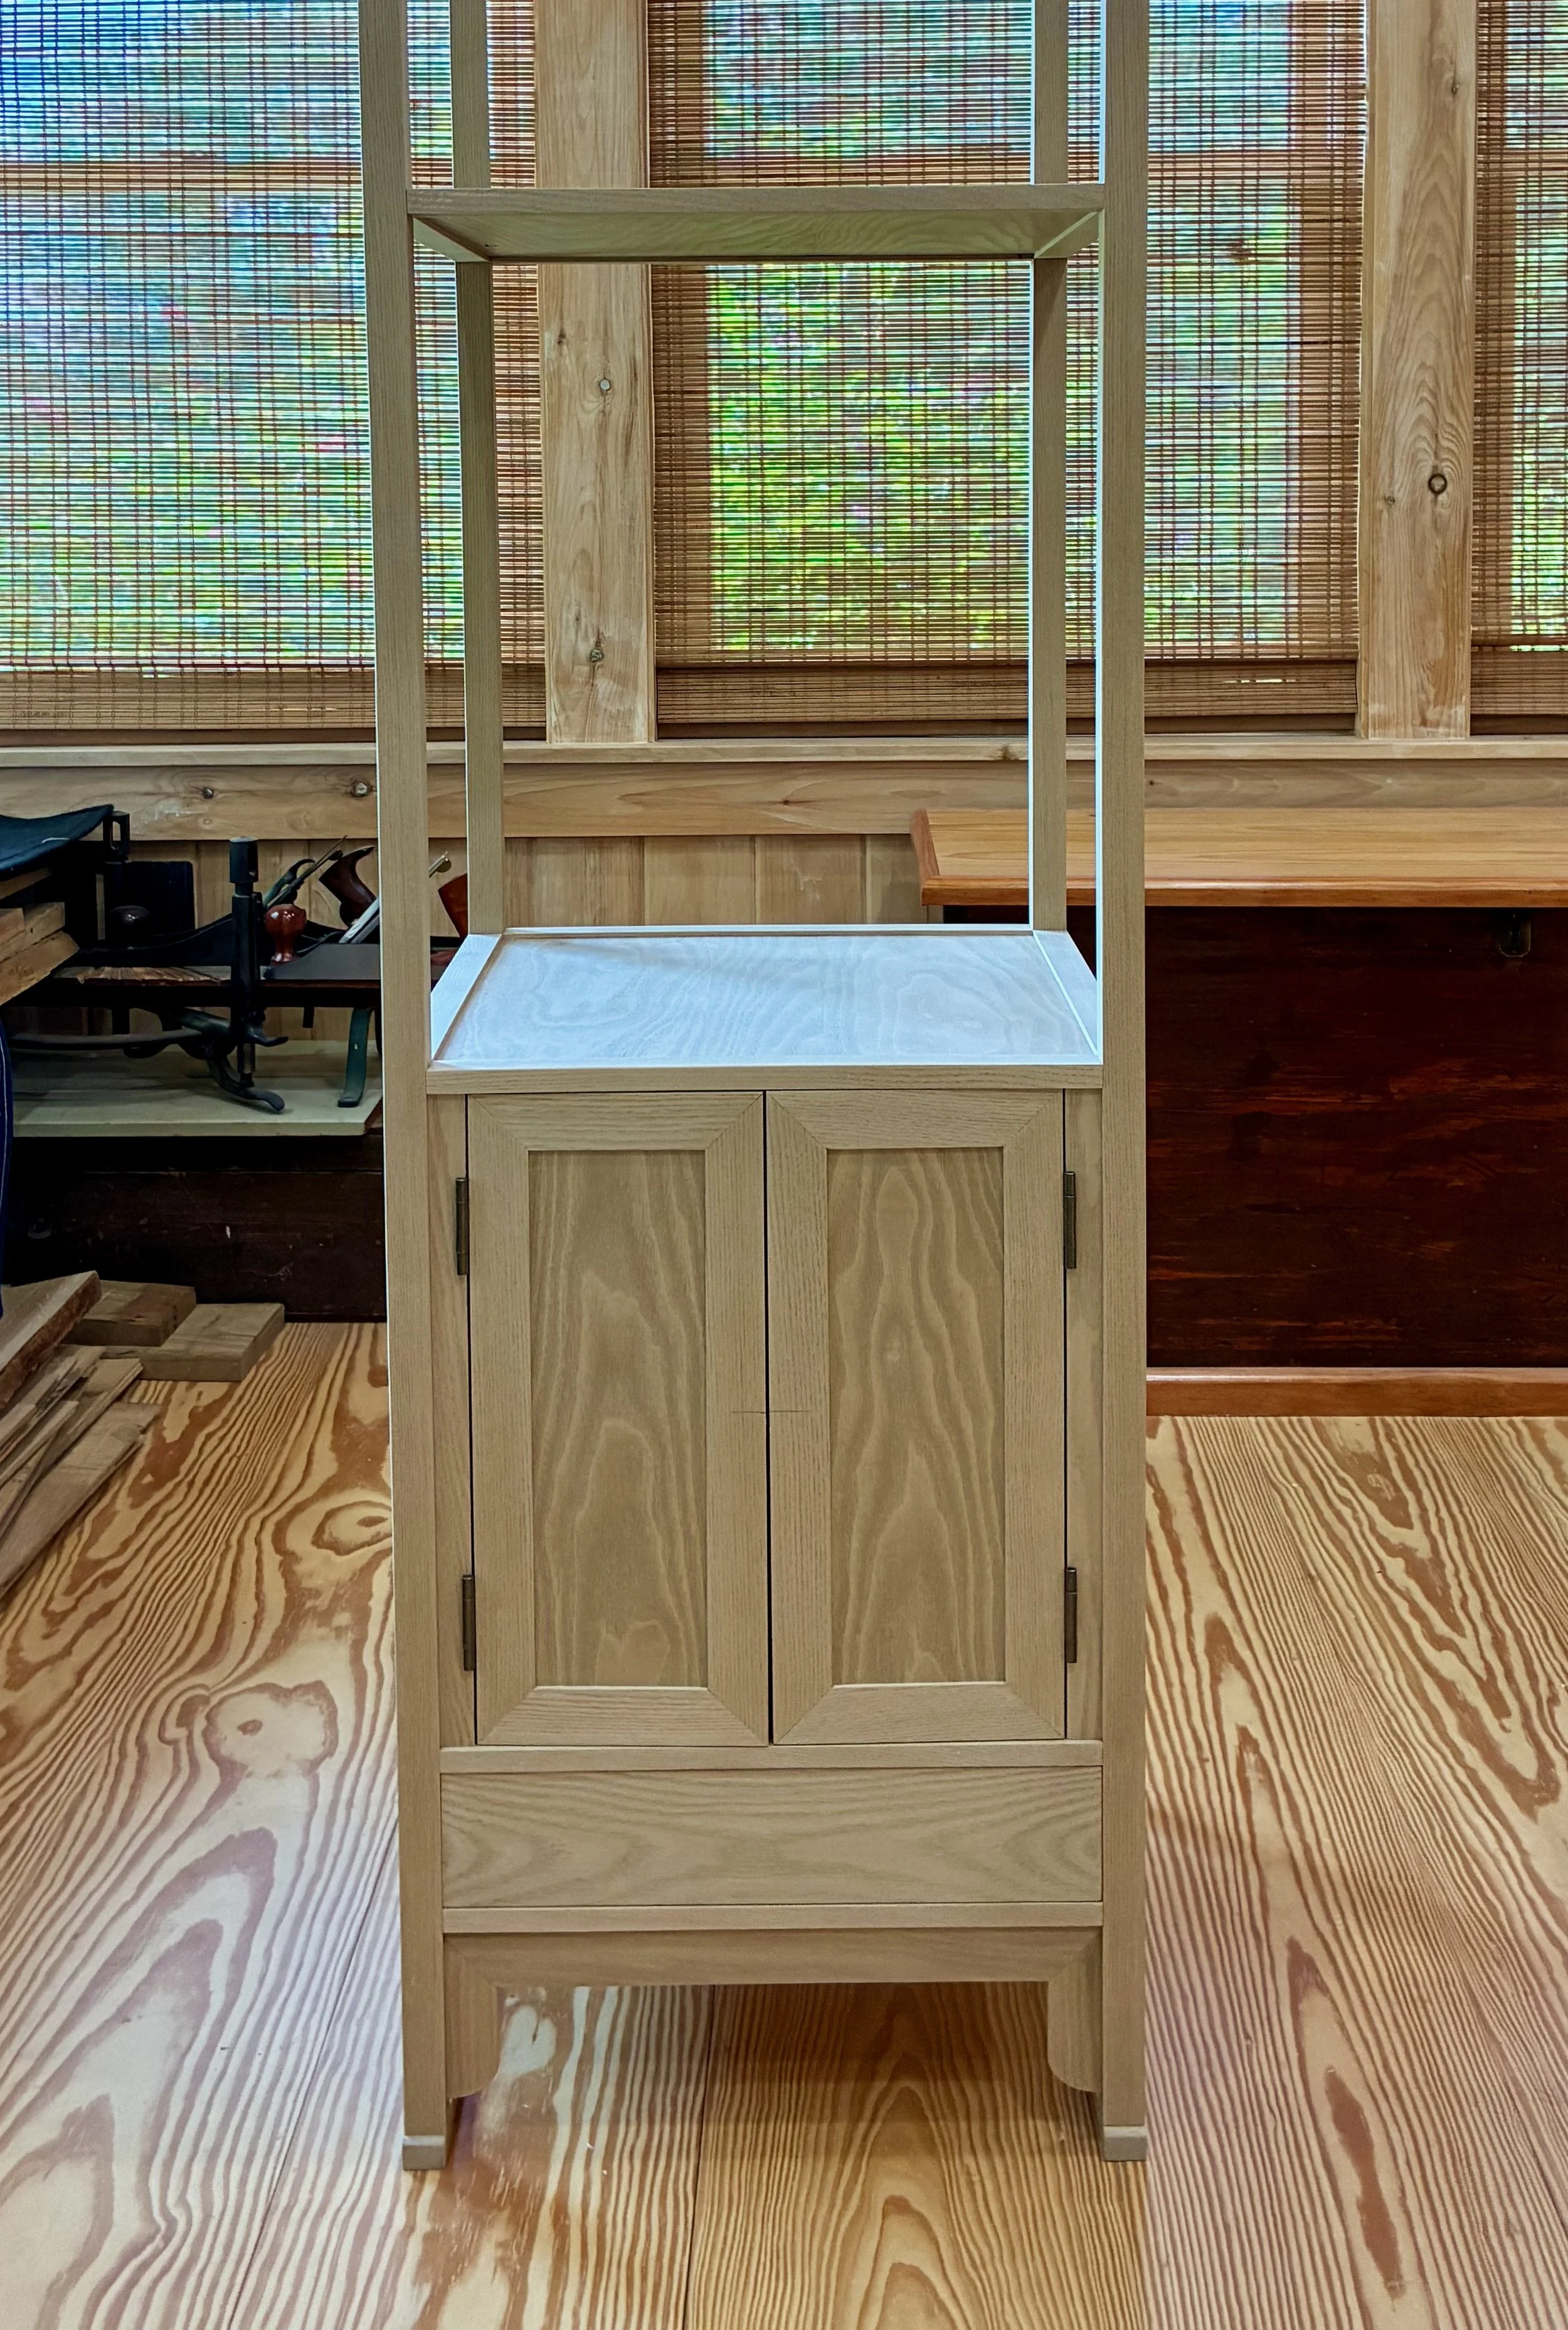
Starting from the Korean Stand work, a rough plan was sketched at 3/32 scale (in inches) of a 3 shelf unit with a doored cabinet enclosing the bottom section and standing 5 feet tall. It looked nice. My only change would be to convert the panel below the doors into a handy drawer for storage.
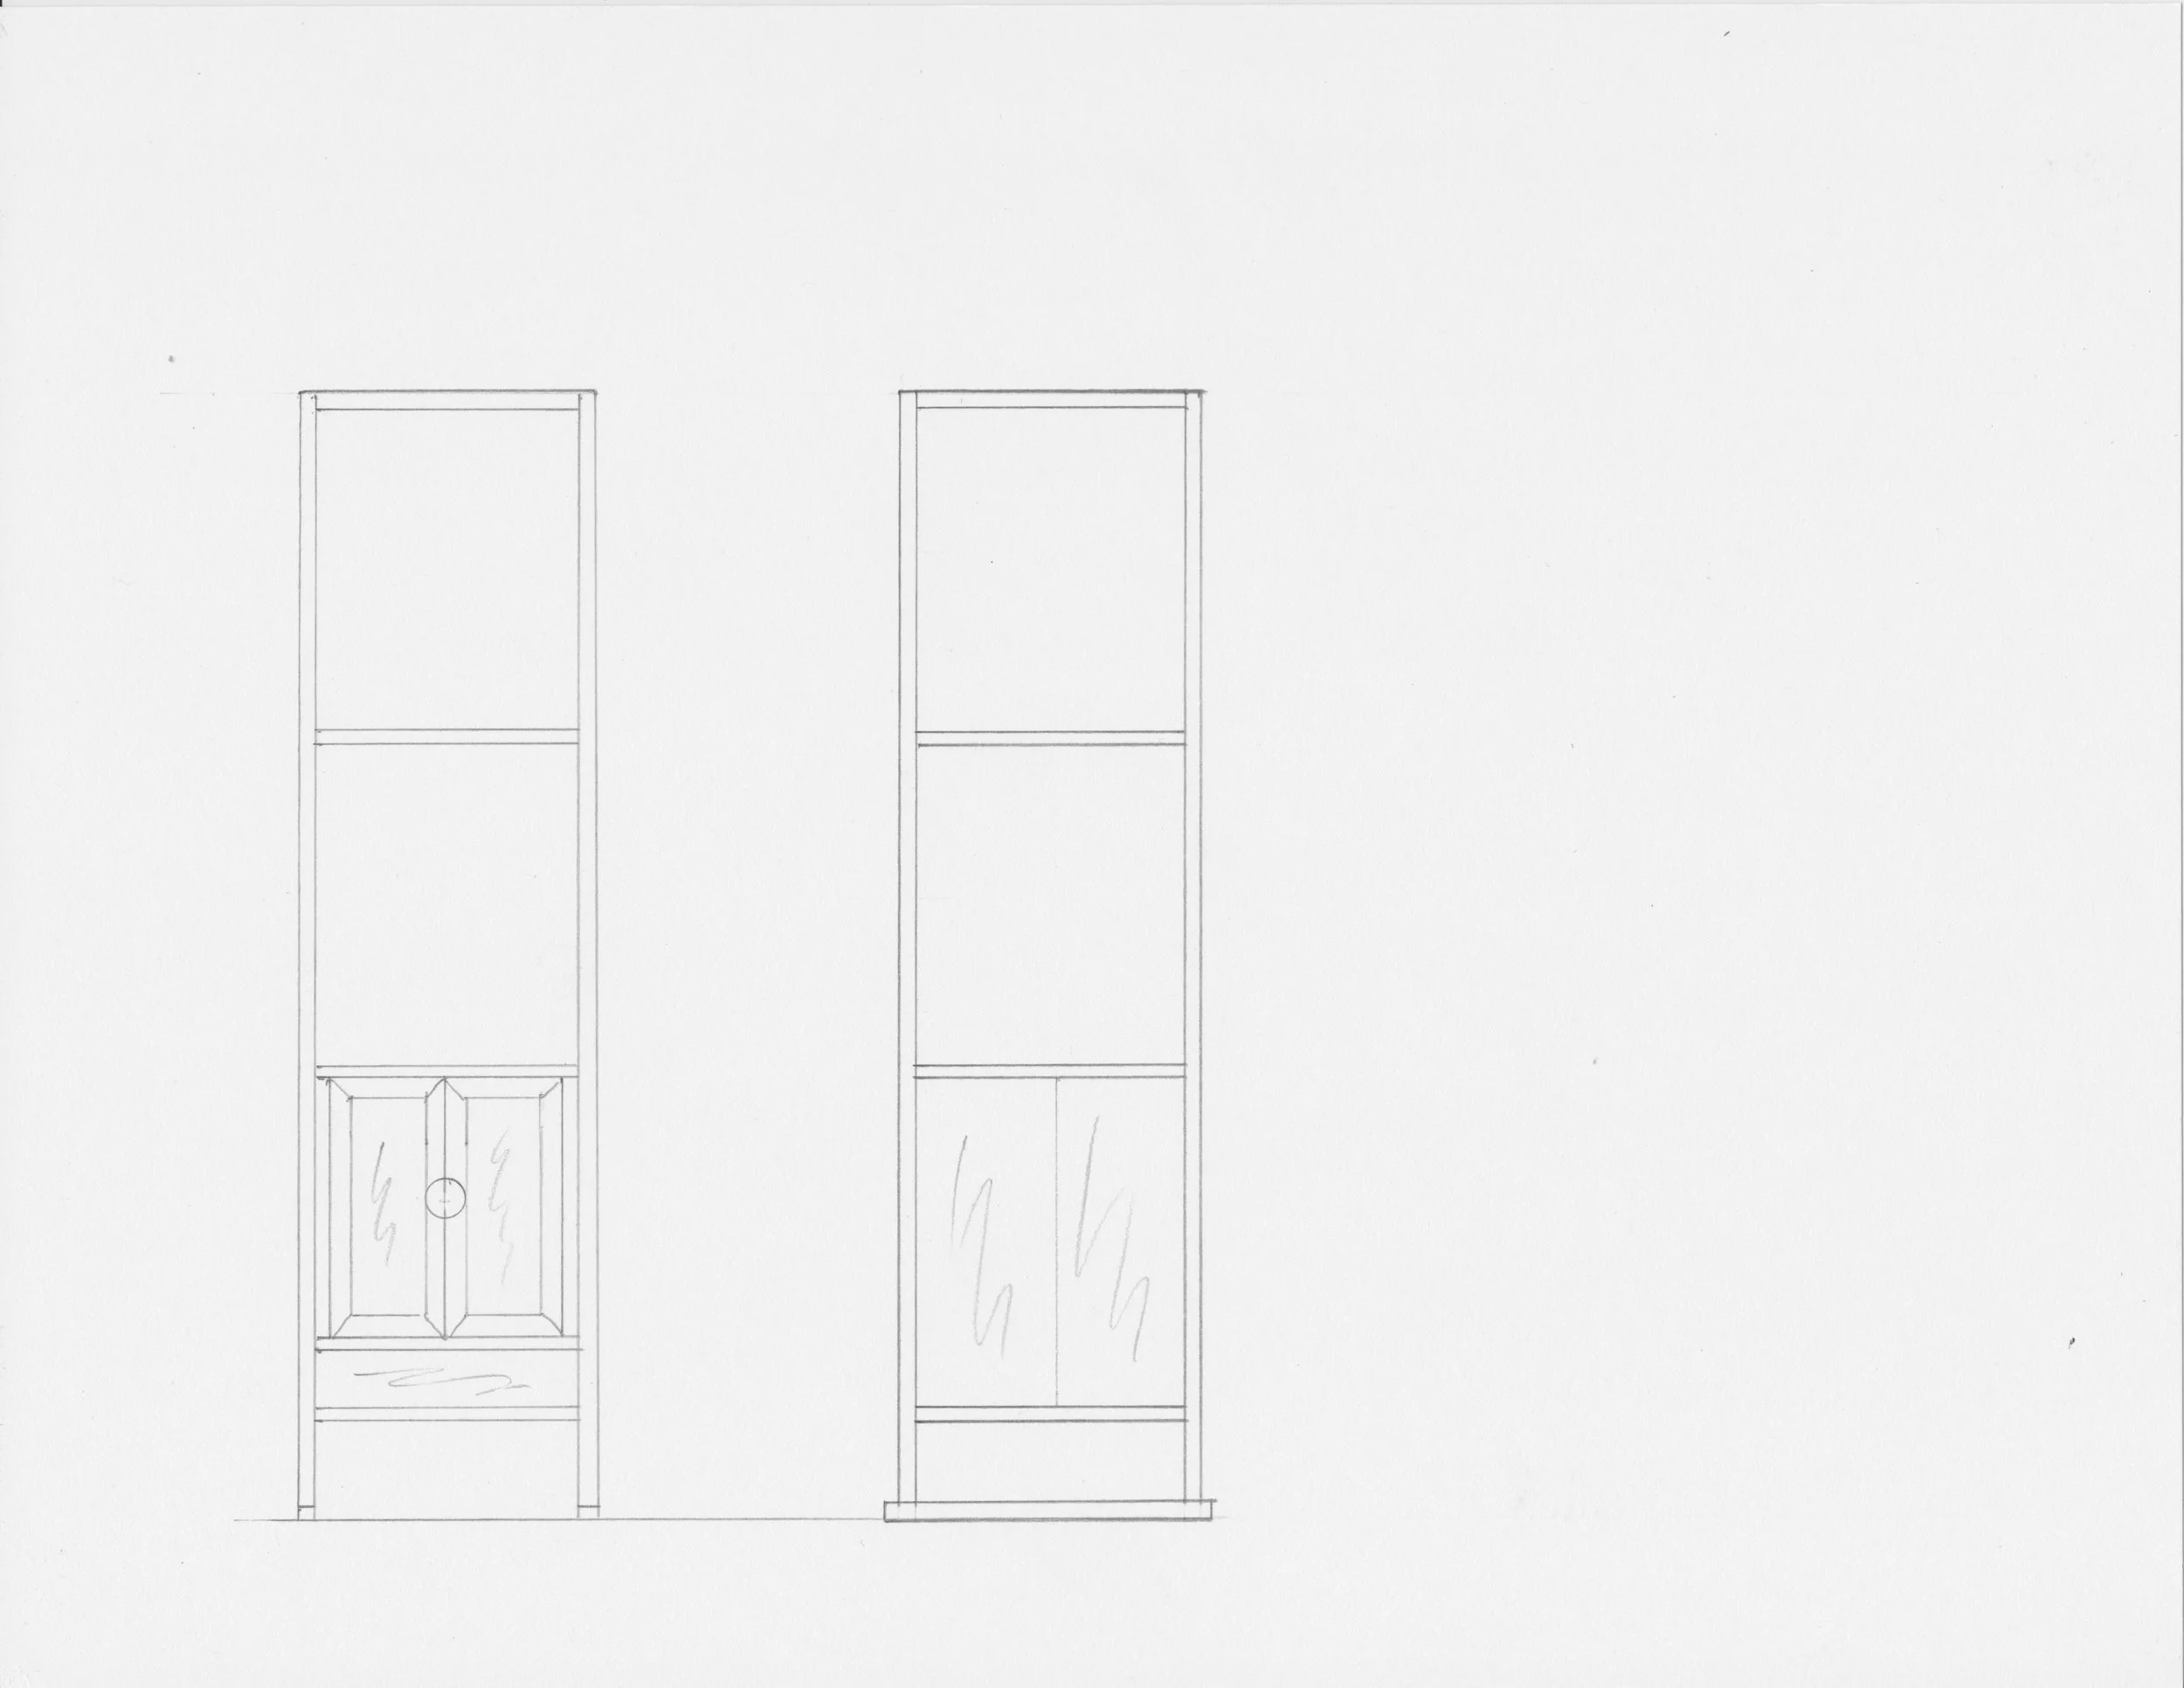
New and Improved “Three Story Table”
Materials
I wanted a special wood for this piece that in nineteenth century Korea would almost certainly have been fashioned from paulownia. Paulownia, second only to balsa as the softest hardwood, was favored in the East for its lightness and supposed insect resistance, however, it is difficult to source in the Eastern United States. There is sassafras though, a wood that has always intrigued me. A bit tougher than Paulownia, but still a weakling according to the The Wood Database strength index, this North American hardwood is not common but, if you can find it, the lumber is also not particularly expensive. I got 20 board-feet from the nice selection available at Reader’s Hardwood Supply. The hinges and other hardware for the cabinet will be selected later, once I can assess the character of the piece.
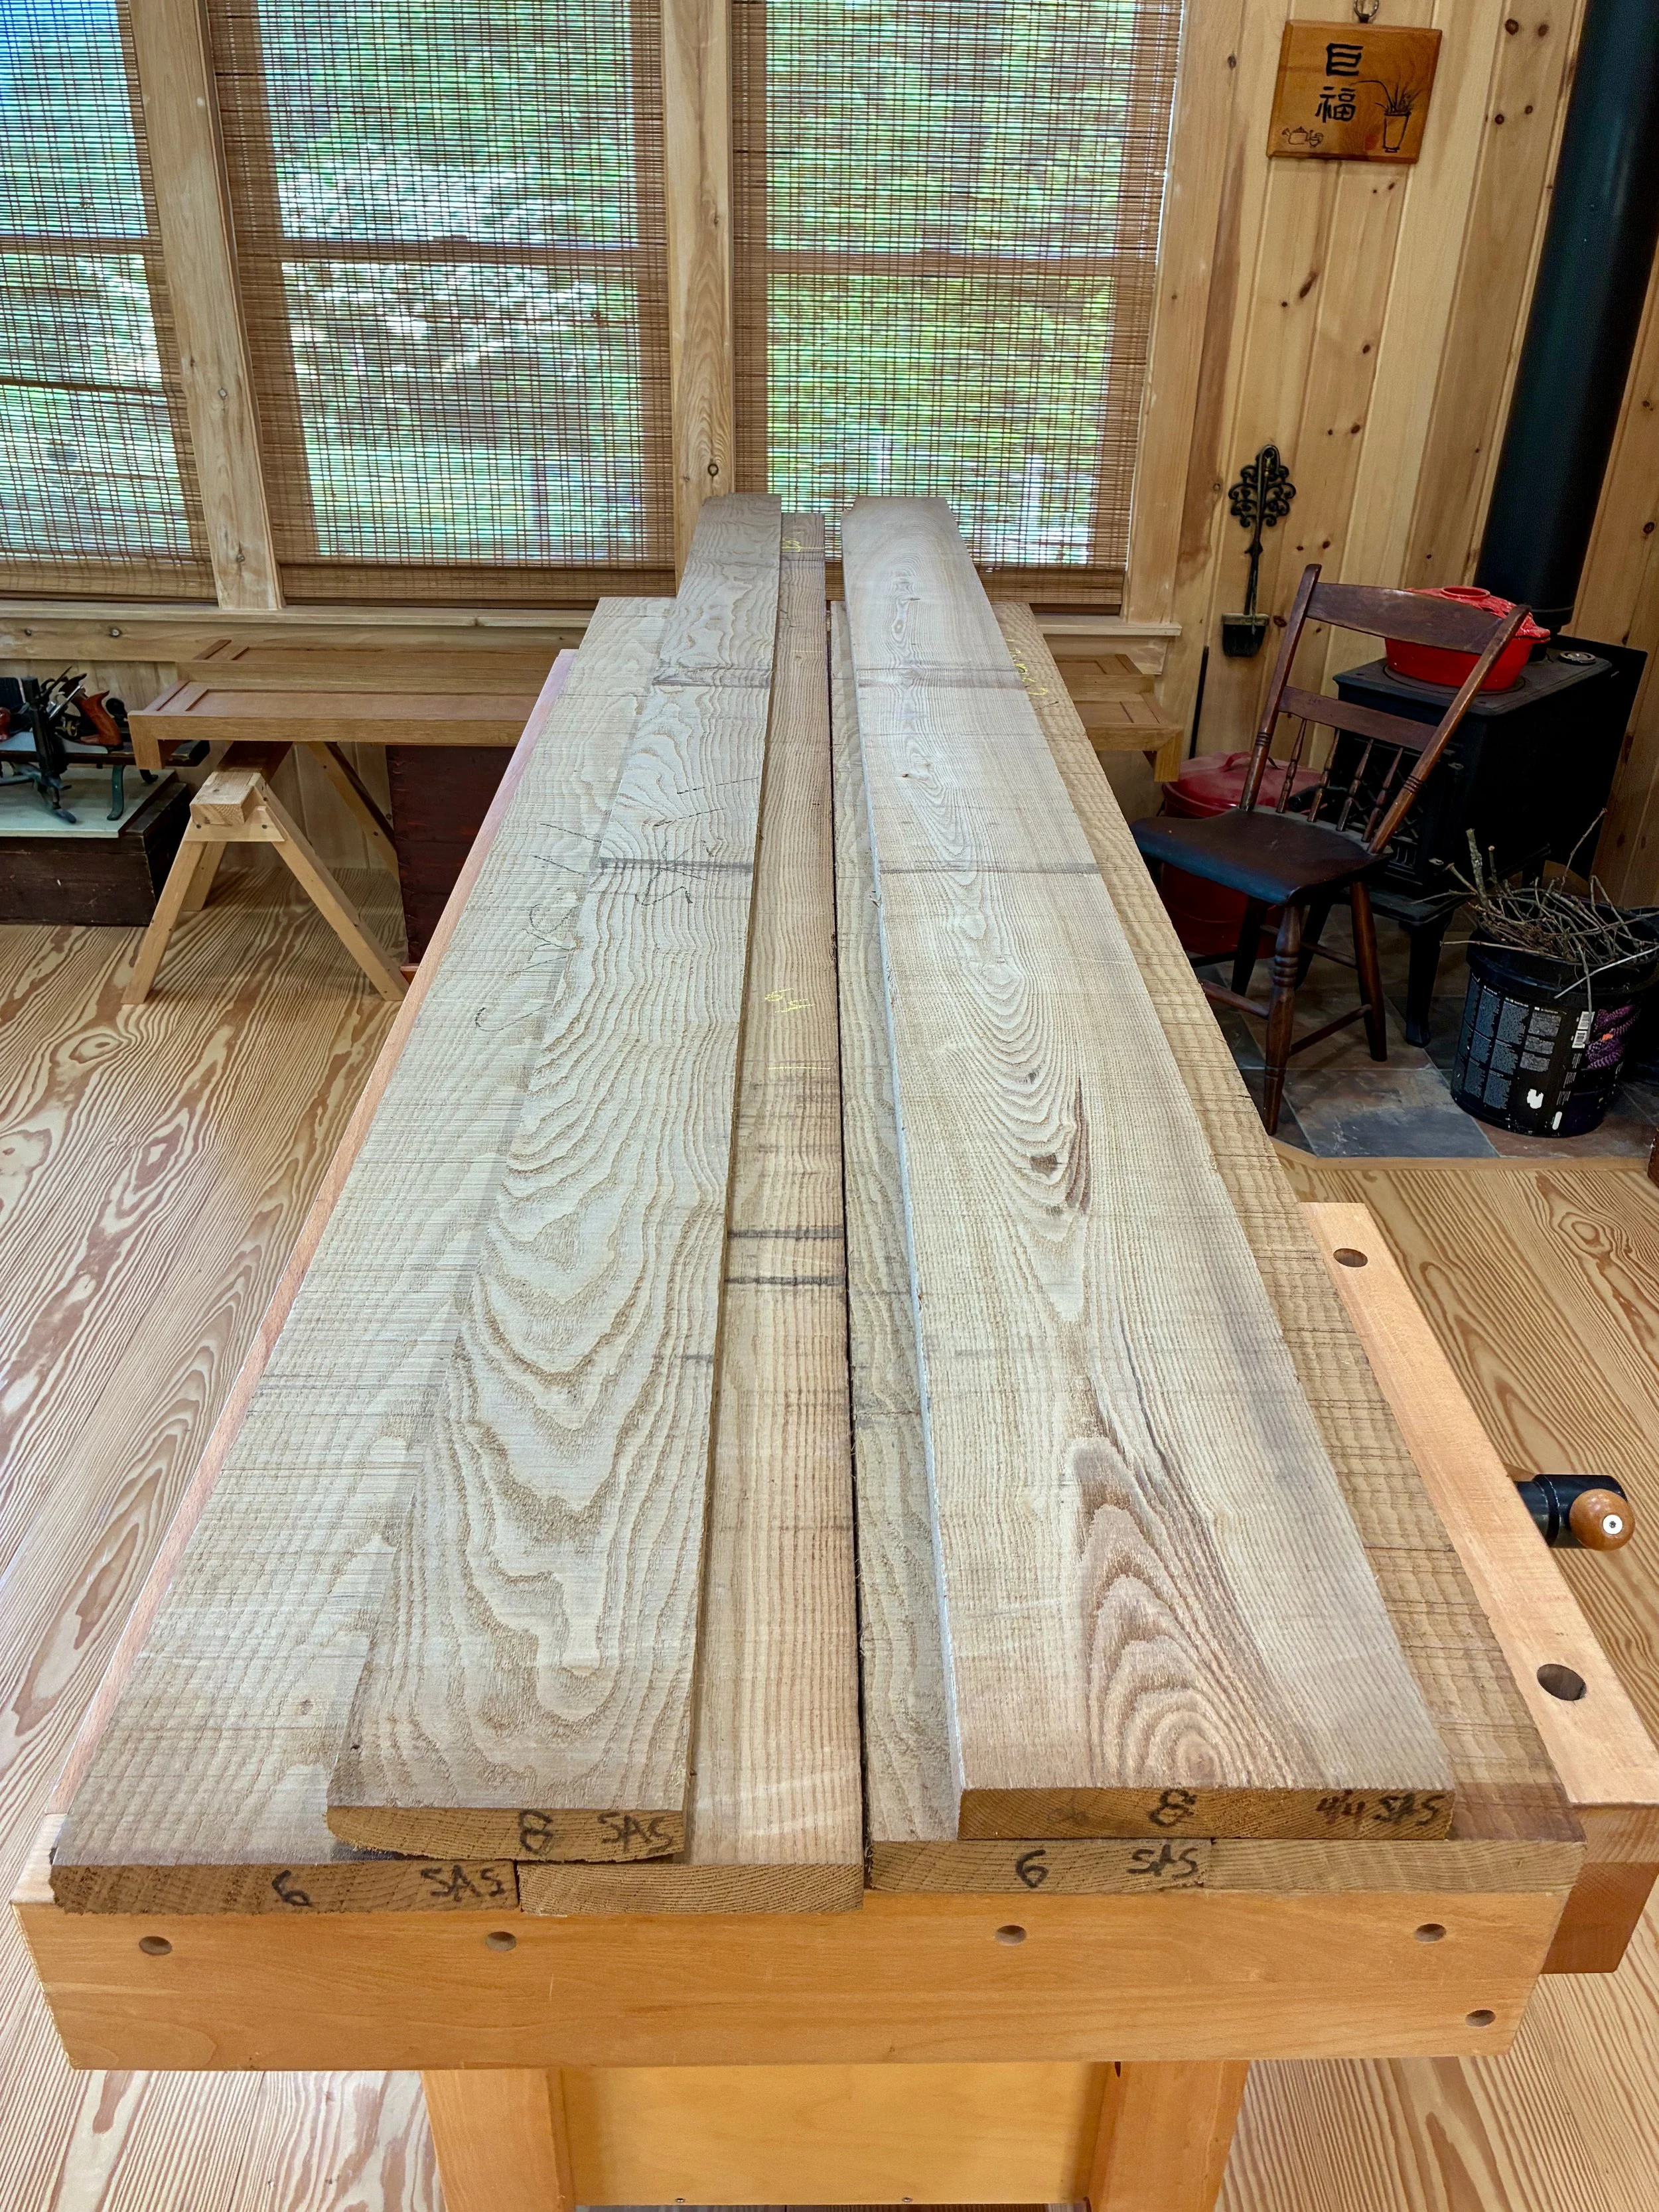
Sassafras boards
Dimensioning
To begin, I went back and studied the blog post for the Korean Stand to refresh my memory on its production. Not much has changed in the workshop since then and so I set about on that same path, replacing red oak with sassafras. If you have never worked with sassafras I suggest you give it a try. It smells so sweet at the saw, cuts like warm butter and stays “true” when ripped into thin poles. Fashioning the frame parts for this piece is all about ripping these rectangular poles at the table saw: all 7/8 in. wide and either 7/8 or 1/2 in. in the depth dimension. Ripping narrow slices, such as the 1/2 in. thick rails required for this piece (n = 14), can be tricky and I found that my homemade “straddle fence push tool” worked great to cut accurate parts, safely.
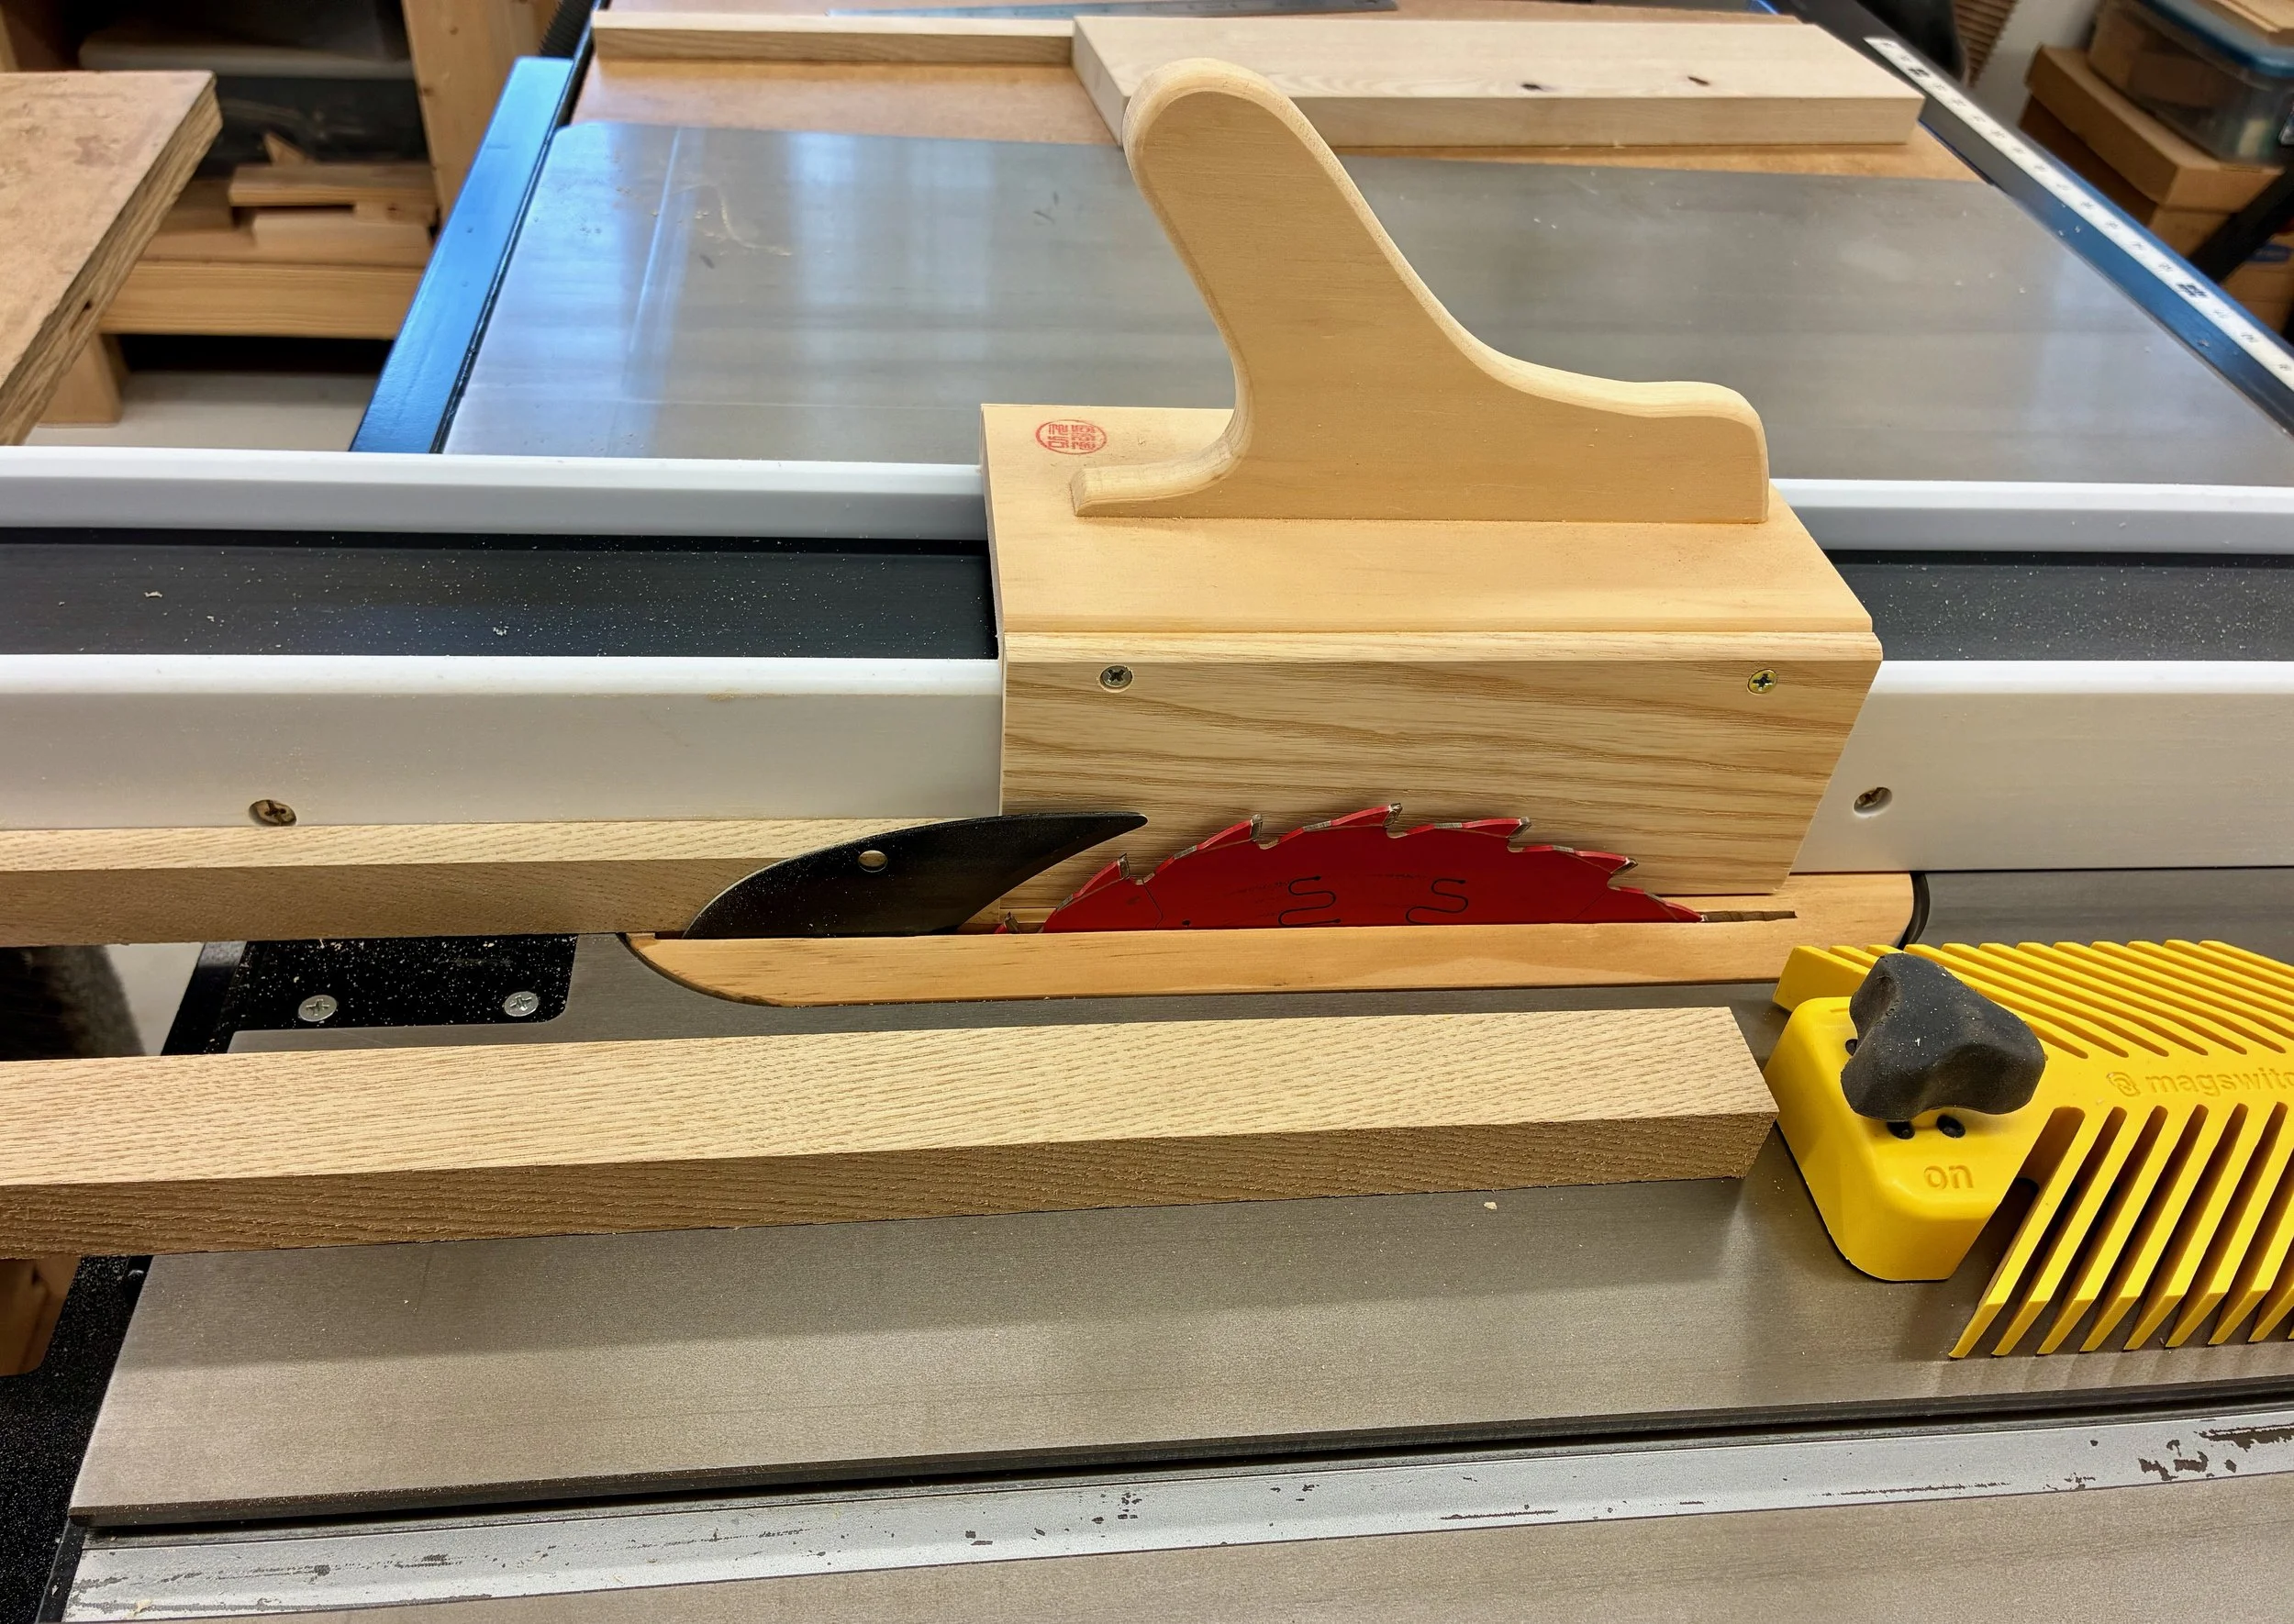
Ripping 1/2 in. wide rails at the table saw
After all the leg poles and rails were cut-out and trimmed to final length, I needed to assign them each a “role” and then fashion the mortises, tenons and grooves for the joinery. These operations variously employed the mortiser, miter saw, table saw, and router table, as well as a Sharpie for labeling what’s what. When complete, 22 value-added parts had been produced.
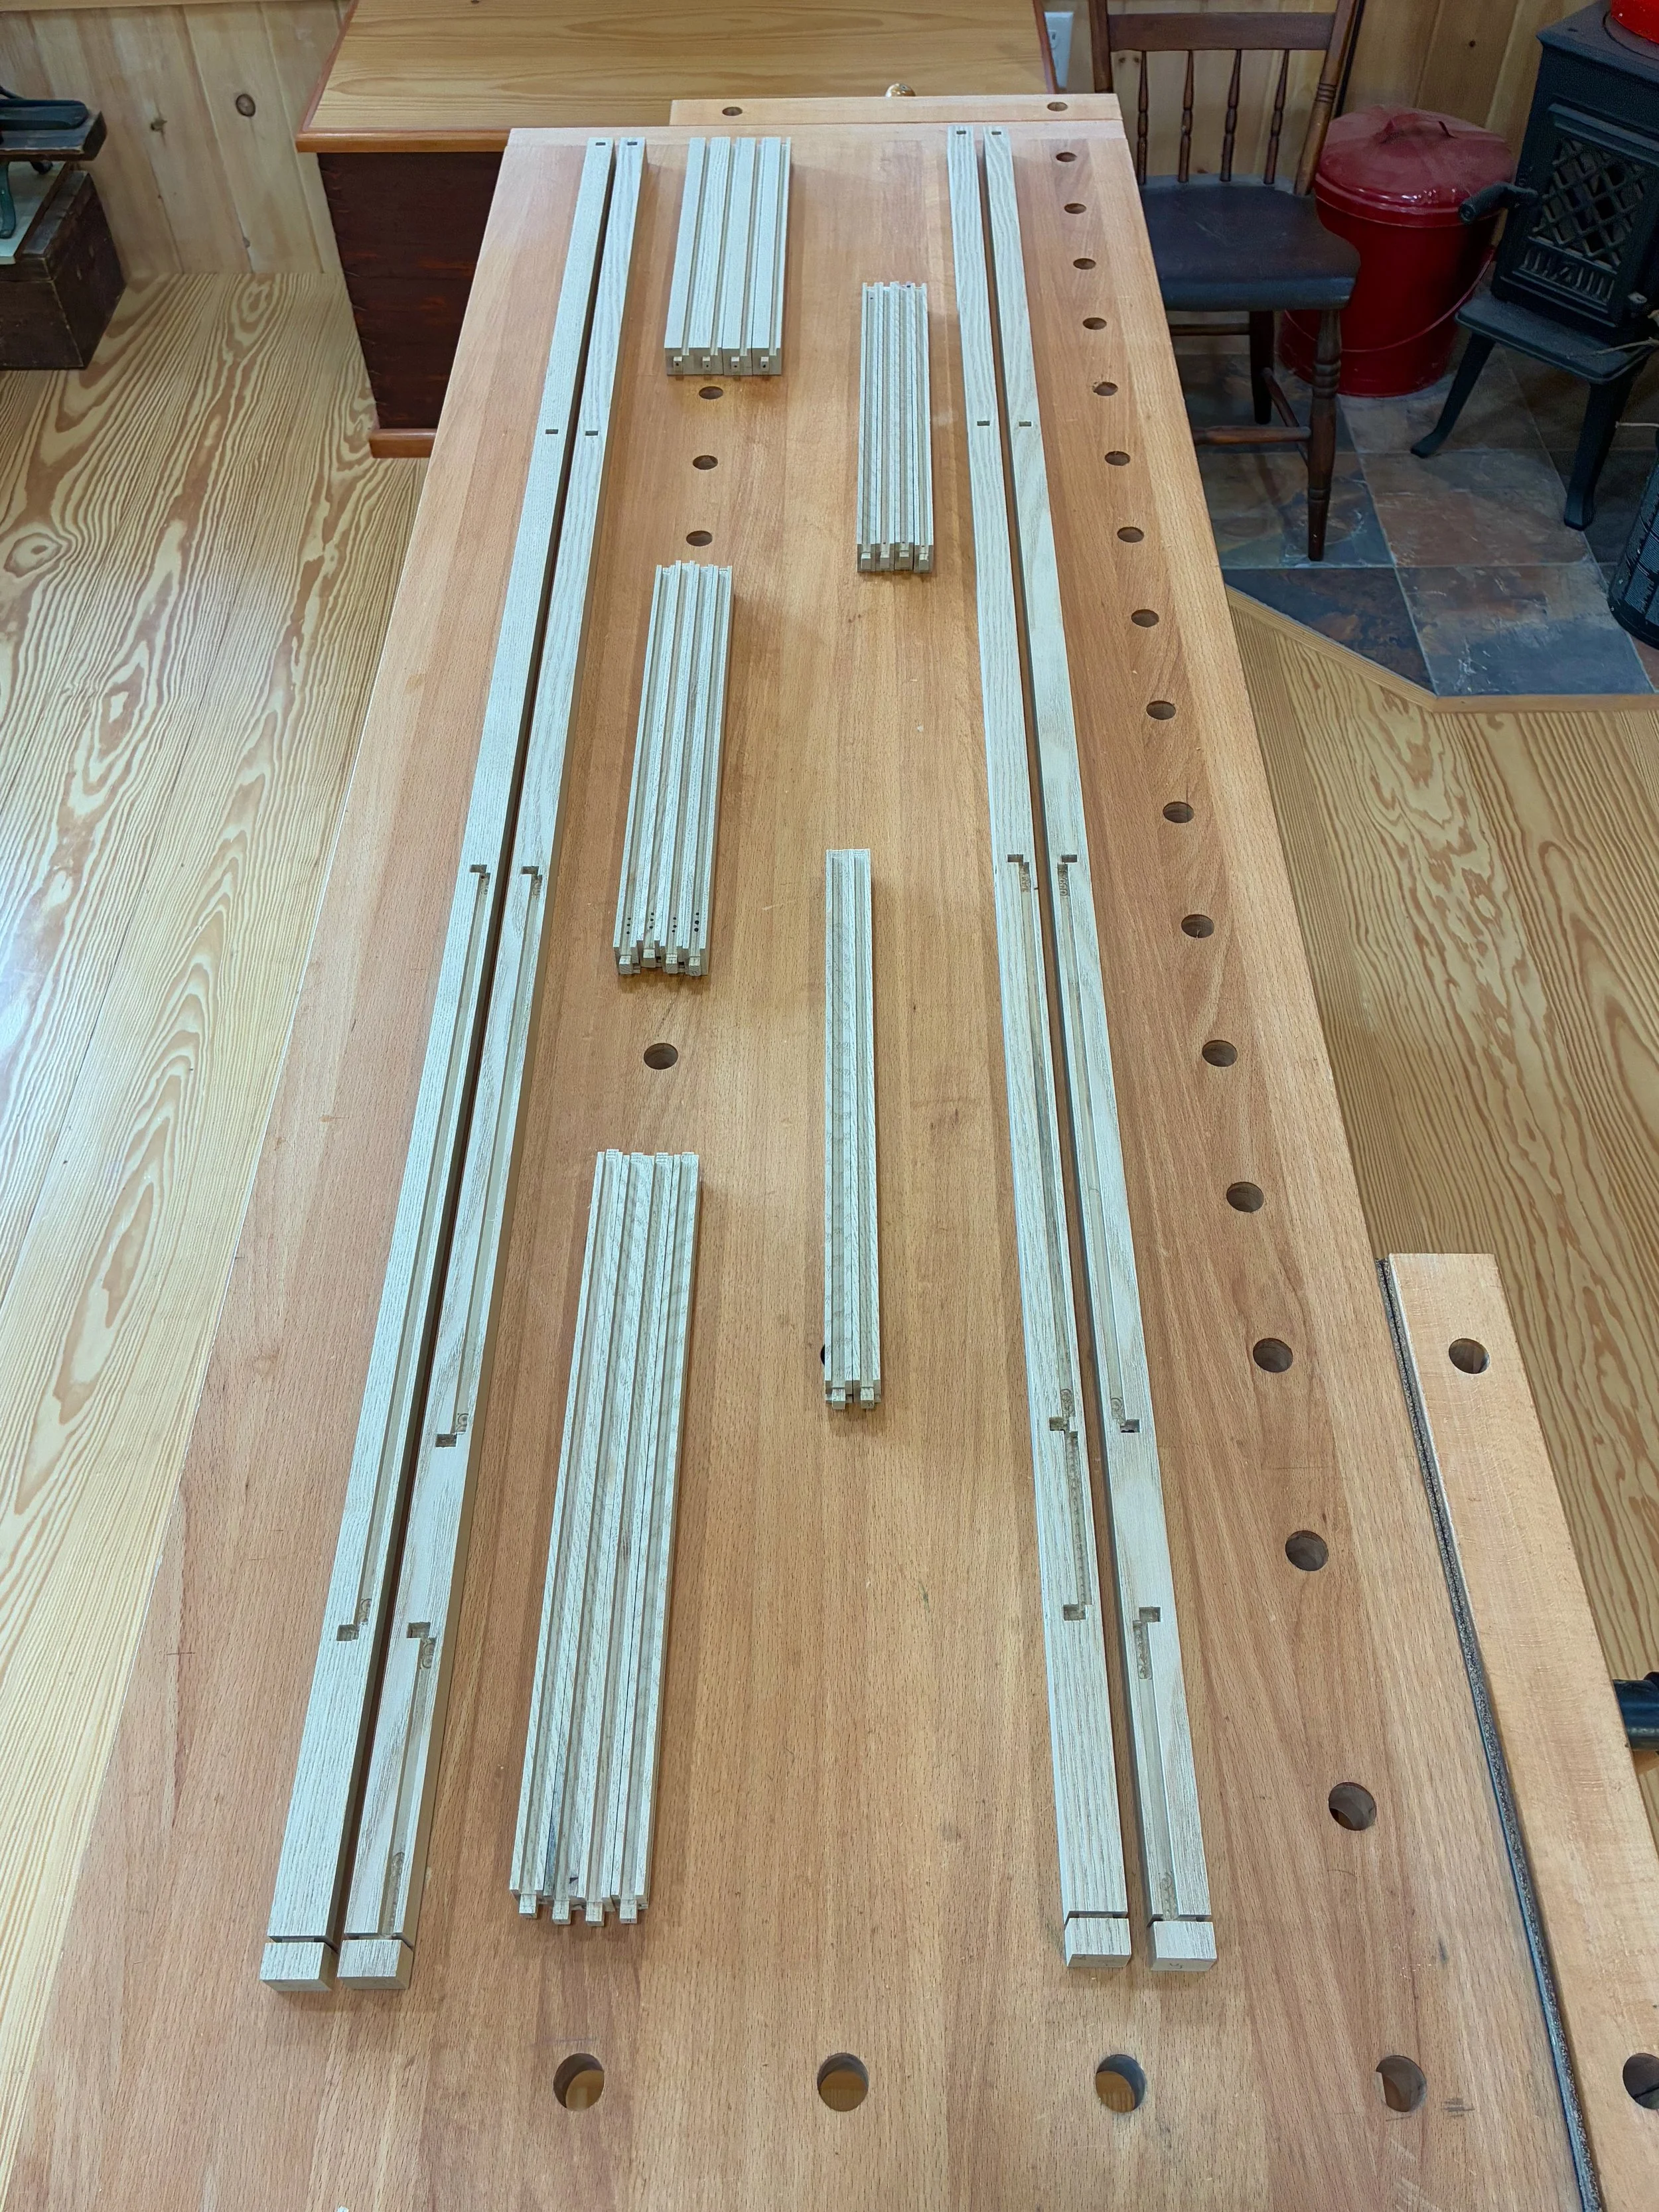
22 Frame parts
After some fine-tuning at the joints, the parts could be metamorphosed into a frame.
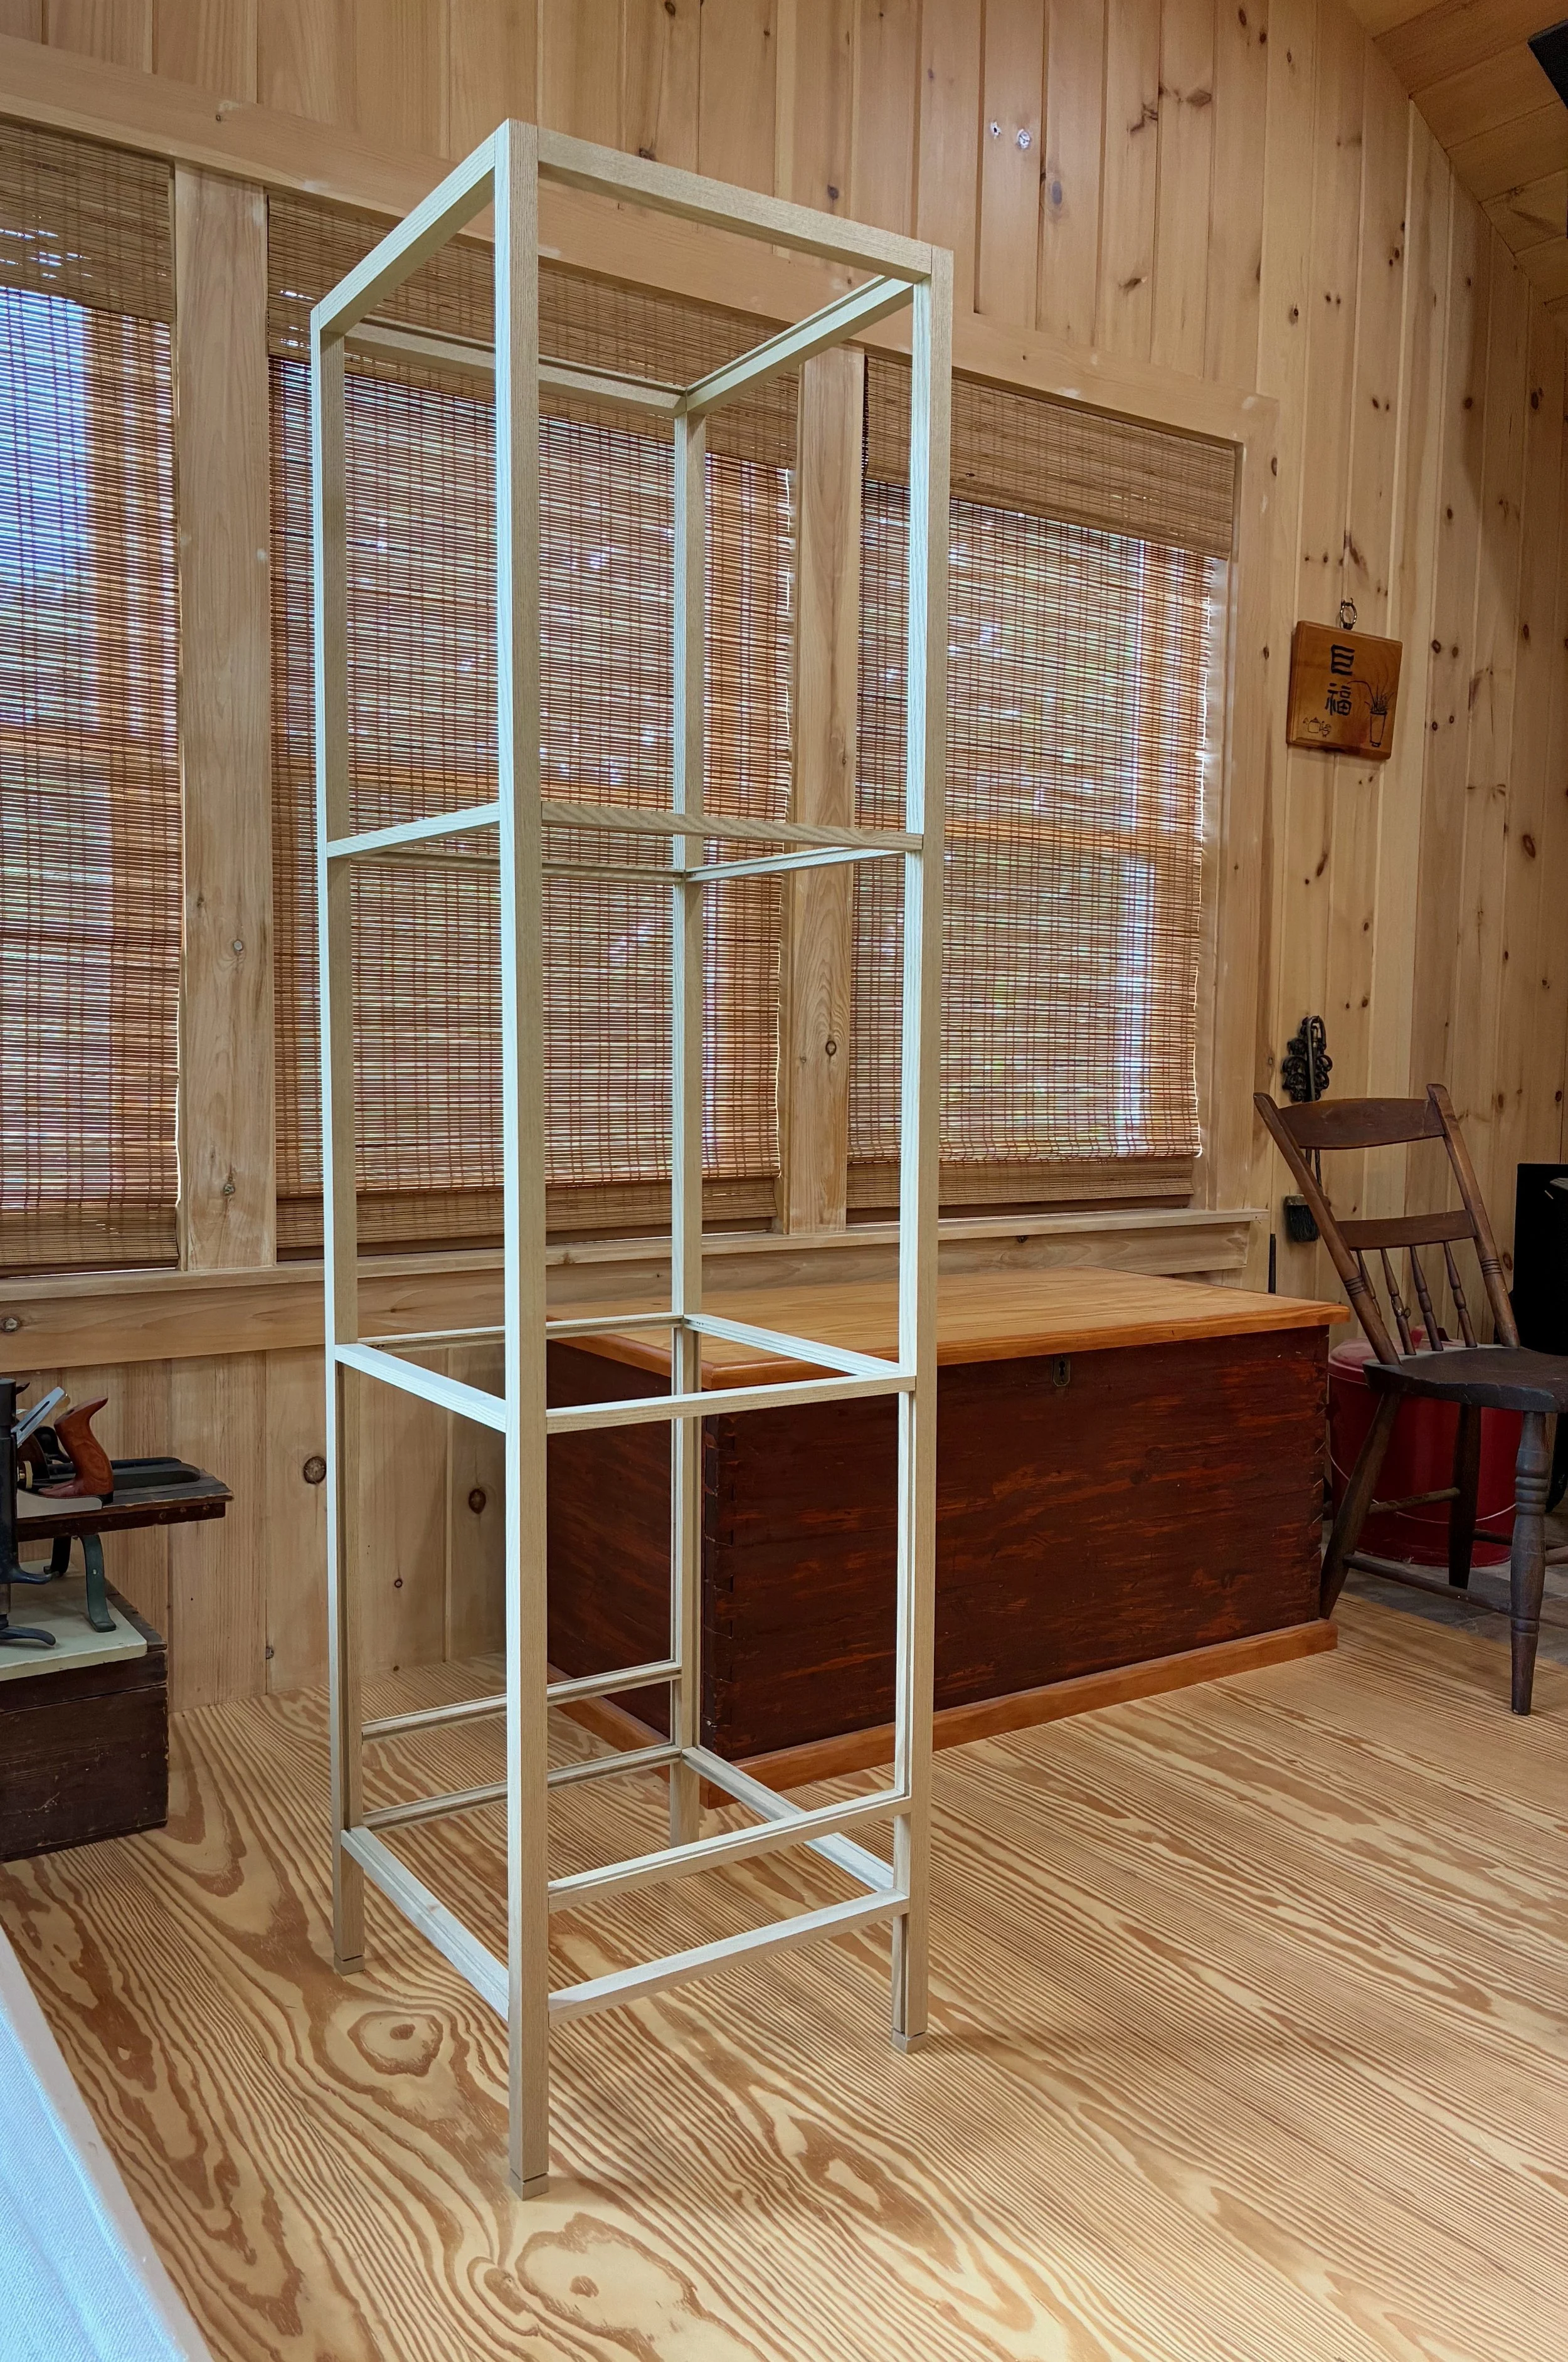
Dry-fit frame
The next step involved re-sawing sassafras boards to make the three shelf and four side panel parts. I decided to use birch plywood for the (out of sight) cabinet floor and drawer support layers. Each sassafras shelf/panel would be comprised of three narrow boards glued together - a result of the plank widths available at the lumberyard. Fortunately, the three shelves for this piece could be fashioned out of a single plank, thereby ensuring consistency of color and grain. After chopping that plank into four segments of approximate final length, the boards were re-sawn at the band saw into thinner parts which then were all thickness planed to a depth that snuggly fit the rail grooves, ~1/4 in. To create the 14 1/2 in. square shelves, a 2 1/2 in. wide board would be sandwiched in between two 6 in. boards. Attention to grain pattern and direction helped to create visually pleasing shelves that were also warp-resistant. The components were glued together and the resulting shelves trimmed to their final dimensions using a combination of track saw and table saw. Small notches were made at all the corners to accommodate the frame poles. The side panels were constructed in a like manner, whereas, the plywood layers were fashioned from 1/2 in. material by rabbeting along the sides to make “tongues” to fit the grooved rails.

Glueing 3 boards together to make a side panel
After some easing of the edges with a hand plane, the panel parts were dry-fit with the poles and rails. This serves to stiffen the structure and gives a first glimpse of the final form.
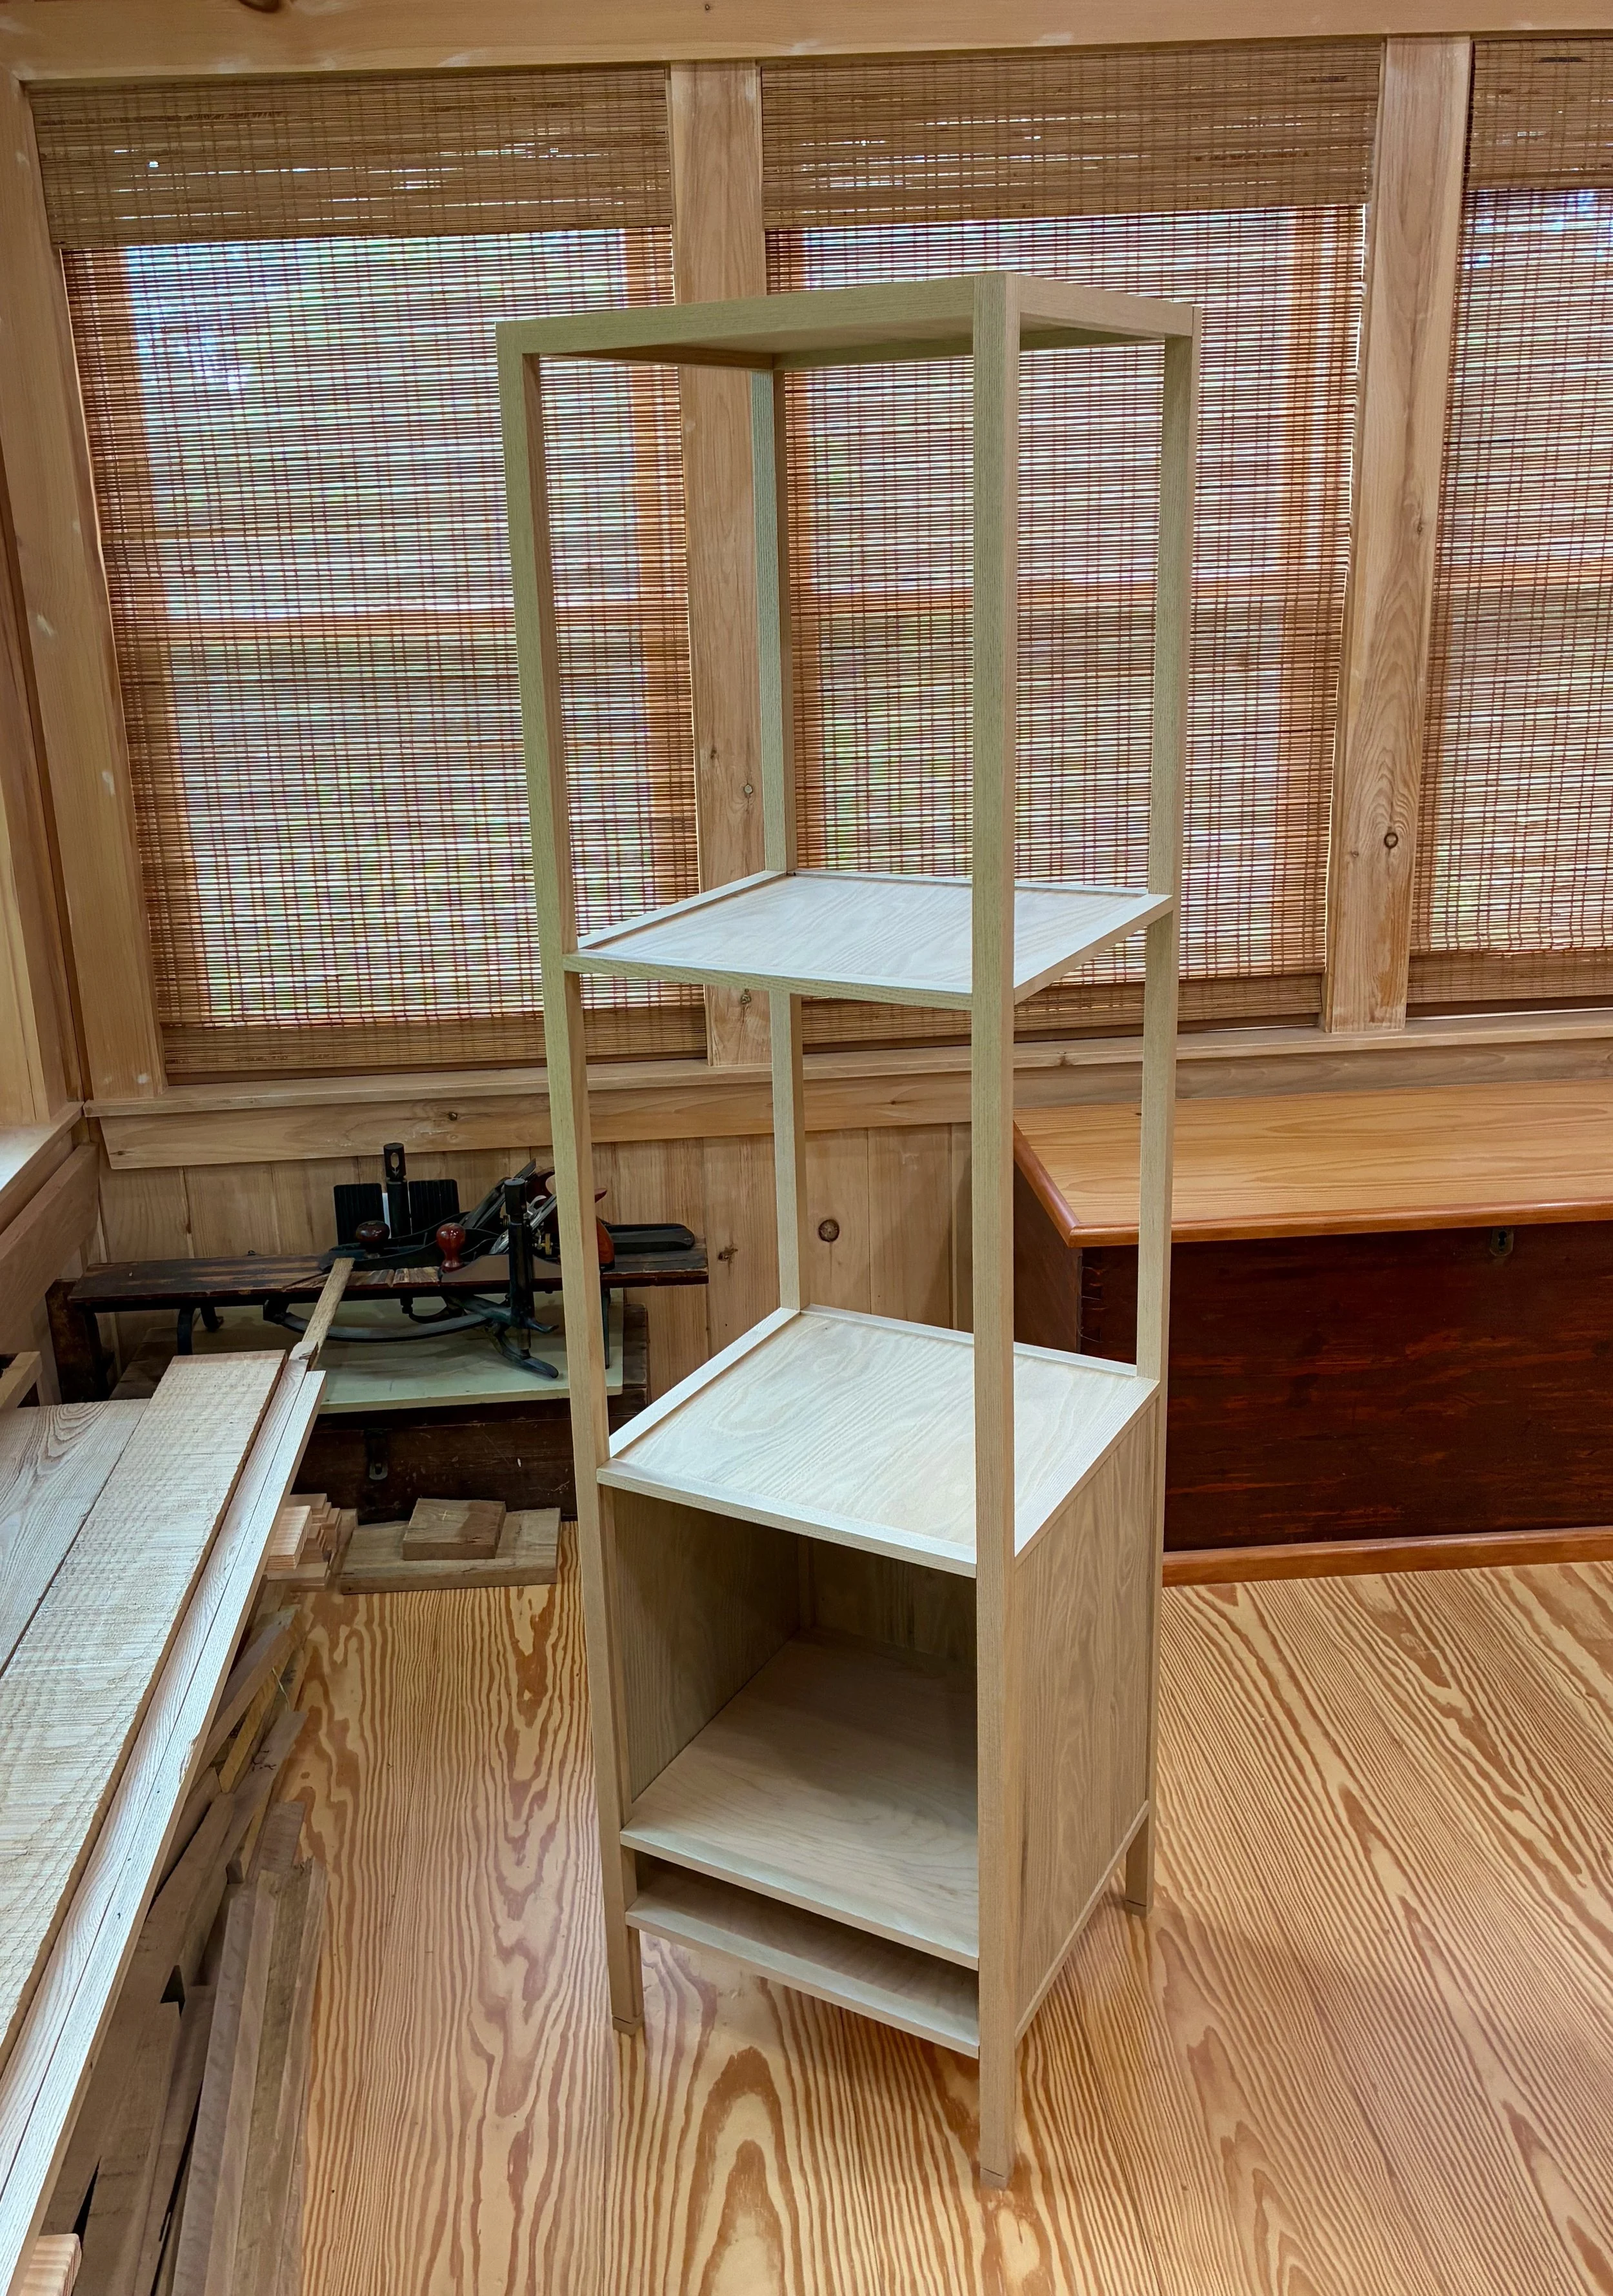
Dry-fit frame with panels
Two final case parts were fashioned to serve as hinge boards along the sides of the doored cavity. These were rabbeted so that the front edge would fit within a groove on the side poles, thus recessing the door frame the same amount (1/8 in.) as the side panels. With that completed, the parts were disassembled and all surfaces card-scraped and sanded to #220 grit. The last step before glueing-up the carcass was to liberate the tenons at the bottom of the poles. The tenons will join to the tatami-zuri boards later in the build and their positions were marked with grooves at the very beginning.
Assembly and Finish
There is still much to be built, but it was now time to pause and assemble the carcass. The first step is to decide on the final finish and whether this would require treating the panels prior to glue-up or not. I have come to favor simple oil finishes that let the wood glory in natural hues. However, I found that when surfacing my yellow-brown sassafras to a final state, a dreary gray chatoyance was produced that made the panel boards look “dirty”. Further, I found that oil finishes on a scrap piece did not “clean” things up. This odd coloration might change as the boards age, or it might not. Thus, it was worth experimenting with some colored finishes to improve the look. I liked the orange-brown color of the exemplar piece and so I aimed in that direction.
A variety of dyes, glazes and stains were tested with the goal of imparting a better “look” while not going overboard. I picked among the products that I already owned, and after a few days of play landed on a nice ZAR® stain by the name of “Salem Maple” (Red Top Translate: “reddish brown”). On my scraps it seemed to bring the grain to the fore while imparting a more uniform background red that worked better with gray. Sold! I would also wait until the very end of the build to stain and varnish the piece.
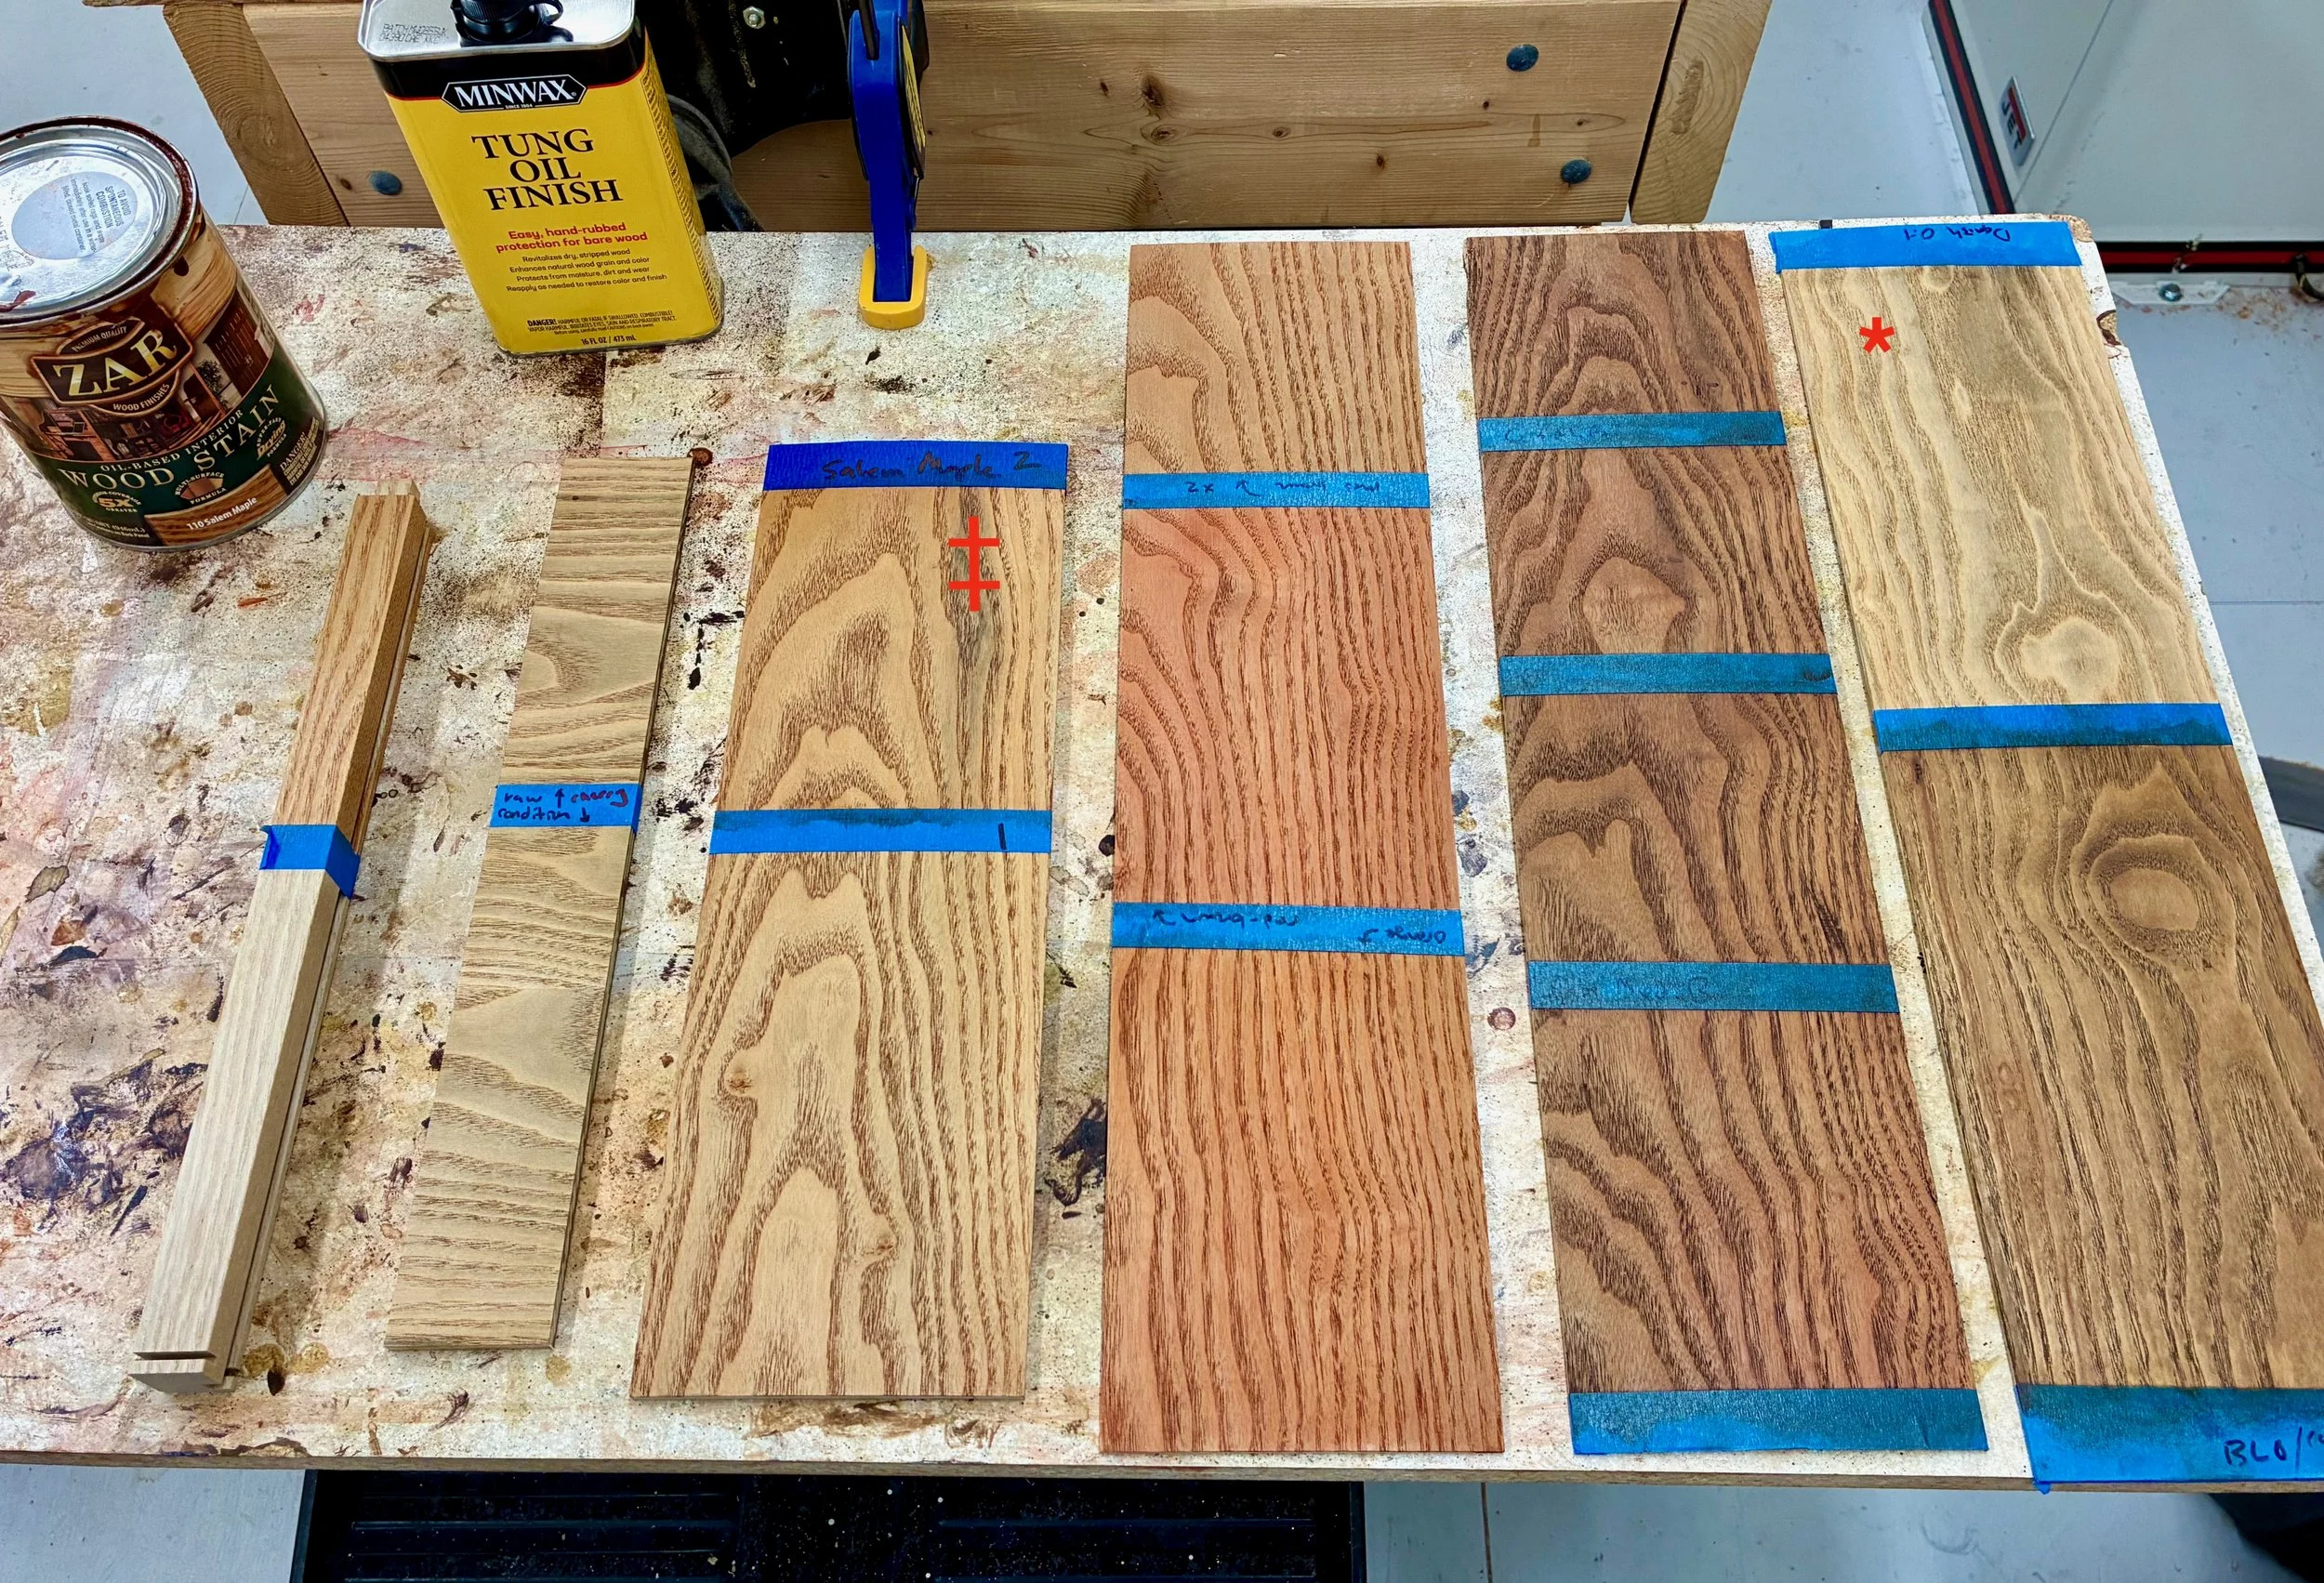
Finishing test panels
*Oil-only (note gray tones)
‡ Salem Maple stain “winner”
Assembly of the carcass was a smooth operation given the prior labelling of parts and some assistance from Joung. I’ve hit upon a favored sequence for these cabinet builds: assemble the back flat on the workbench; then raise the sides; and finally cap-off the front before standing the thing upright to cure.

Carcass with glue and clamps applied
Next came the doors. These are simple framed panel doors that I chose to make even simpler. You might have noticed on the exemplar that the interior edge of the door’s stiles and rails had been eased to create a “rounded” rectangular opening for the panel. It is a subtle way of softening the look which adds appeal. I tried to reproduce this on some practice parts, but all of my attempts were unsatisfactory. In the end, I made two rectangular doors and a vow to keep noodling on how to create the rounded version next time.
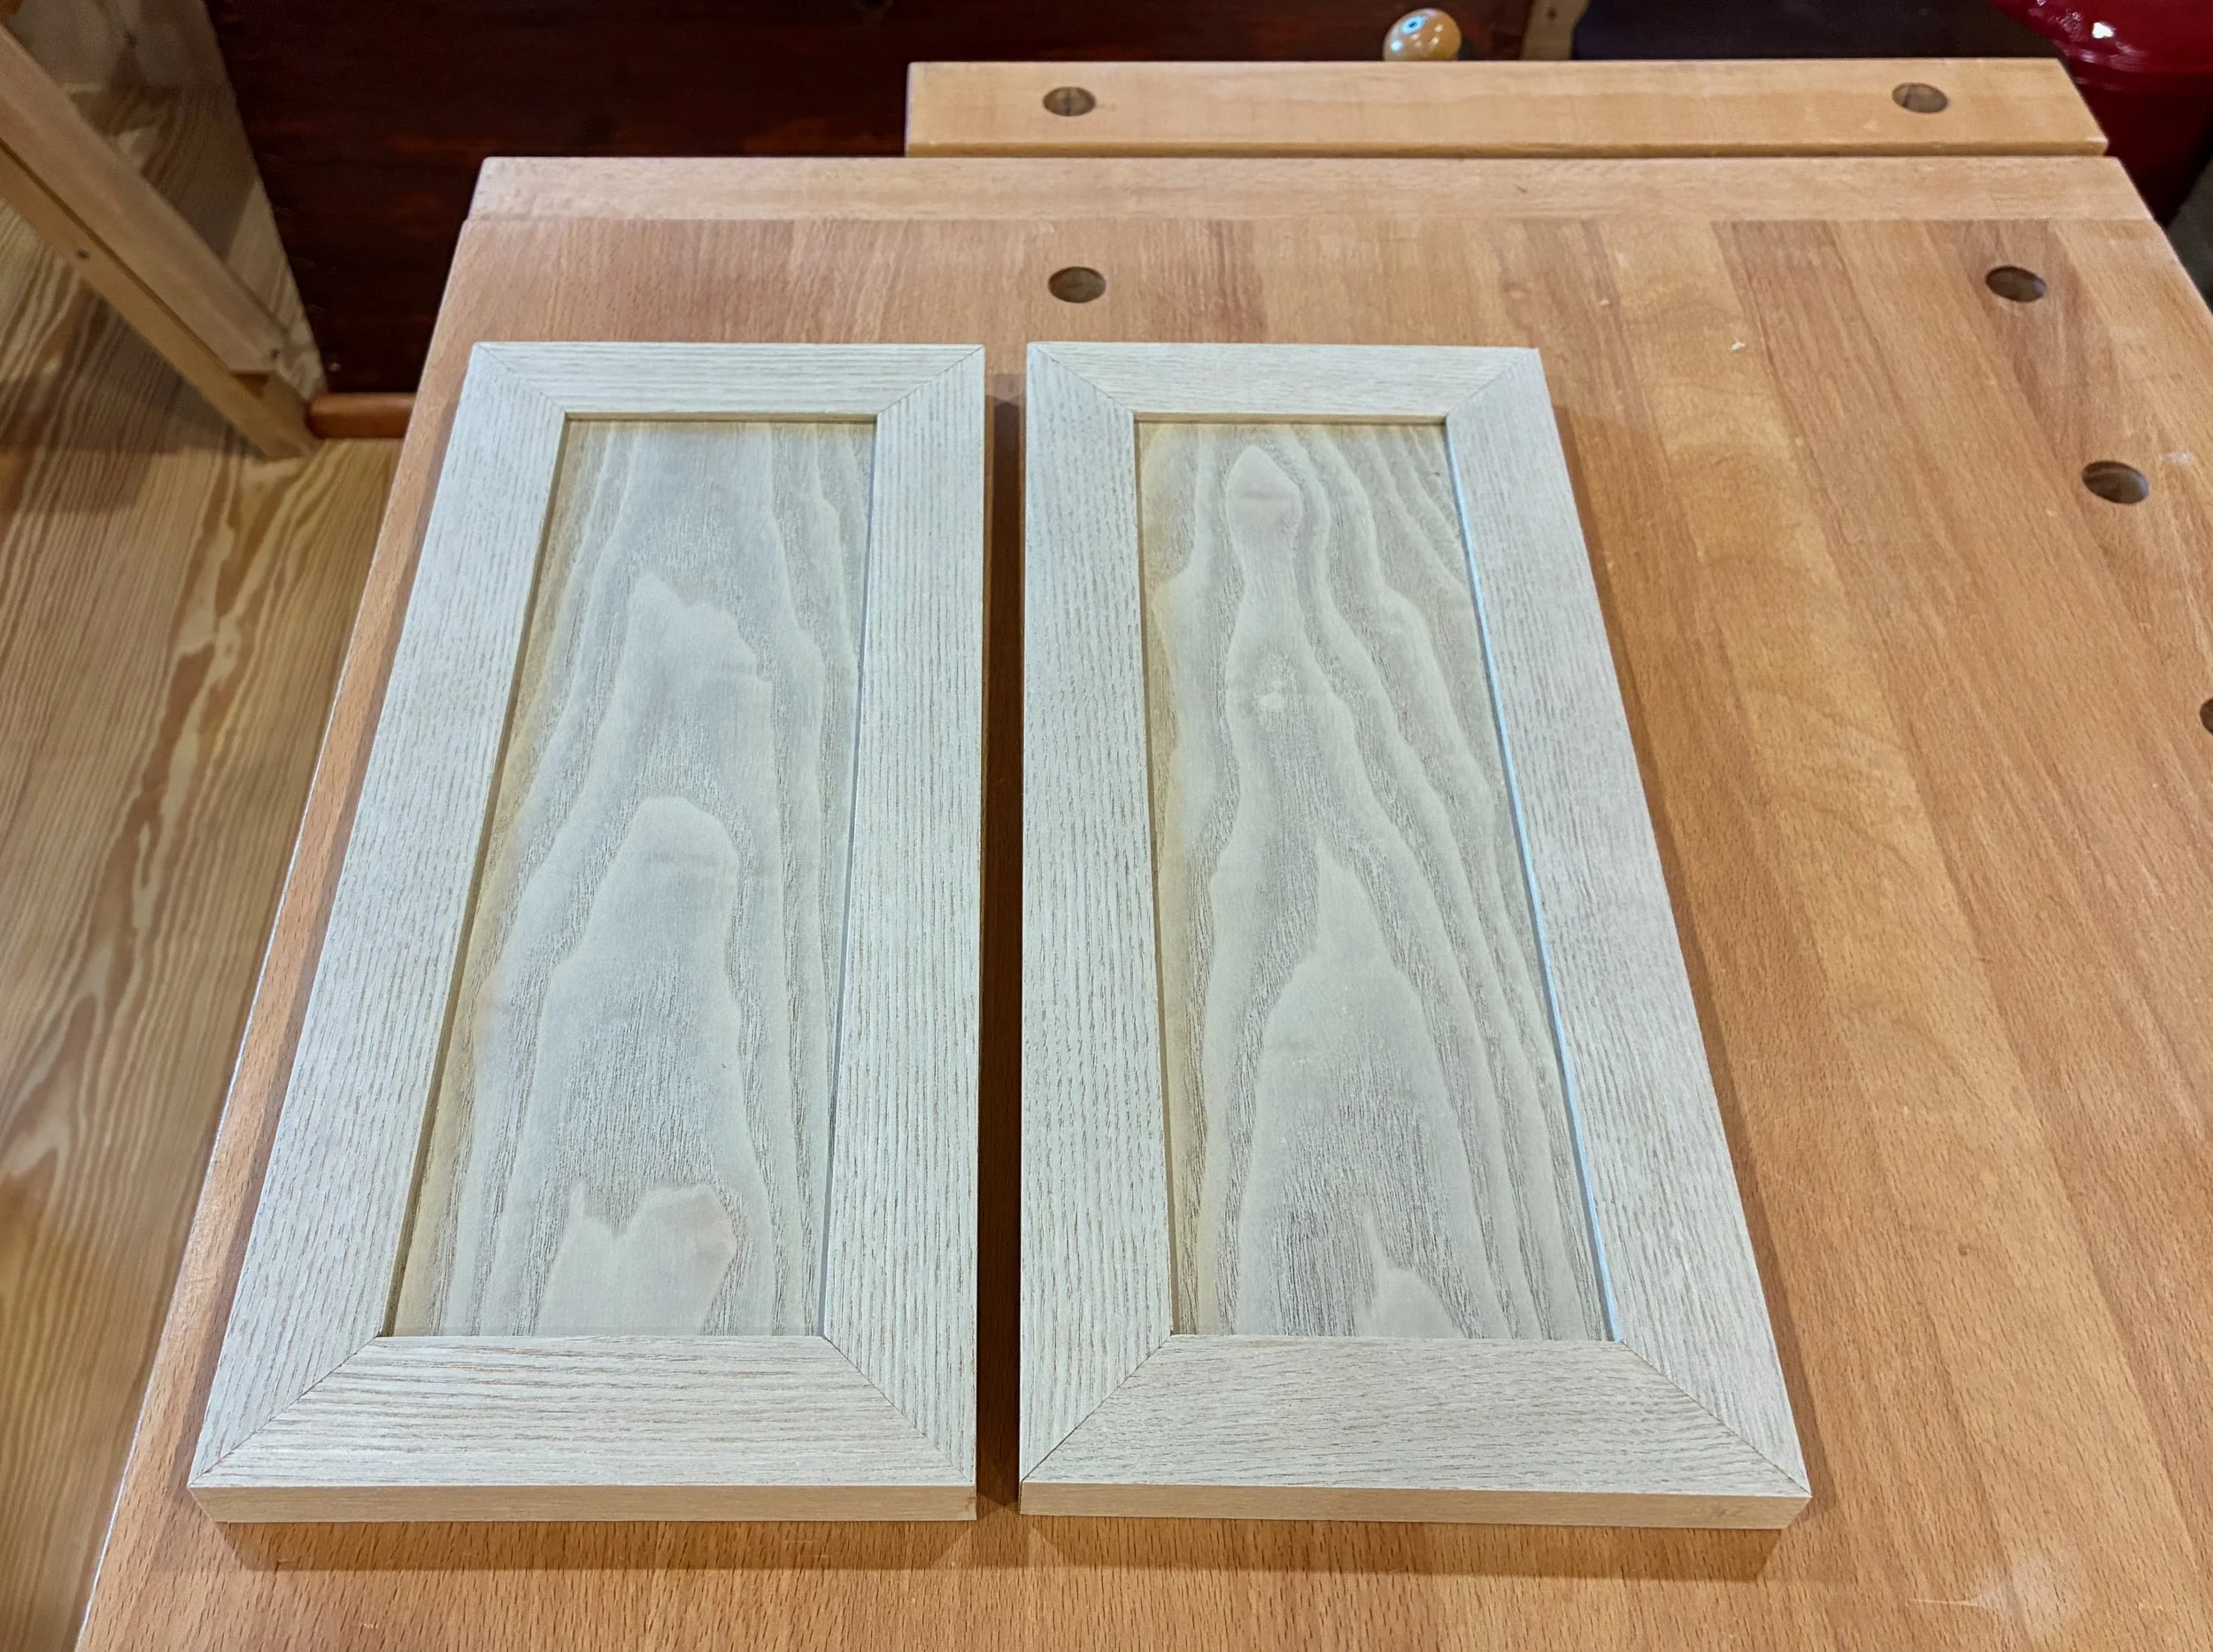
Mitered panel doors
Let’s talk hardware. Alas, procuring traditional Korean furniture hardware is a challenge in the 21st century. Over time, I have accumulated a small assortment of these treasures, almost exclusively in black, mimicking the iron fittings used for kitchen cabinets, trunks and such. The brass stuff is very hard to find, but that is the material I wanted for this piece. What I did find was a Chinese-inspired latch in antique brass from an Etsy merchant (FashionLook4U) that might look nice to anchor the cabinet portion. What I could not find was a suitable surface mounted hinge set in antique brass to match. Rather than resort to a mis-match that would distract from the latch, I went with non-mortise butt hinges, where only the barrels would be visible. As to the drawer, I wanted it to be a secret so no hardware was required here, just a spring-loaded drawer kicker with a mechanism akin to that of a retractable ball point pen. The hinges and kicker were obtained from Lee Valley Tools, a nice Canadian firm.
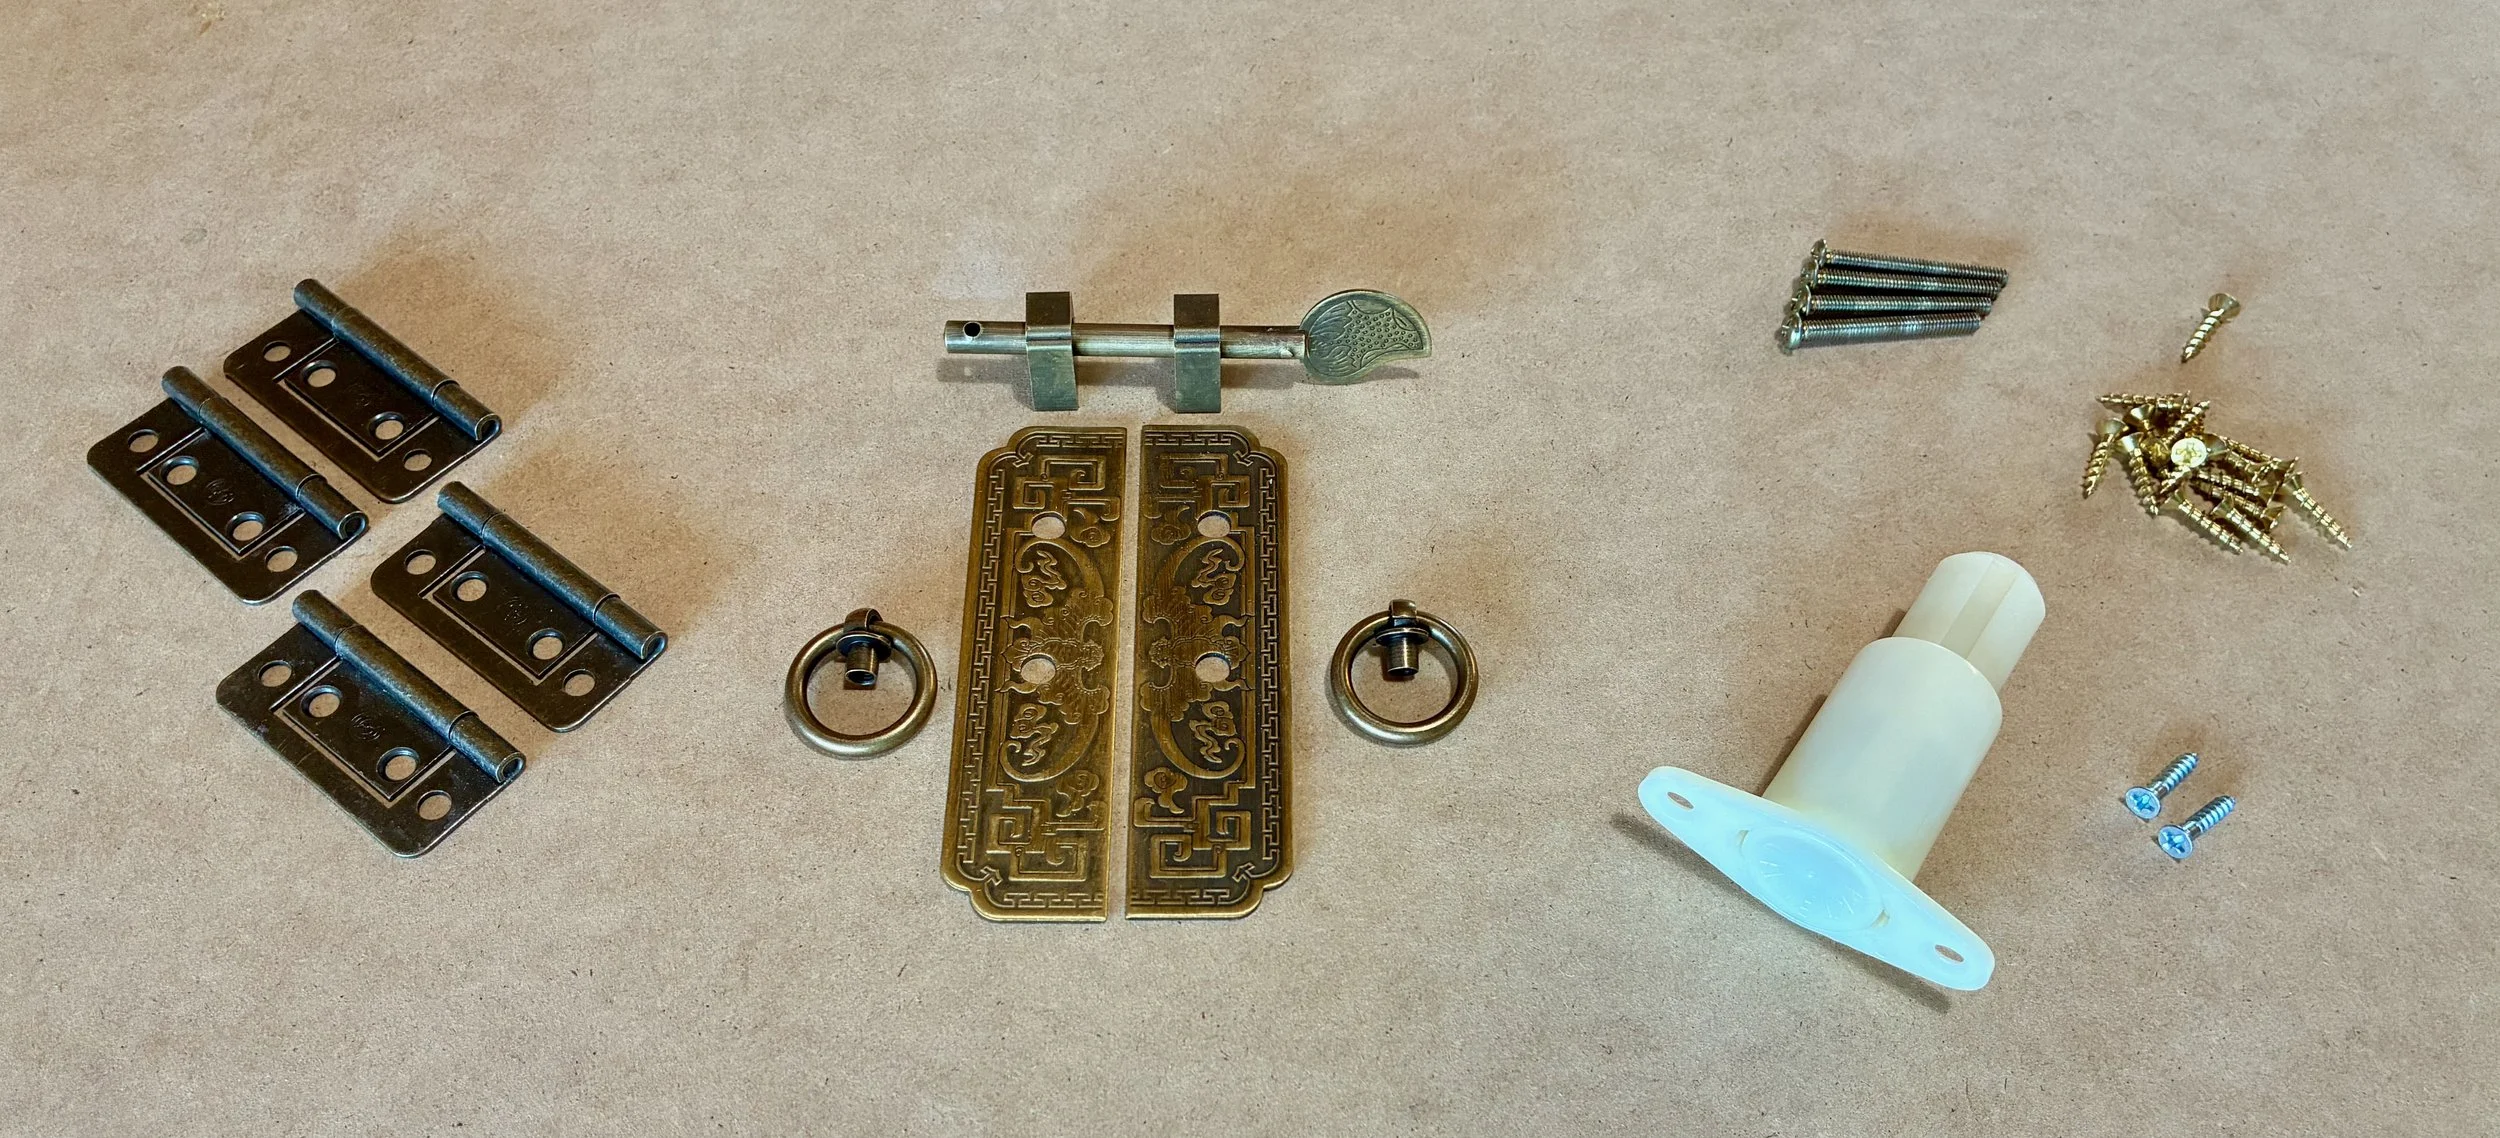
Door and drawer hardware
Before completing the drawer and doors I needed to finish up the base. A decorative punghyeol or “ventilation cutout” was constructed by joining 3 thin pieces with miters and slipping them into grooves on the legs and rail. Next, two tatami-zuri boards were fashioned from straight-grained stock, with mortises cut at each end for the joinery. These slipped around those tenons at the end of the leg poles to form the characteristic “feet” of East Asian furniture.
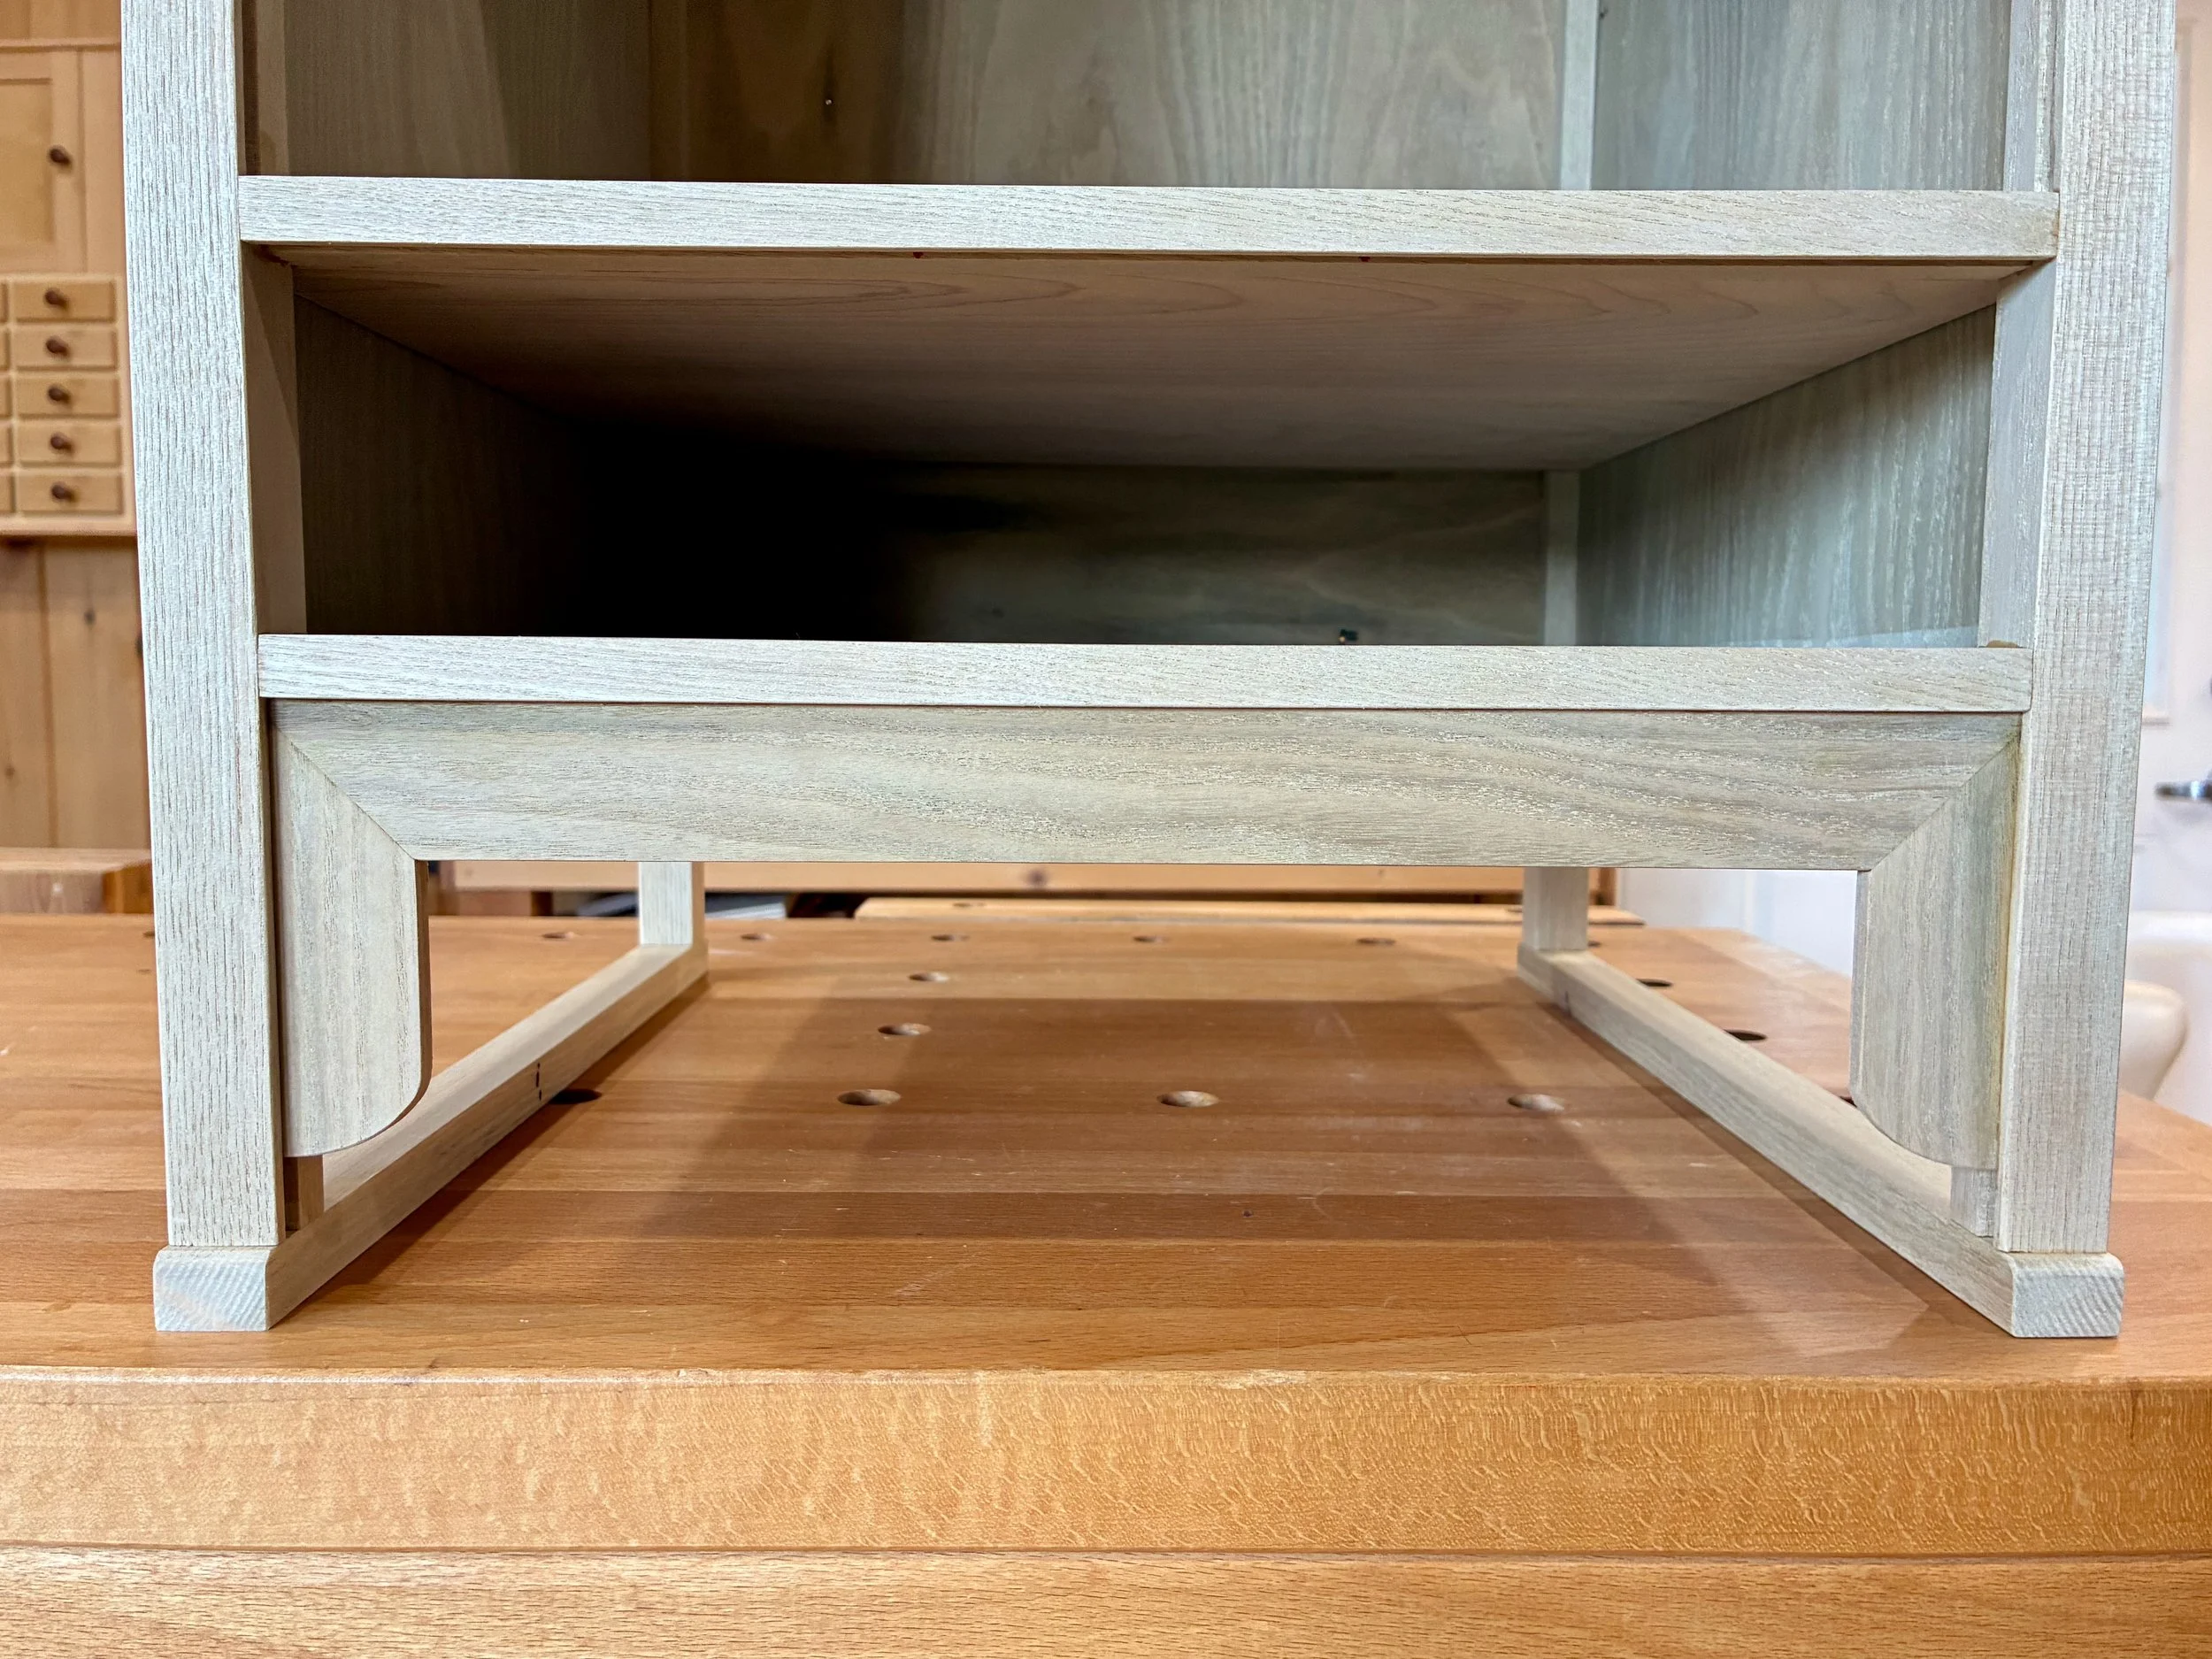
Tatami-zuri and mitered punghyeol trim in place
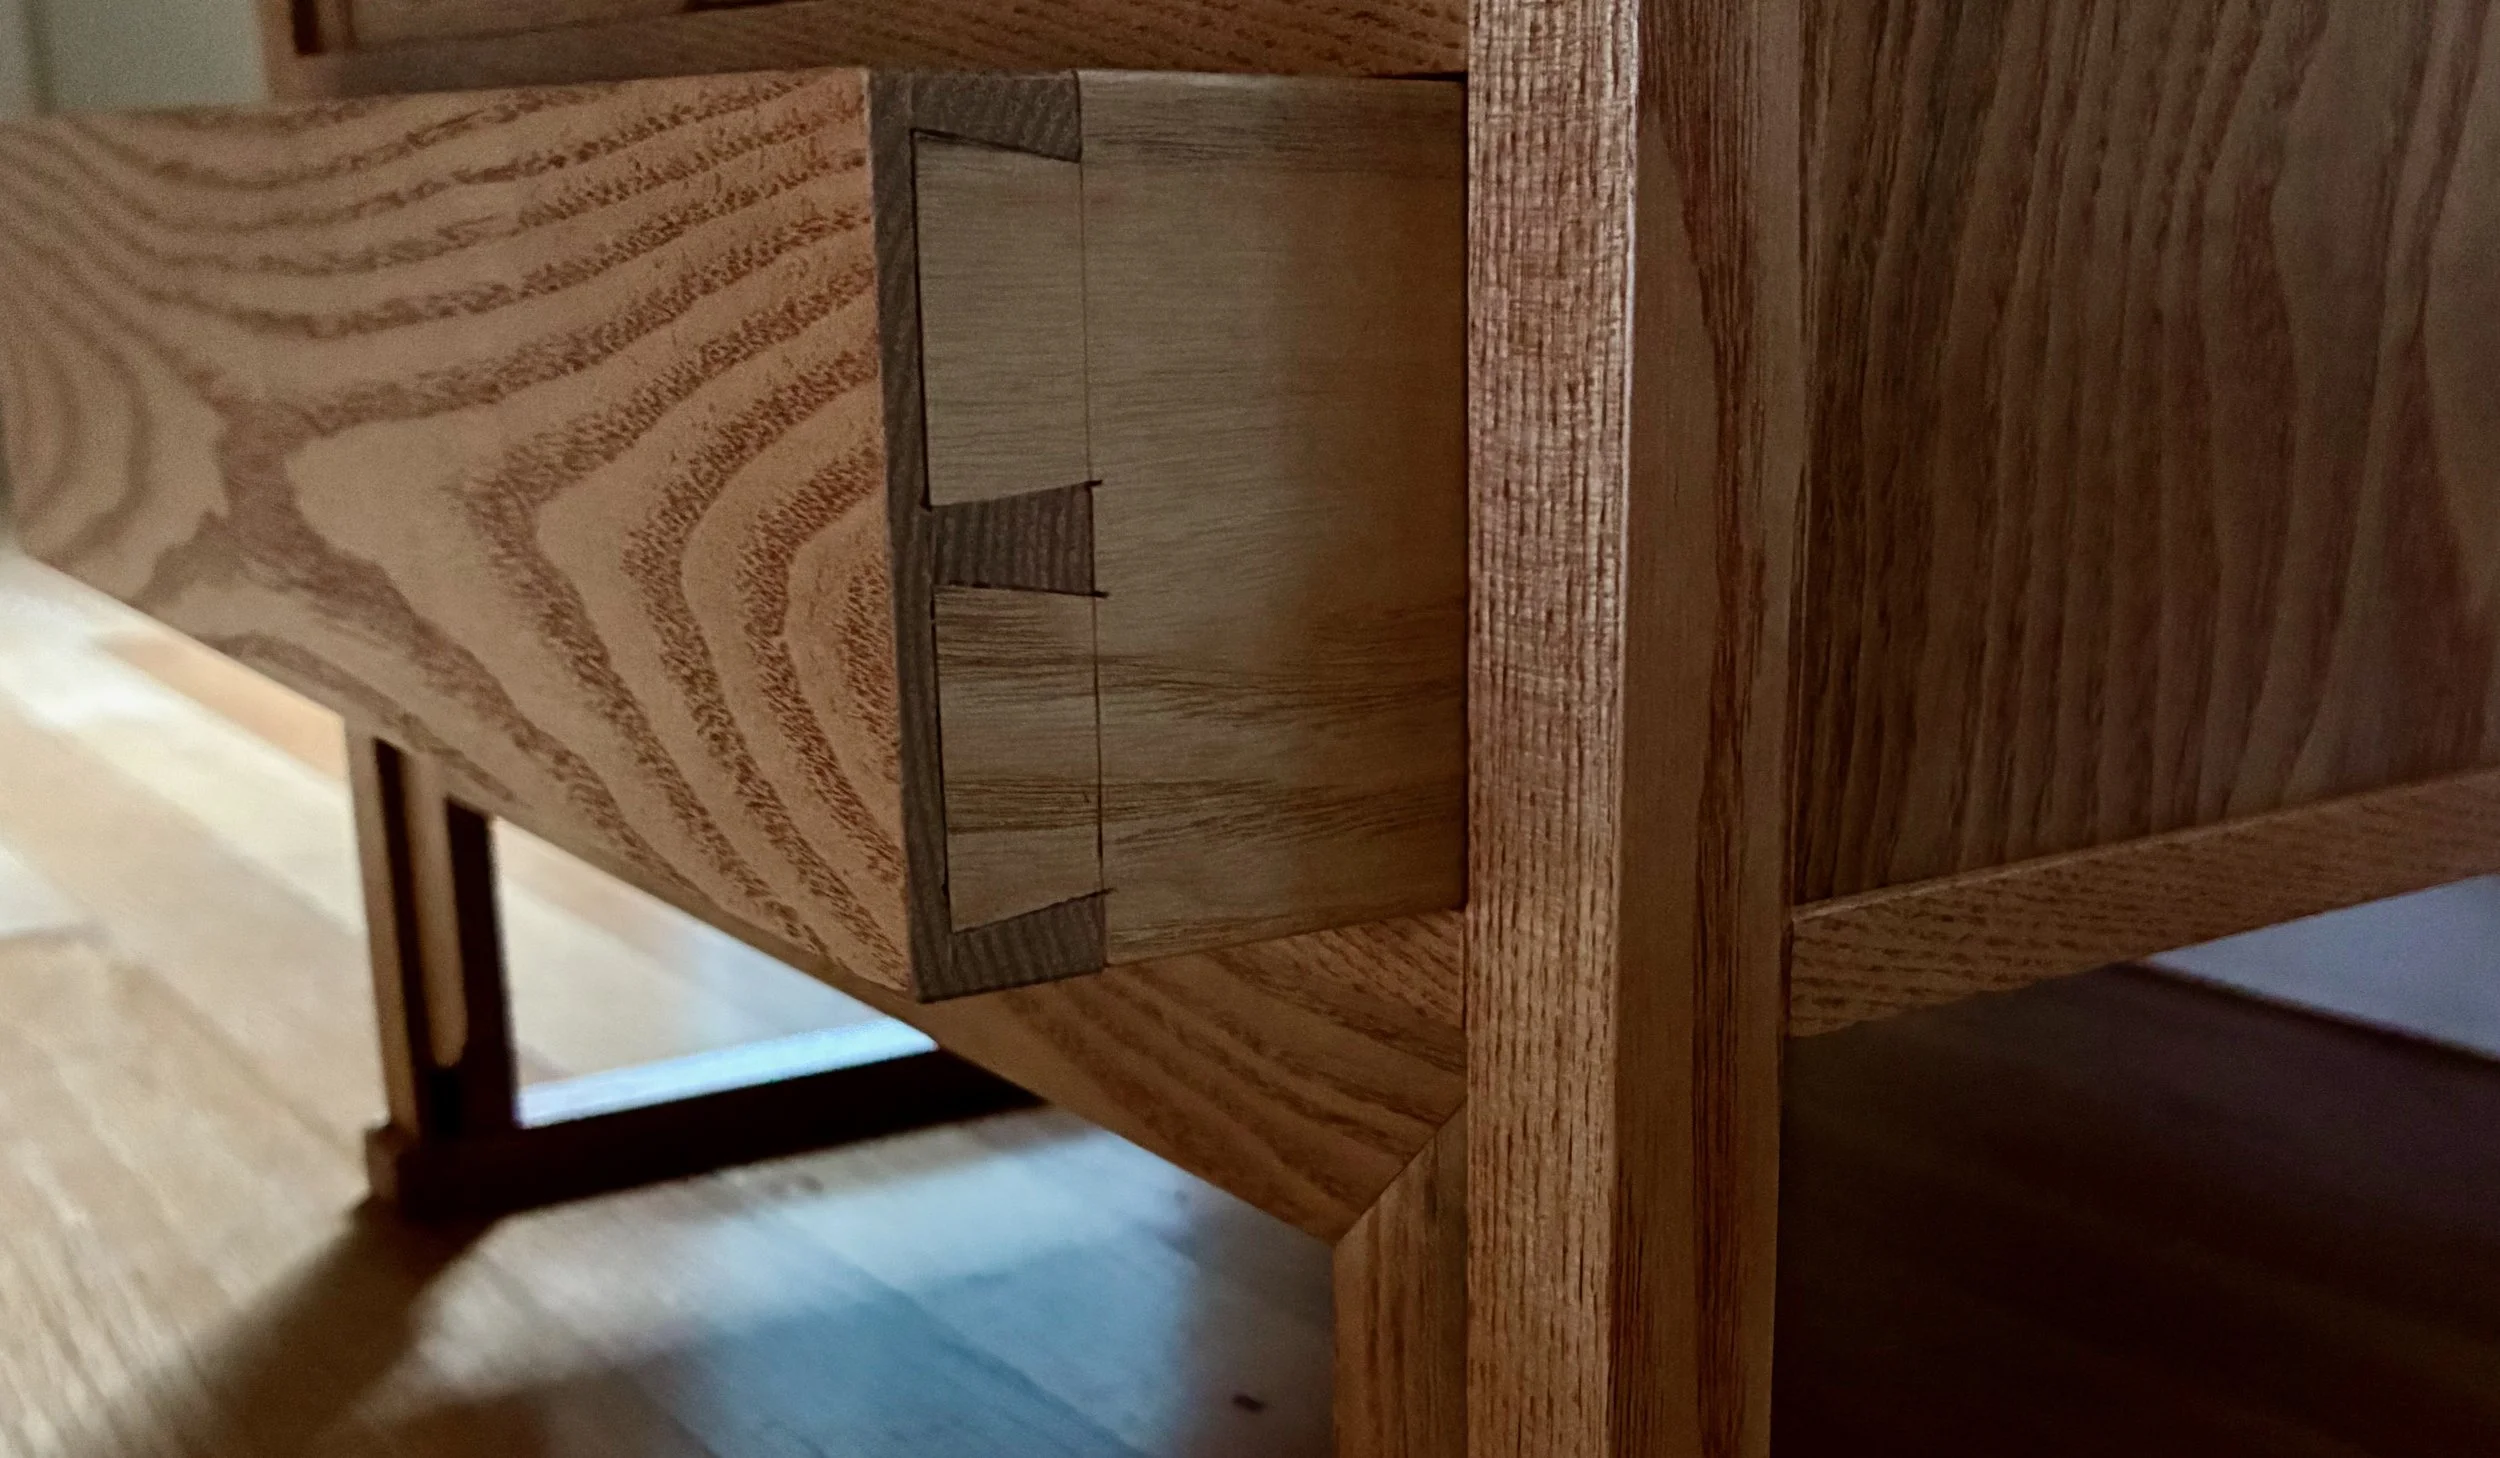
Time to tackle the drawer. Since the original was drawerless, I would be co-opting the space below the doors for this feature. An inset drawer here would be nearly indistinguishable from the original, yet provide useful space for knitting needle storage. This slim, 3 inch drawer would be constructed using half-blind dovetails in front and lock joints for the back. A thin plywood board would be used for the bottom to maximize cavity height. After choosing the best grain from the remaining stock, the drawer front was cut to exact dimensions and then the sides were cut to a matching height from less-distinguished sassafras. Once the boards were marked I used my new dovetail saw to cut the joint elements. Sassafras is a soft wood to saw and chisel, making this an easy maiden voyage and one of my better dovetail experiences.
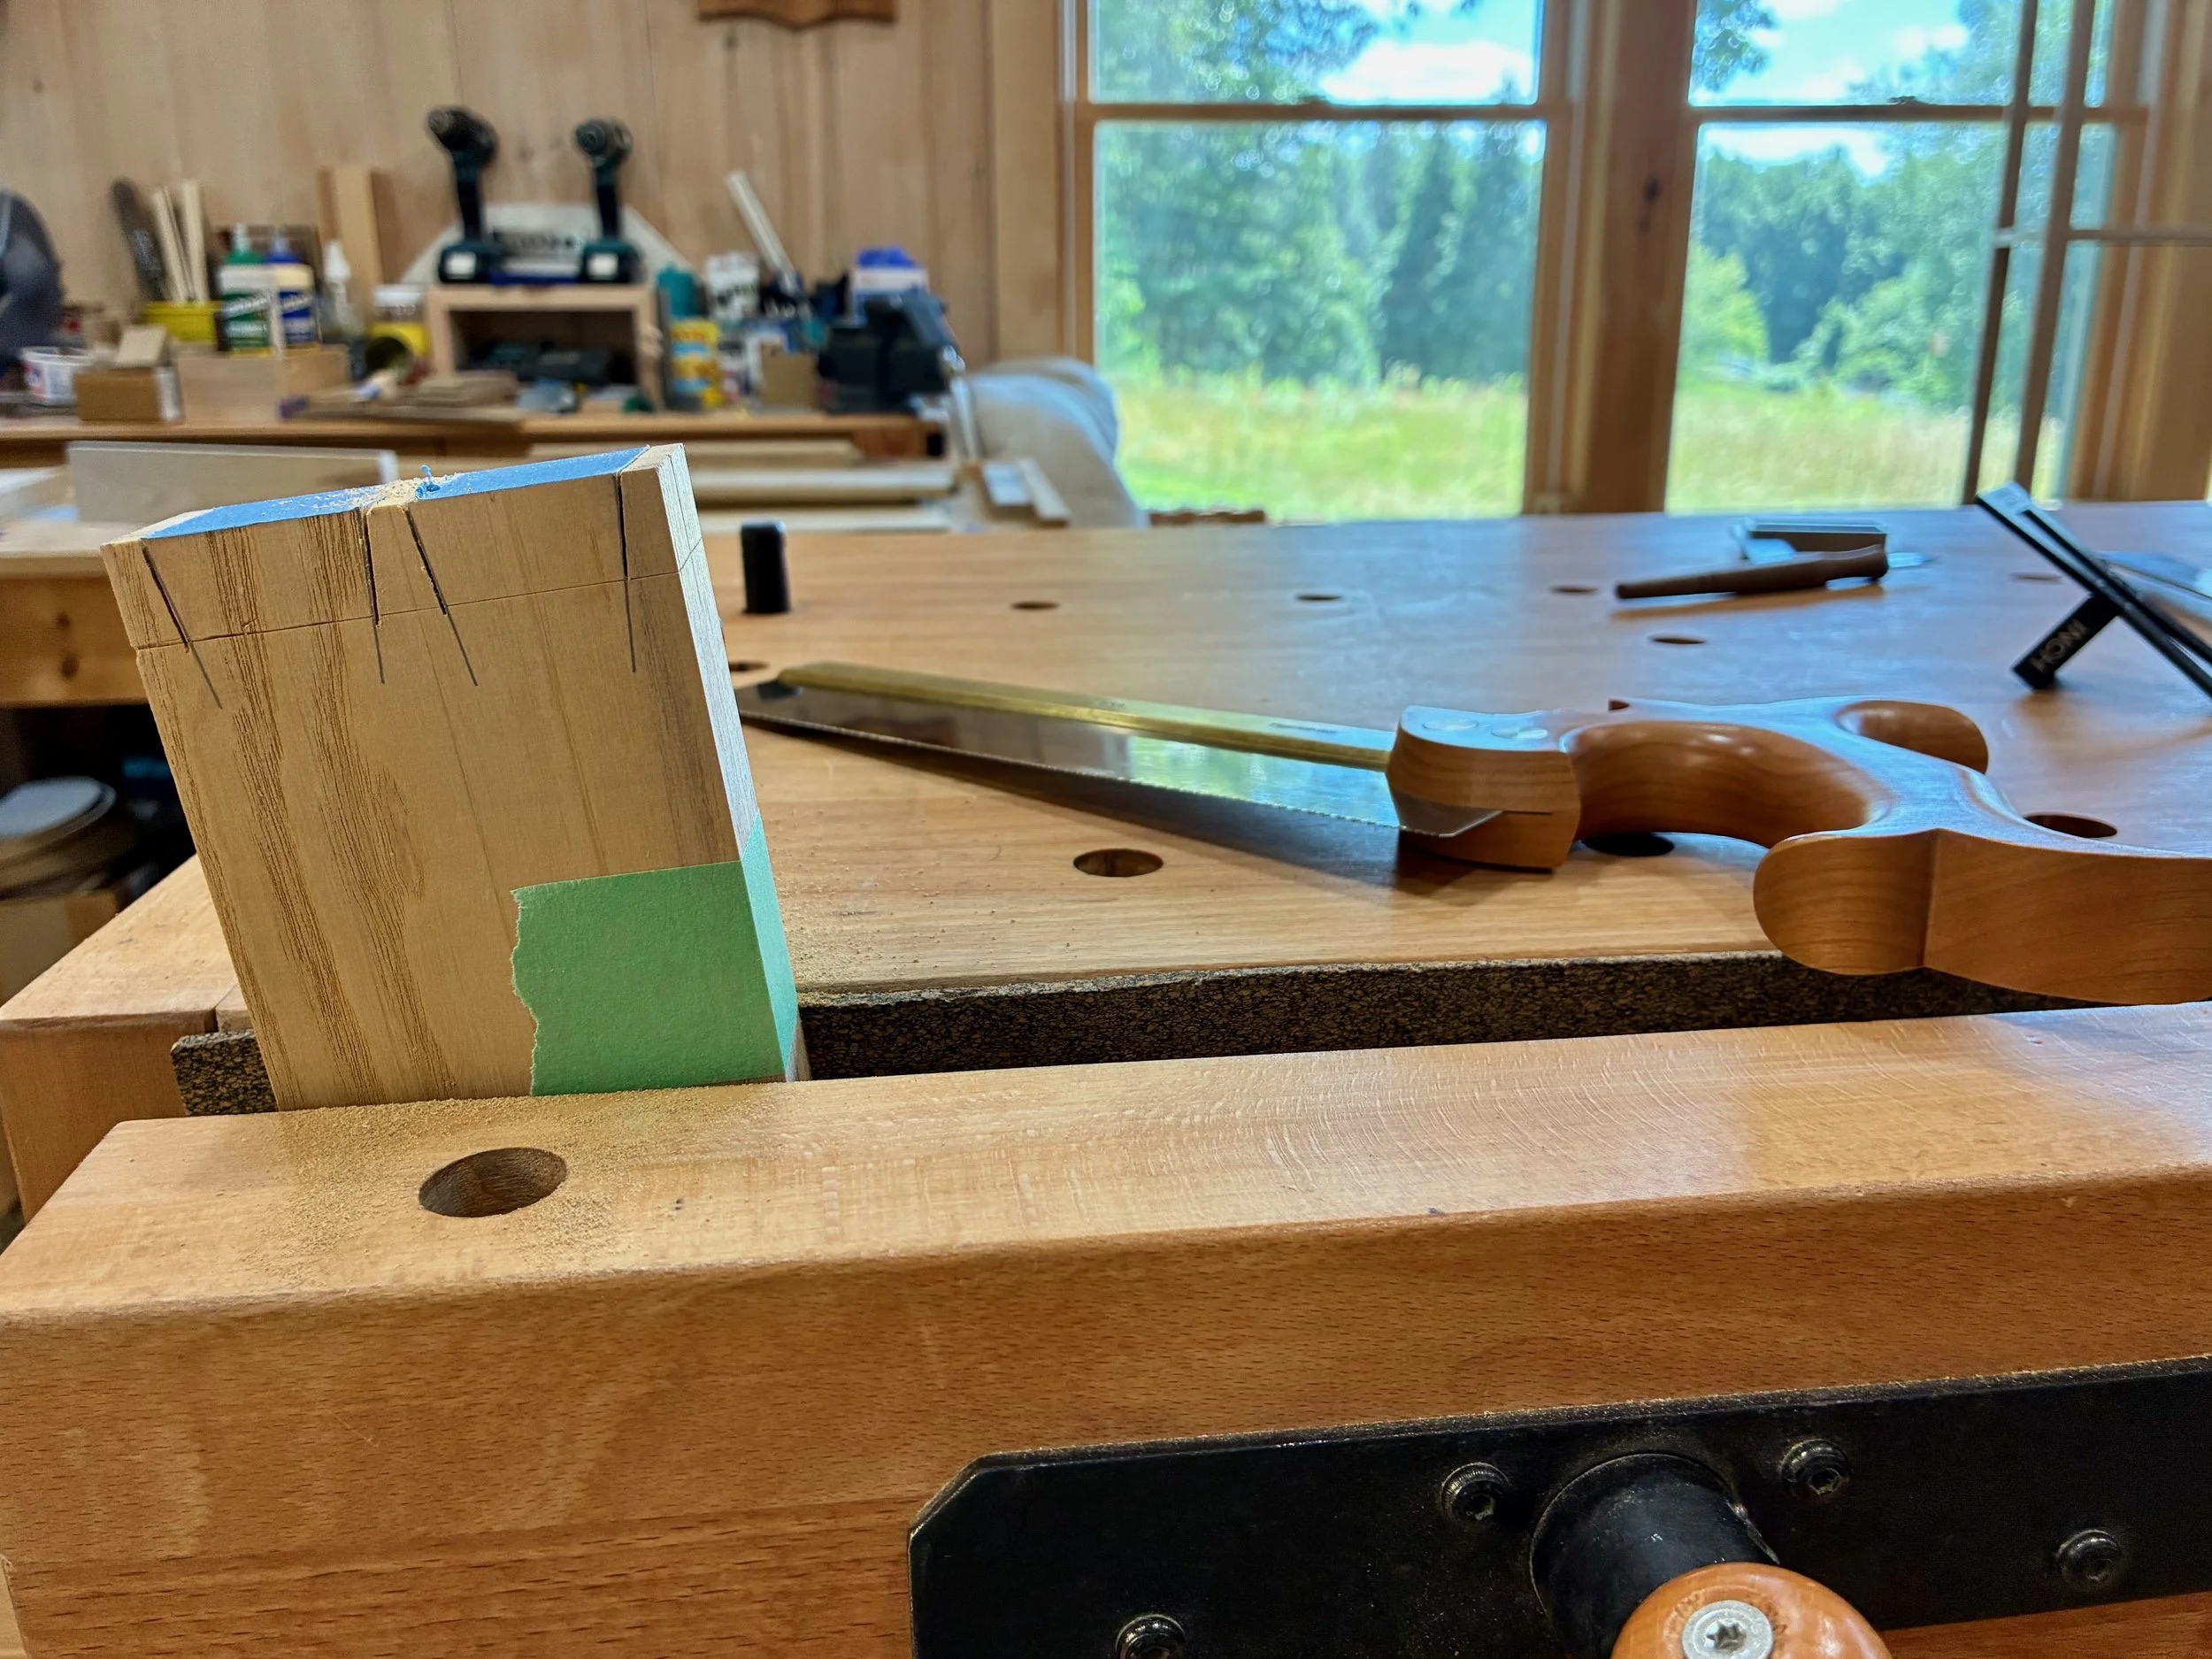
Cutting the tails on both side boards taped together
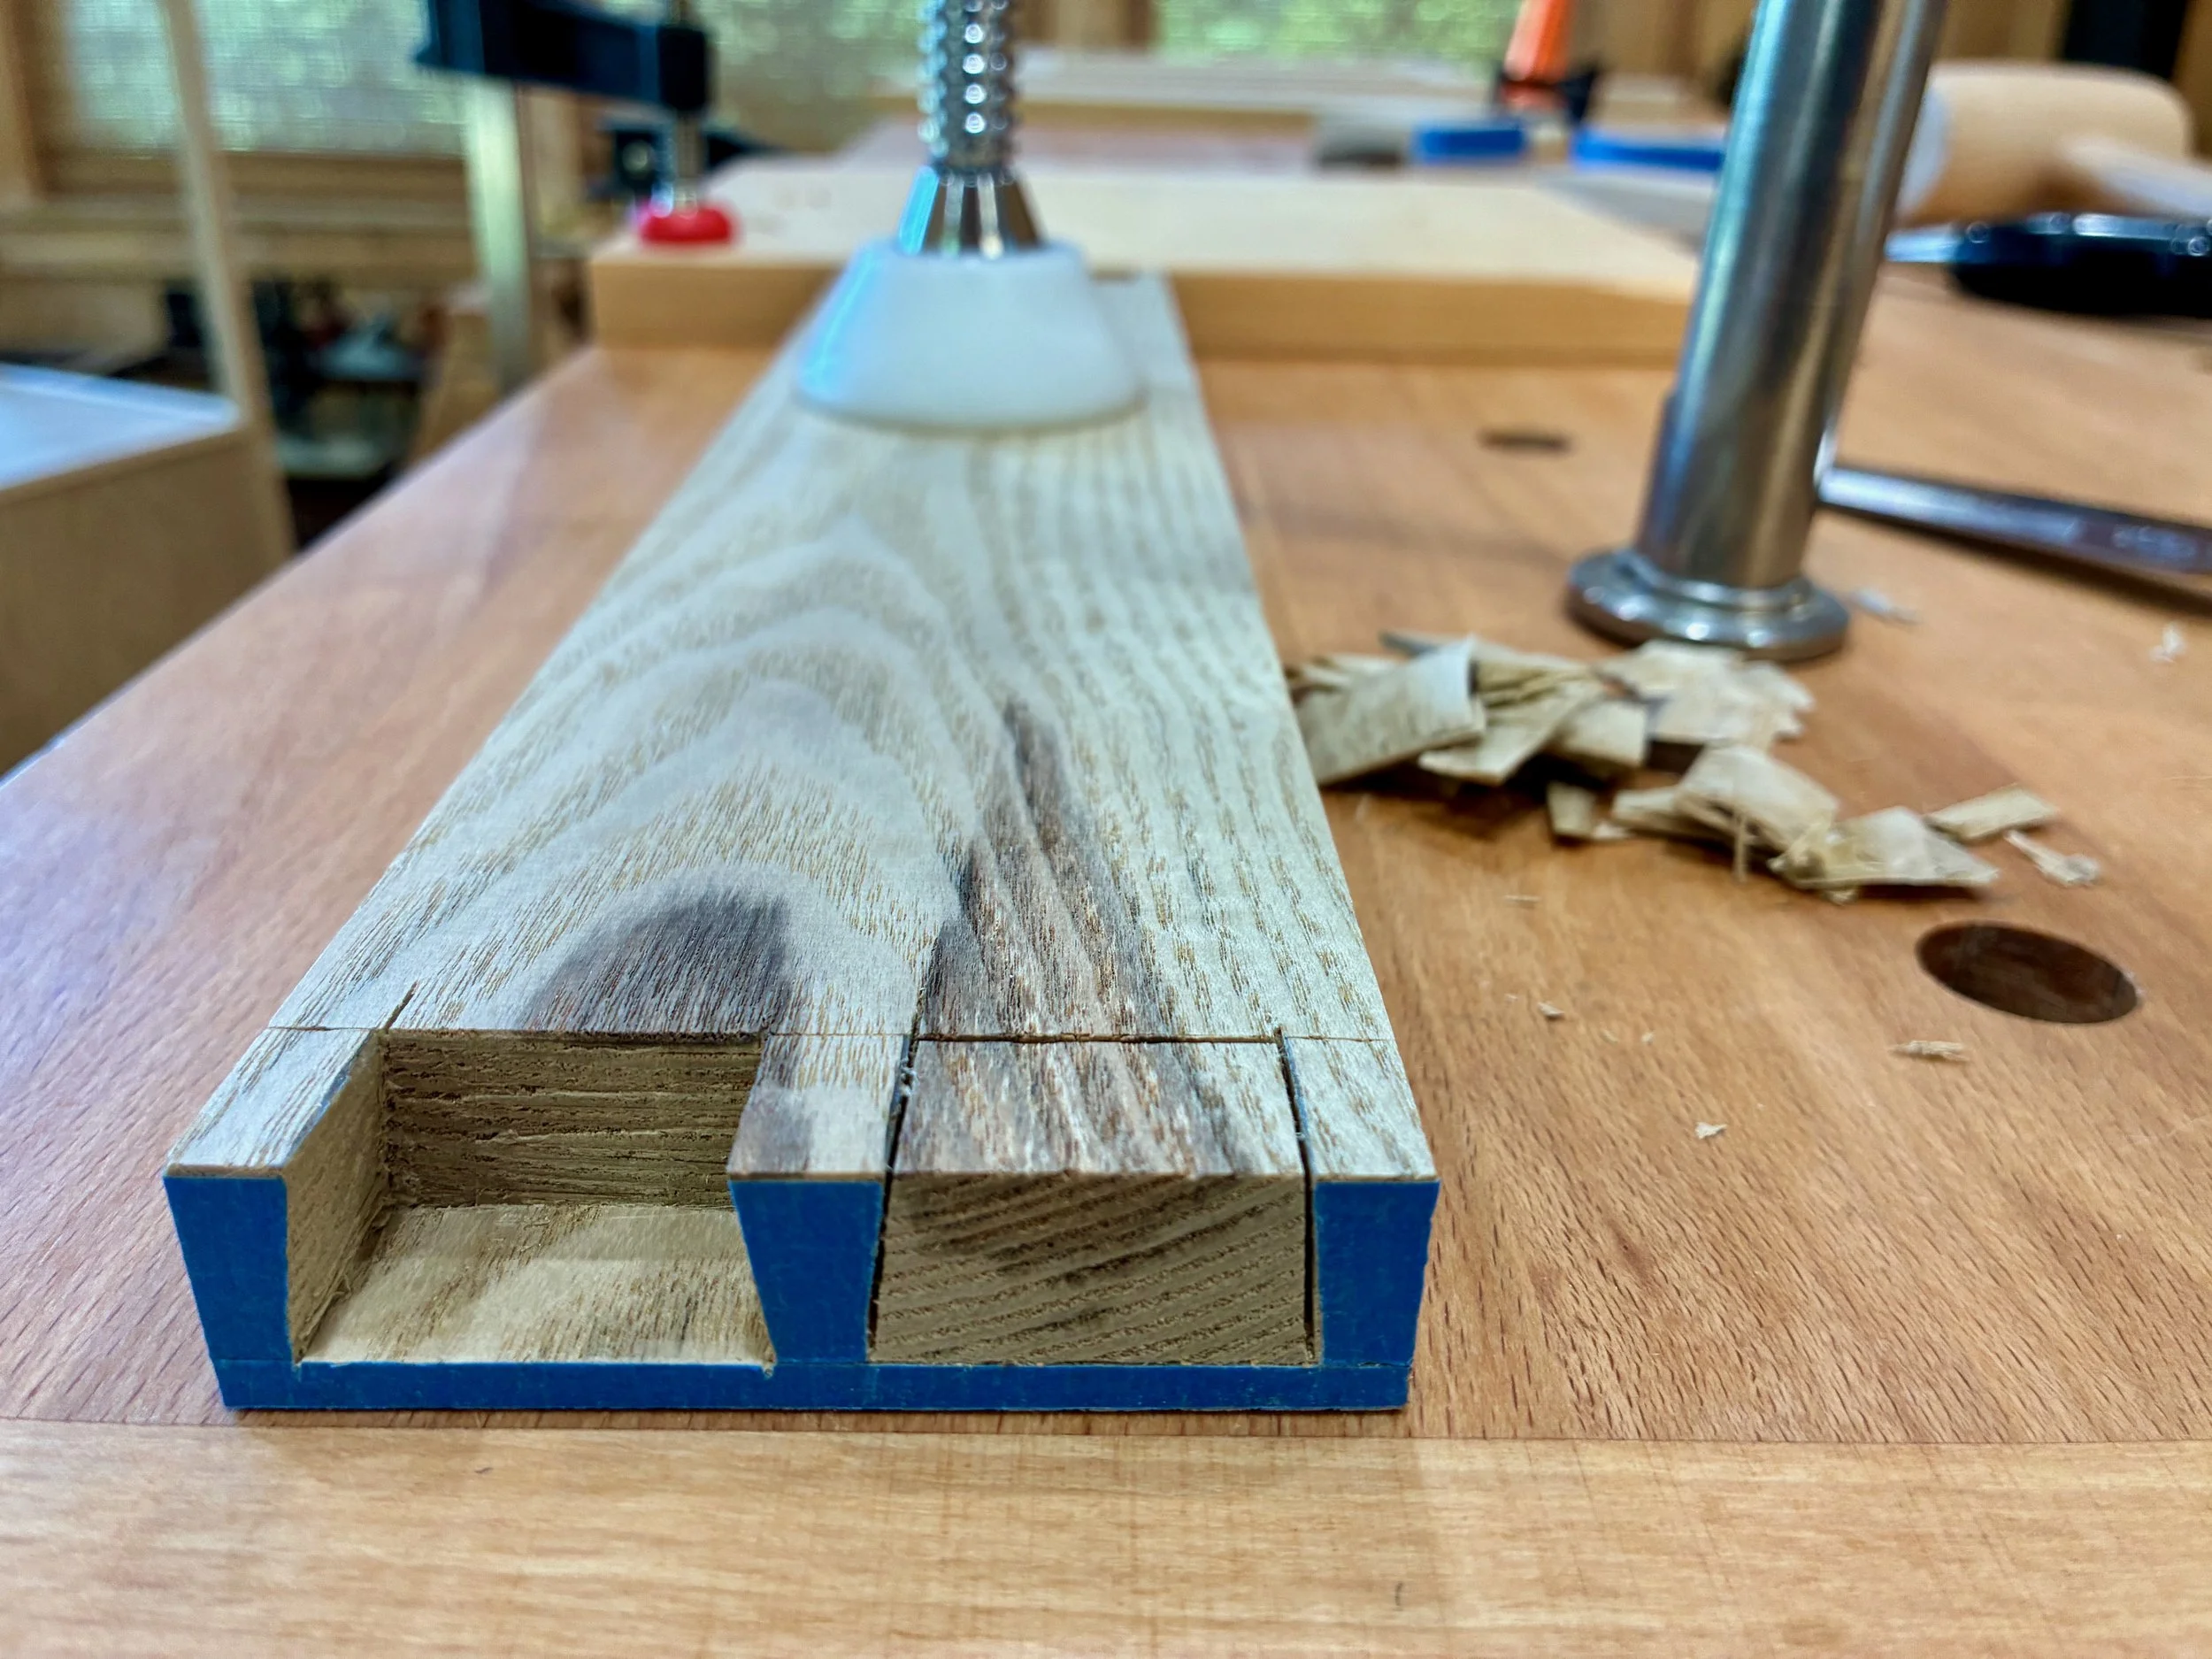
Chiseling pins out of the drawer front
After dadoing slots for the back and bottom, the drawer snapped together nice and neat. Along the sides of the cabinet cavity, two “guide” boards were glued to keep the drawer tucked snug while running in and out. The back board was modified to accept the kicker and then all drawer parts were glued together. Once dry, a hand plane and sandpaper were used to perfect the fit.
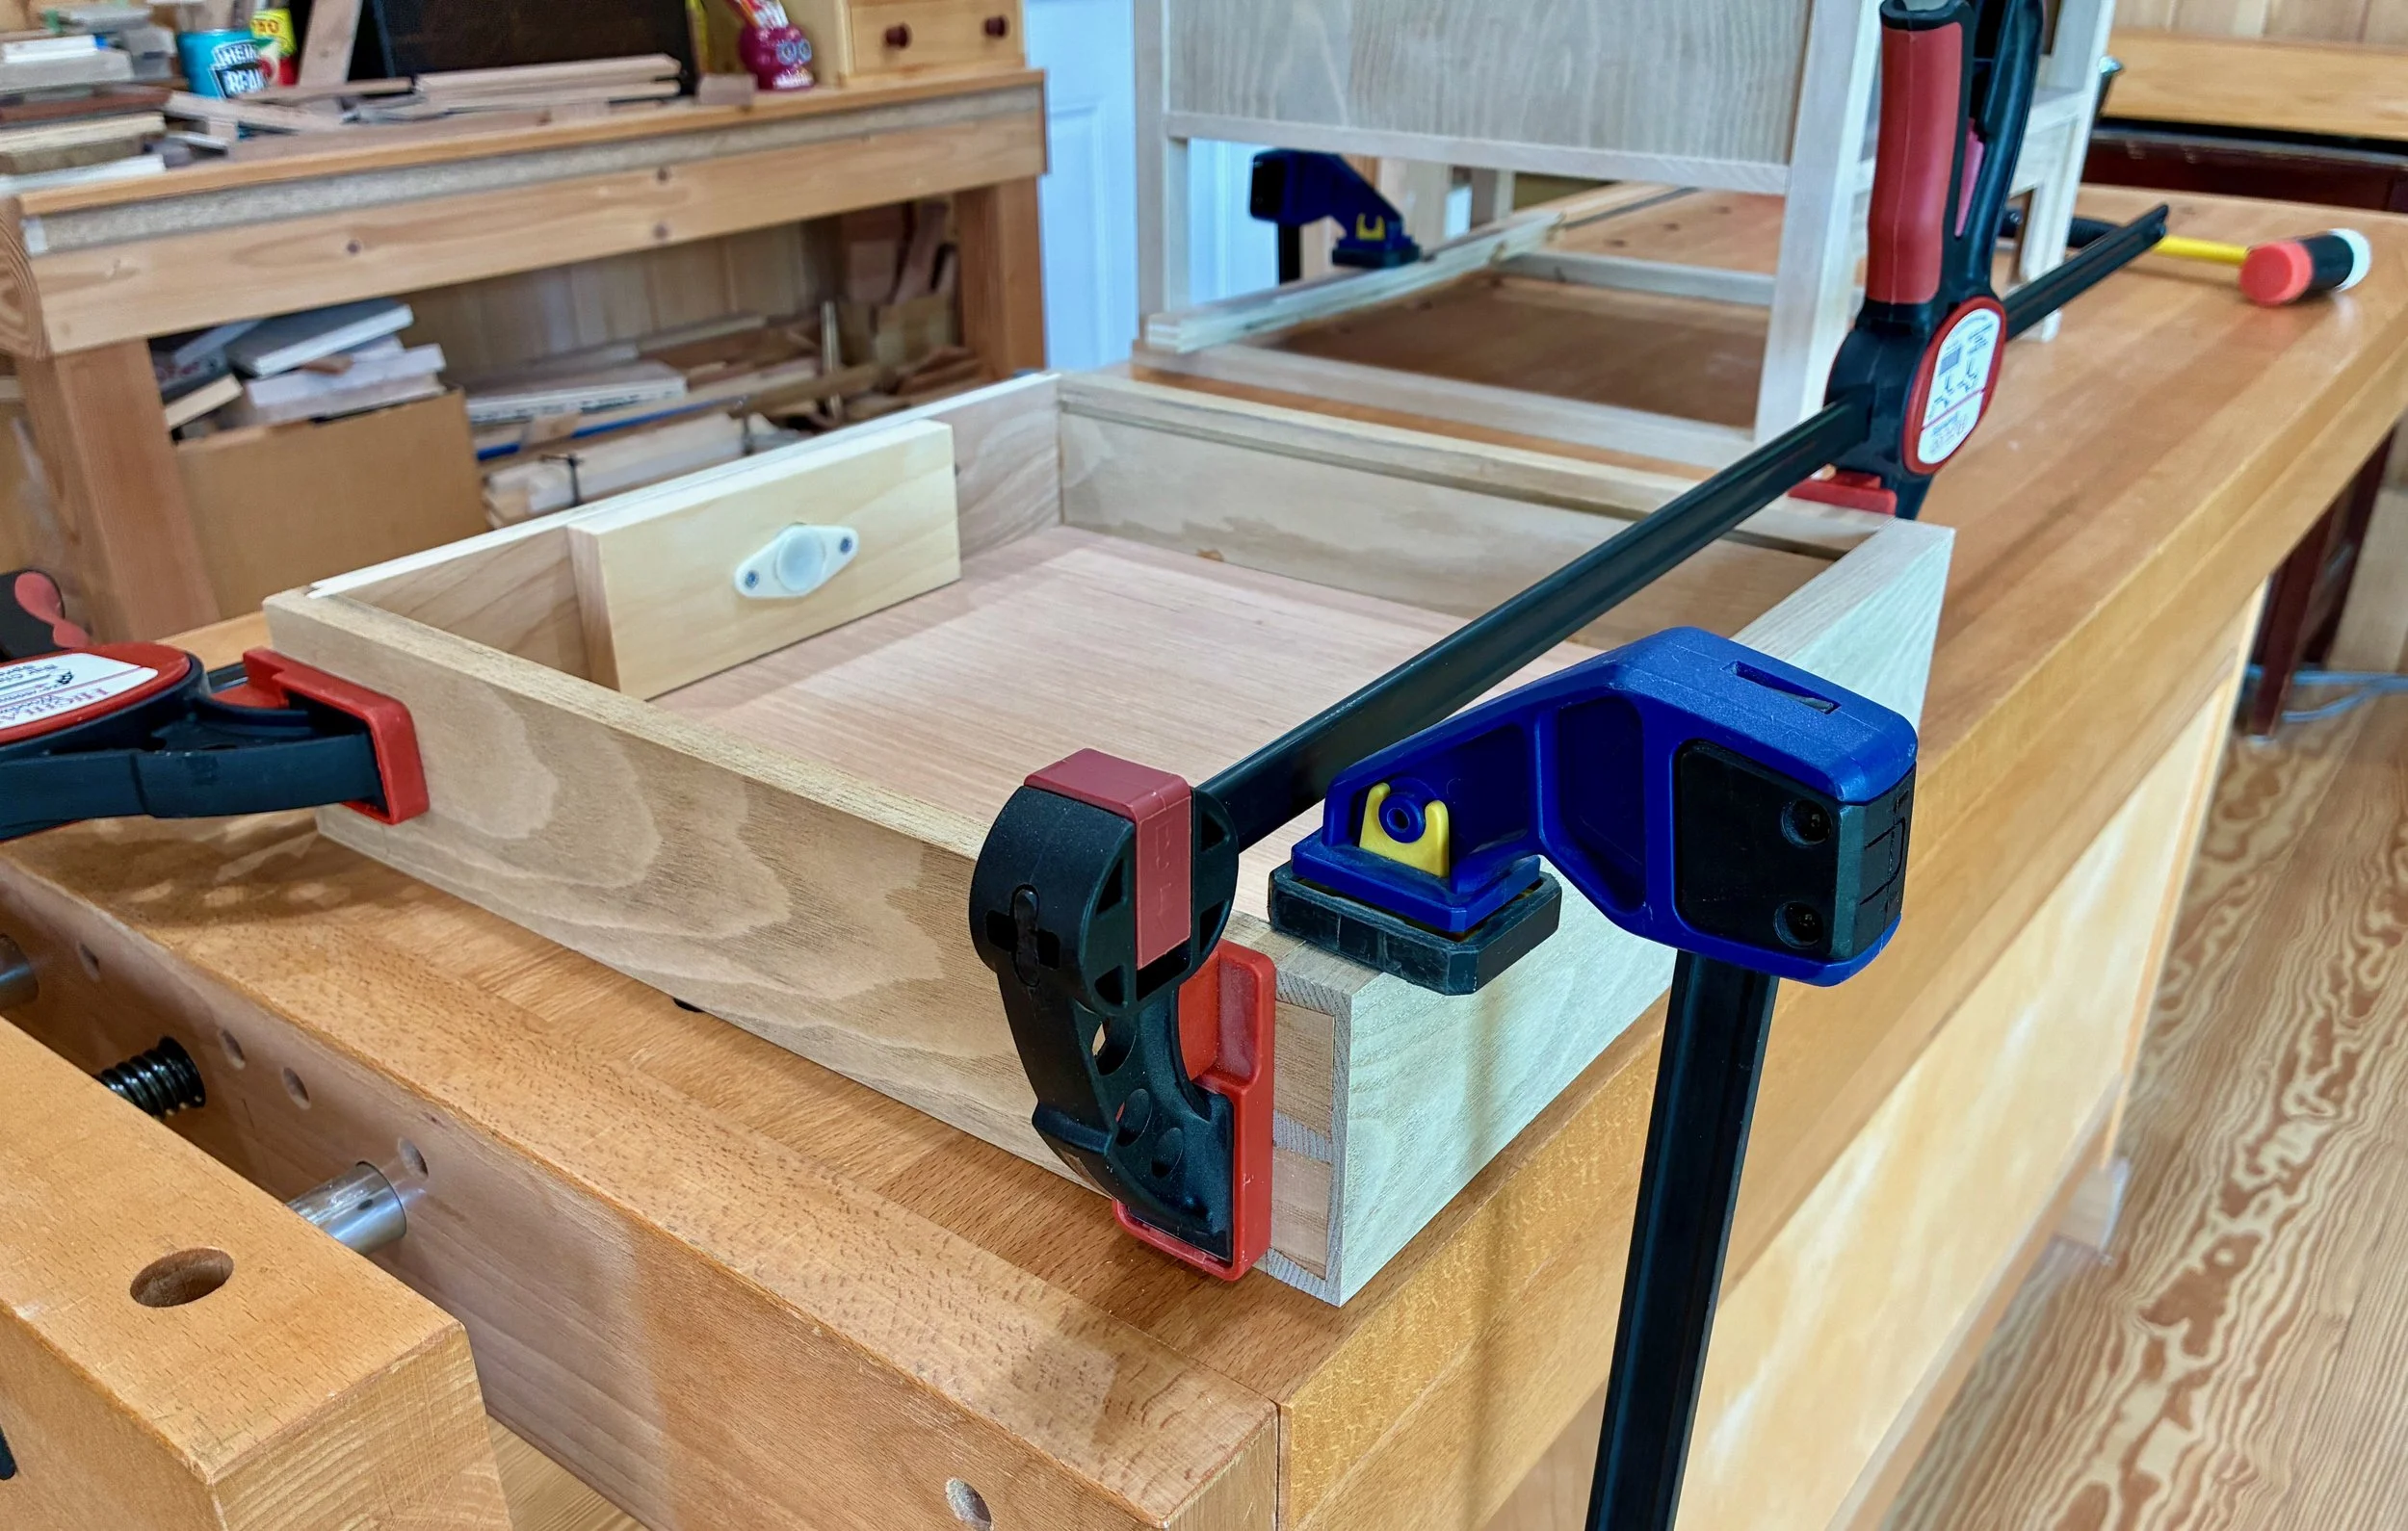
Drawer glue-up
Finally, it was time to mount the doors. The first step was to attach the hinges to the hinge boards and then glue those boards in place along the sides of the cavity. As prepared, the doors were a bit too large to squeeze into this opening so I used a run across the jointer to get things “close” and then, with a thin spacer beneath, I did my best to measure, mark and mount the doors. This was tougher than anticipated. I think mortised butt hinges would have made for easier job, but I could not find the right size and color in a non-finial hinge. (They must be out there, I just need to accumulate more sourcing sites.) Anyway, the attached doors were still a bit too wide to close on each other and so a block plane was used to gently shave them to a proper fit.
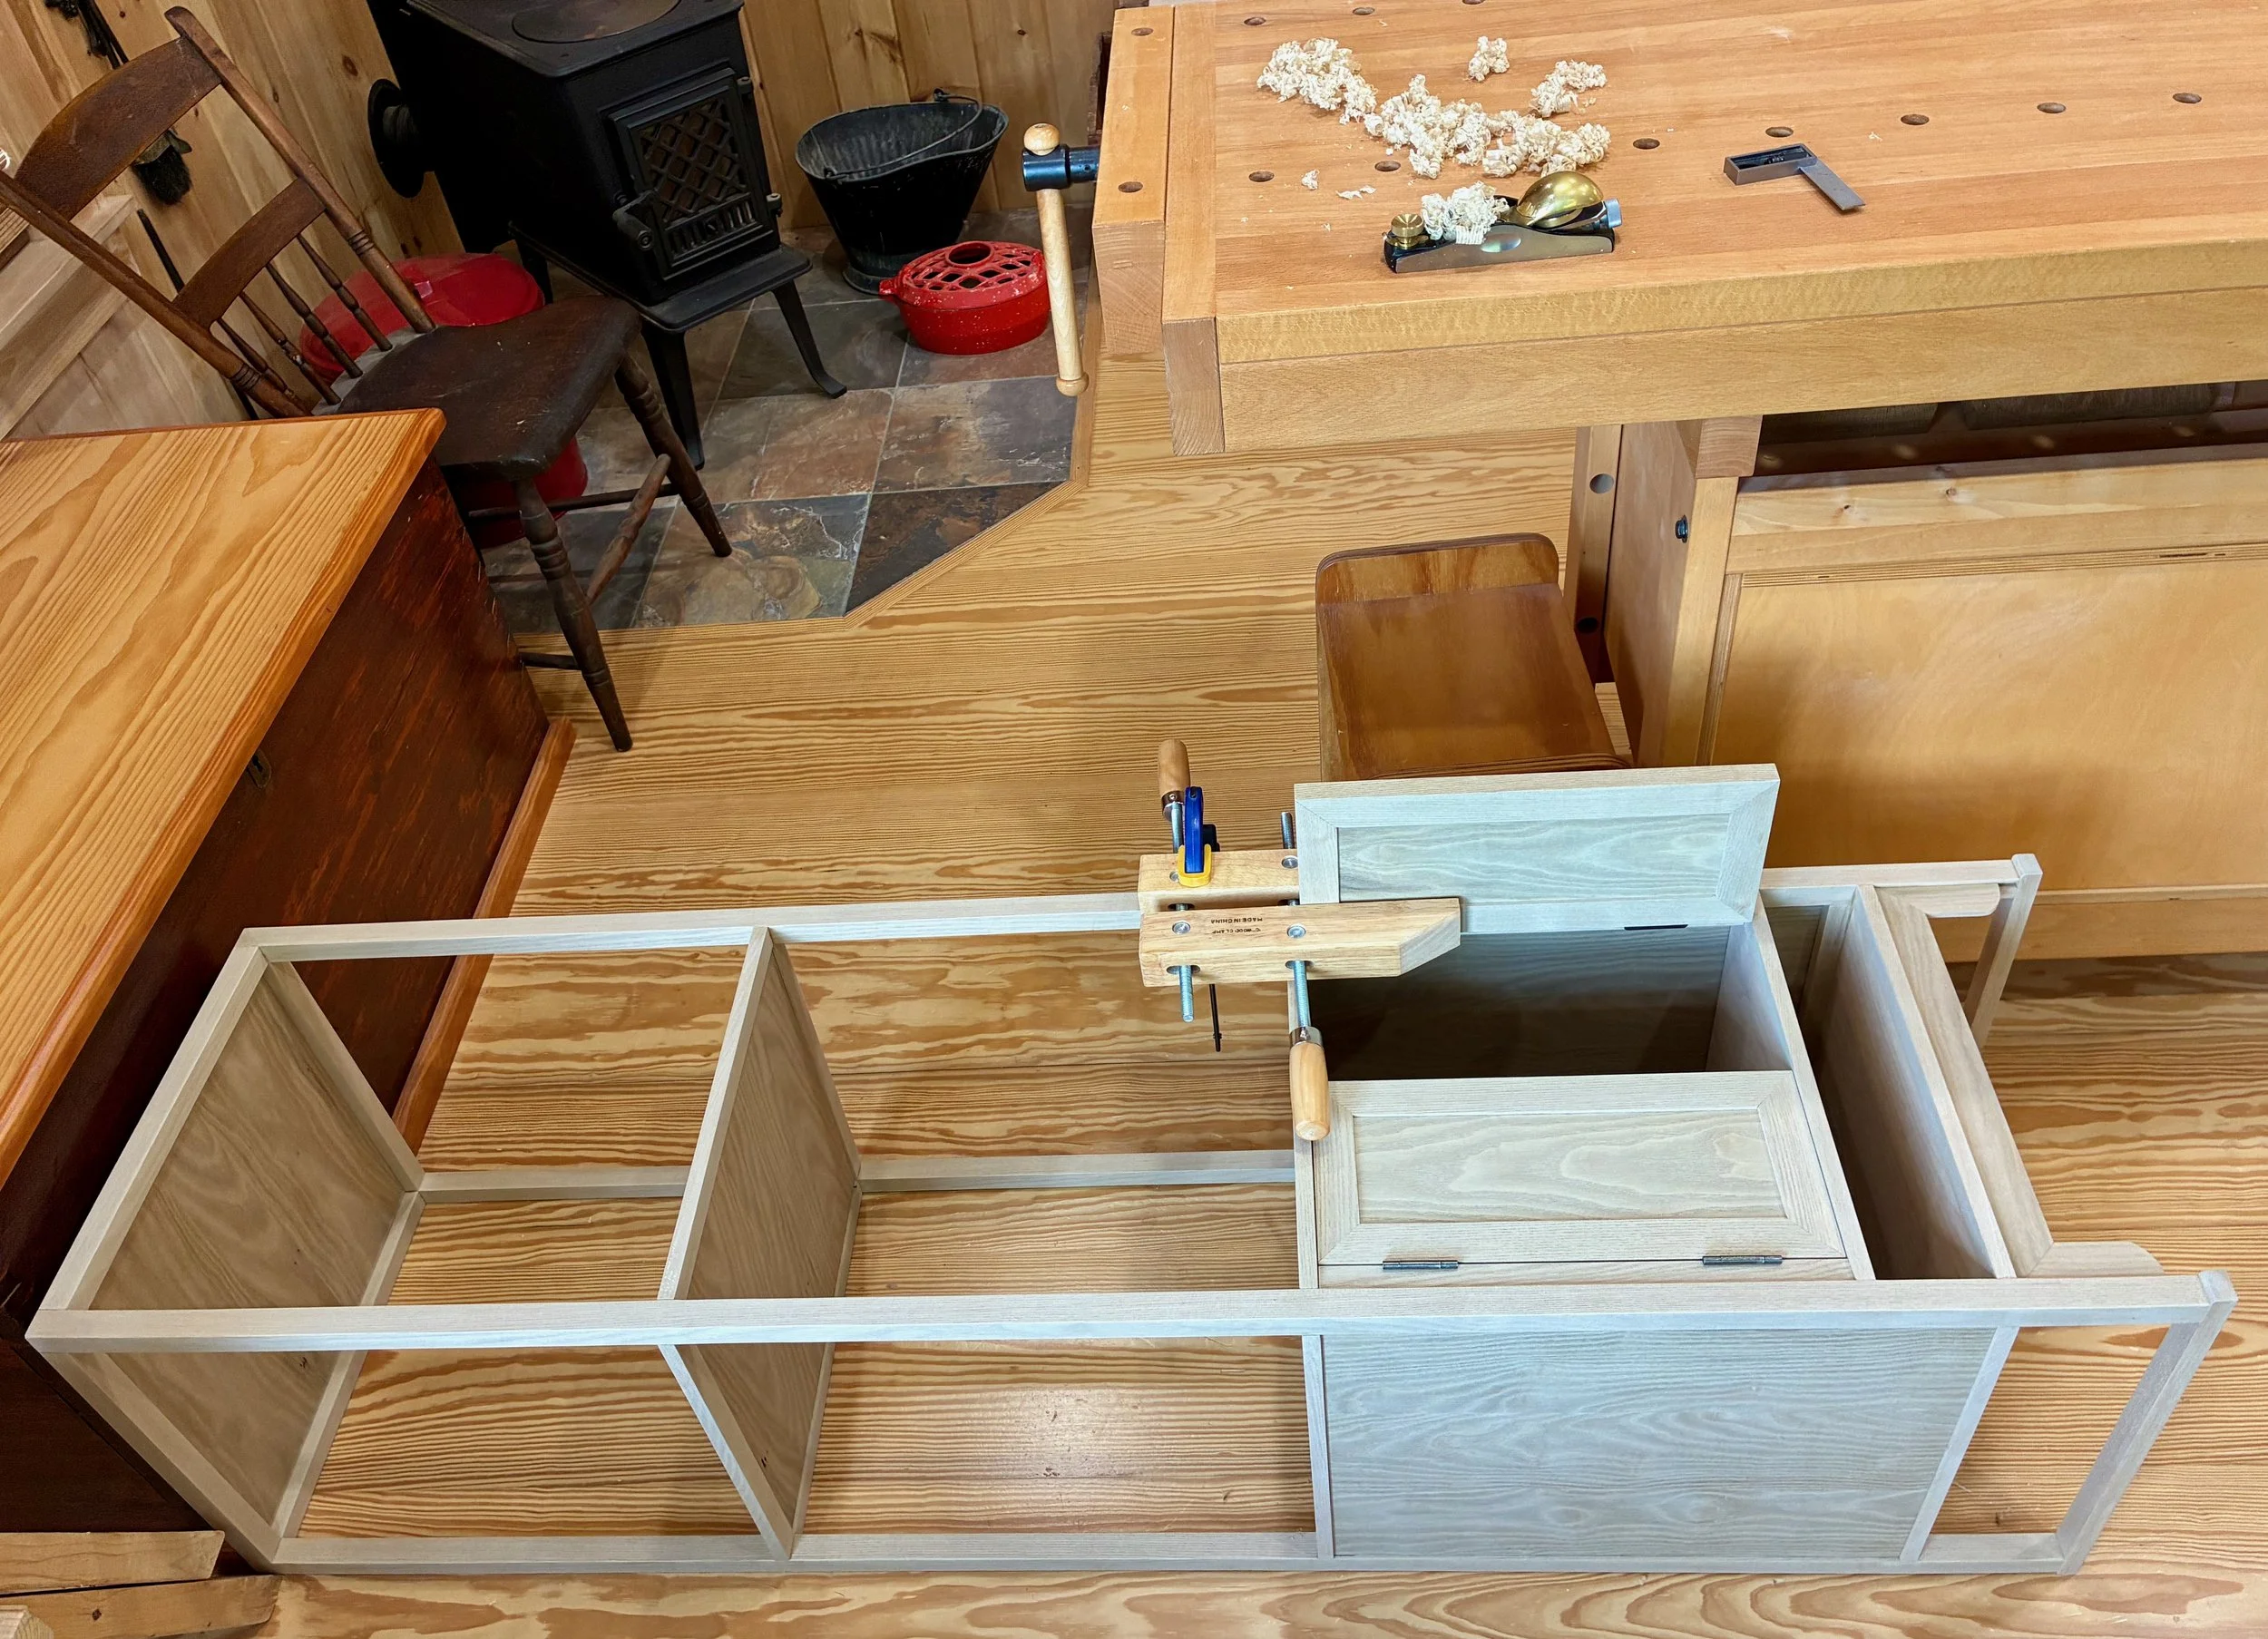
Carefully trimming the doors
That completes construction. From here, bolt holes for the latch hardware could be marked and then the doors disassembled for drilling and final finish.
Doors and drawer in place.
After a final sandpaper touch-up, the finishing step was a snap. The Salem Maple stain was applied and, after a 24 hour drying period, the toned wood was smoothed using a piece of brown paper grocery bag. I learned this trick from watching the furniture refinisher Thomas Johnson on YouTube. By whatever mechanism (burnishing, maybe?) the rough Kraft paper serves to smooth out the nibs without creating dust, nor risk sanding into the stained surface. This was followed by an application of satin sheen gel polyurethane to protect the surfaces. After a 3-day cure, the piece was rubbed down with a soft cloth and then treated with Howard Feed-N-Wax. The wood now had a nice mellow glow without feeling “over-finished.” The drawer sides and cavity were treated with a stronger furniture wax to promote a smooth glide and then the door hardware and doors were attached to complete the build.
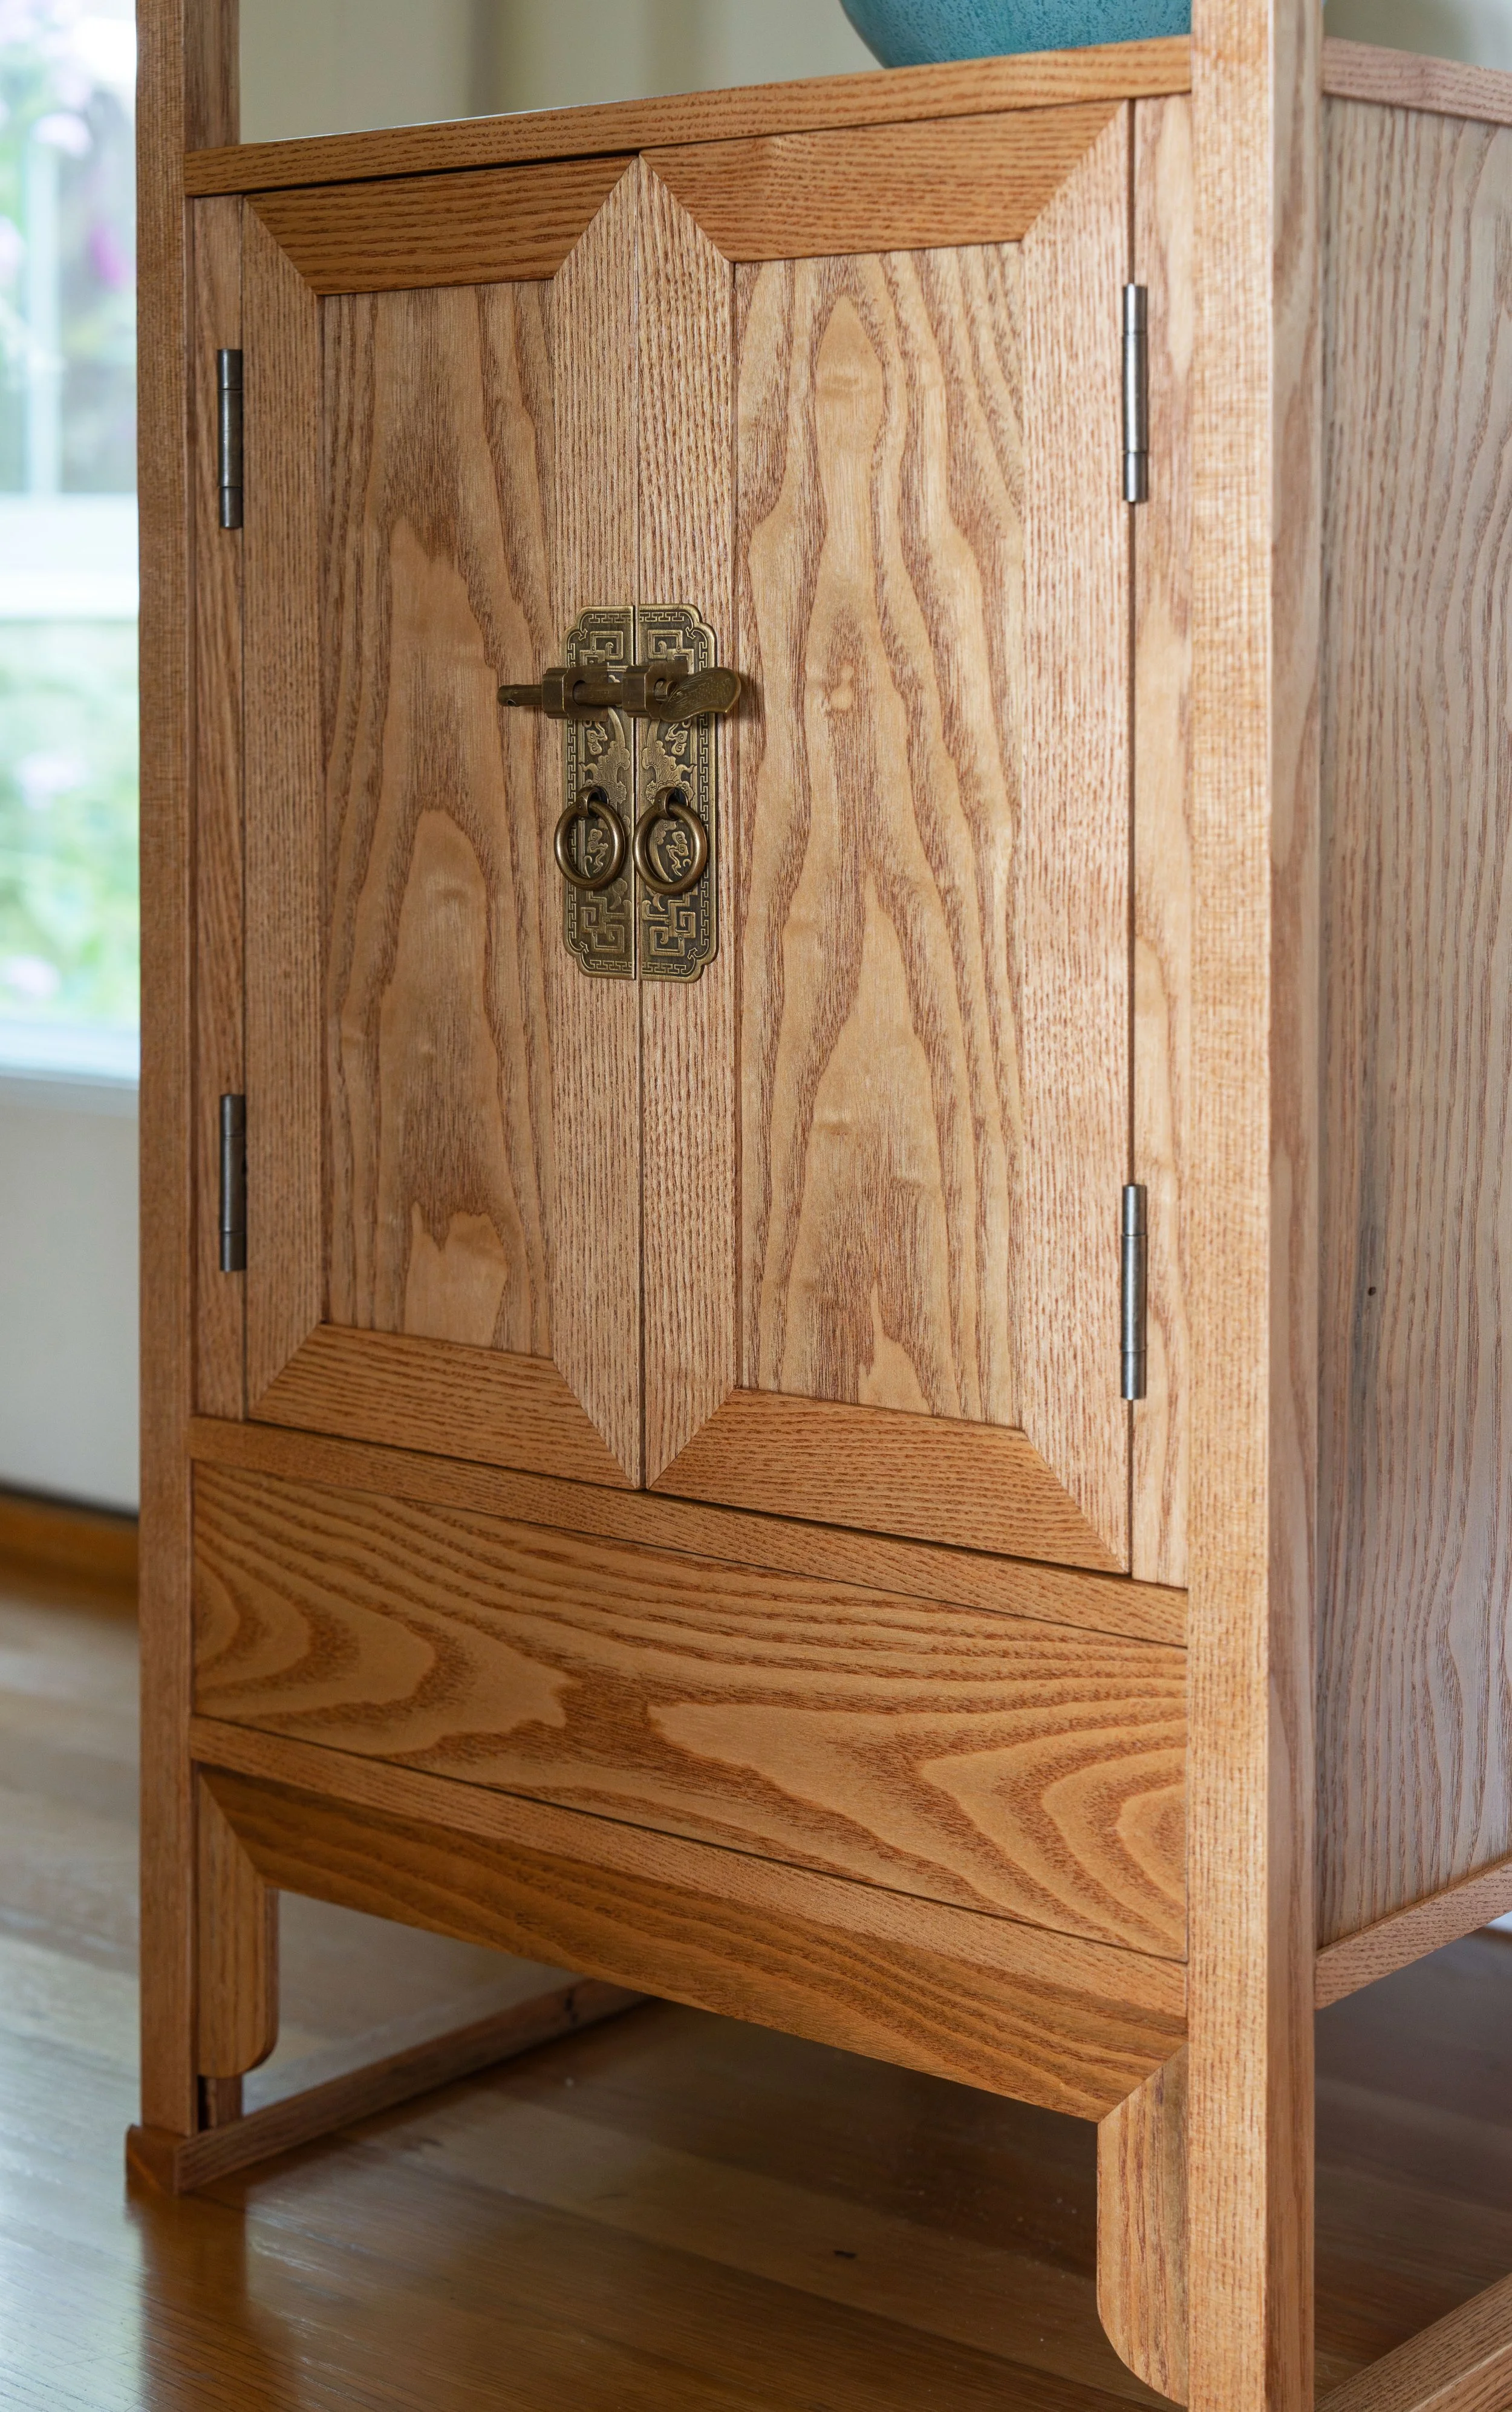
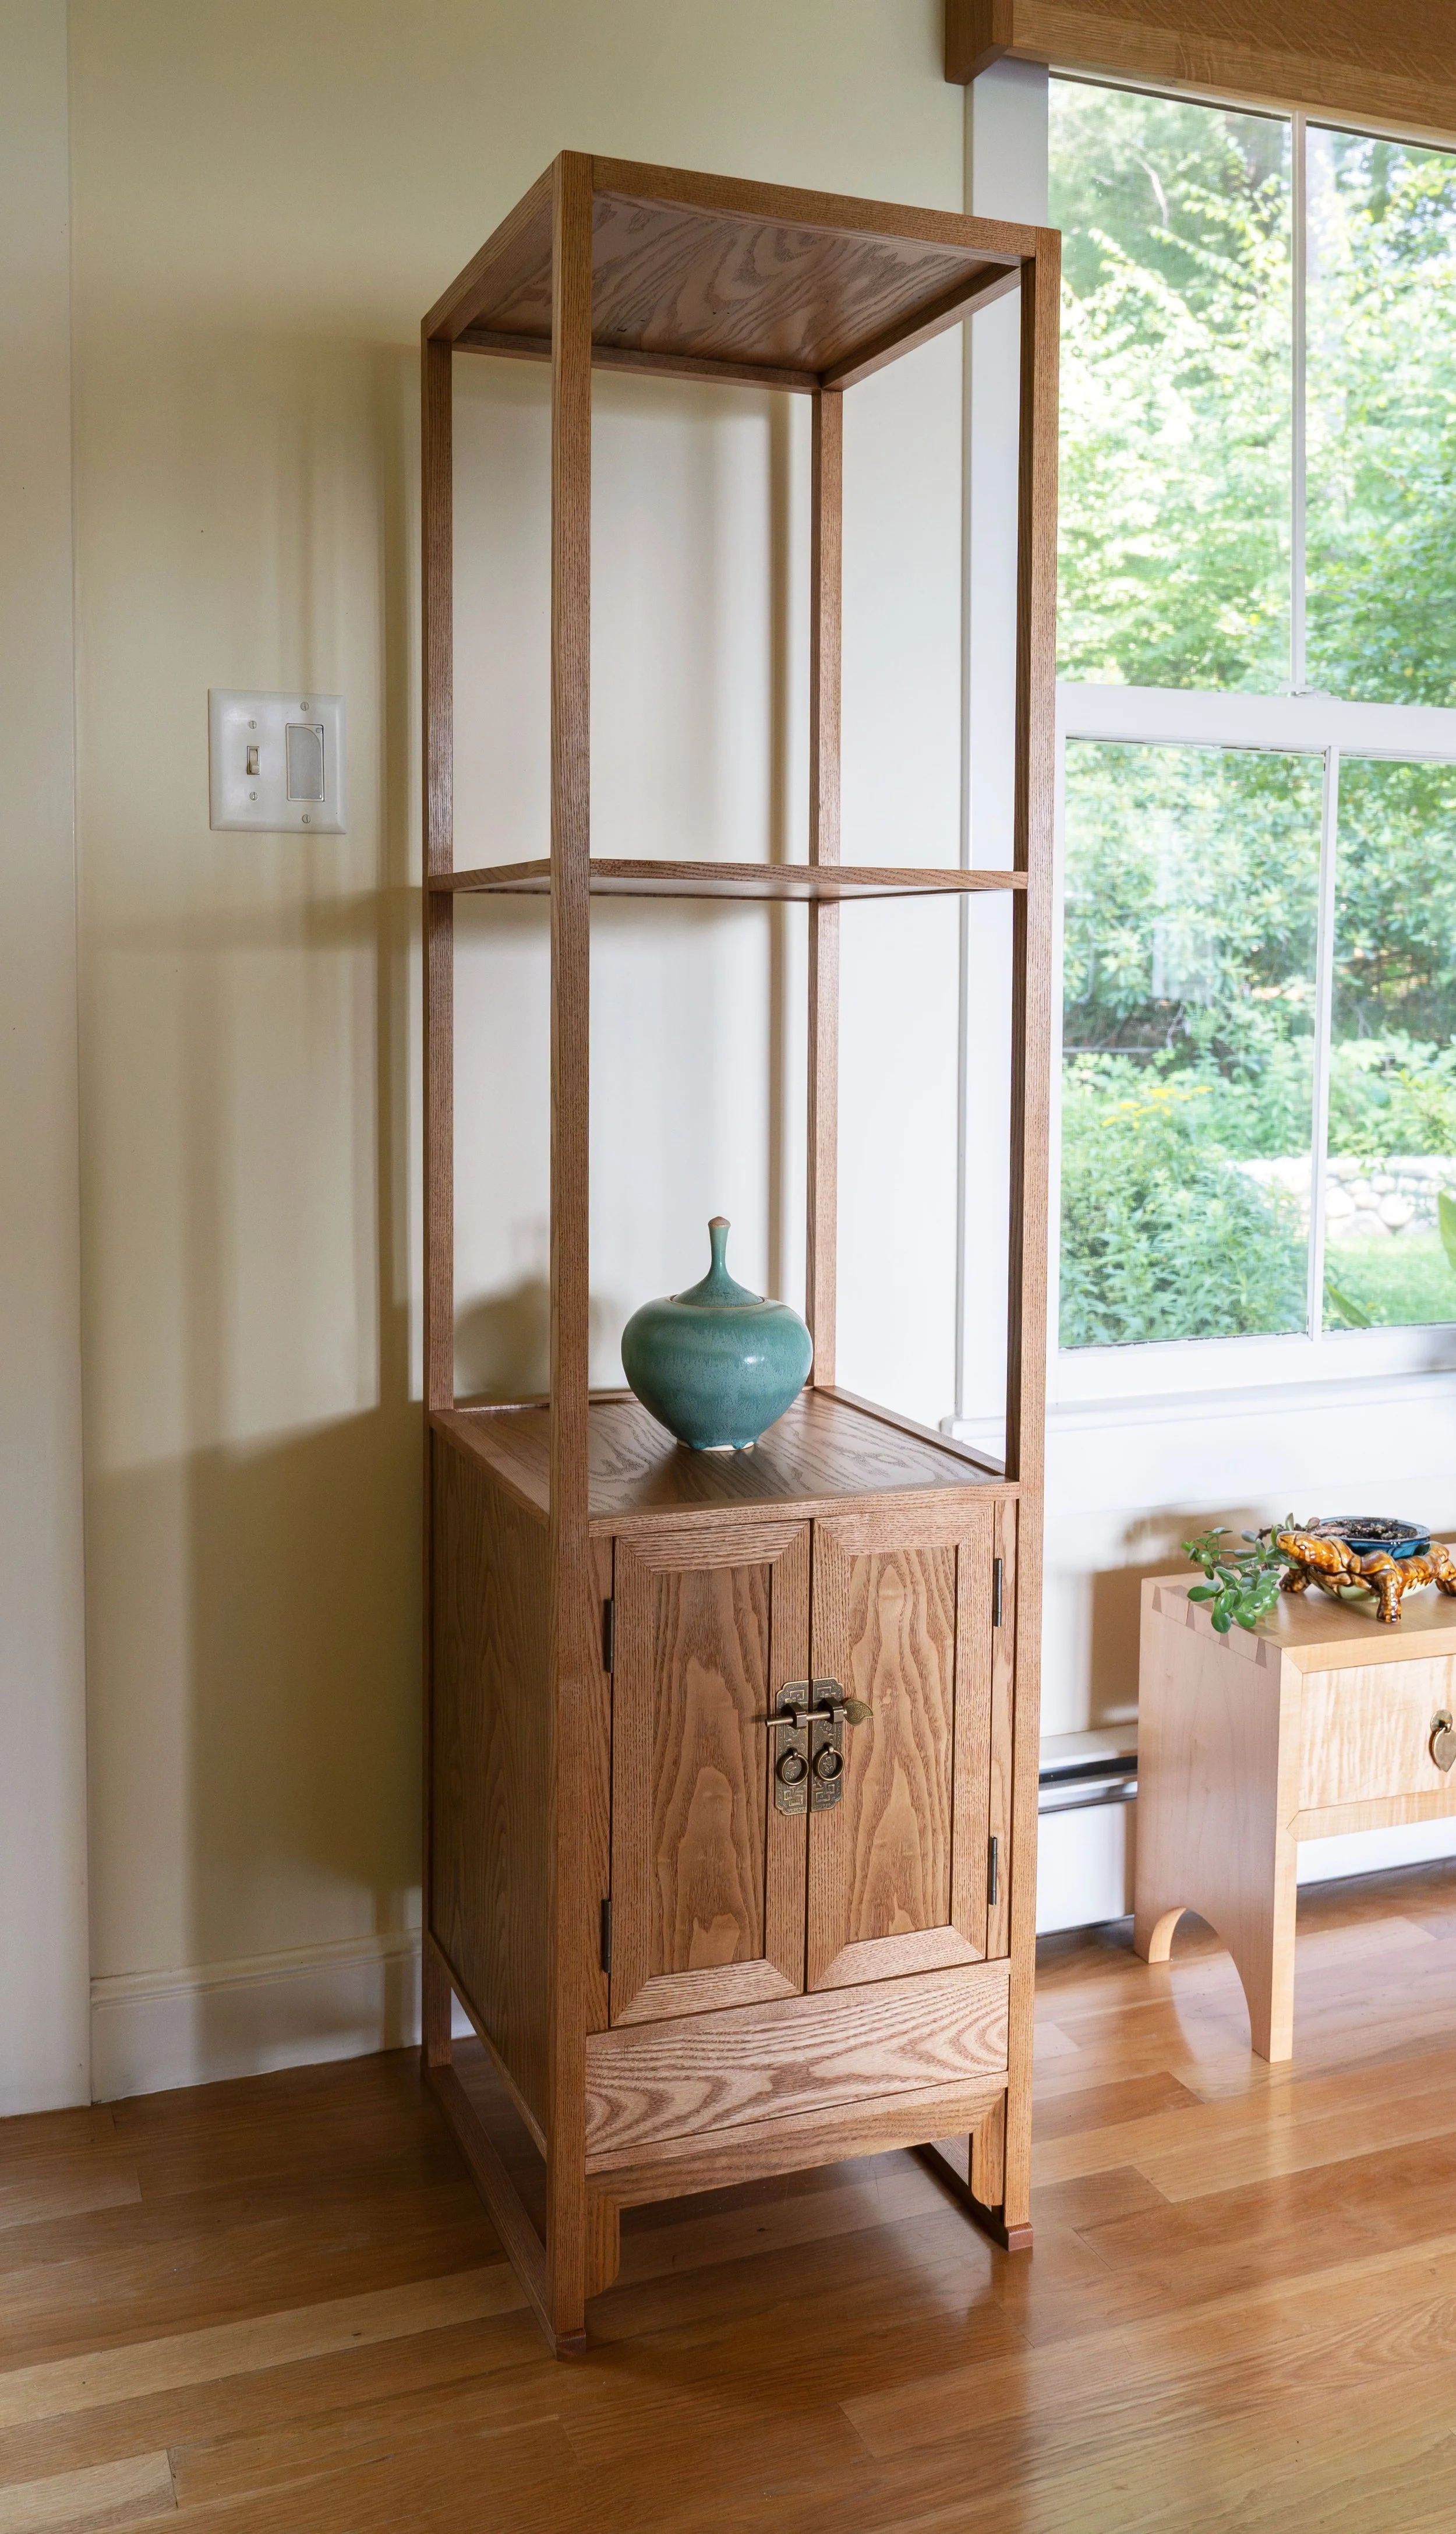
Doors back on and latched
I like the character of this quintessentially Korean piece. It enables our hobbies and ennobles our room.
Three Story Table