

Framed
We turn out 5-10 picture frames a year at the Red Top Workshop. Some are for our home, most are requested by family members and the rest given as gifts. I’ve never written about these but decided it was time to give them a turn.
Making frames is much easier than one would expect, given the prices at a frame shop. In terms of material investment, the wooden frame structure costs very little - glass is the culprit. Fancy moulding work adds value, but unless you are hand-carving your wood, milling with industrial shapers (or a router) is quite economical. The work consists of shaping & rabbeting the wooden members, cutting these parts to exact lengths and then joining things together. From there it is a simple process of finishing the wood and mounting the art behind glass. You’ll find the final product always looks better than expected and, having taken part in its creation, that frame keeps your attention long after you’ve become blind to the picture it confines. Try it!
Design
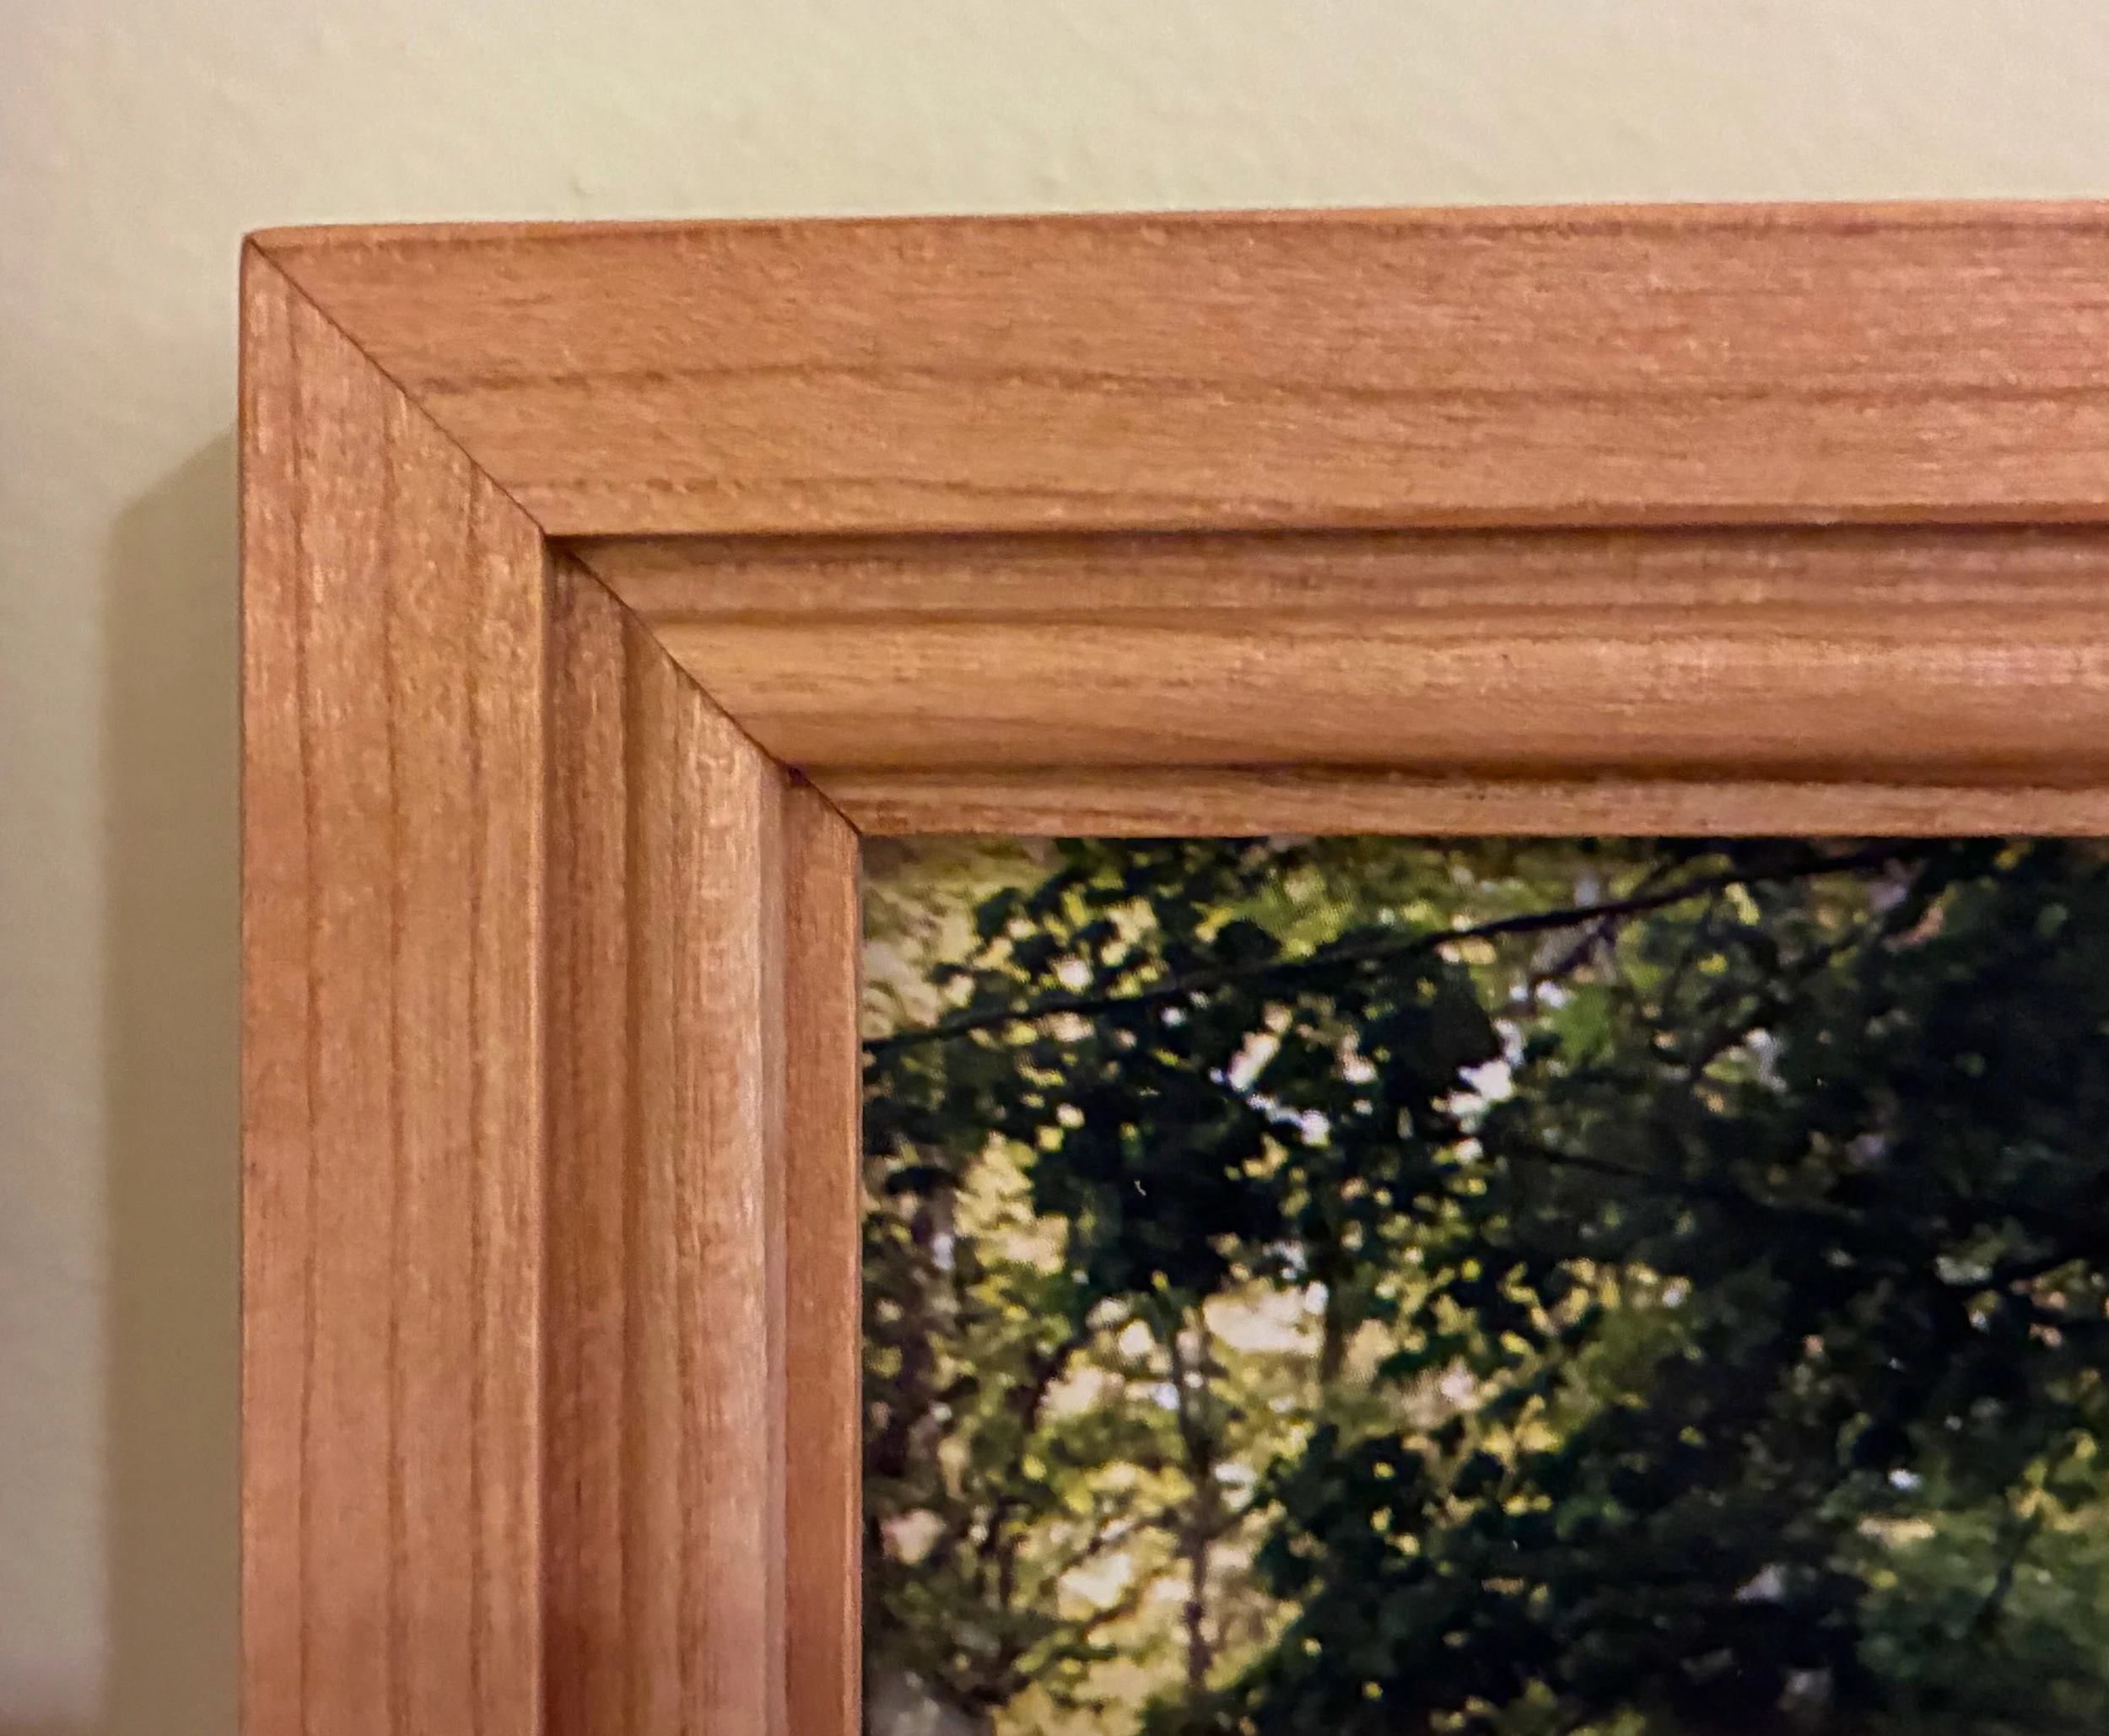
For this Project I am framing two 8x10 in. family photographs, taken a few years’ back during the wedding of my oldest son. They are similar in composition, so two identical frames were in order. And since these were photographs, the frame did not need to do much other than look nice, and stay out of the way while doing so. It was decided that mitered corner frames made from narrow stock with a simple bead along the inner edge would do the trick.
Materials
I like cherry and its been a while since I’ve worked this wood. A nice quarter sawn cherry off-cut (called “shorts” at Highland Hardwoods) was selected that should be perfect for the job.
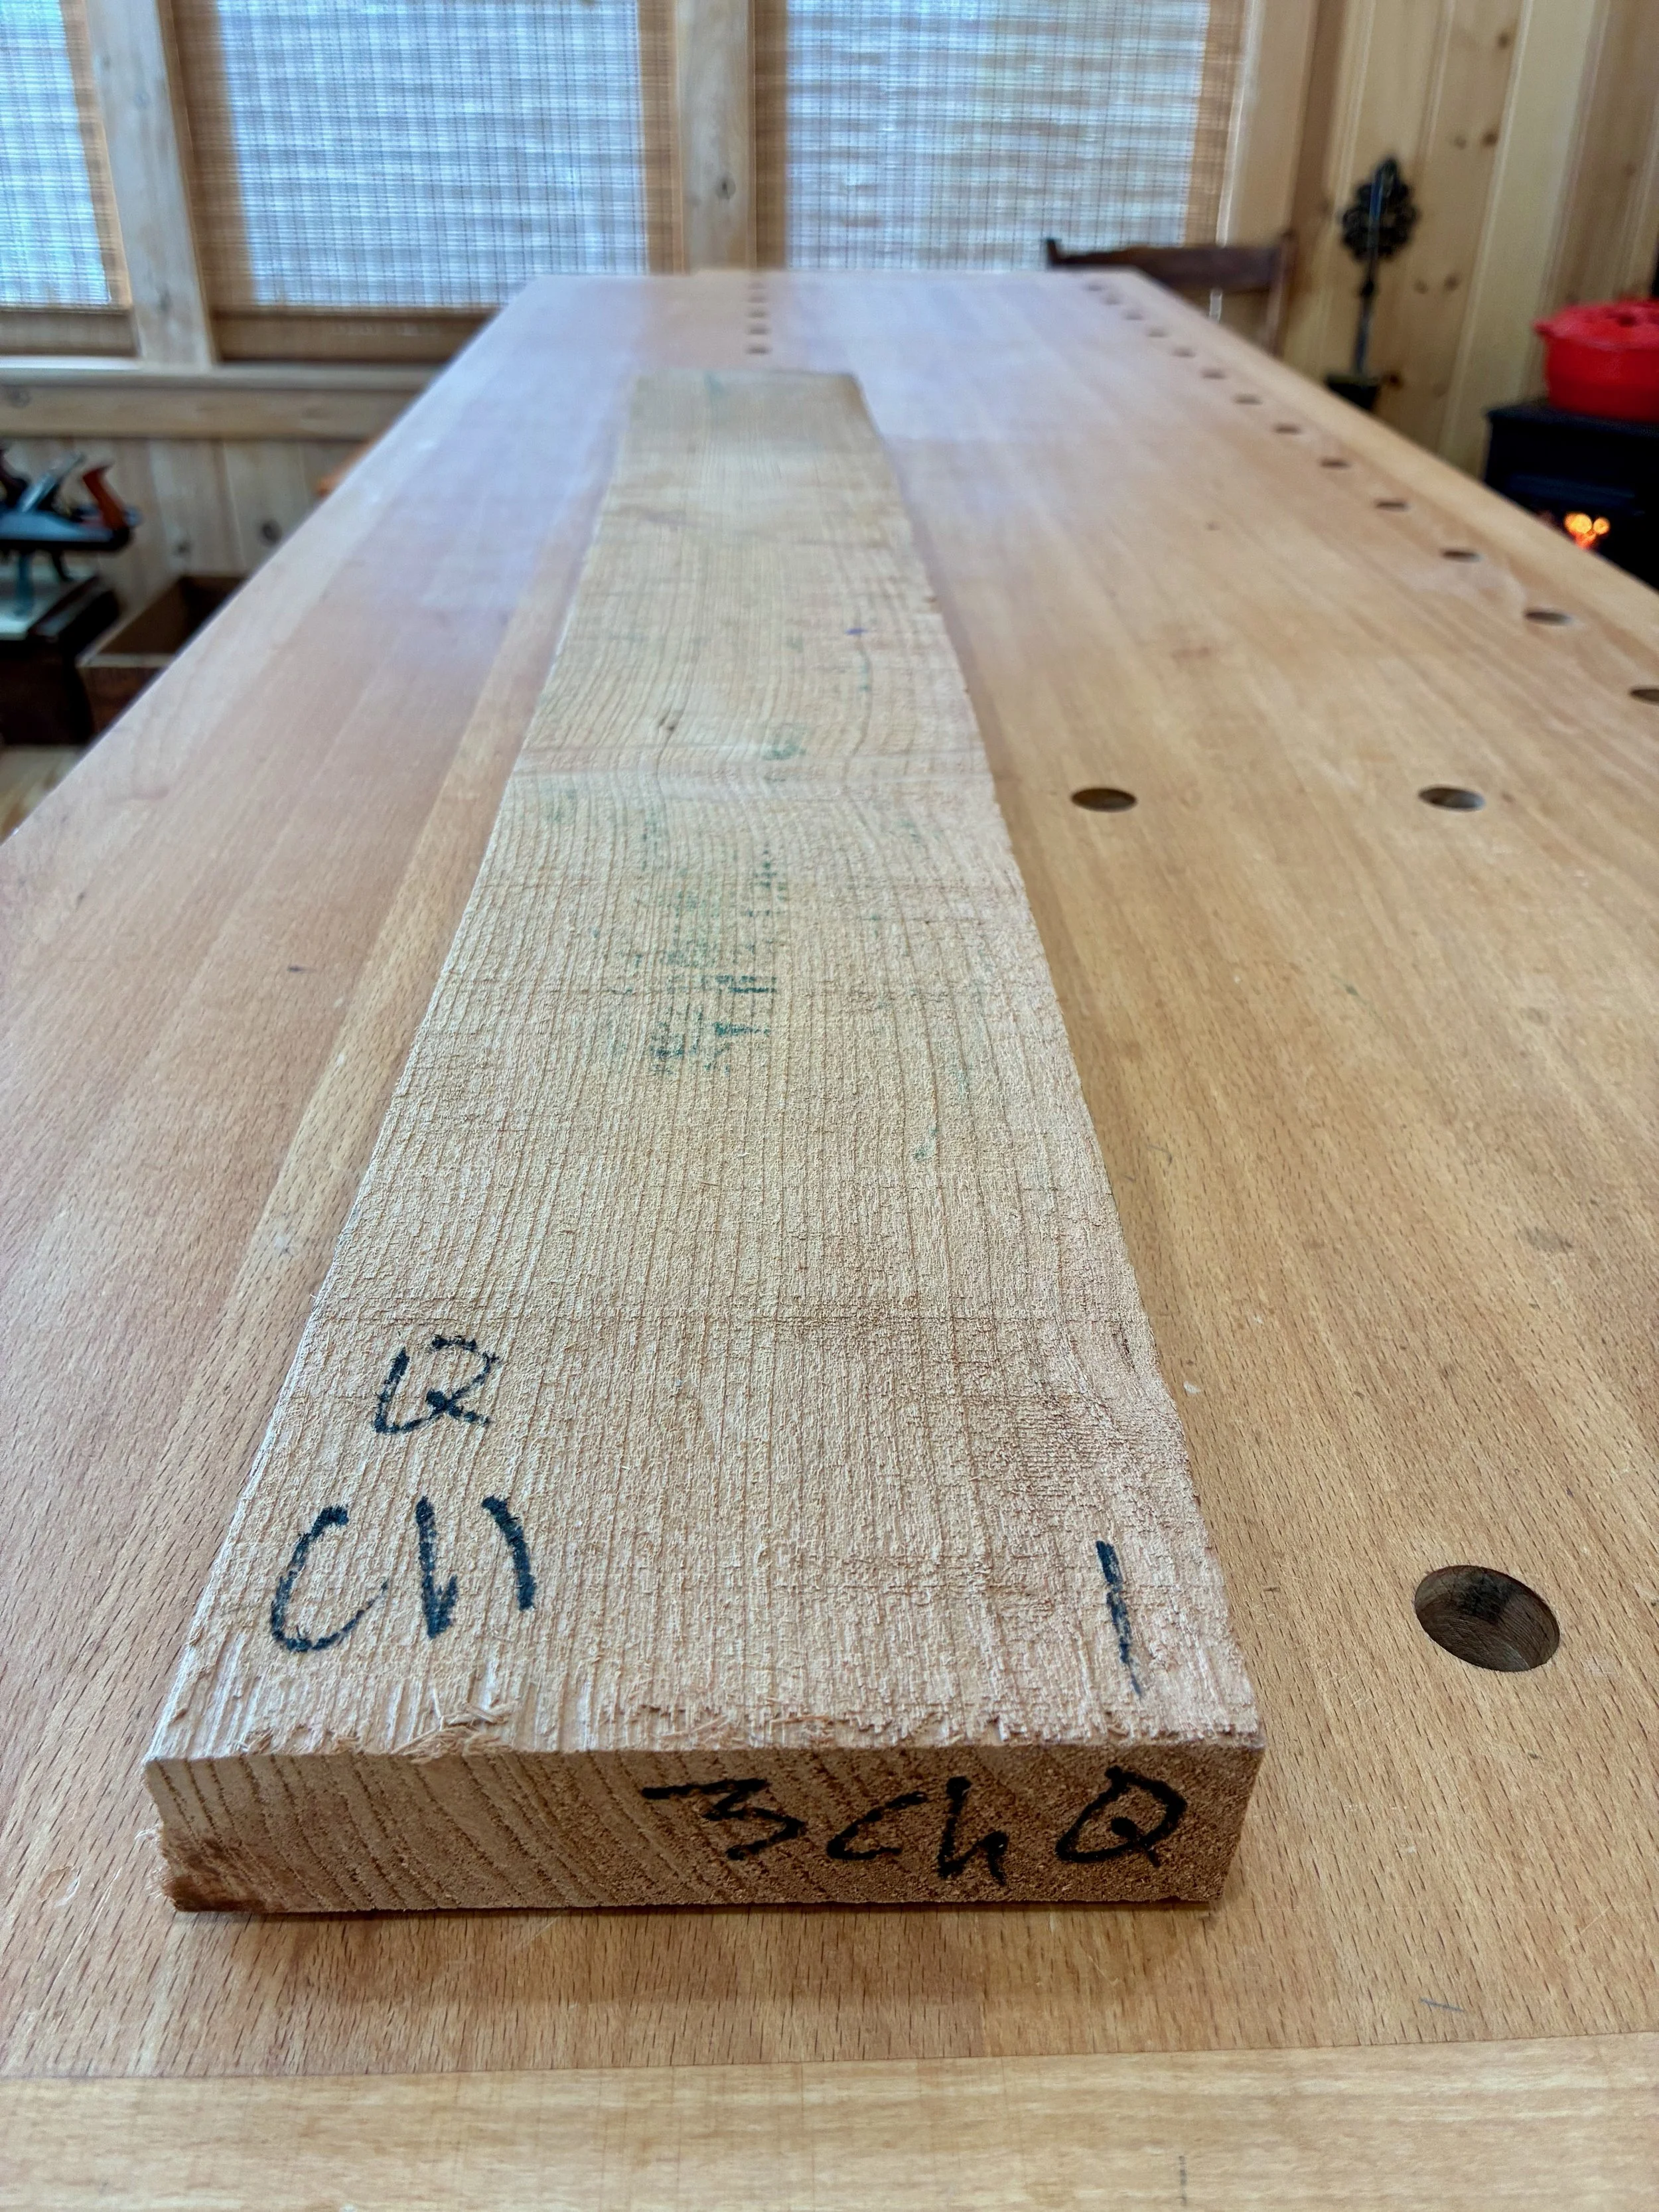
Making a “short” appear long
Dimensioning
To prepare the stock, that 3 ft. long board was first cut in half. Next, both pieces were flattened and squared at the jointer and then resawn to 3/4 in. depth at the band saw. (Removing the bulk here gives my thickness planer a break.) Lastly, the boards were reduced at the thickness planer to a uniform 5/8 in. depth and smoothed with a card scraper and sandpaper.
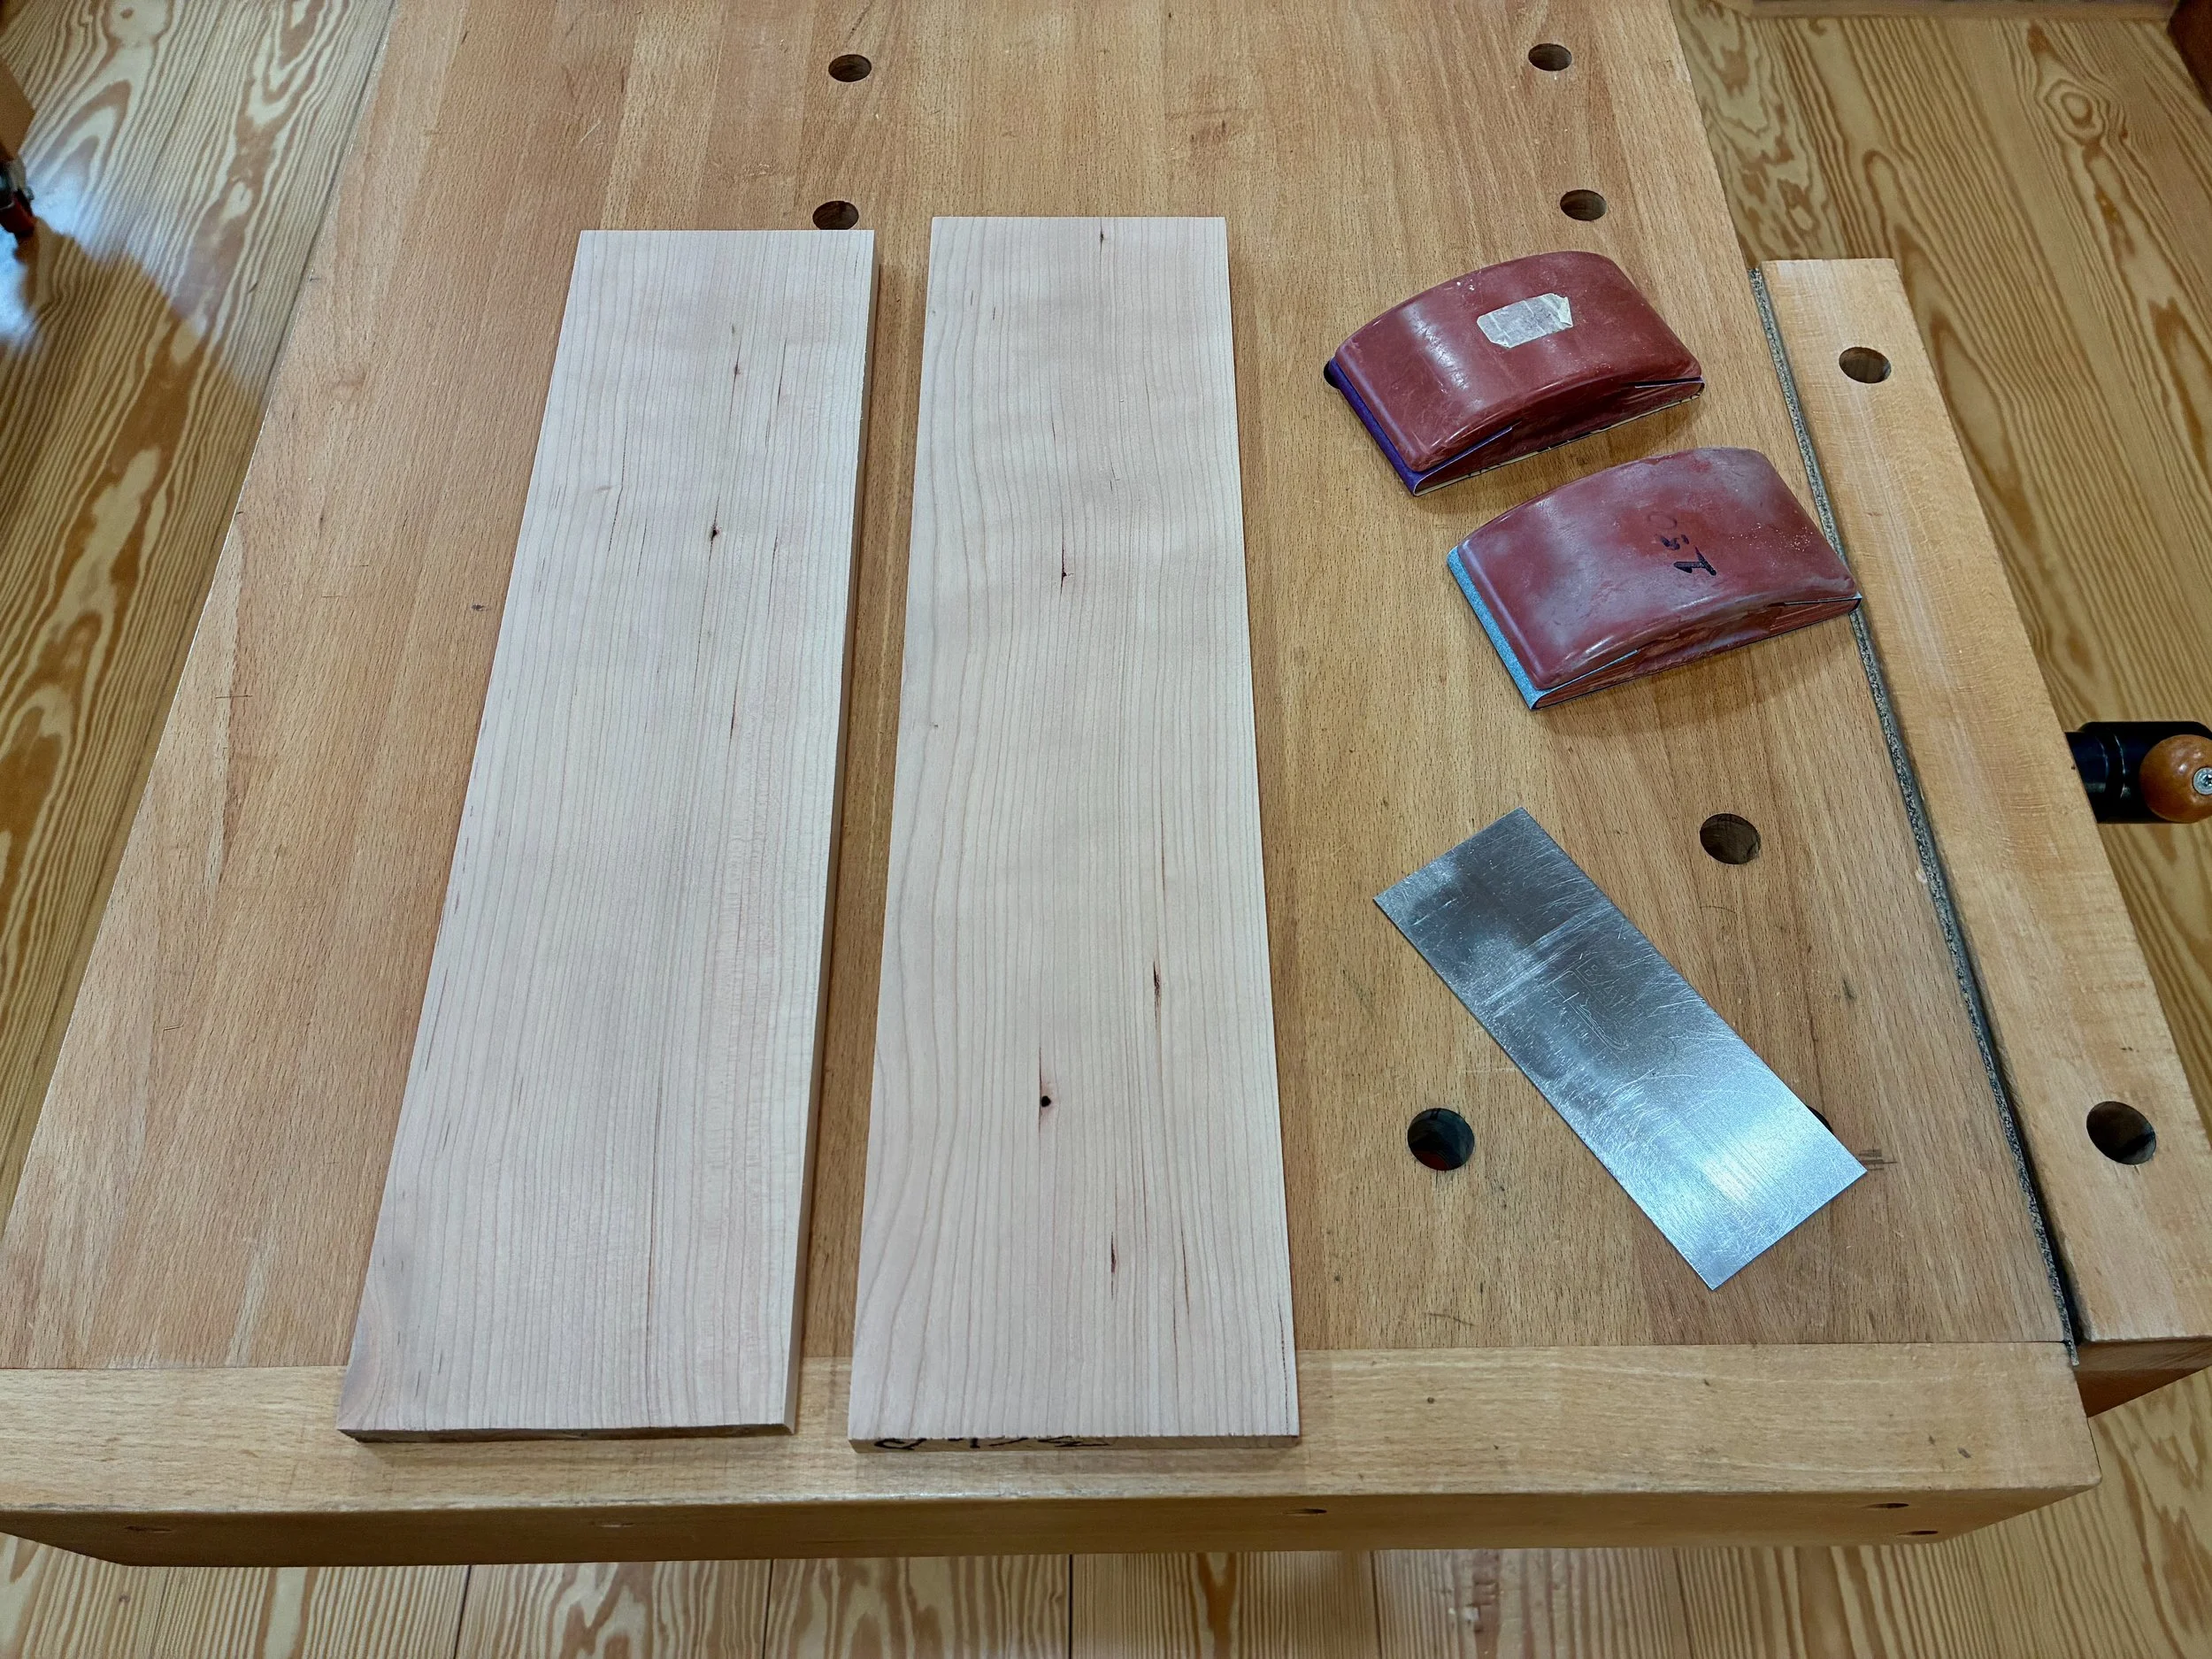
Prepped stock
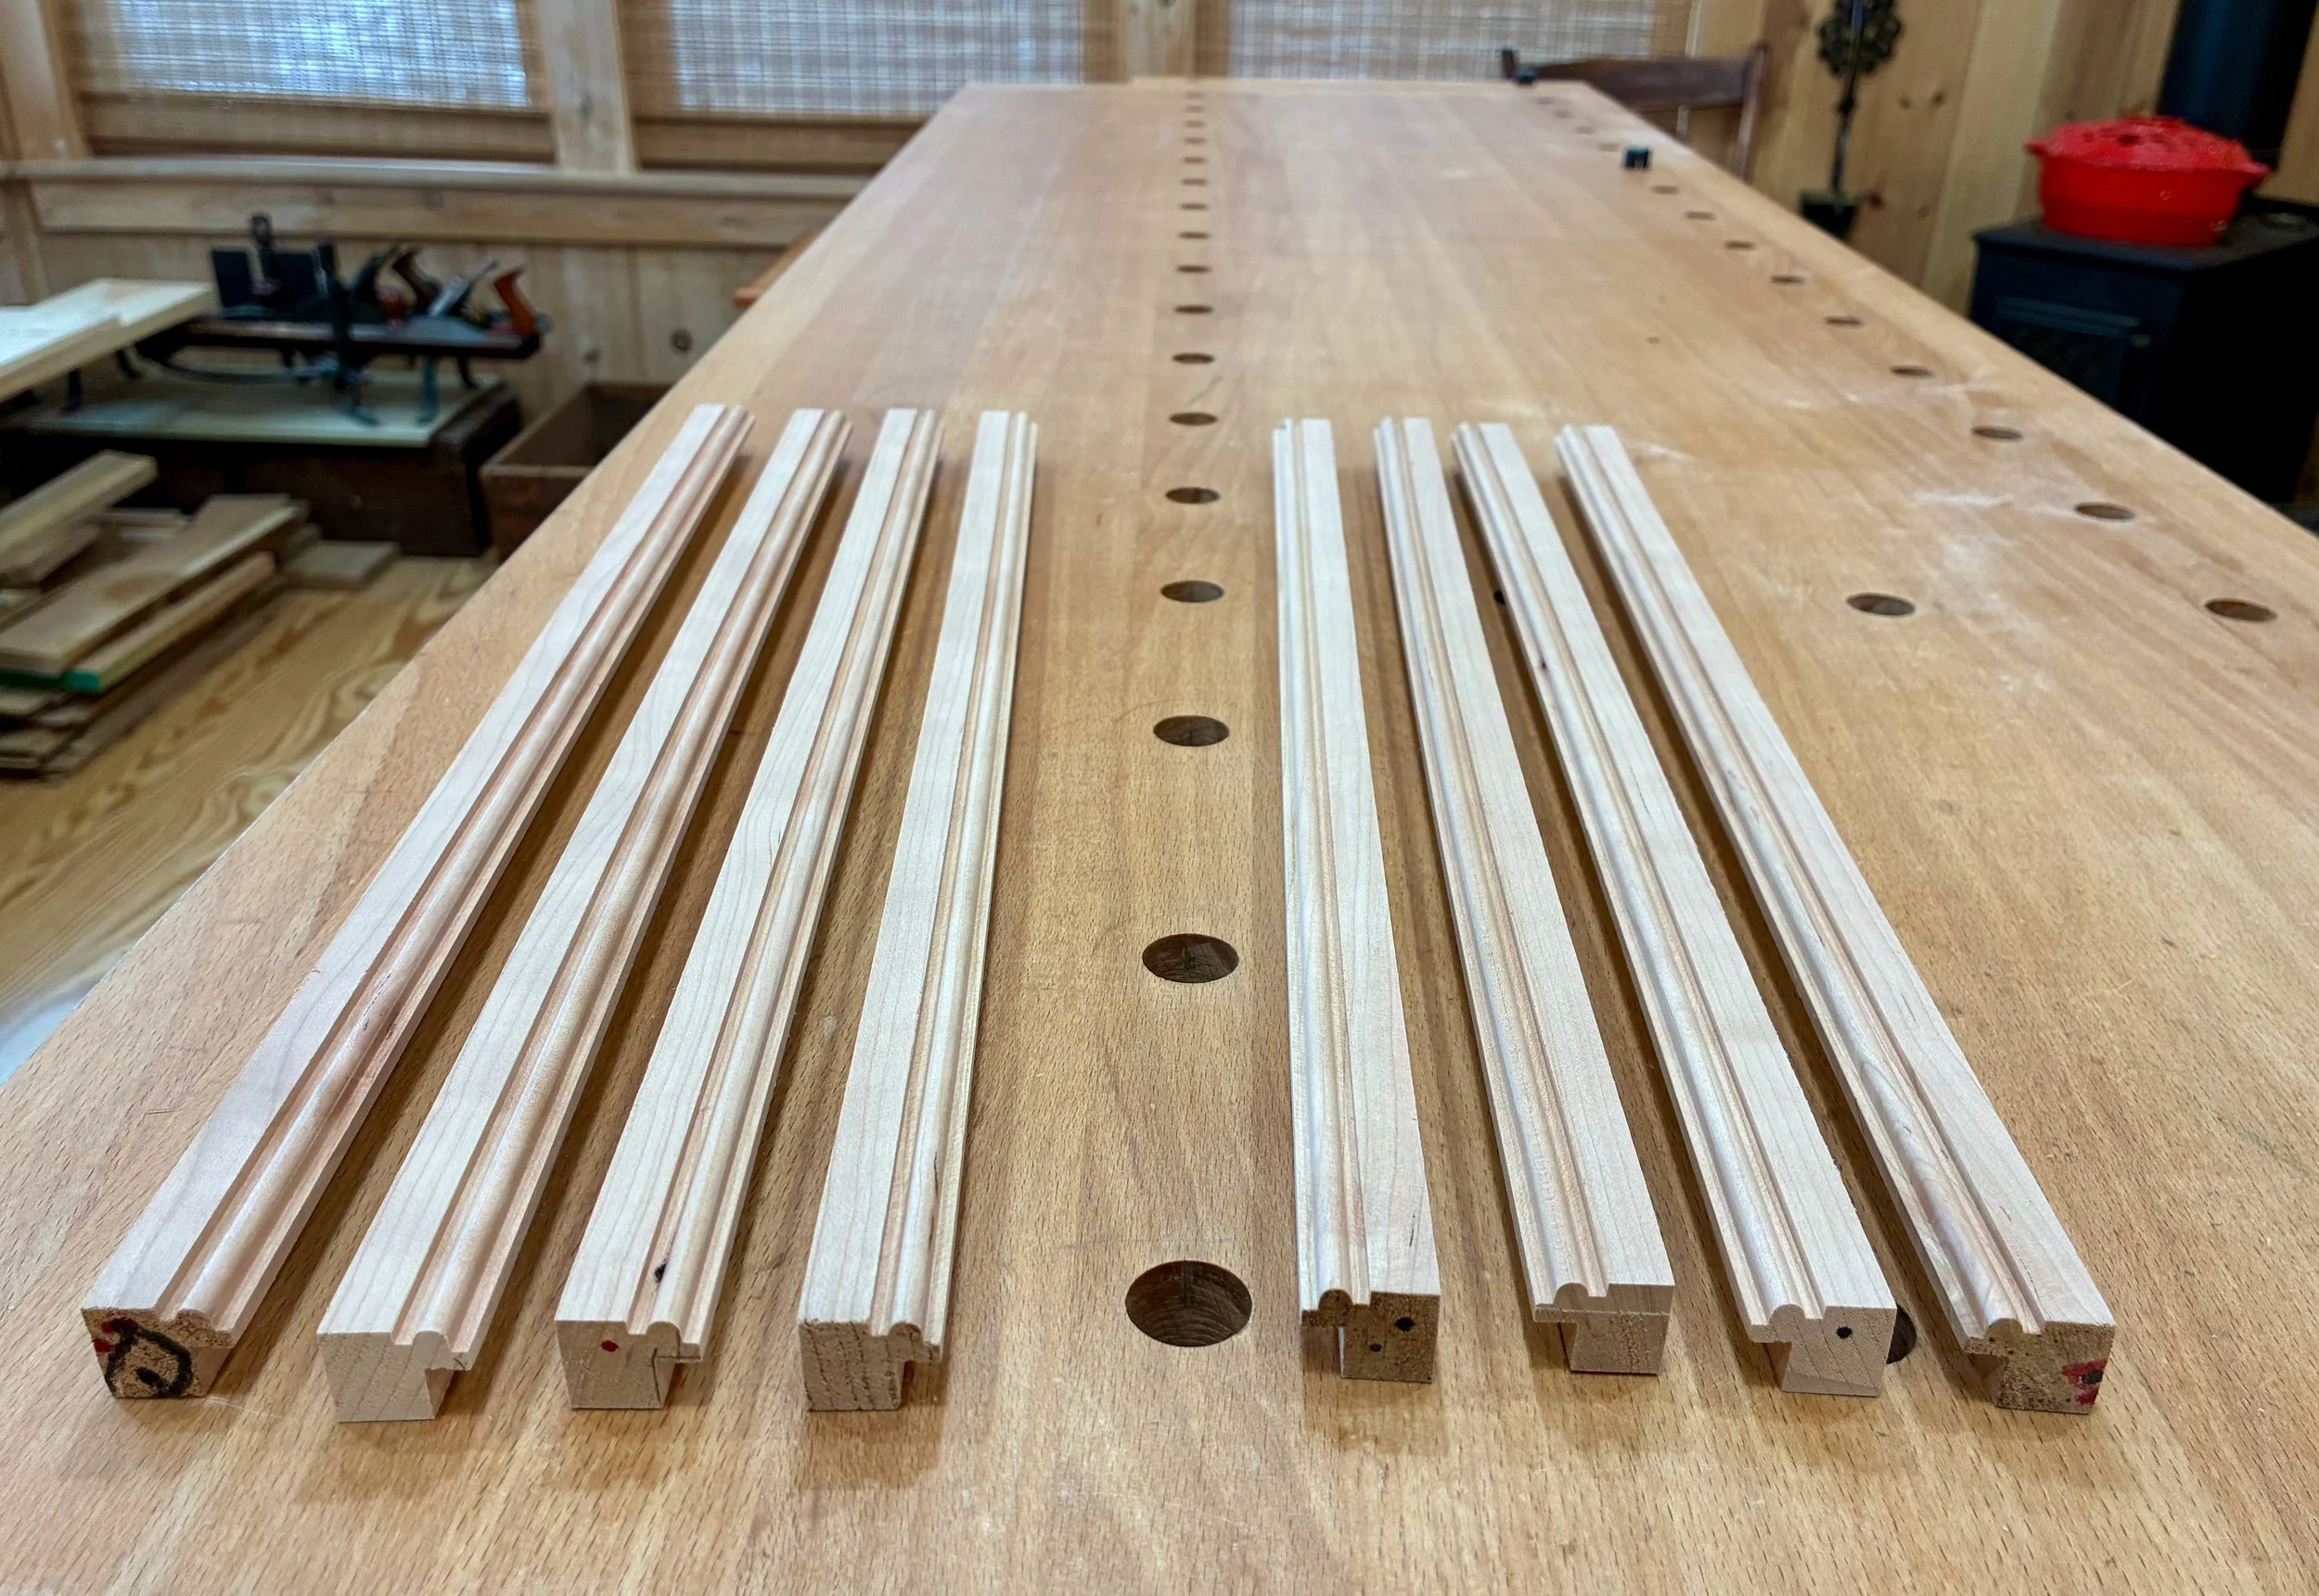
In the next operation, the boards were trimmed to equivalent widths at the table saw and then ripped again to form four parts. I find it easier to shape and rabbet wide boards and so both edges of all four boards would be modified before again splitting these in two. A beading bit at the router table was used to decorate the edges.
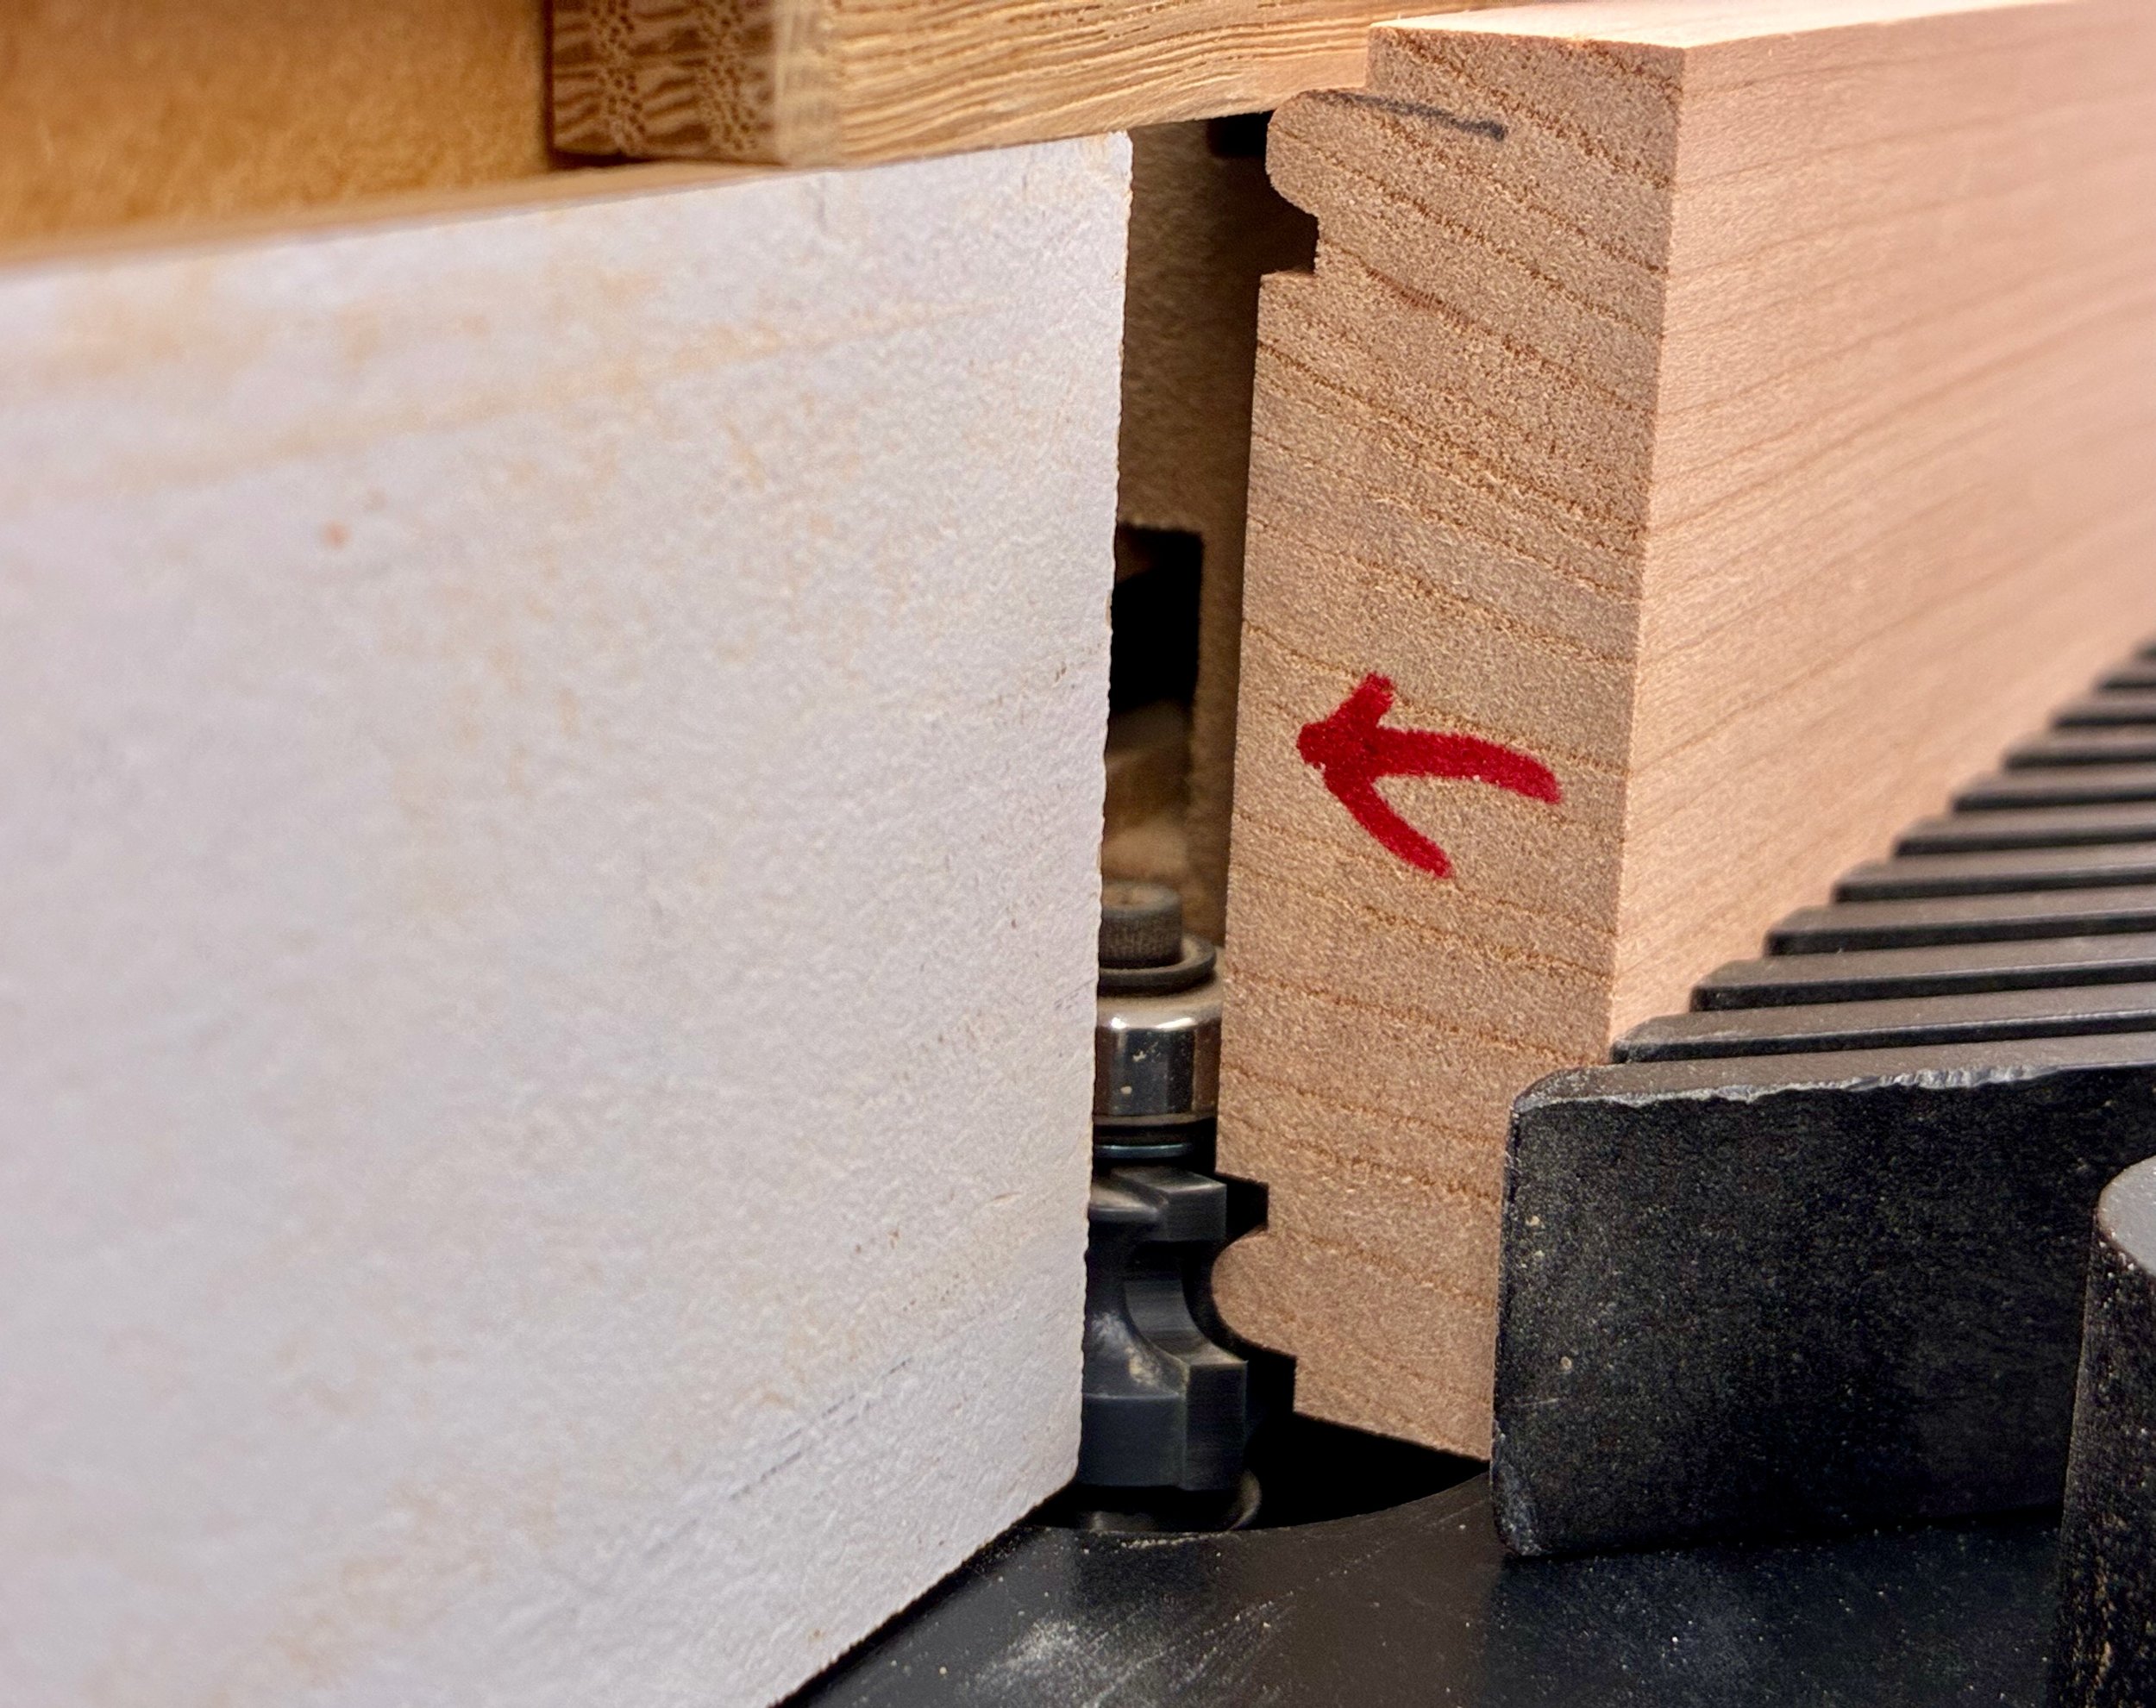
Routing a bead feature
Beaded boards
Next, rabbets were created on the undersides by the action of two sequential cuts at the table saw.
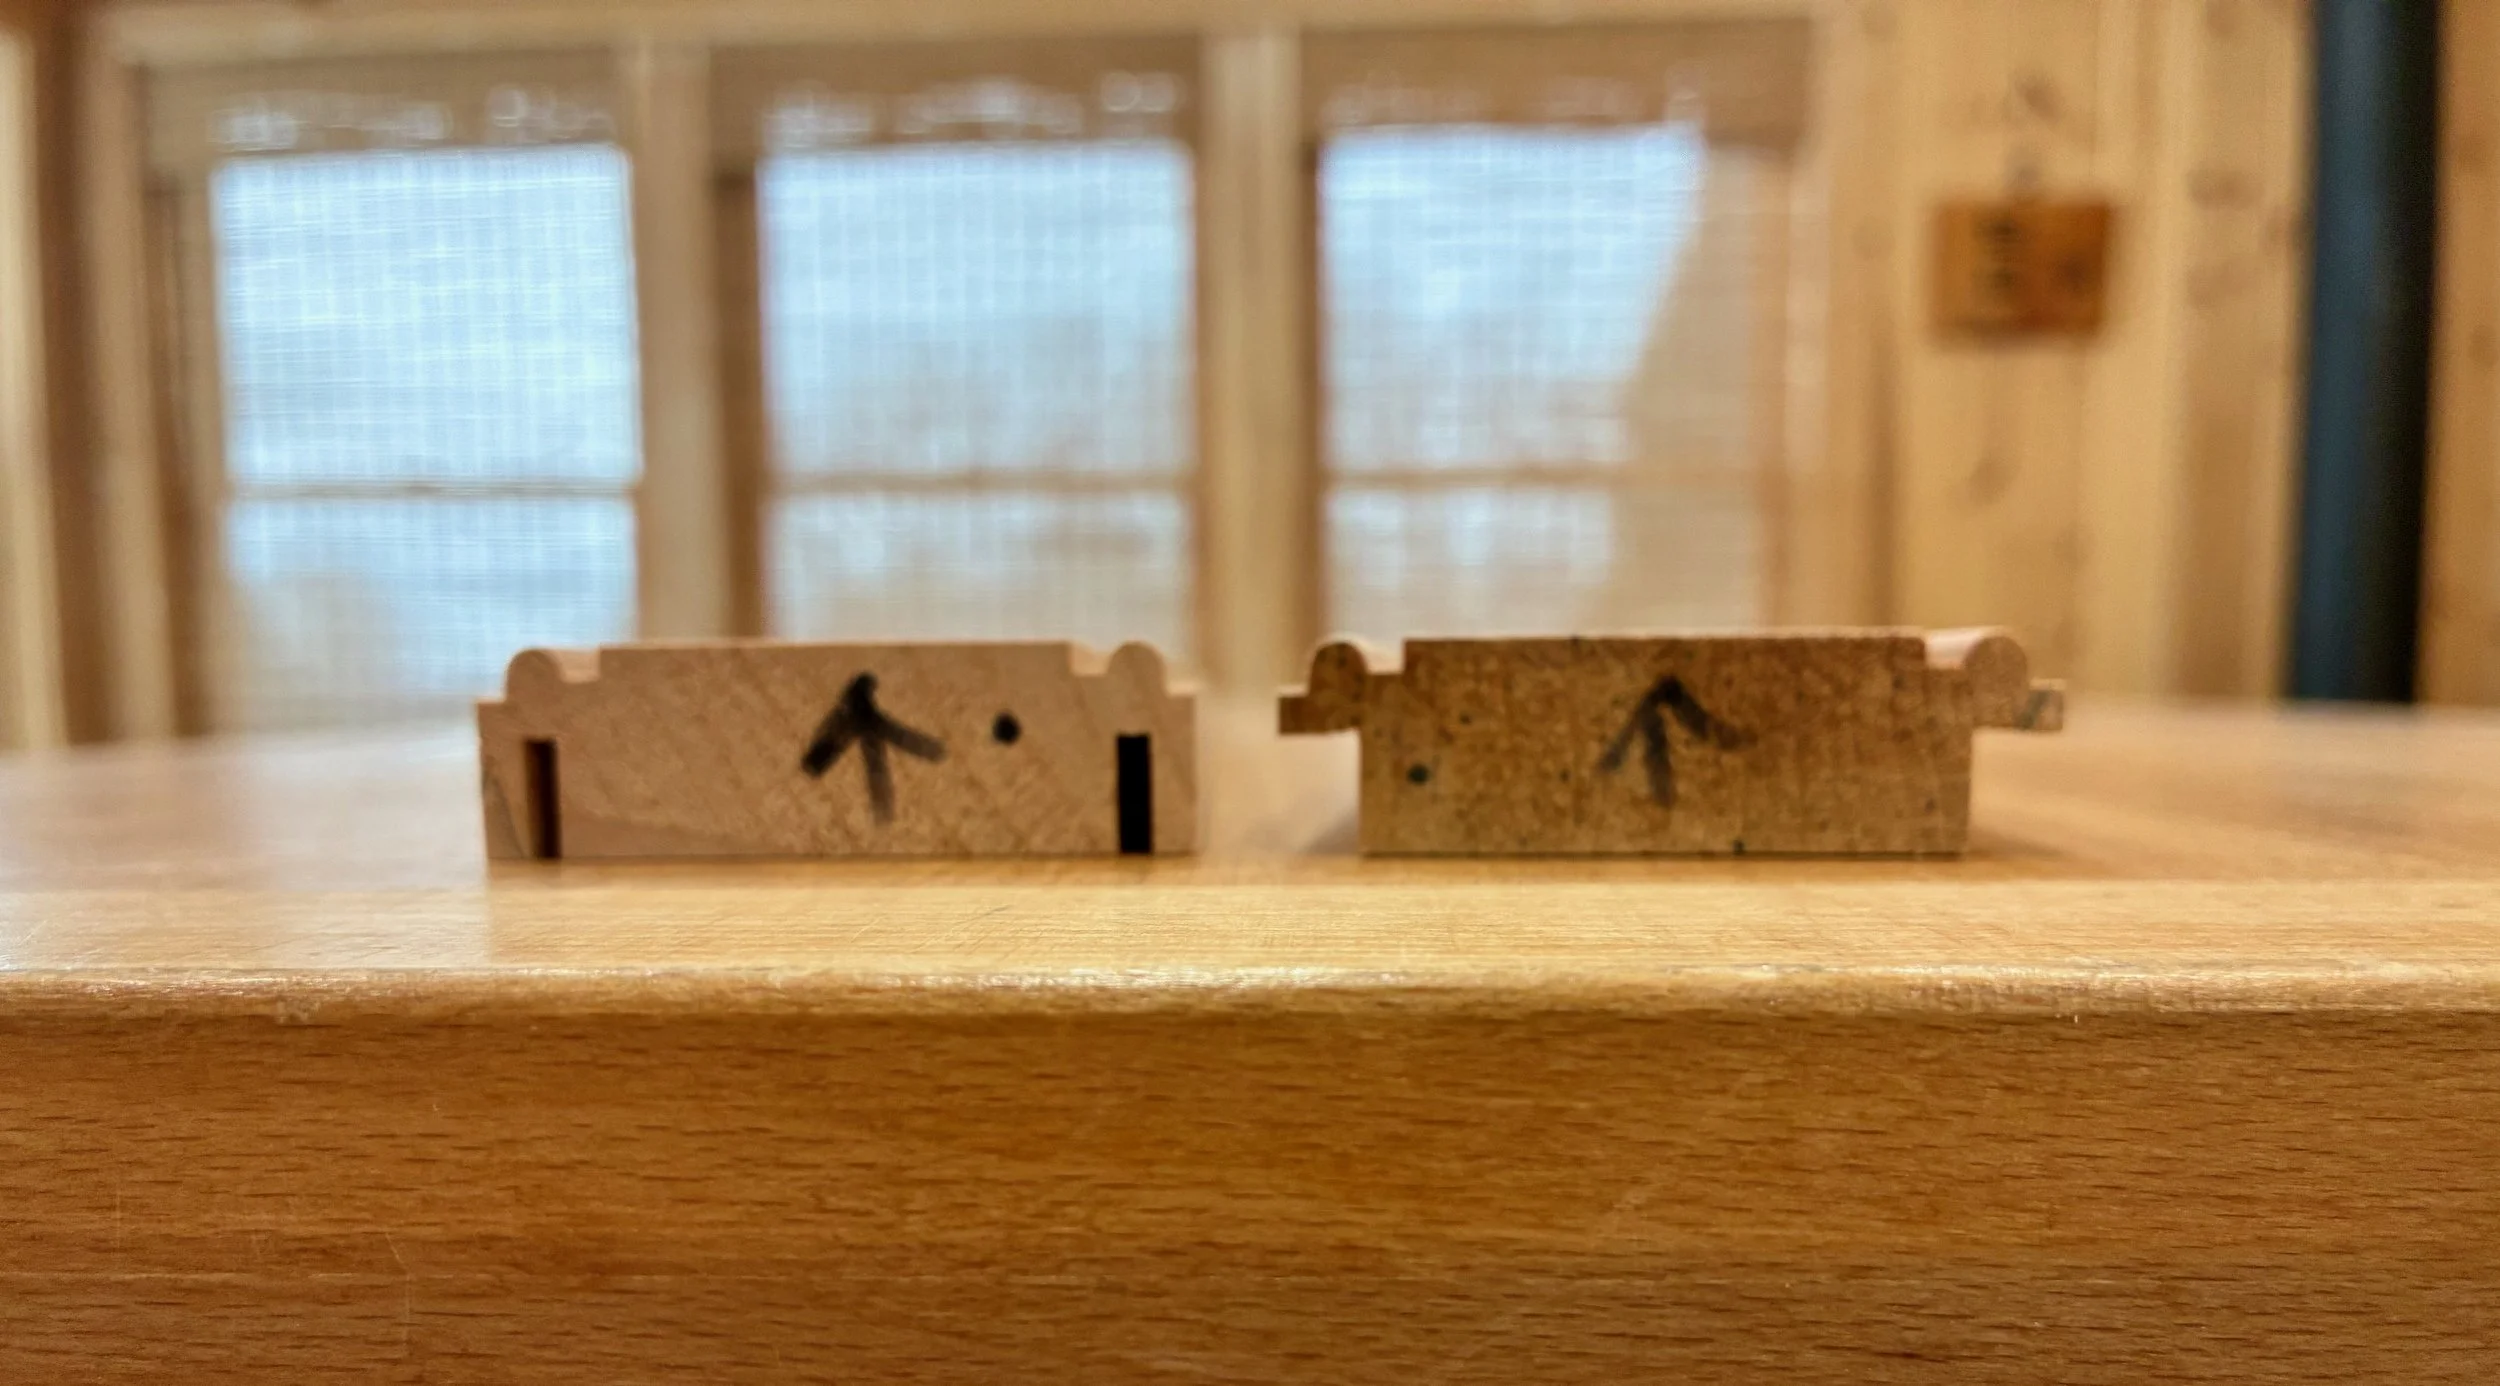
Left: Initial cuts define the frame depth
Right: Second cuts define the overlap
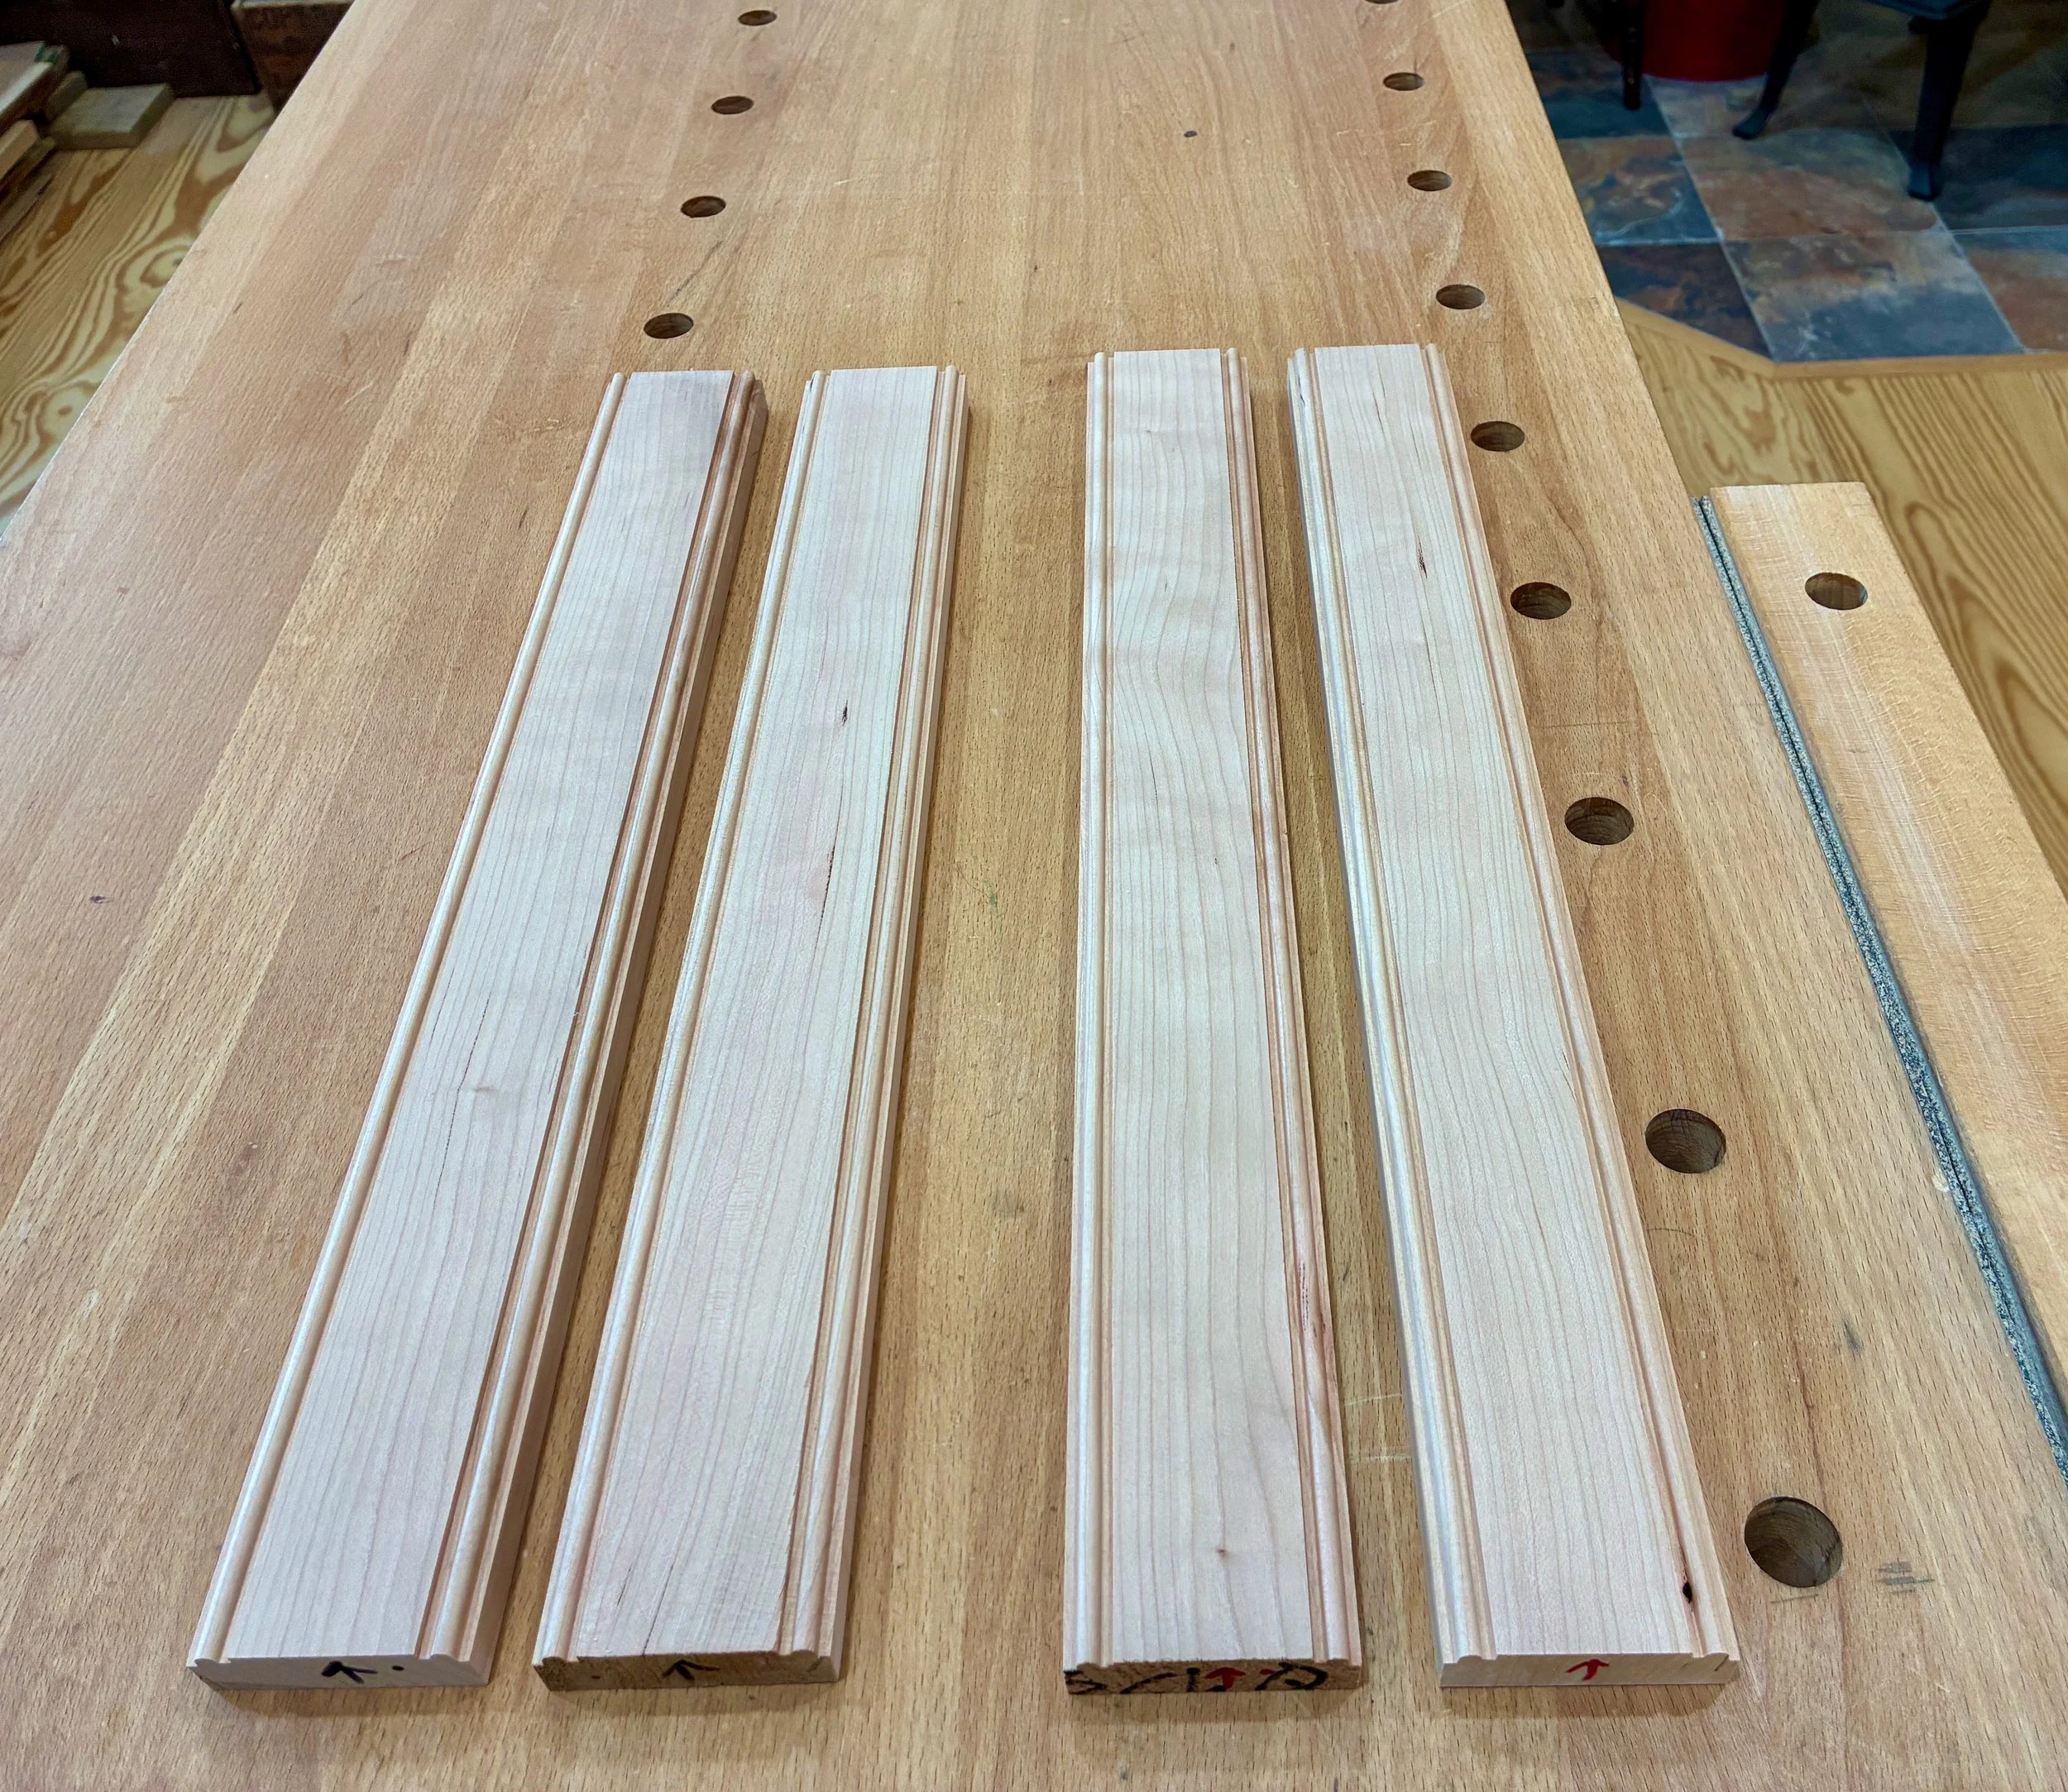
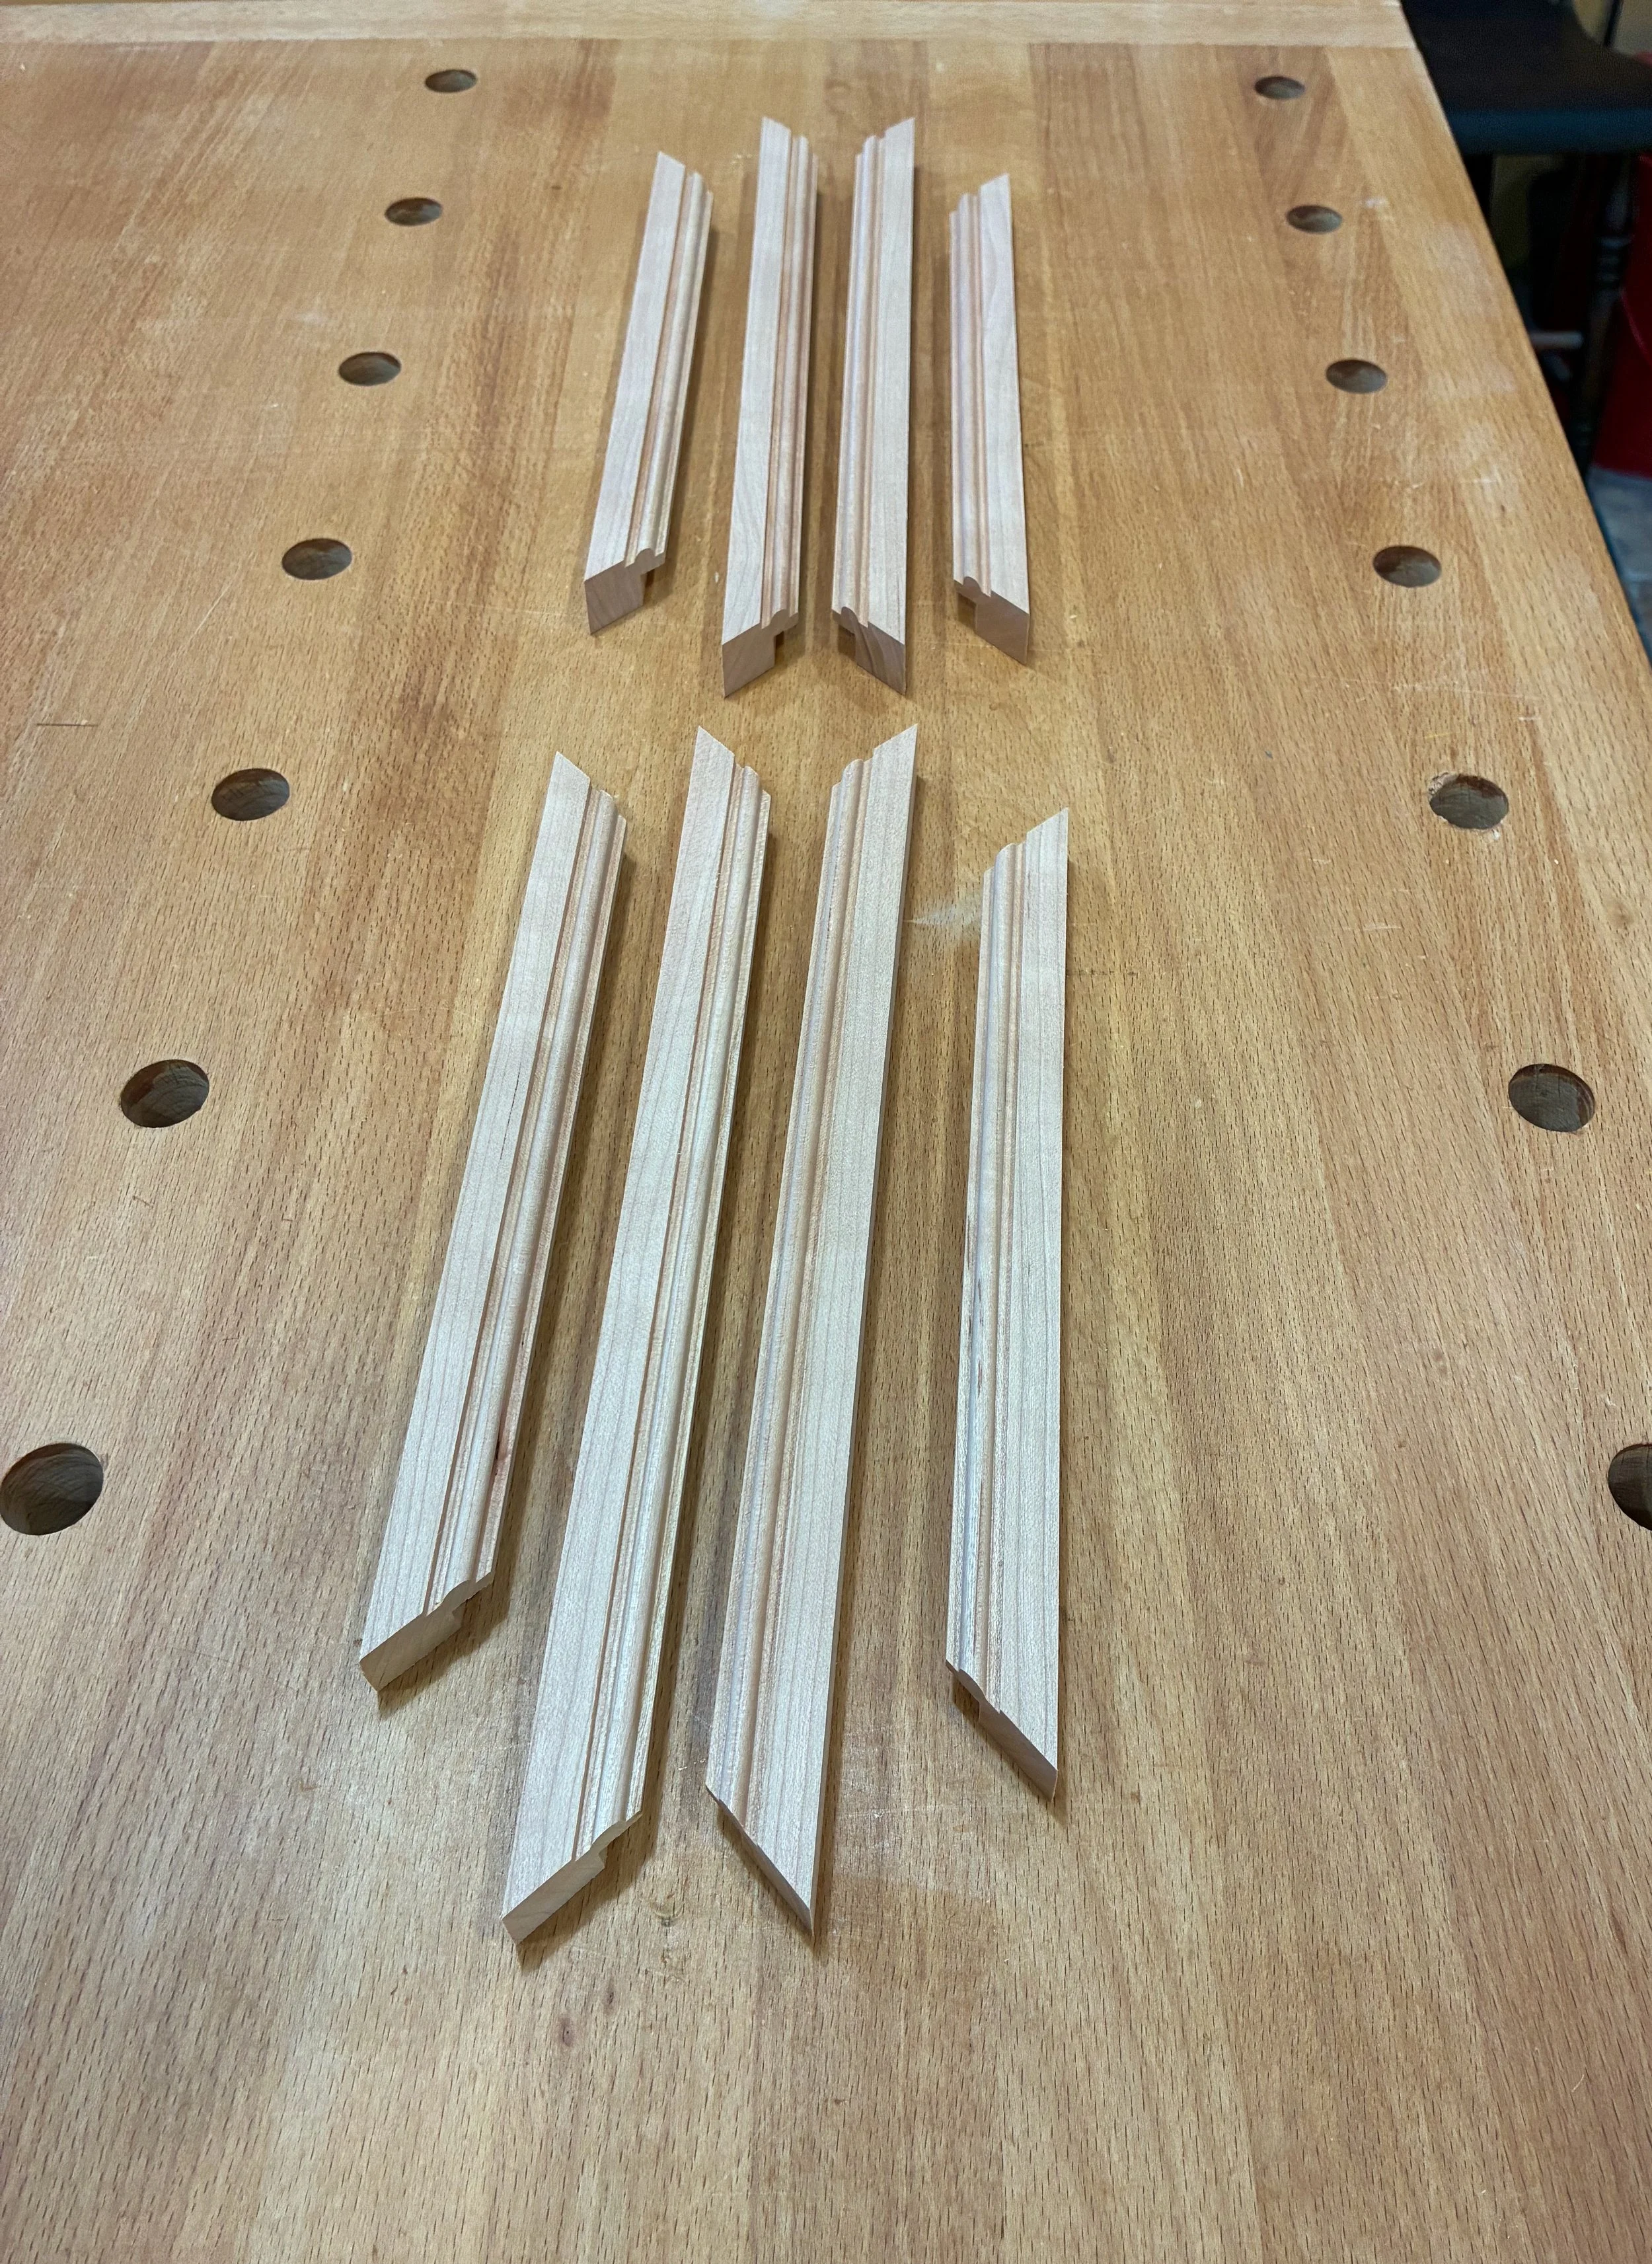
Finally, the boards were ripped at the table saw to yield eight, 3/4 in. wide frame parts. The freshly-cut edges were smoothed using a card scraper.
Frame stock
It was now time to cut these parts, accurately, to their final length on a 45° miter. In prior posts, you’ve seen me use my son, Andrew’s, nifty frame cutting jig at the table saw. I love that jig but, for some reason, it’s base is beginning to warp and the miters were not as clean as they should be. Fortunately, there is always another tool that can step-in to do the job; in this case, the sliding miter saw. This tool specializes in making accurate angle cuts. With a backing board, there is zero tear-out, and a stop block can be used to ensure all parts are cut to identical lengths. (Also, by flipping the frame part over after the initial cut, one can use the same angle position of the miter saw to make both cuts for each part.) Getting the length “right” is the only challenge with this set-up. You see, an 8 x 10 inch frame needs to match those dimensions at the rabbet. The outer frame edges will be longer than and the inner edges shorter than either 8 or 10 inches. To get the lengths right, all parts were first cut once on a 45° angle. For the short sides, a ruler was used to measure 8 + 1/32 inches along the “back” of the rabbet and this was marked in pencil. I lined up the pencil mark with the laser sight on my saw and then set a 45° angled stop block to hold this part, and all subsequent parts, in that position prior to making the second cut. Examine the picture and you’ll see what I mean.
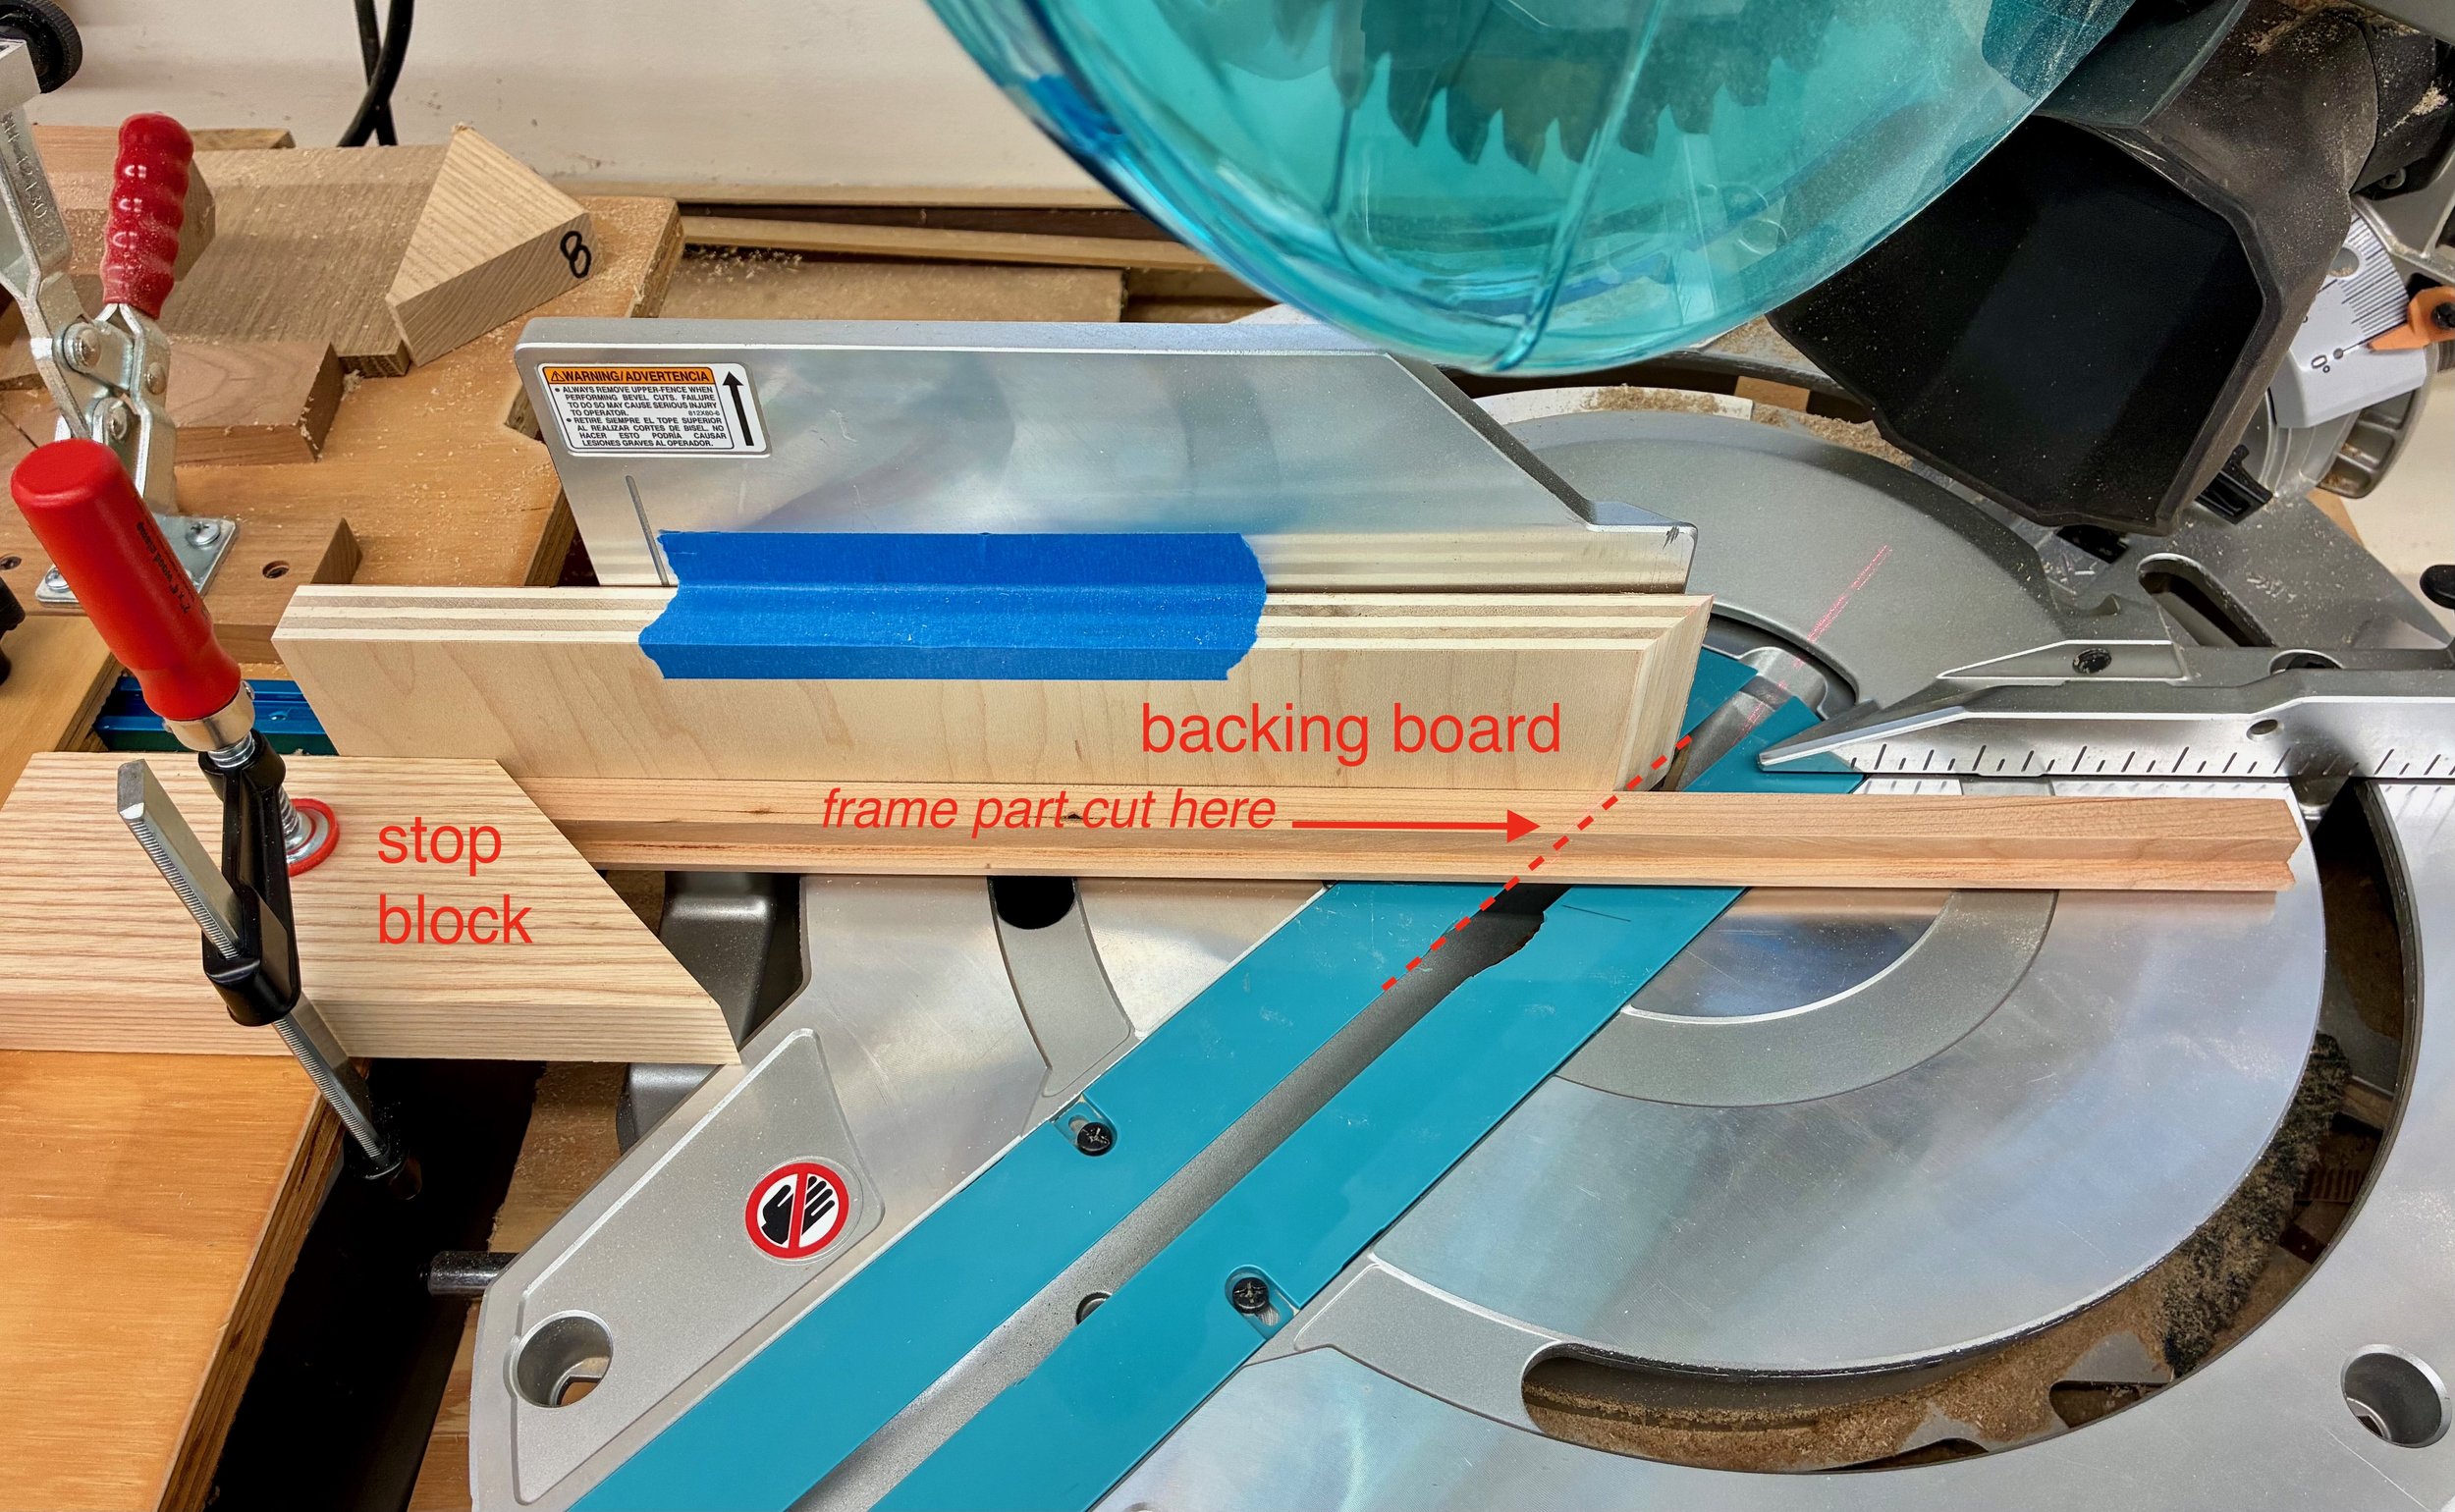
Making the second cut on a frame part
That’s more difficult to describe than to accomplish. Anyway, after 4 such chops for the short sides, followed by 4 more after resetting the stop block for the long sides, the frame parts were completed.
Frame sides completed
Assembly & Finish
Frame glue-ups are a cinch - if you have the right clamp. There are several framing vises available, and I own a few, but my advice is to invest in a band clamp and never look back. Band clamps are foolproof and fun to use. Just dab some glue on the miters, roughly match the parts together and then wrap & tighten the band clamp snugly around the frame. Voilà!
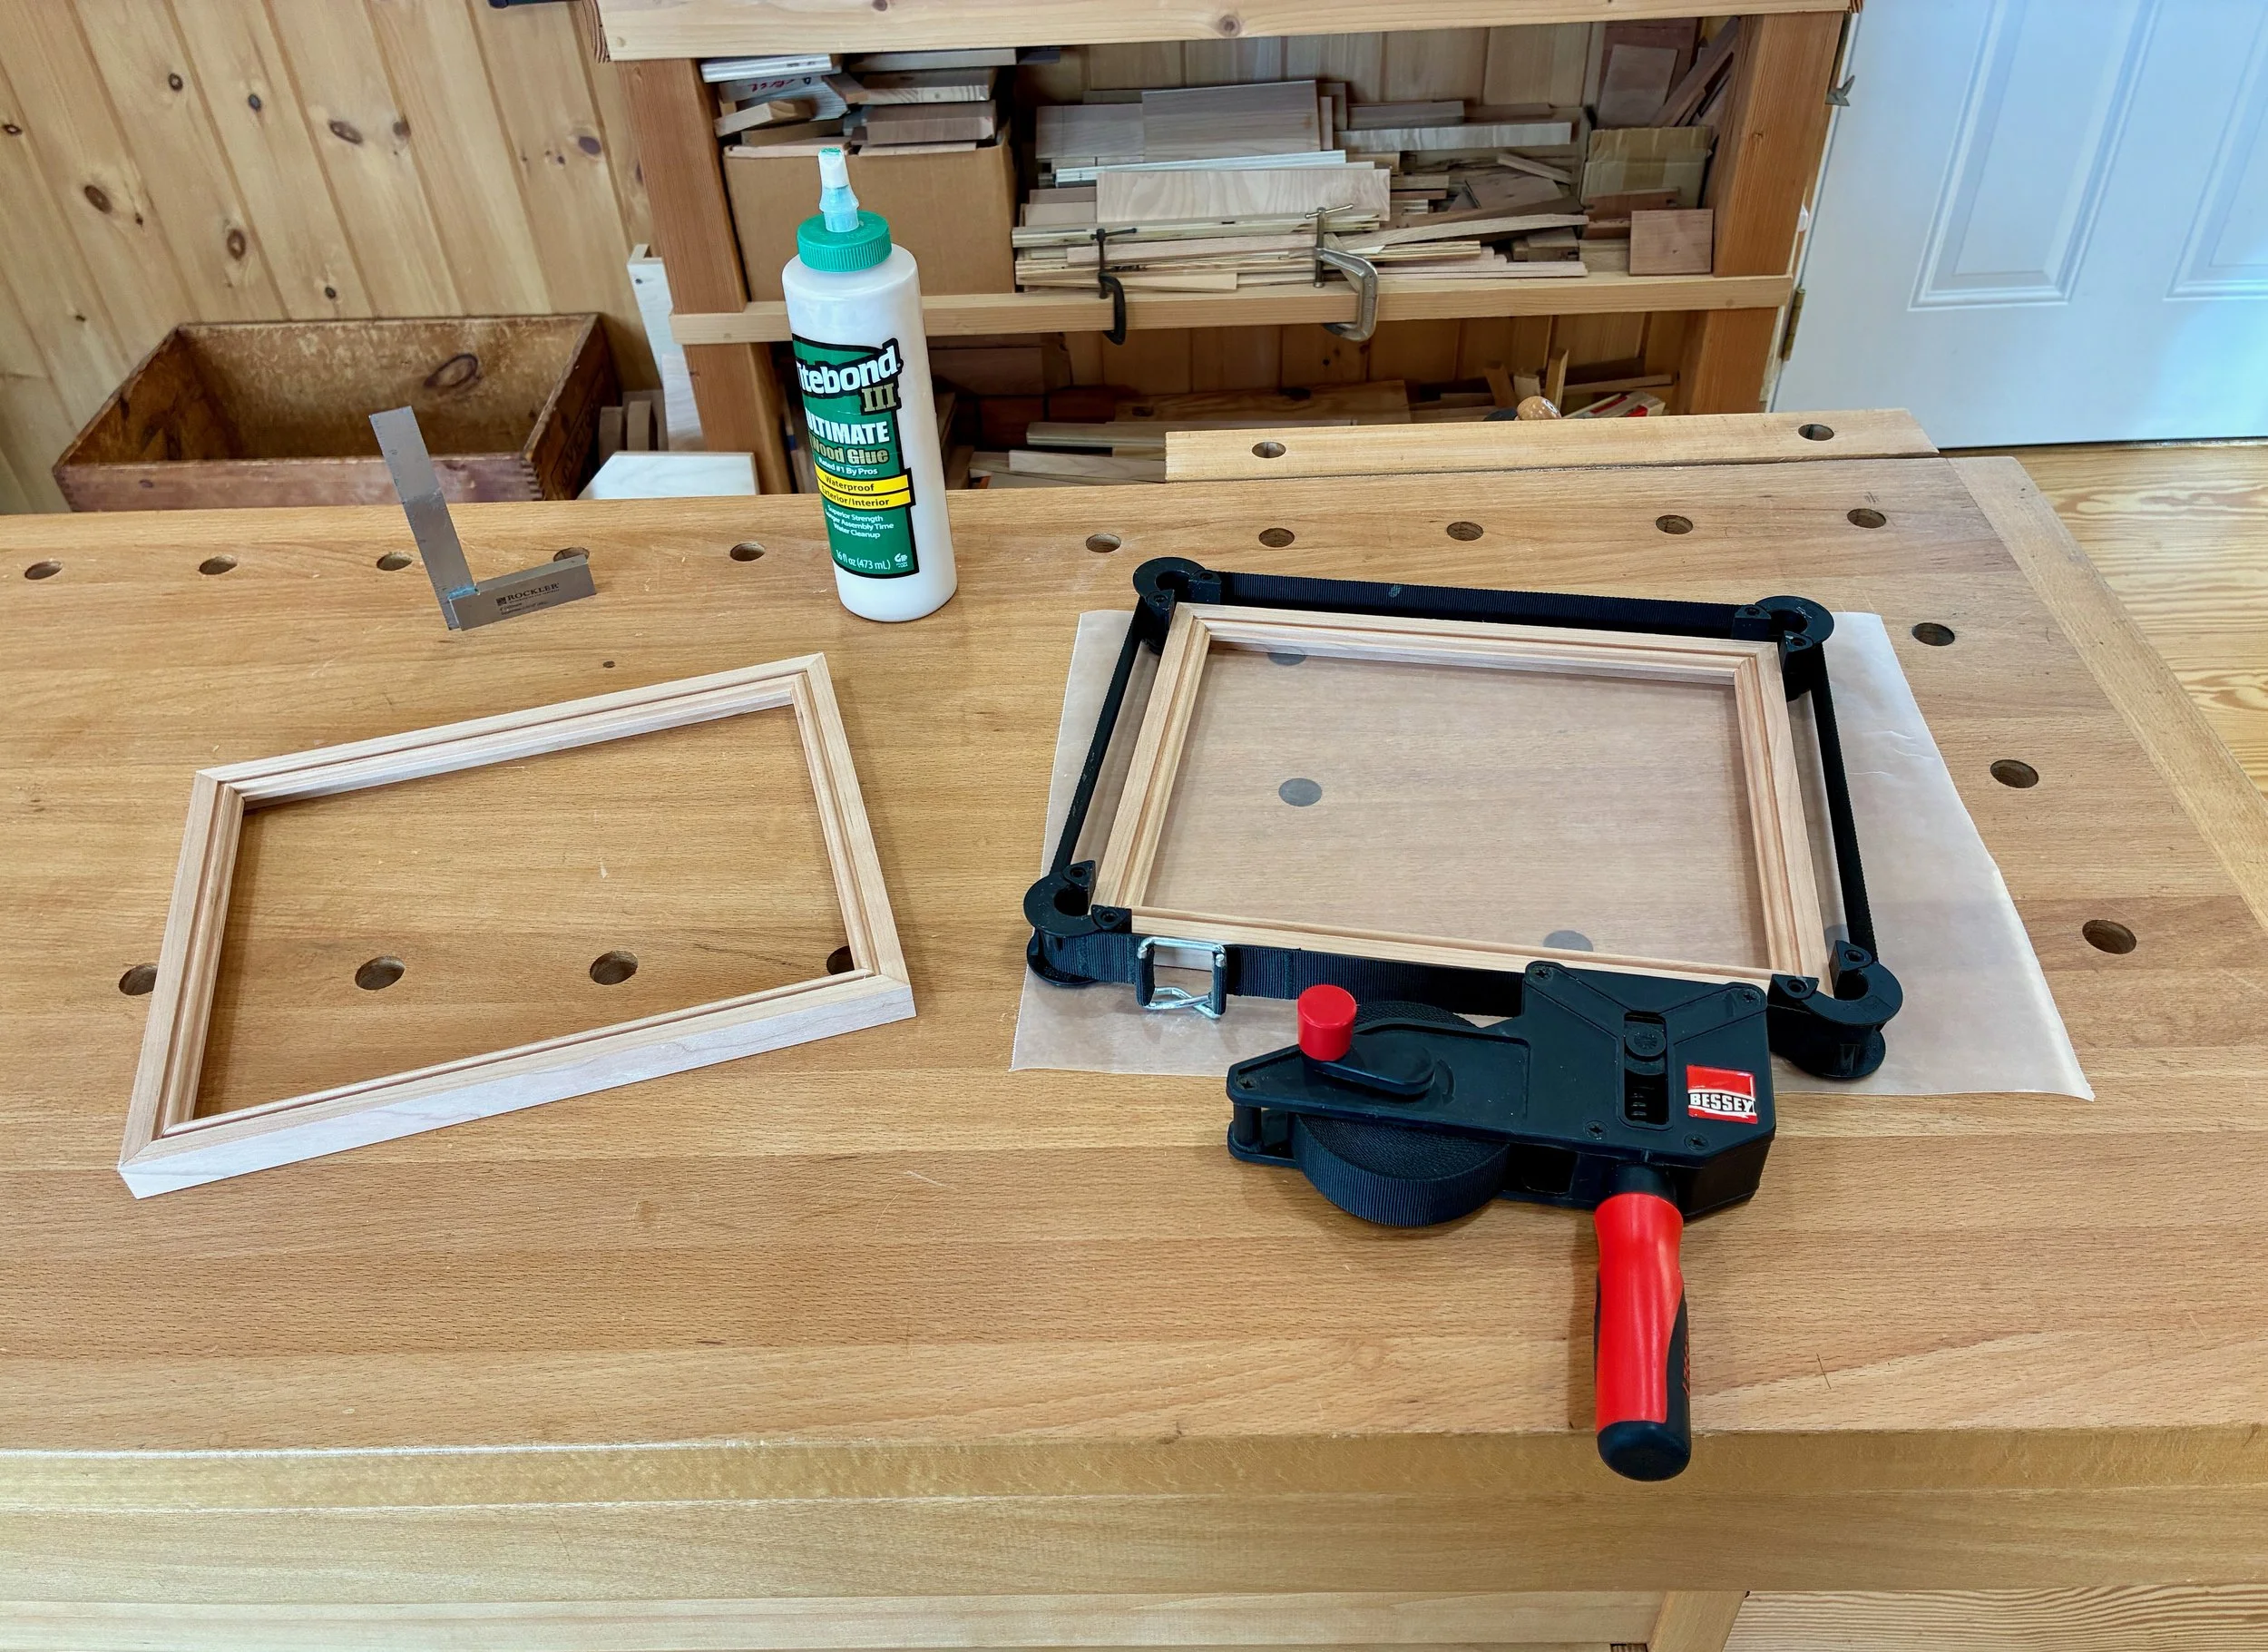
Frame glue-up
Once the glue had dried, the seams were evened-up with a brief touch of the random orbital sander followed by hand sanding to ease the edges and corners. I finished the wood with a single coat of gel polyurethane - no gloss, just warmth.
It is easy to order pre-cut frame glass online if you are after conventional dimensions such as 8 x 10, otherwise a stop at the local frame shop for some custom cut glass is required. For mounting things up I held the glass/picture/backing foam core board assembly in place with some glazier’s points. A saw tooth hanger was used for the wall mount, although I’d suggest wire for anything heavier than this one.
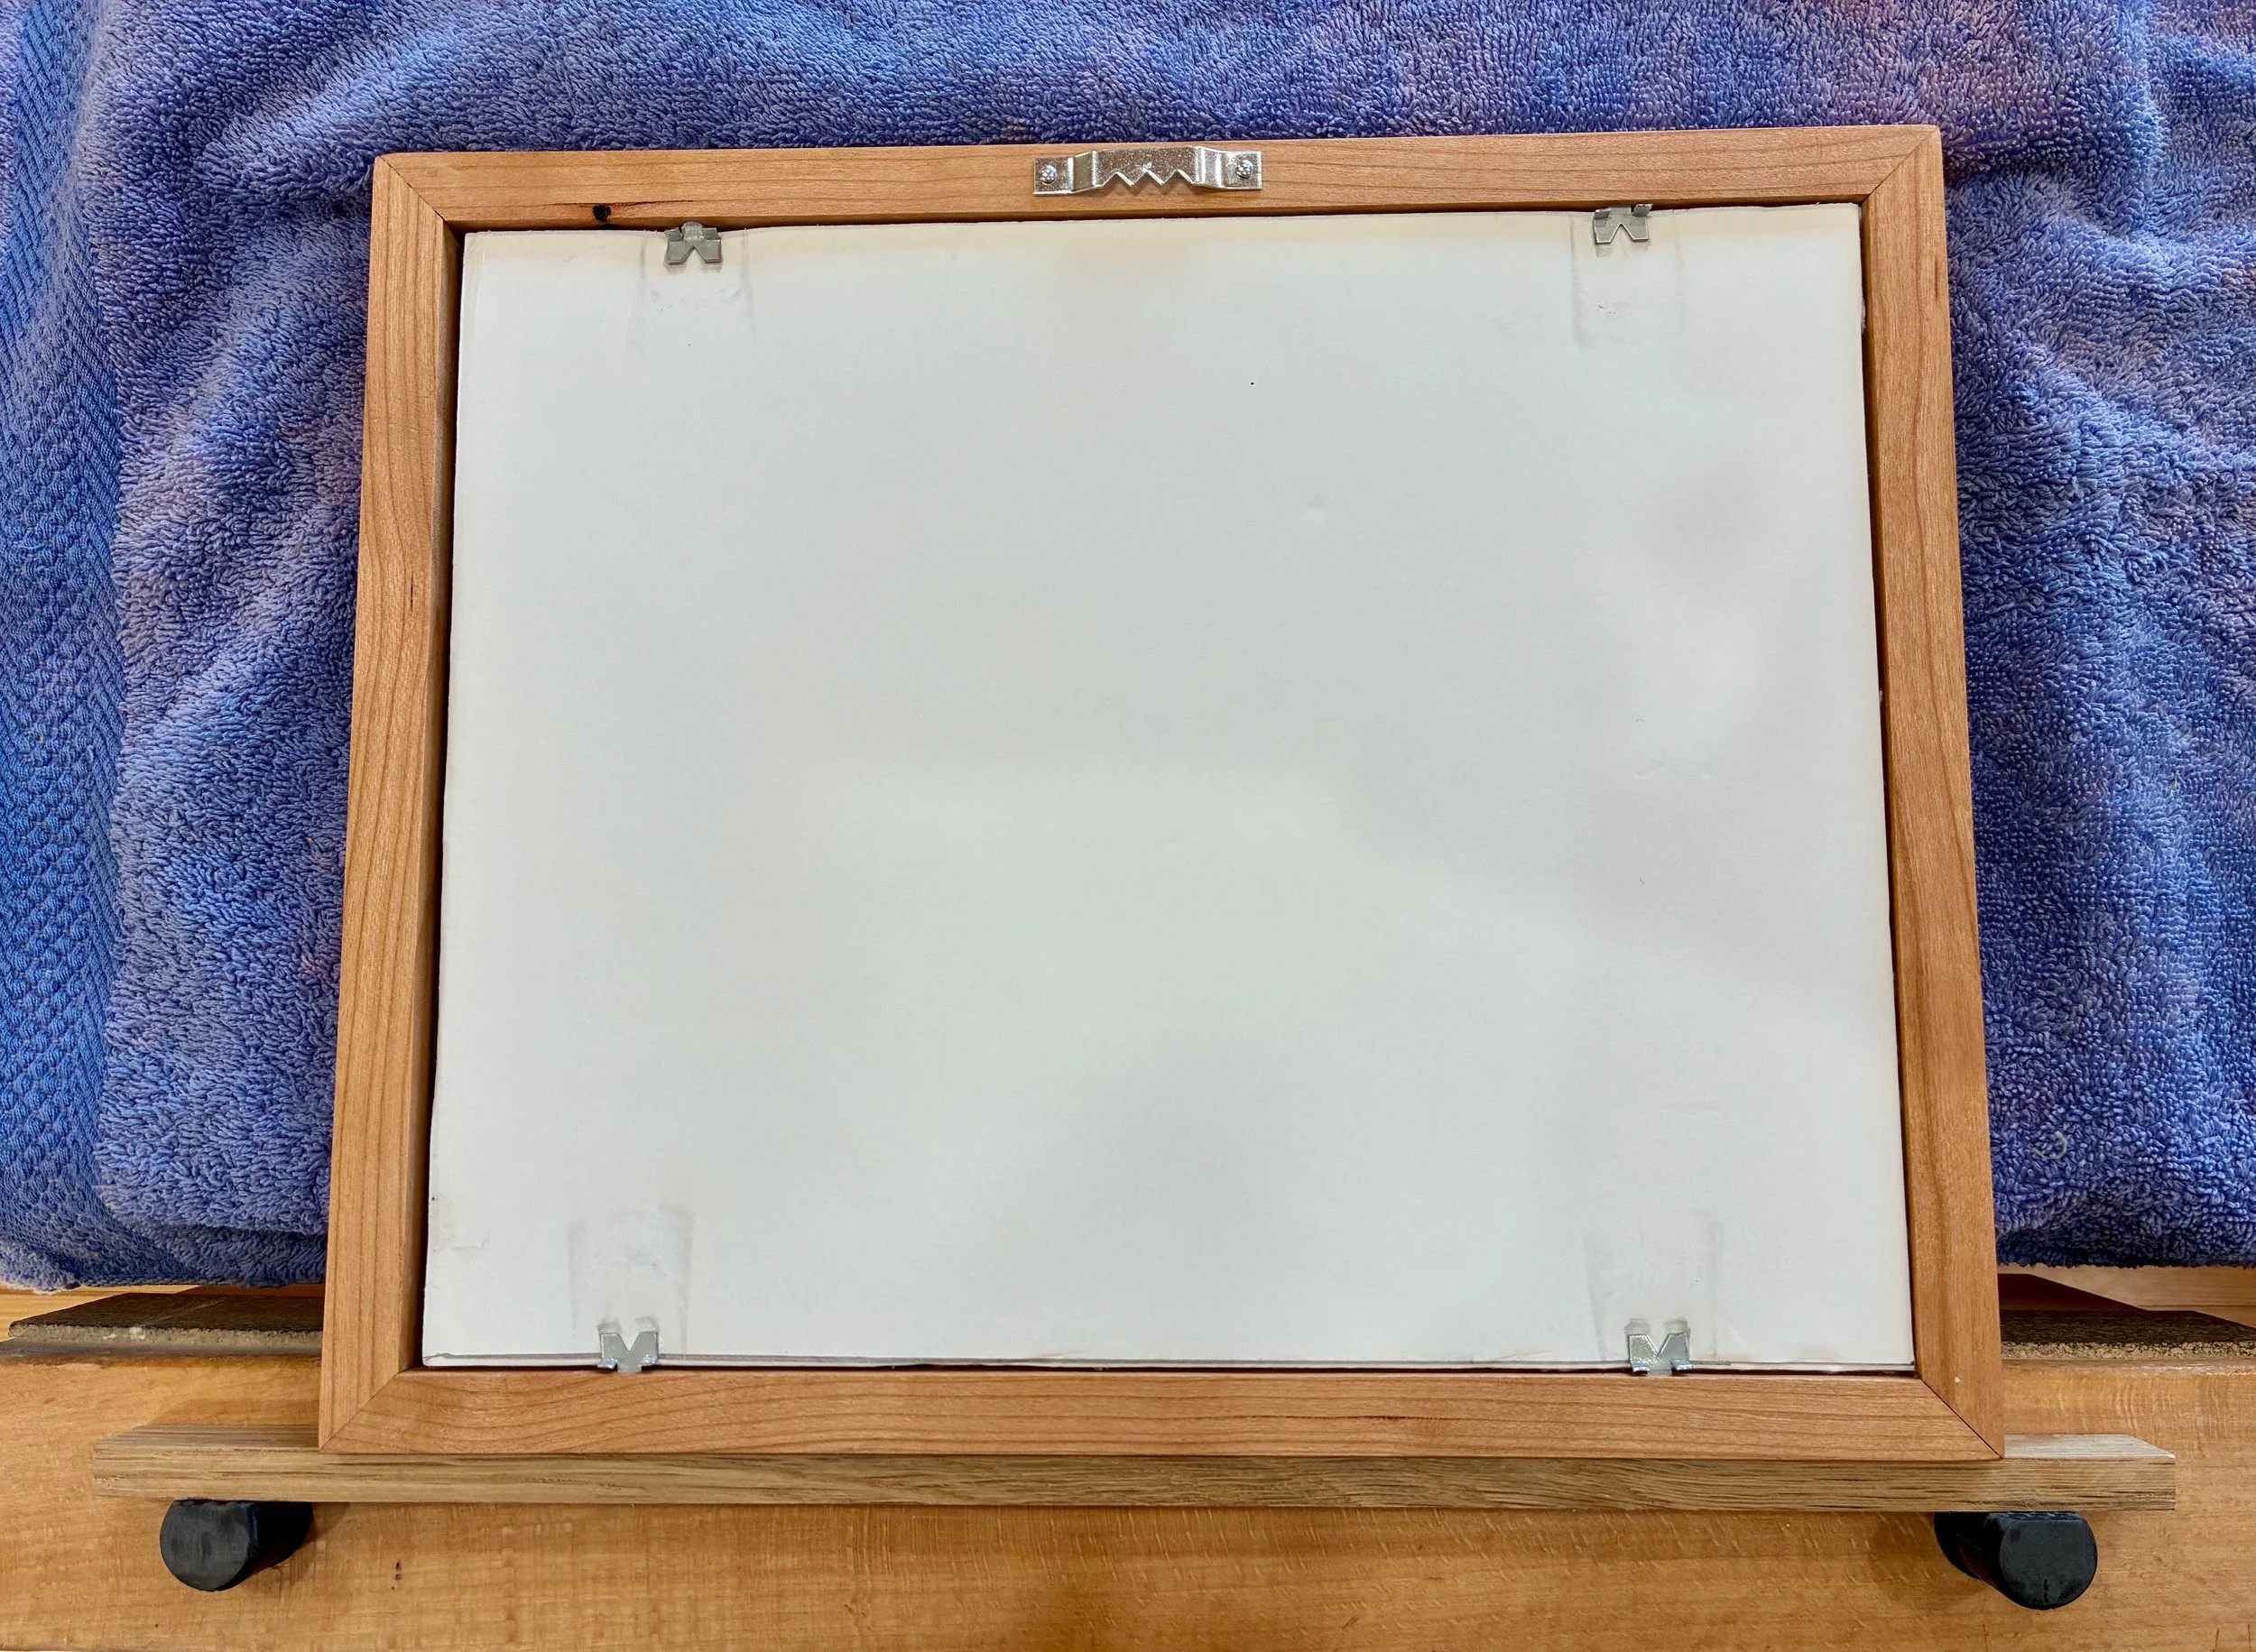
Framed print
And that does it. An unassuming board, a few tools and a little effort makes a worthy frame to display your memories forever. Pretty nice!

Picture perfect