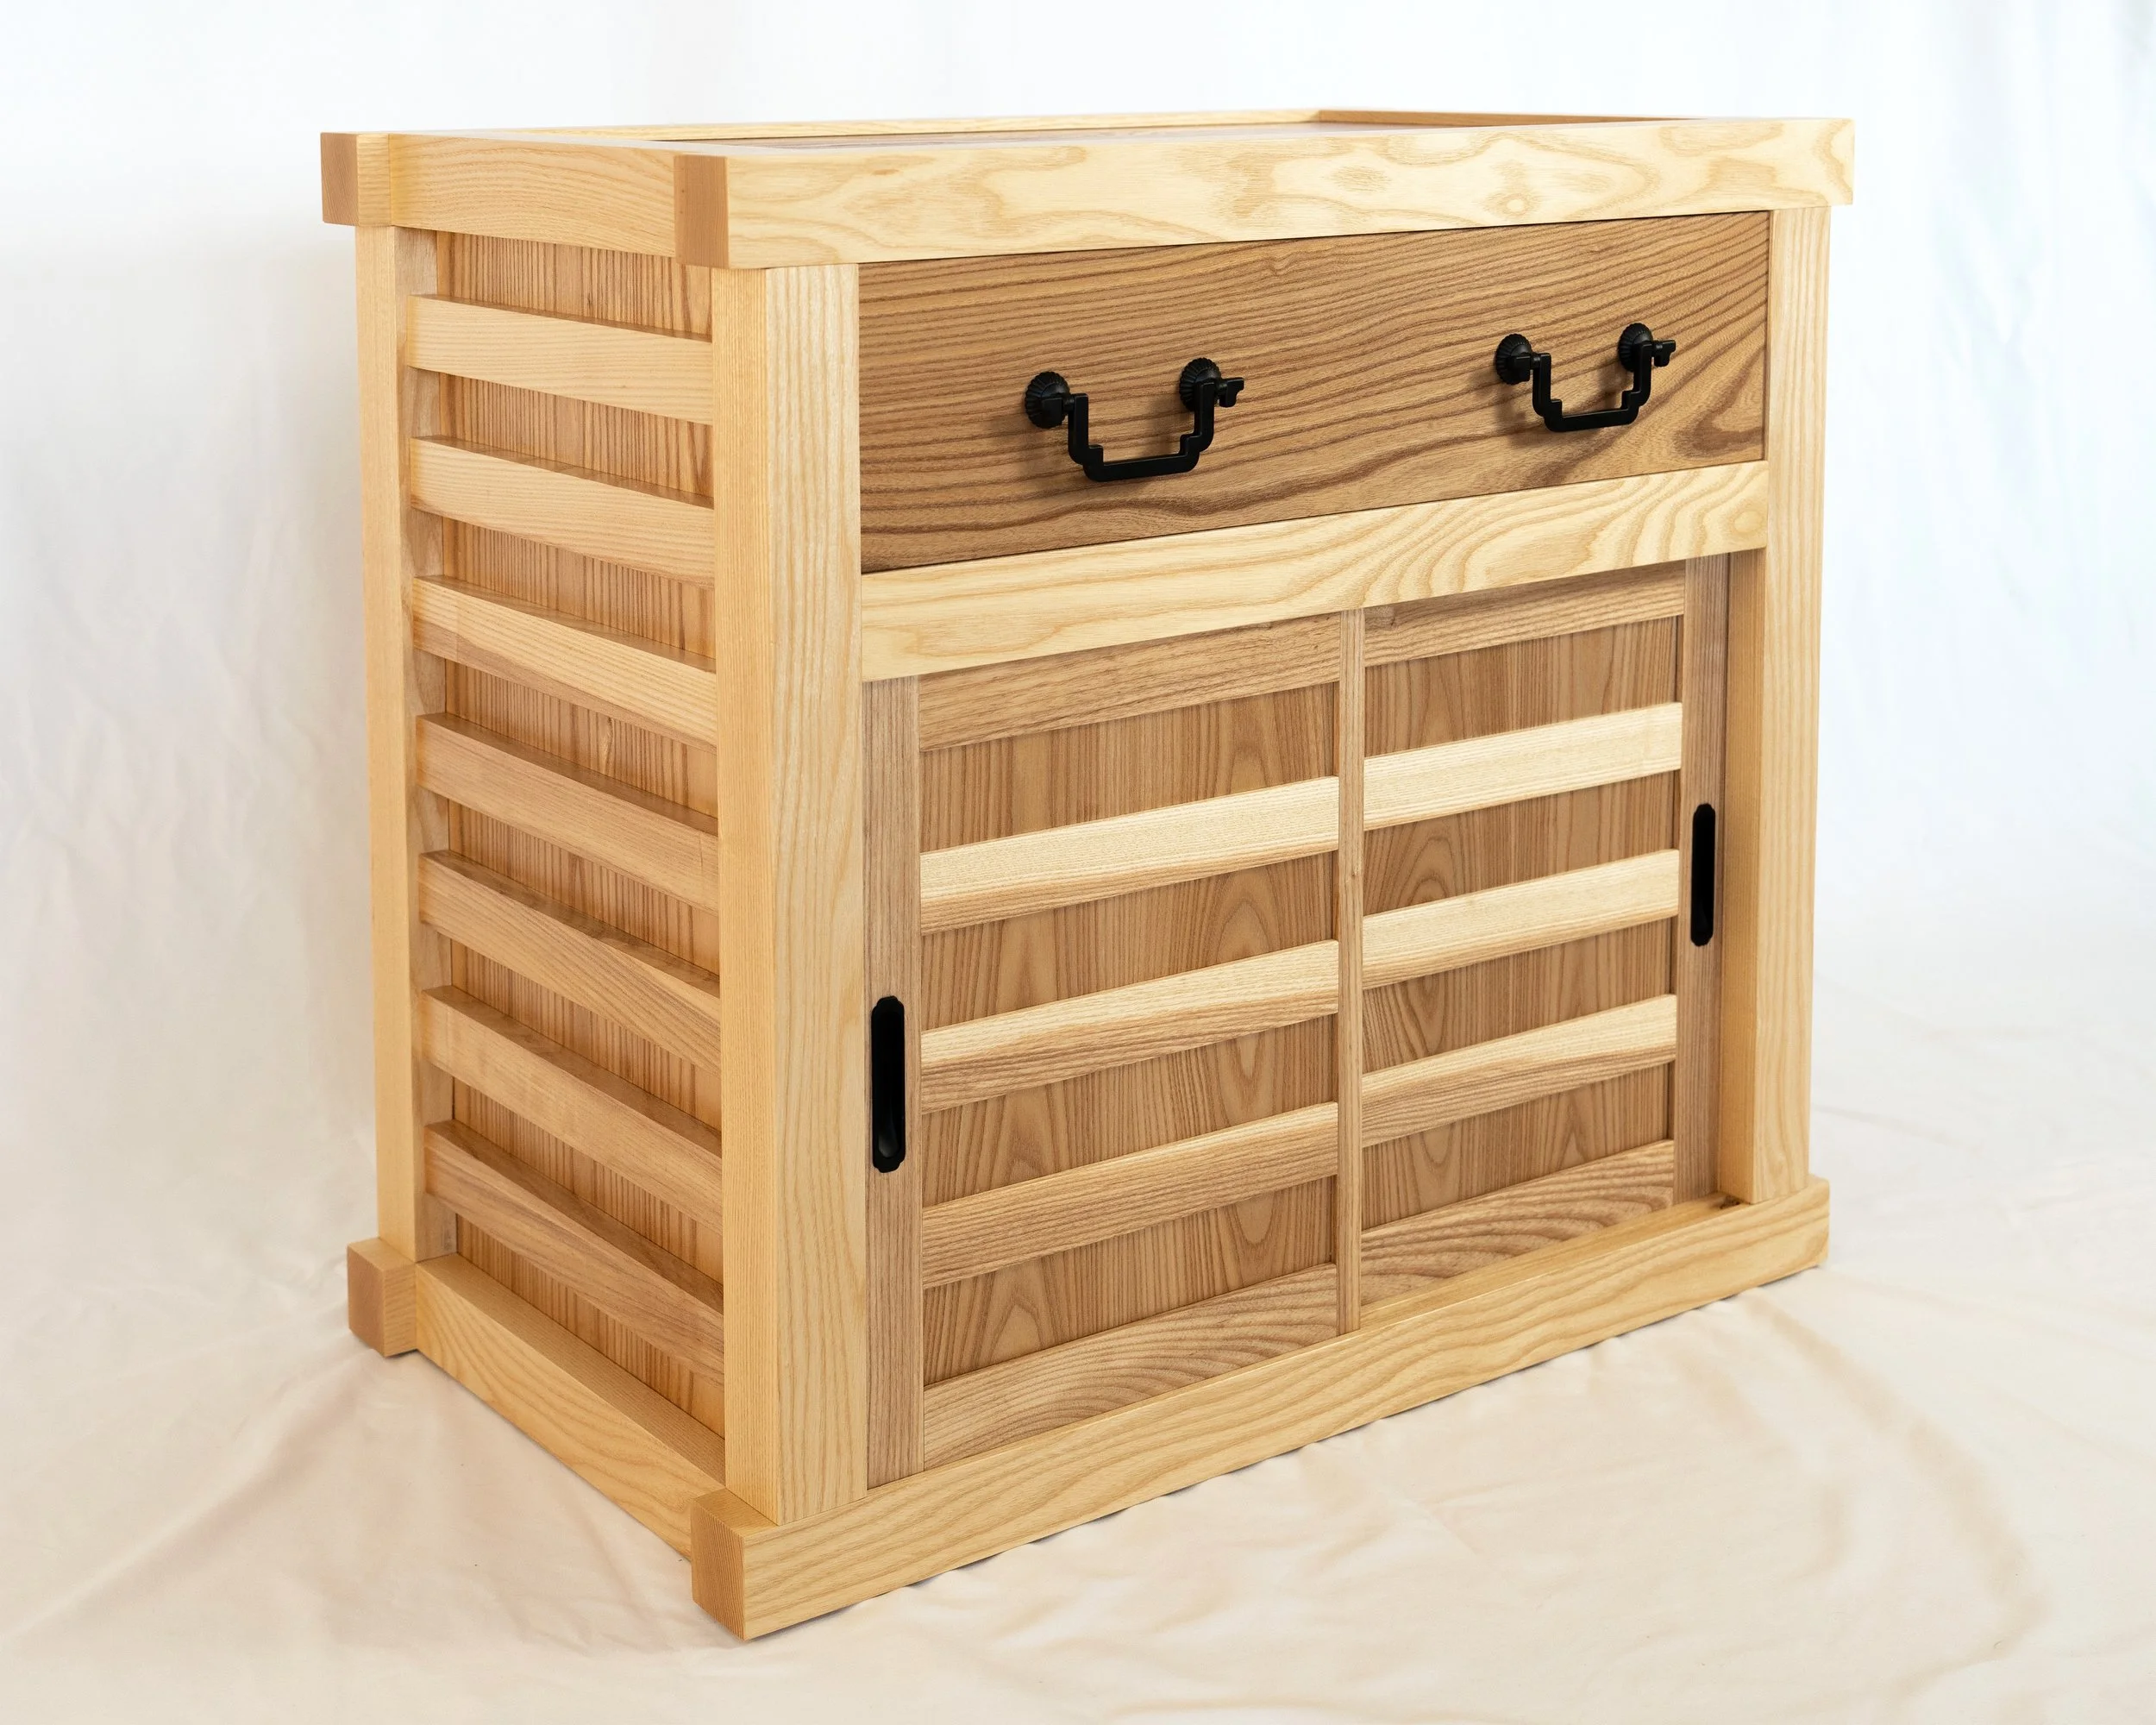
Coin Chest ep. 2
Picking up on the Coin Chest Project we shift our focus from casework to case components; specifically, six drawers and a pair of doors. Let’s get at it!
Design
Back in October 2025 we left the Coin Chest in a state of arrested development, where all of the chest’s framework parts were complete and assembled, just not glued permanently in place. This was to permit the construction and insertion of a box to house the interior drawers. That box would rest just behind the Chest’s sliding doors, creating an inner chamber common to many tansu of the merchant chest type. The plan was to build a box to fill the cavity, disassemble the surrounding framework, apply glue to the tenons, and then re-assemble the frame with the box enclosed. This may not be the method used 150 years ago in Japan, but it seemed like it would work, today, under the Red Top.
With a construction strategy in place, the final design step was to configure the inner drawers. There is no “right” answer here (alas, there rarely is), but the guiding notion was to create smaller containers that could segregate parts of the collection while keeping things versatile. Only half of the cavity would be “drawered”, the other half would be shelved with the intention to house coin books, magazines and other pieces not fit for life in a drawer. Rough plans for a couple of versions were drawn out and discussed with Mike before landing on the one below. Its construction would involve dovetail joints and dadoed housings.
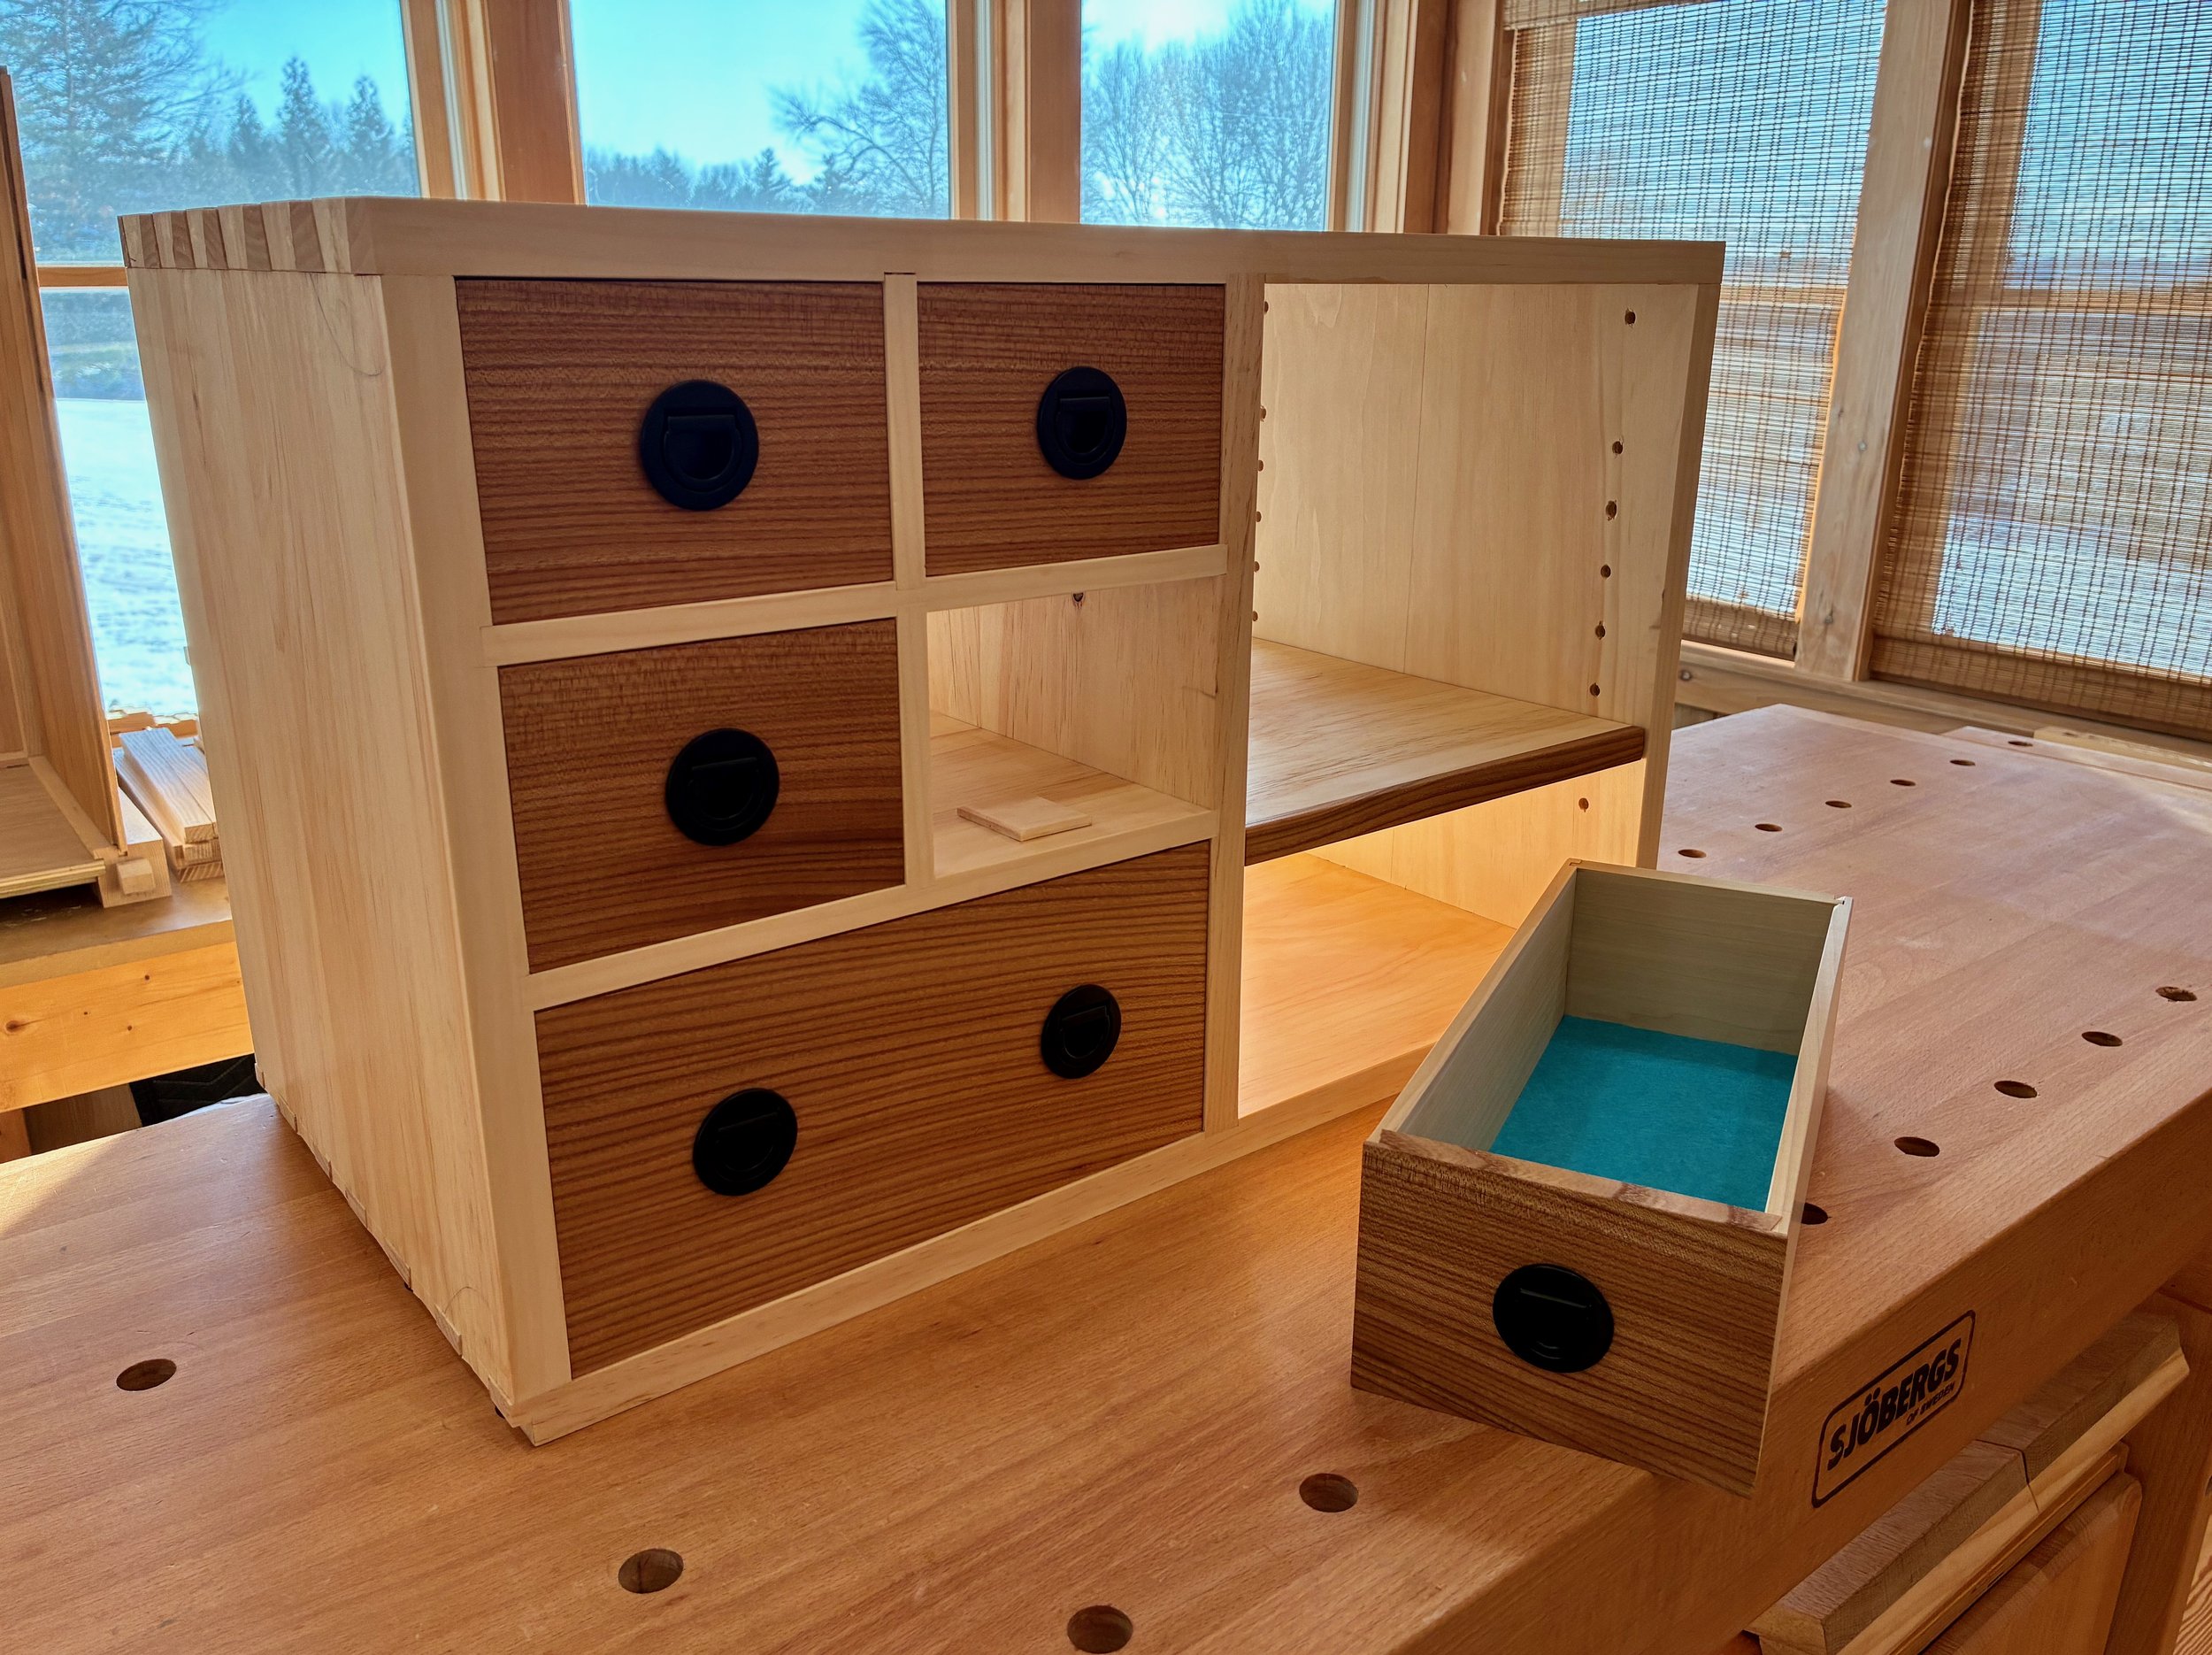
Coin Chest drawer box
Materials
I chose to make the drawer box out of eastern white pine, a stable, lightweight wood that is easy to dovetail. In the end, only a small portion will be visible. Like the other woods, this was picked out of the fine selection at Reader’s Hardwood Supply.
4/4 Eastern White Pine lumber
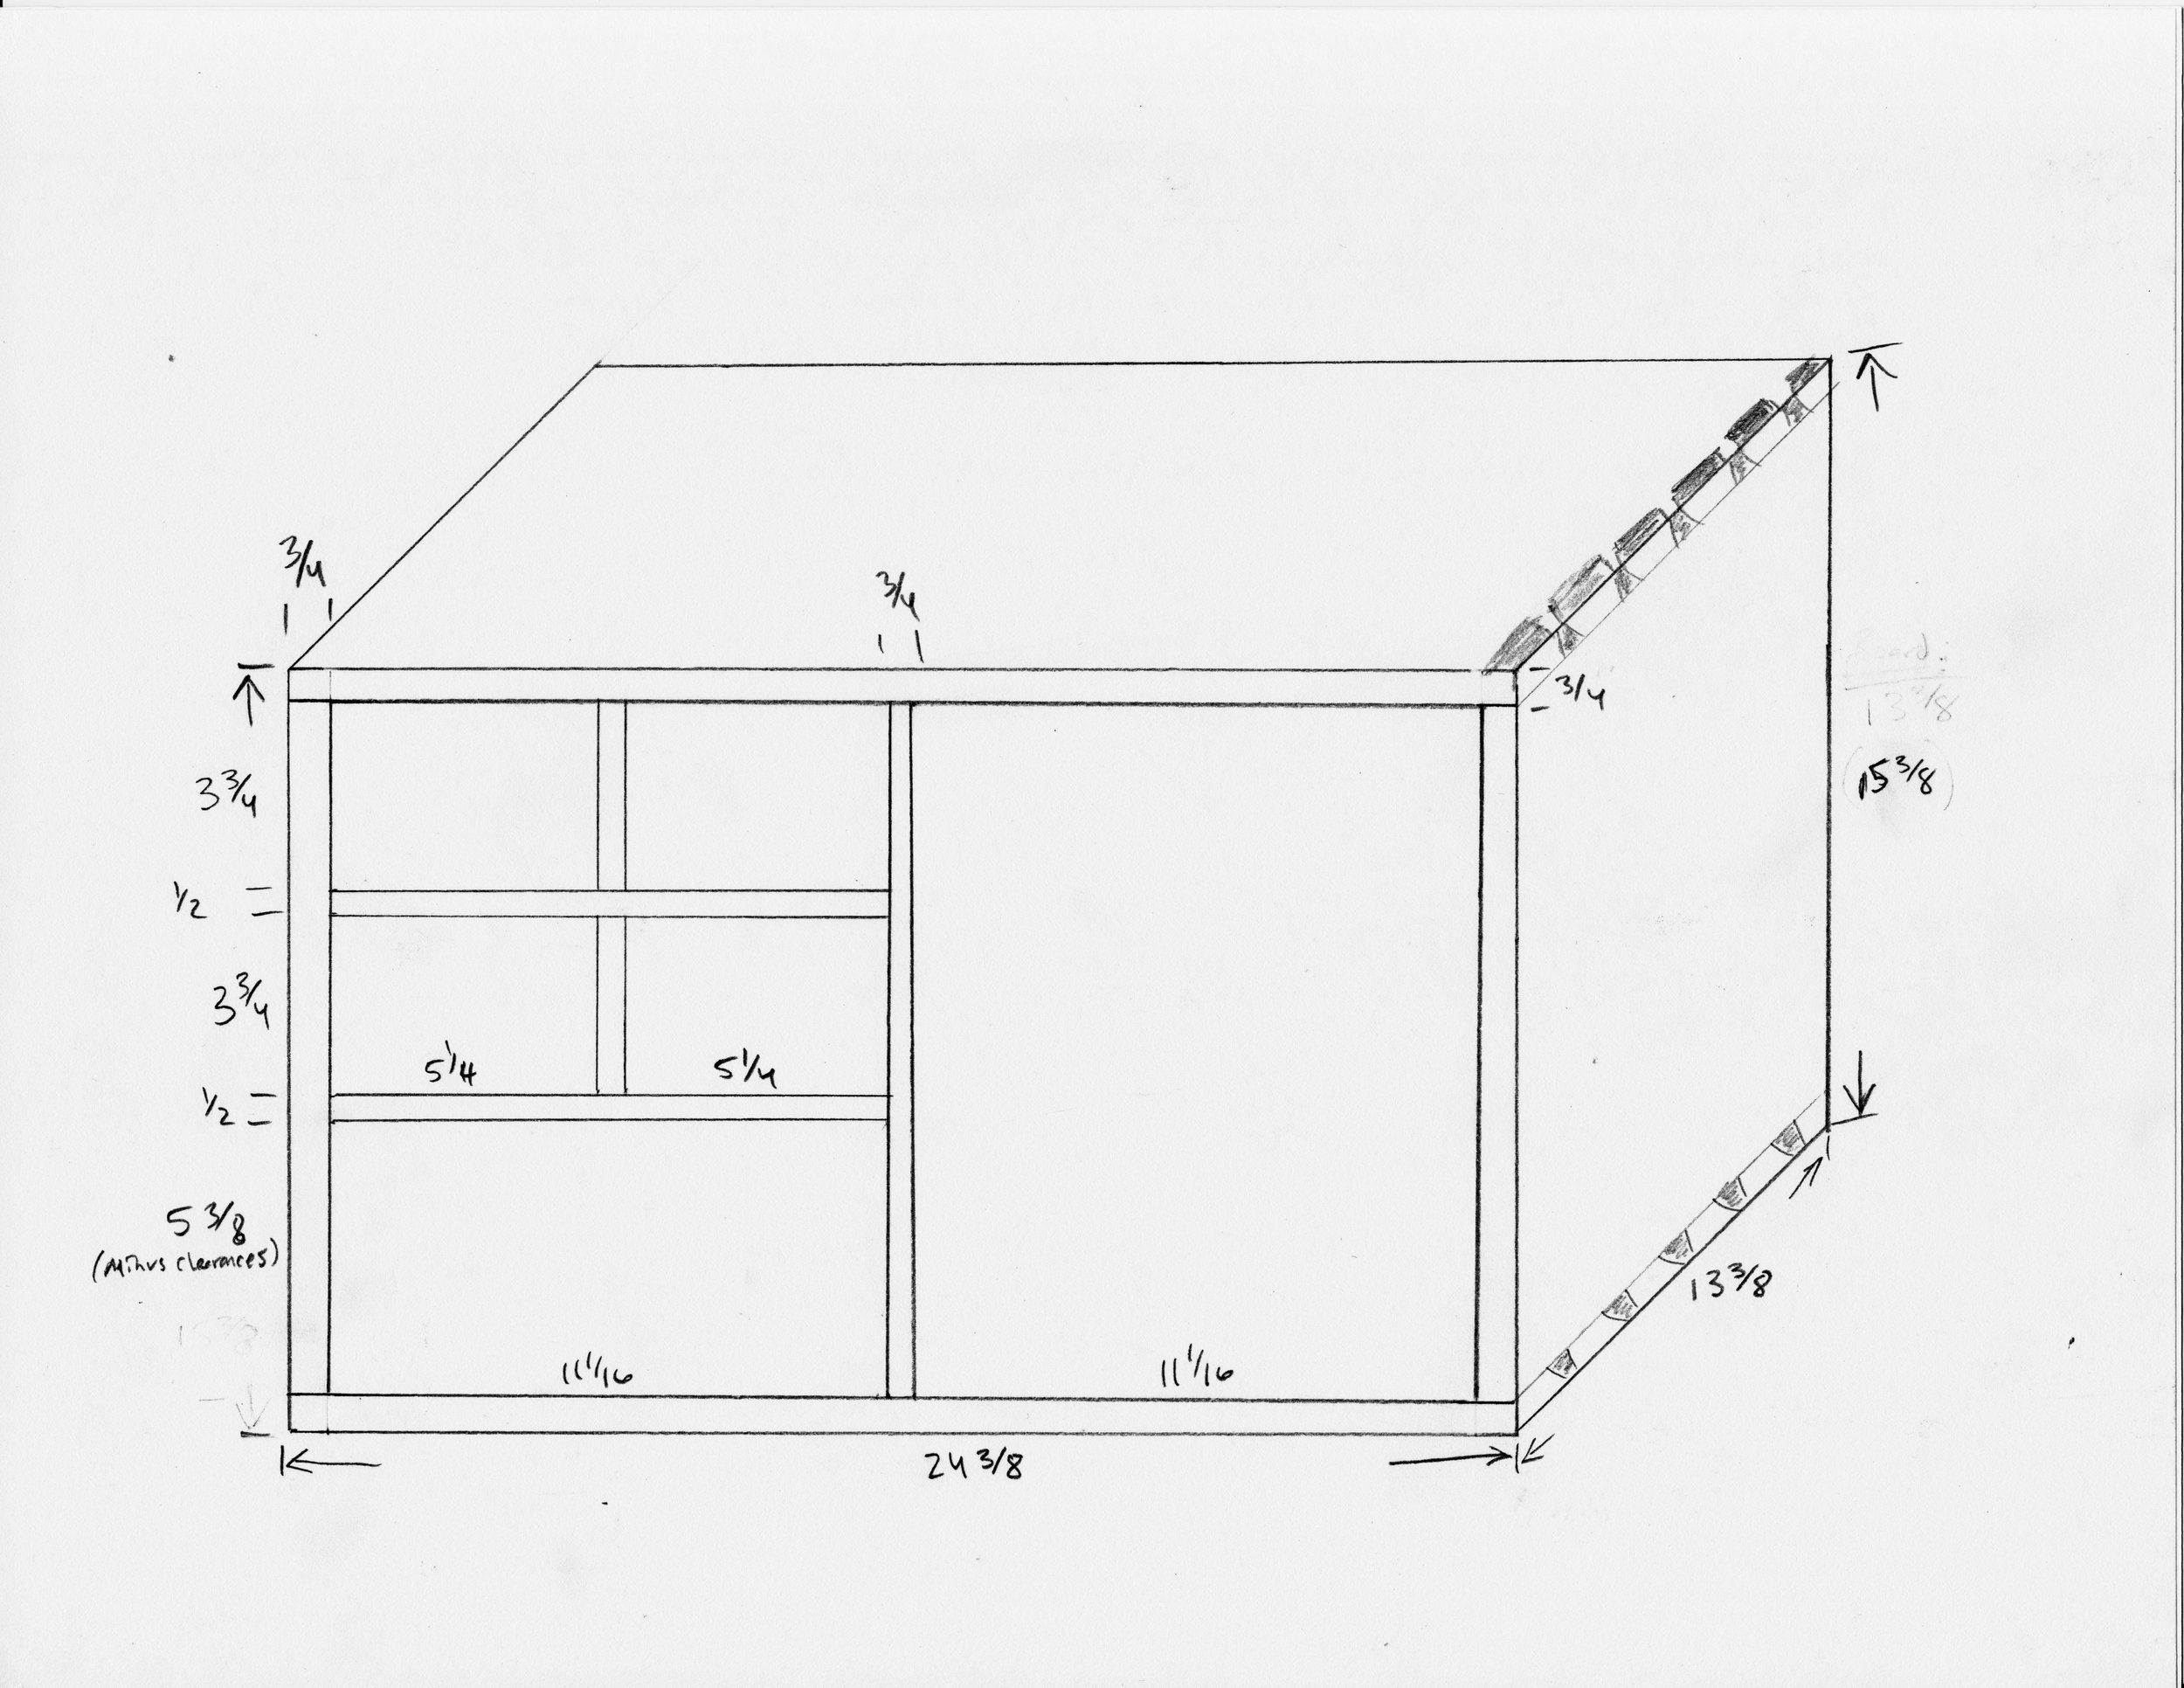
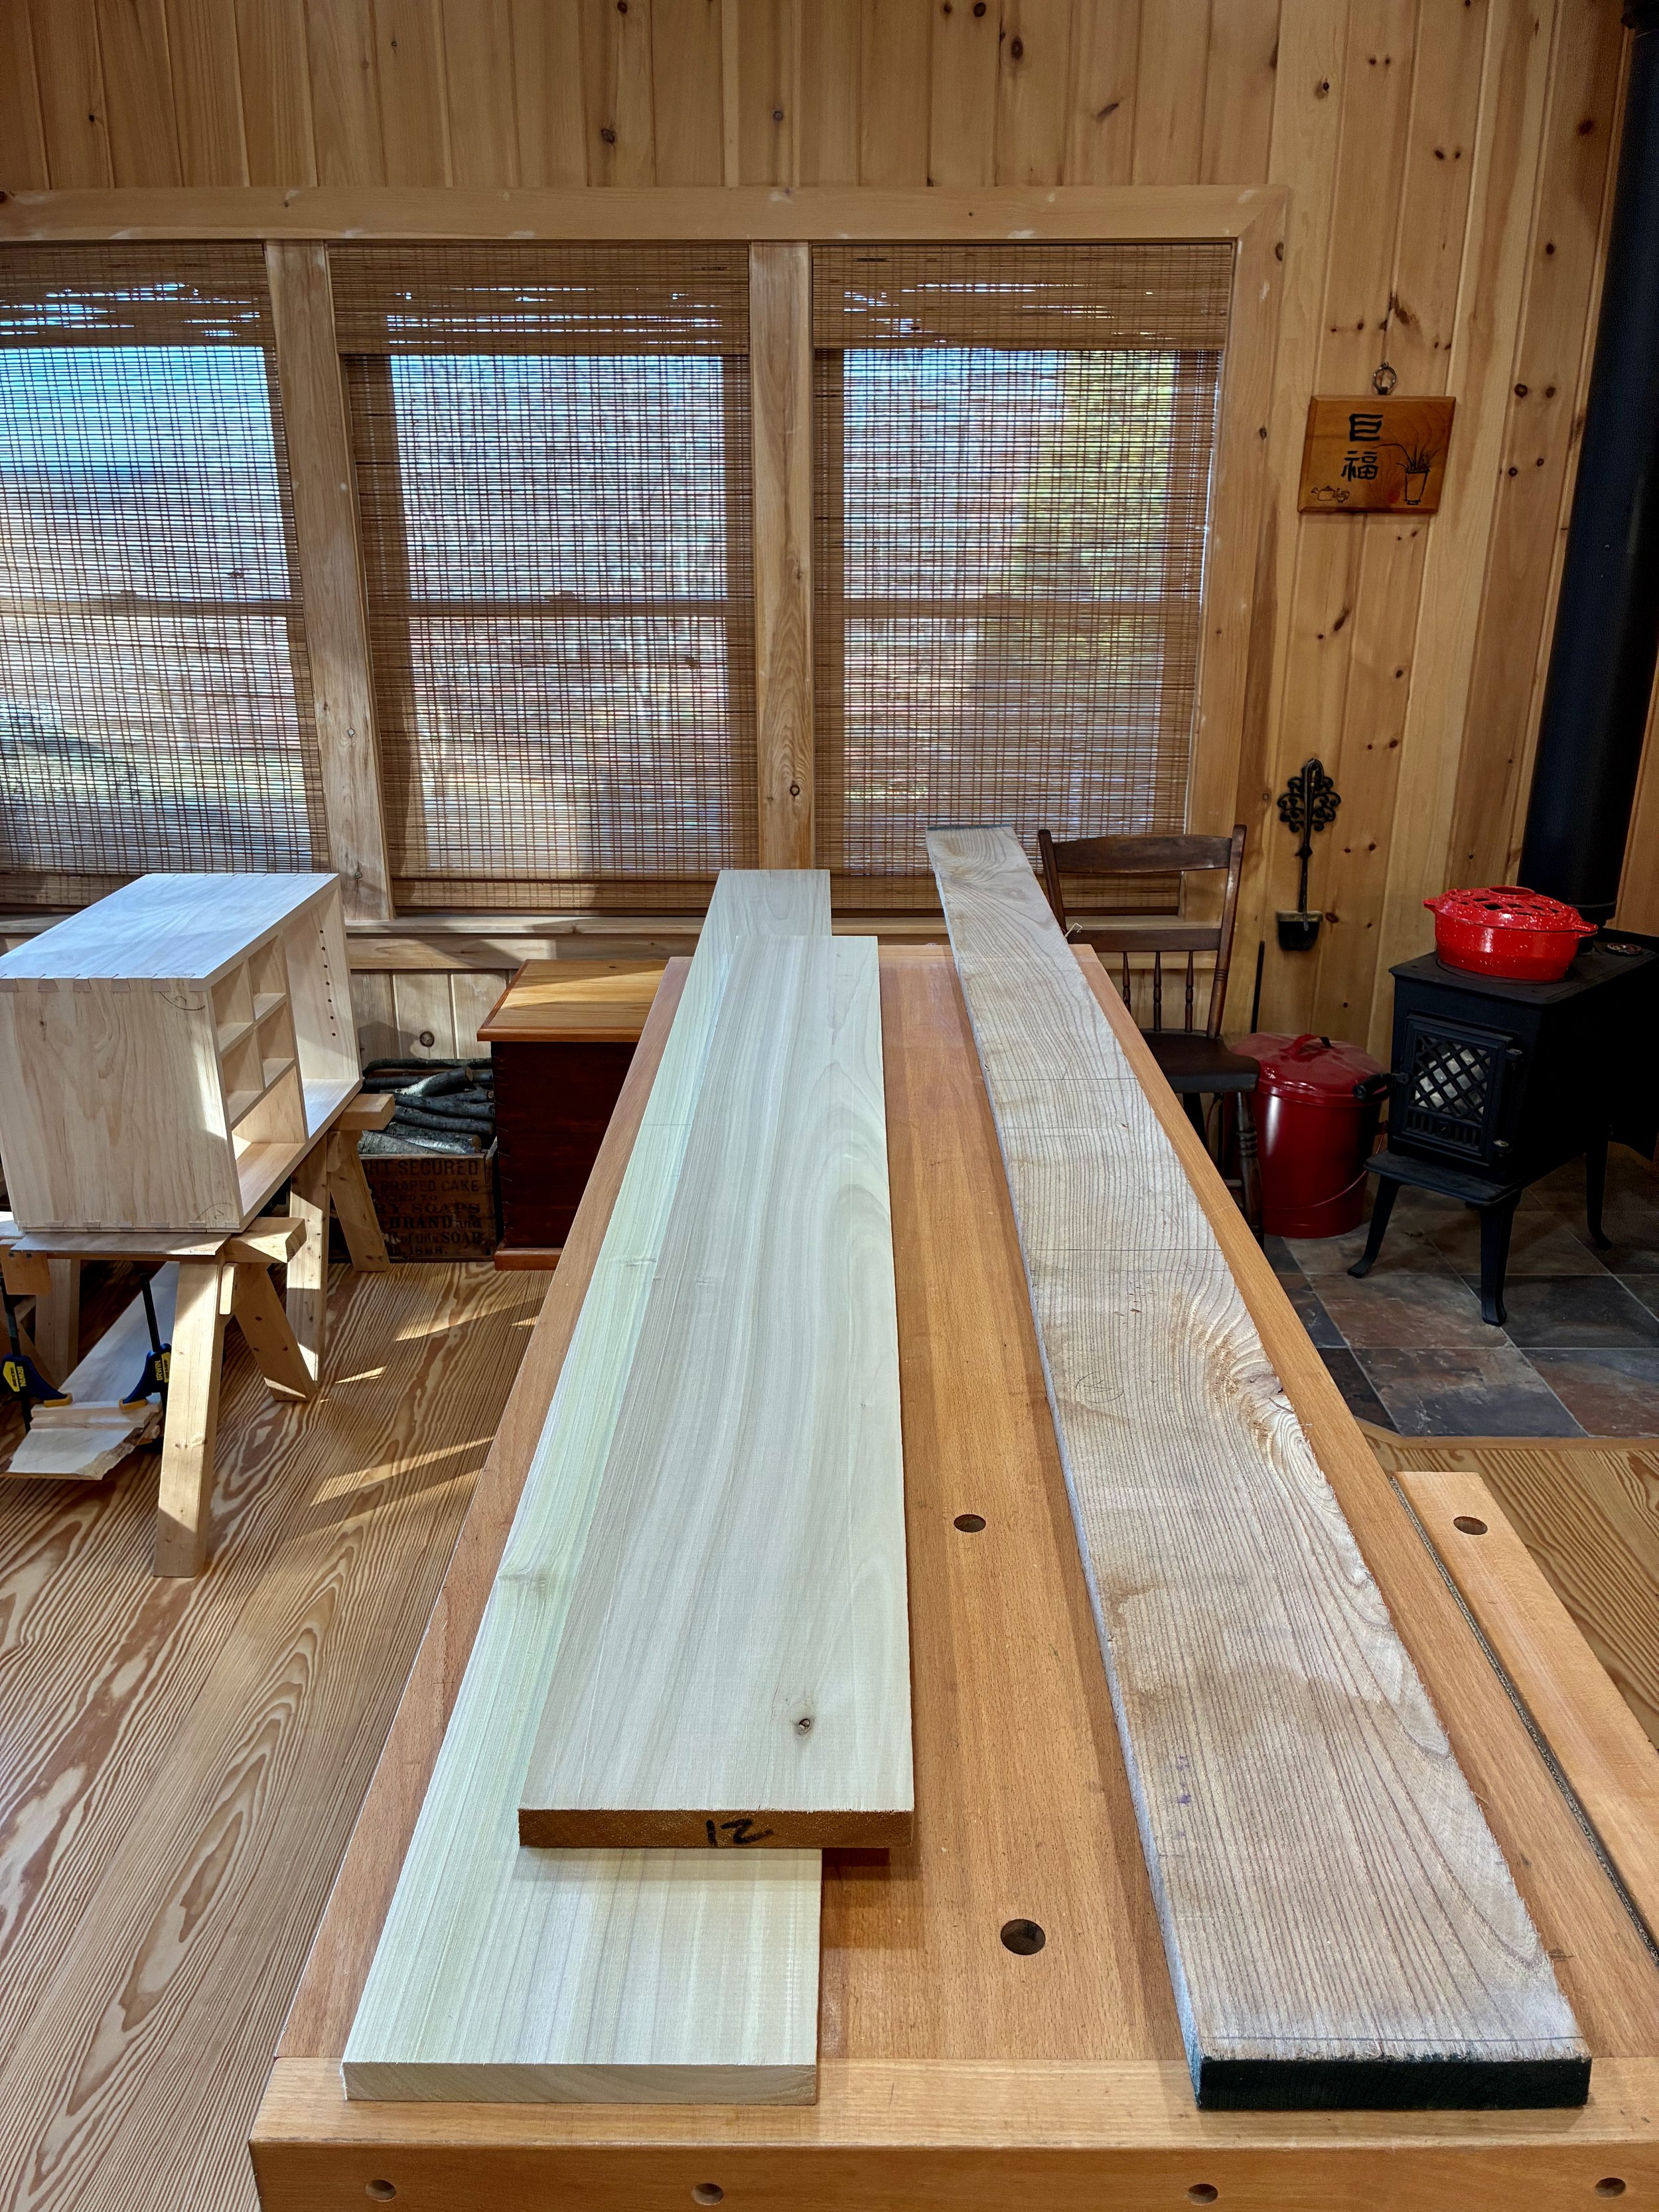
Drawer box
The box would be constructed of a top, bottom and two sides - no front or back. All parts would be 13 3/8 inches in width, a dimension most easily obtained by glueing two ~ 6 3/4 in. boards together. The only issue is that I have a 6 inch bed on my jointer and so, to catch that last 3/4 inch, I would need to use my new thickness planer jig to flatten the stock instead. This is an easy work-around that also serves to keep the jointer blades clean. With resinous woods like pine you learn to take the good with the bad: they are soft as a pancake to work, but all your tools get syruped.
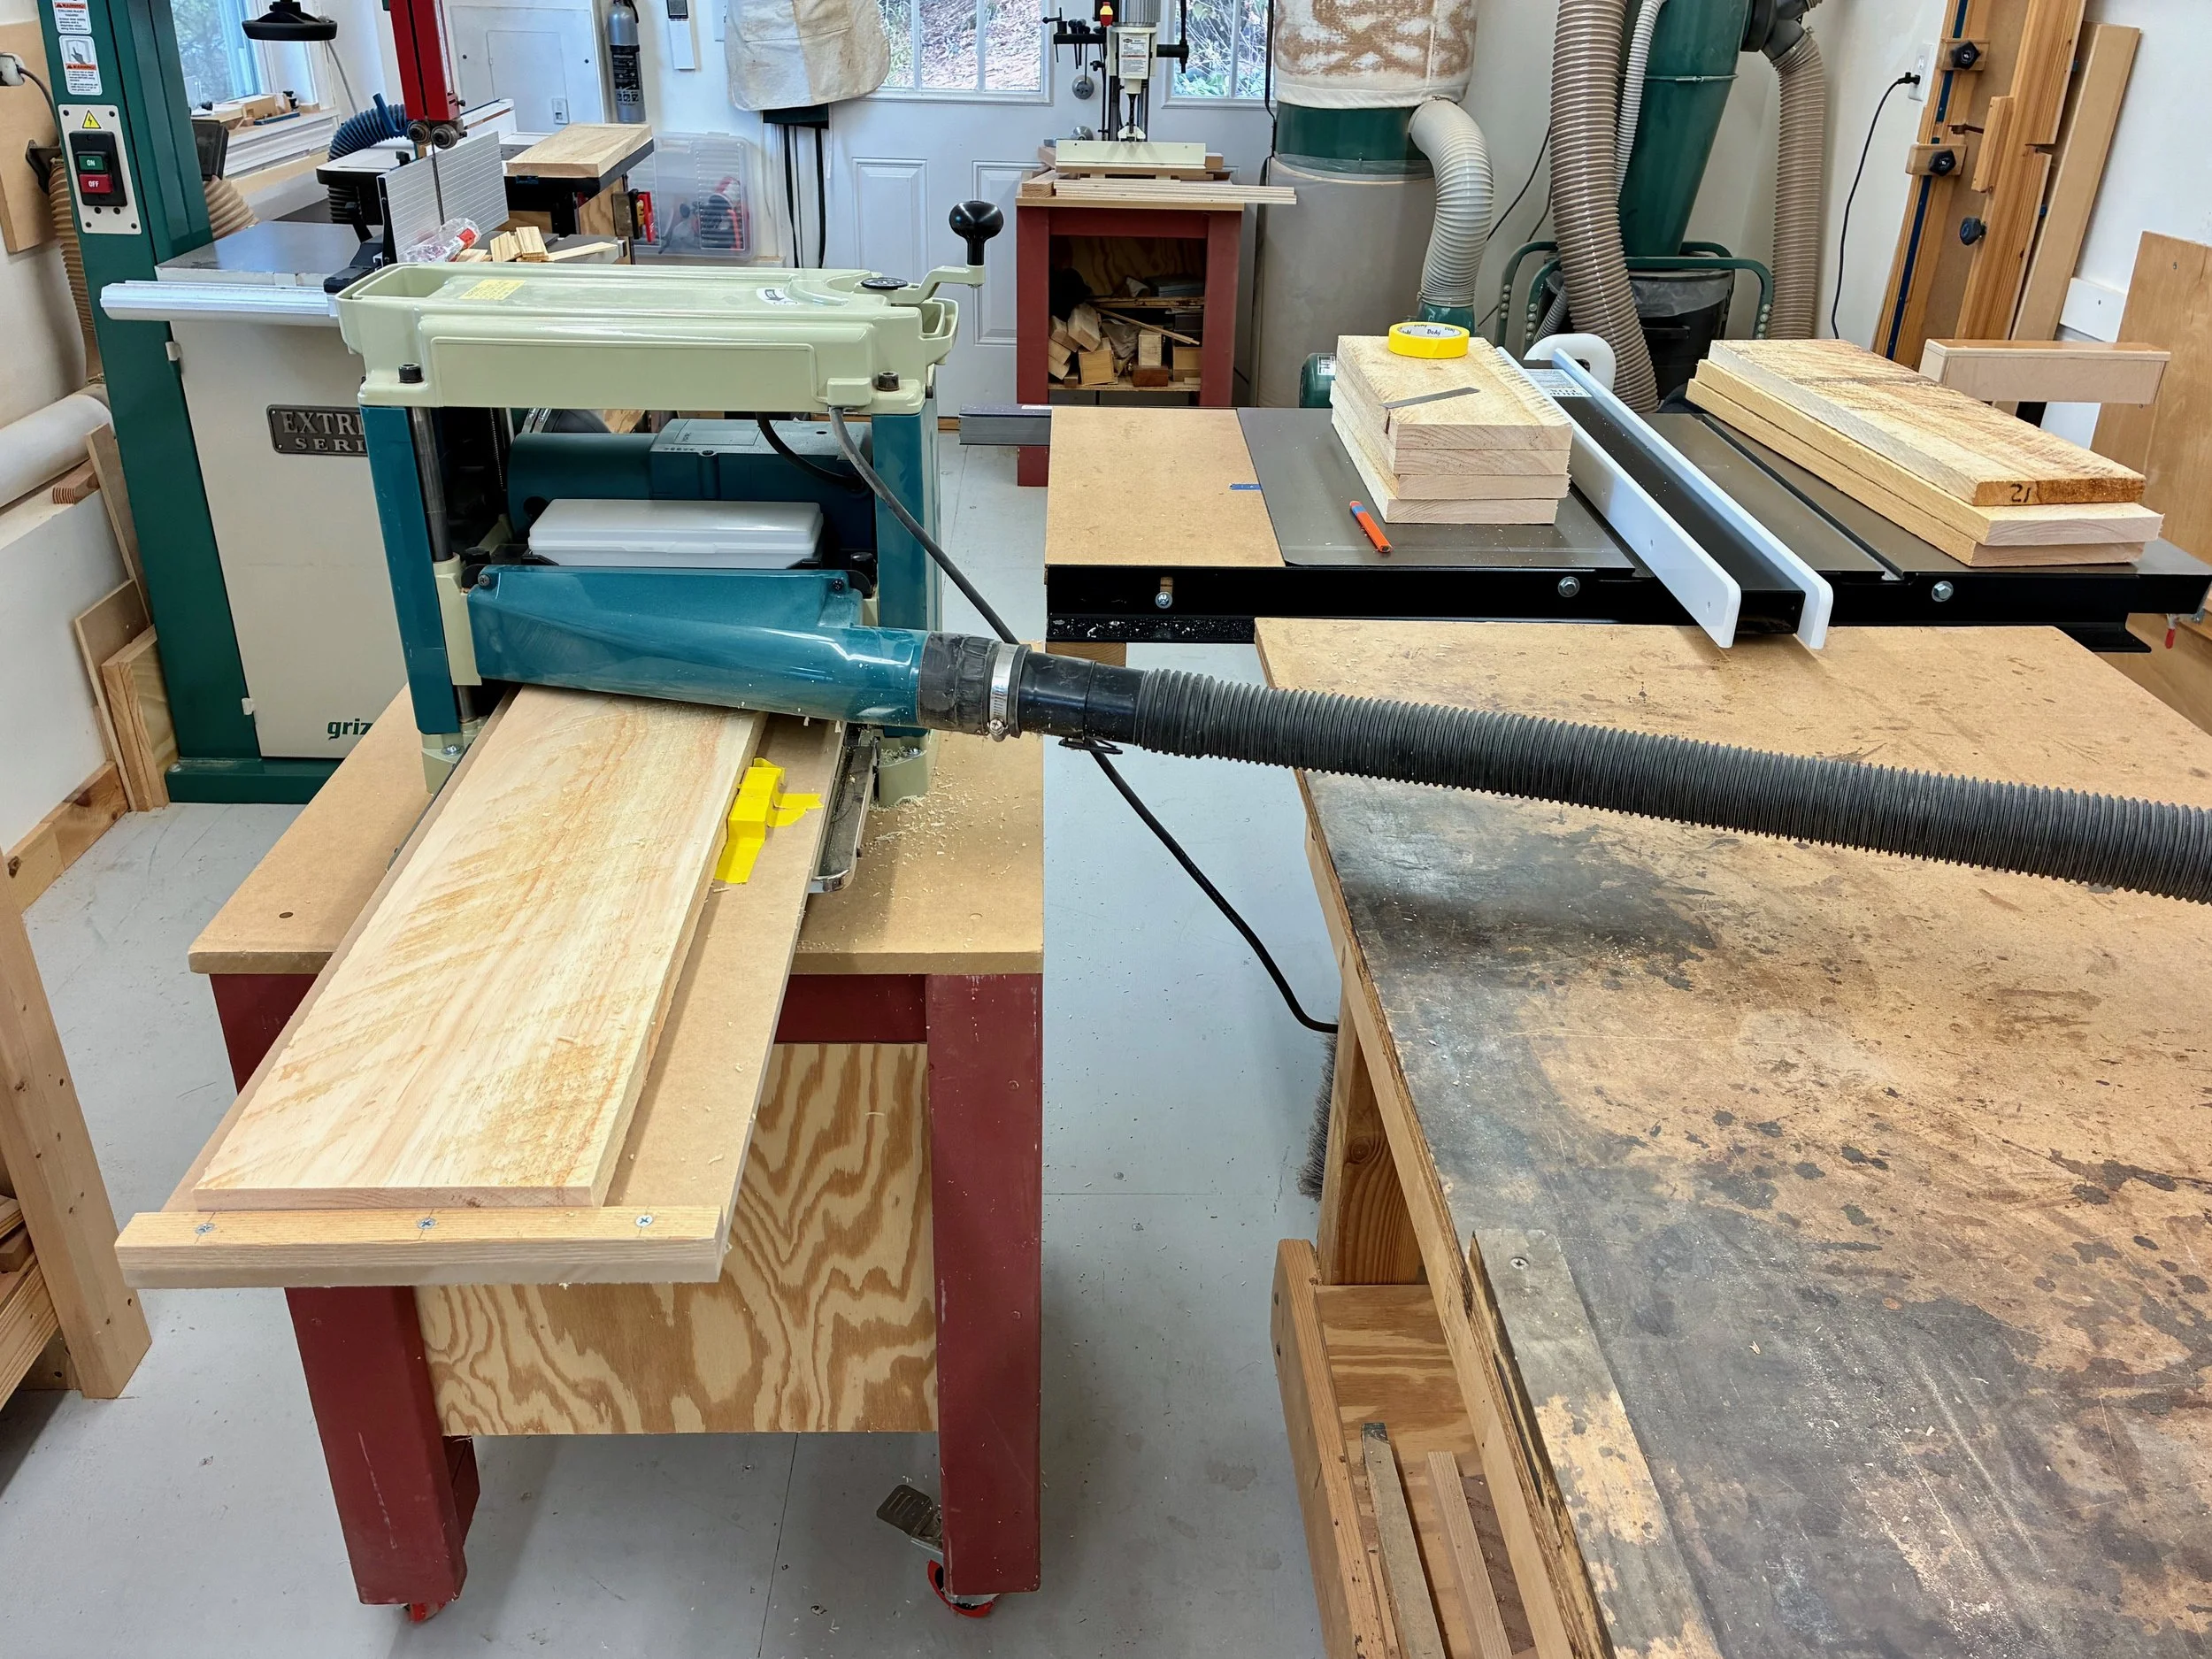
Flattening boards on the thickness planer
After getting the boards milled to a uniform 3/4 in. thickness, one edge was squared-up at the jointer and then the boards were paired and glued together to make the rough box stock. Once sanded smooth, a track saw was used to square up one end of each board, and then the table saw employed to cut each piece to their final width and length.
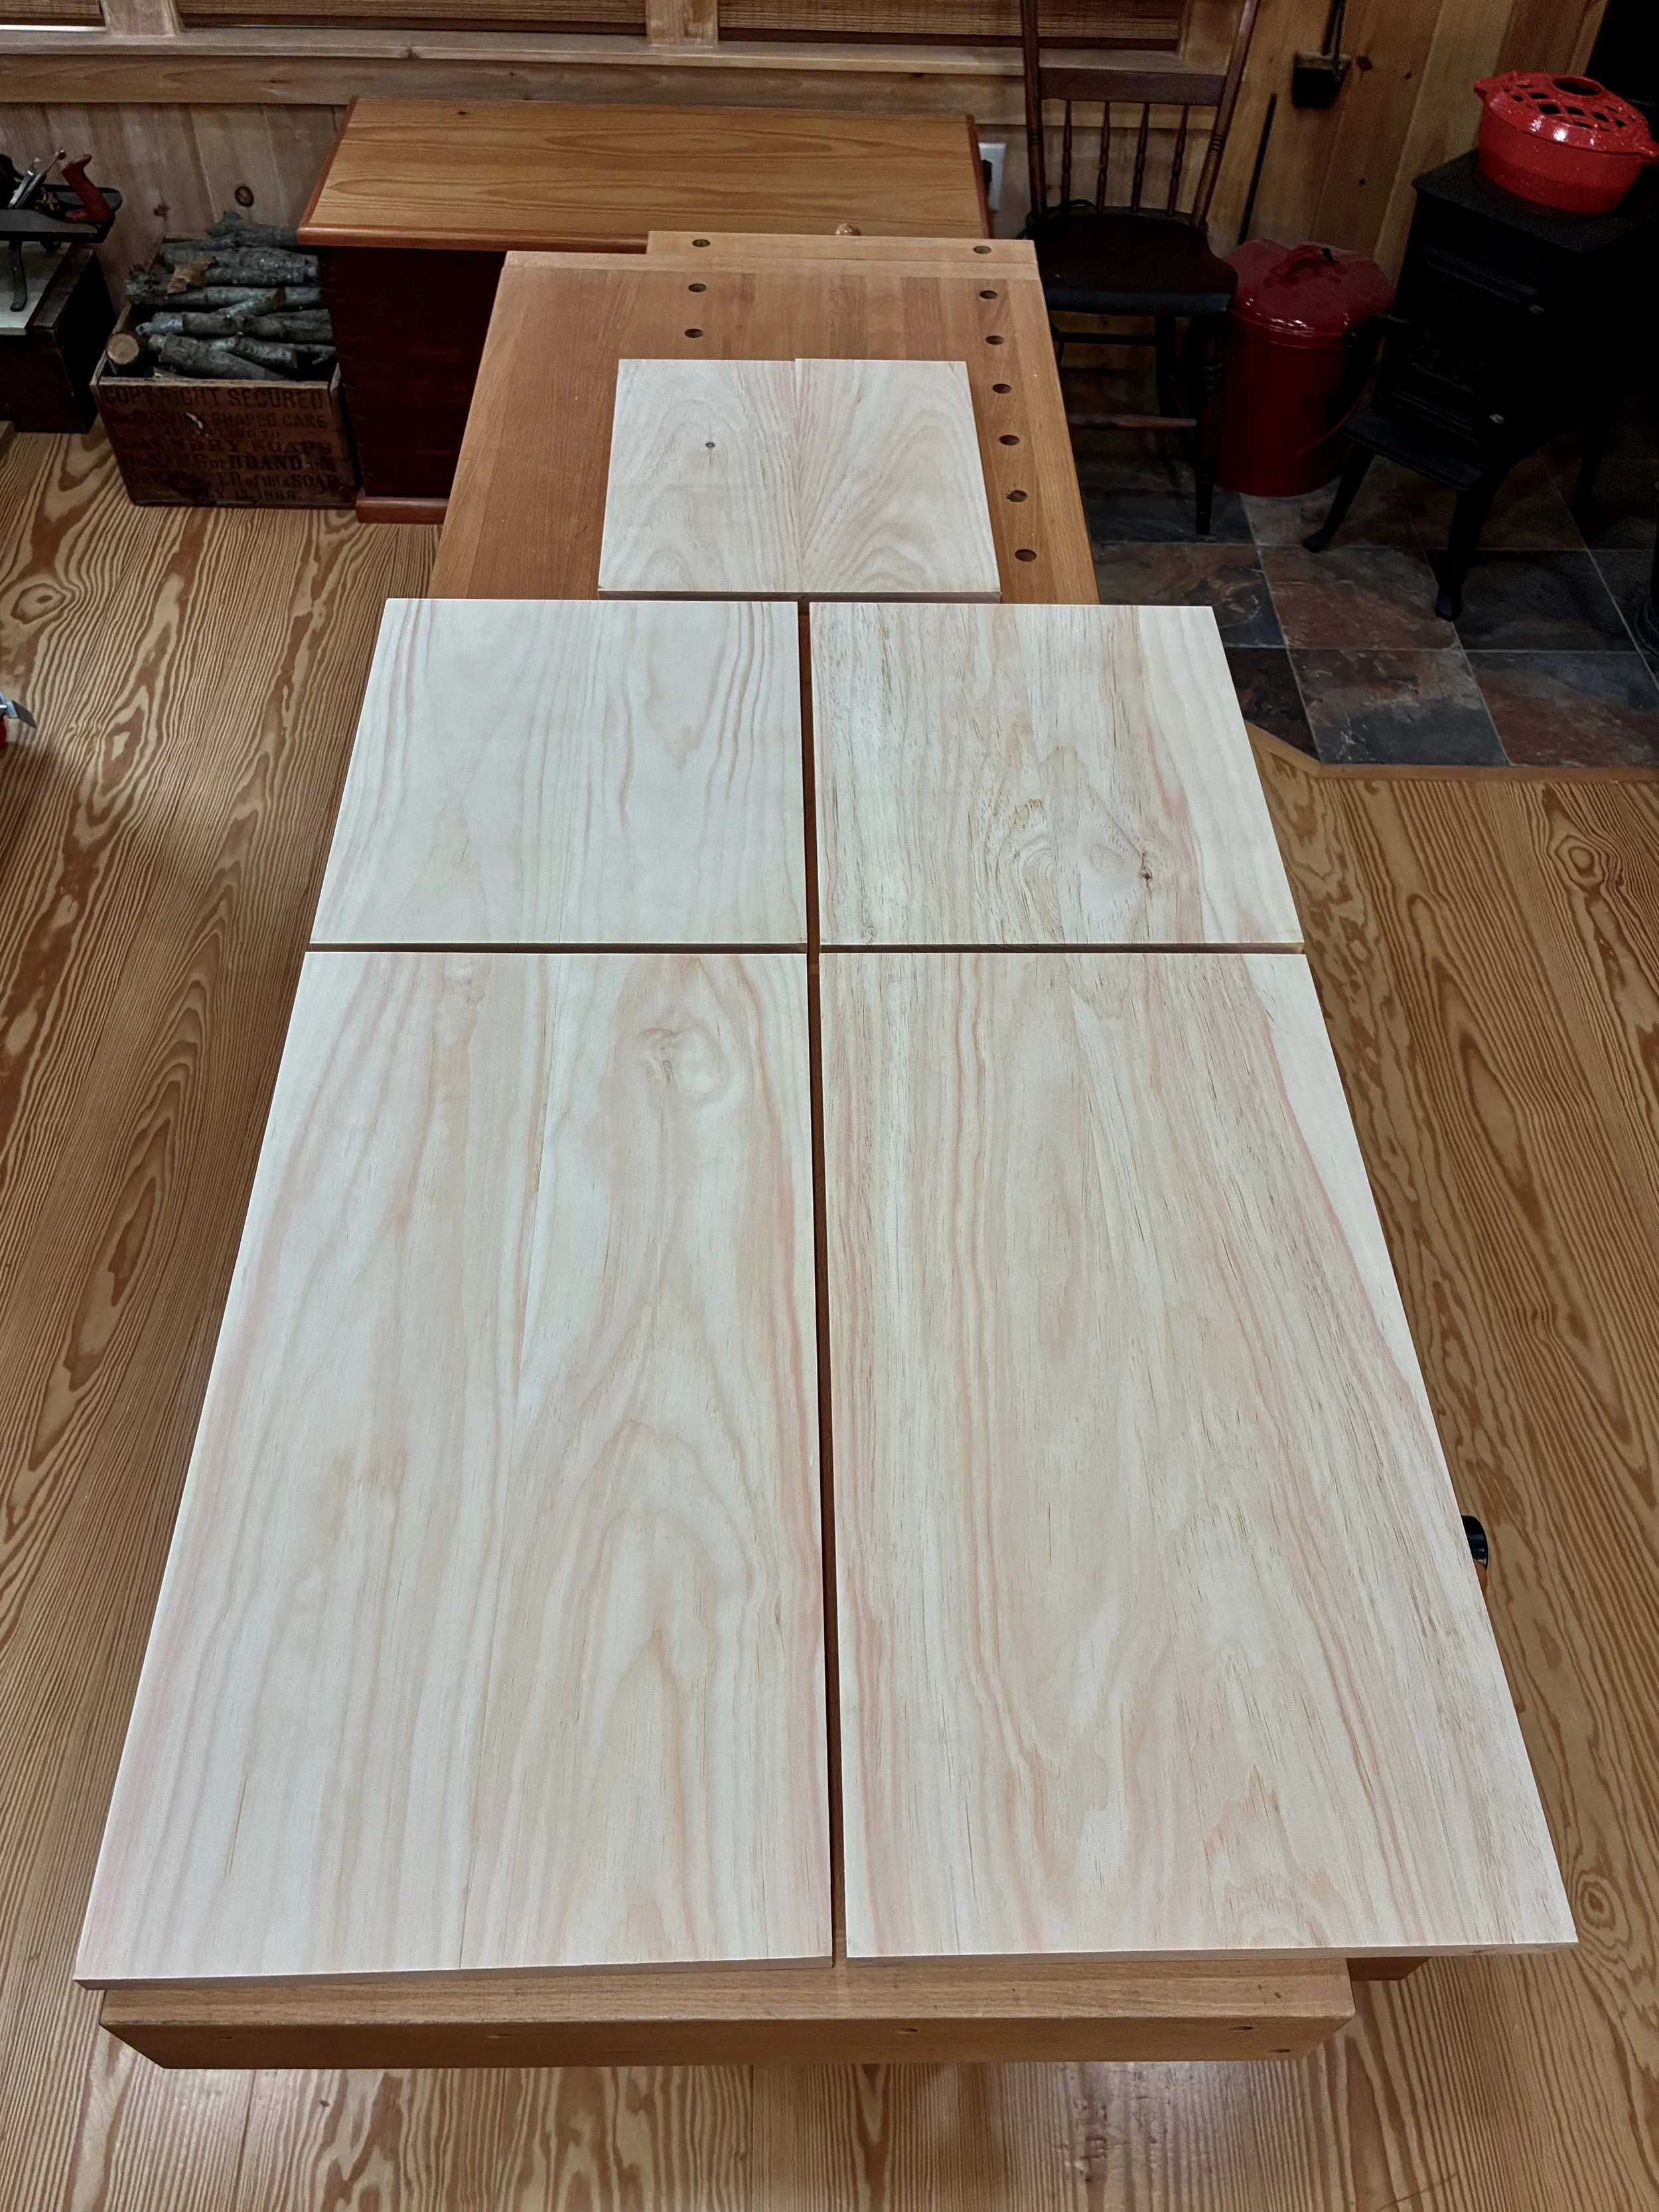
Box stock: 4 sides and a central divider
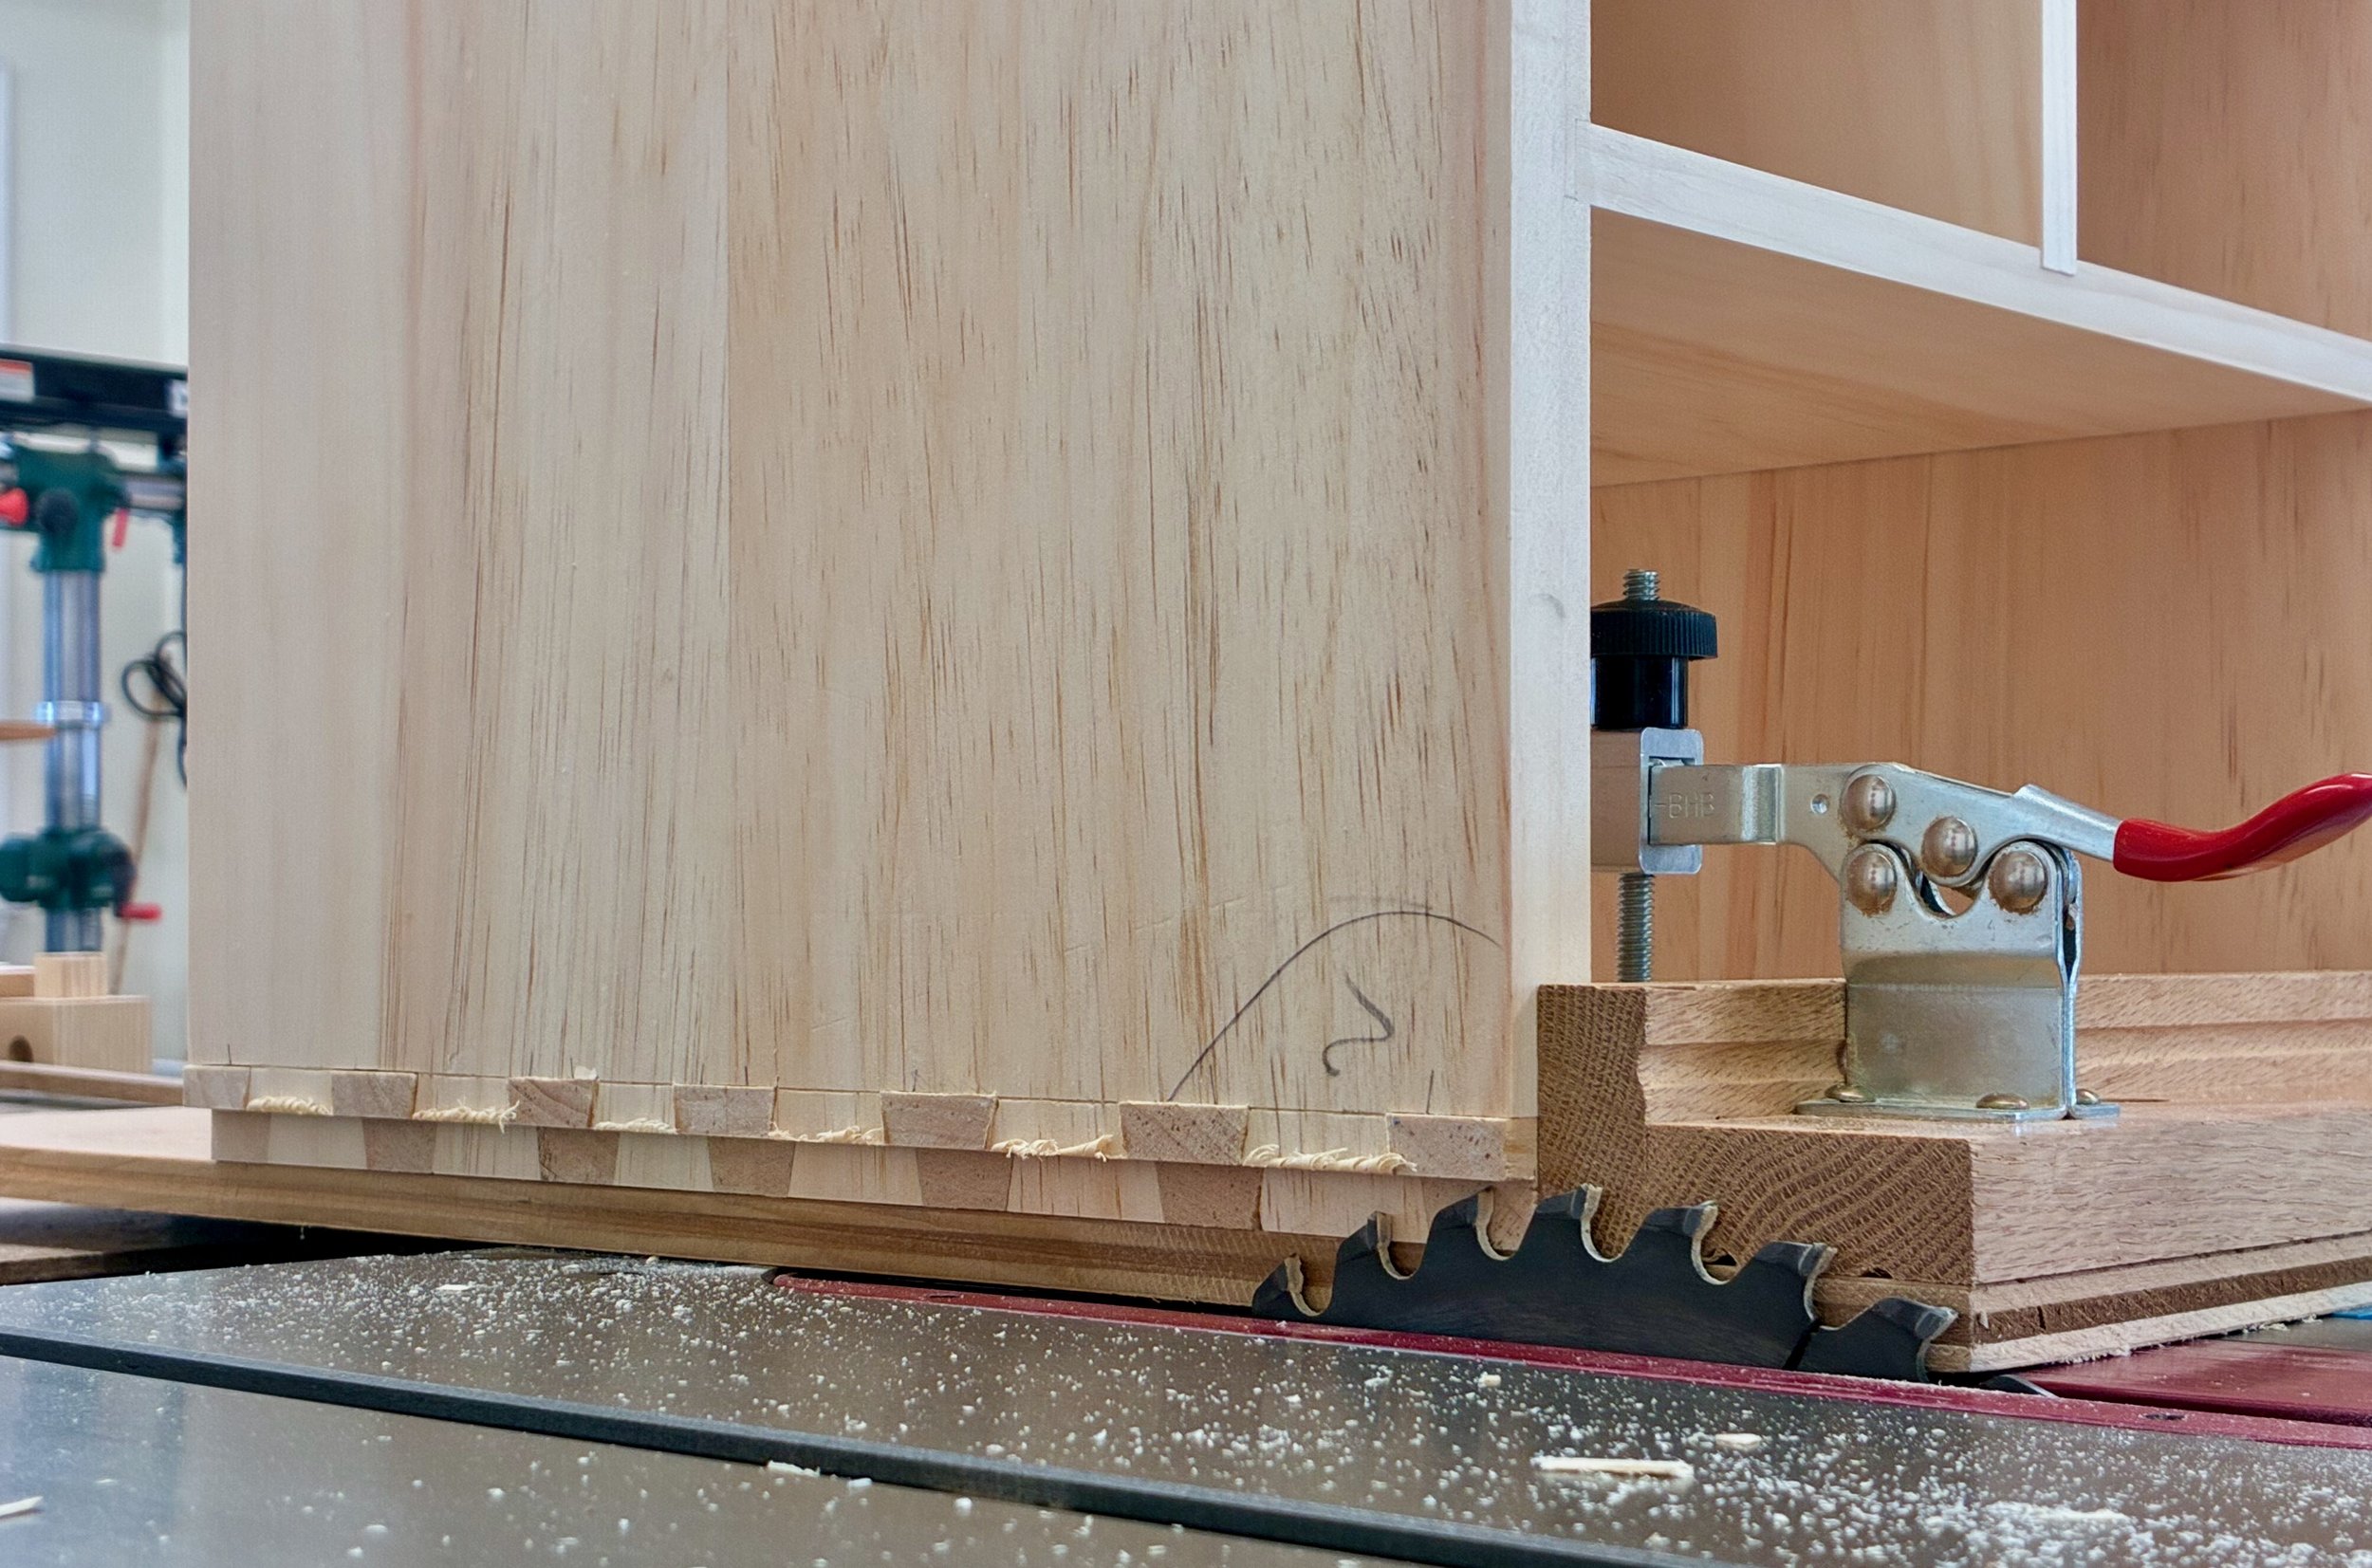
From here the boards were marked, sawn and chiseled in the typical through dovetail sequence. I still consider myself an amateur with this joint, but every bout makes me a better competitor. These turned out pretty nice (in spots). Pity they will be out of sight in the finished piece.
Dry-fit box
Box completed, I was now able to mark in pencil the position of the dadoed slots that will house the drawer dividers. These were cut at the table saw and then pine partitions were fashioned to fit within the grooves. Some of the partitions, themselves, required dadoes so this was an iterative affair: mark/cut/fit/repeat. Finally, a series of holes were drilled in a couple of the boards to hold the shelf support pegs. During glue-up, the divided box came together without issue.
Glueing-up the box
As designed, the box was still 1/2 inch too wide to fit within the case. You see, I made that box from 3/4 in. boards but, to match the drawer divider widths, I wanted only a 1/2 in. reveal around the edges once situated within the case. Also, tucking the box behind the case framework in this manner assures that no gaps would be seen. To achieve a fit, I therefore had to cut a rabbet along the bottom sides and around the entire back of the box. This was accomplished at the table saw.
Rabbeting the box bottom at the table saw using a zero-clearance sled.
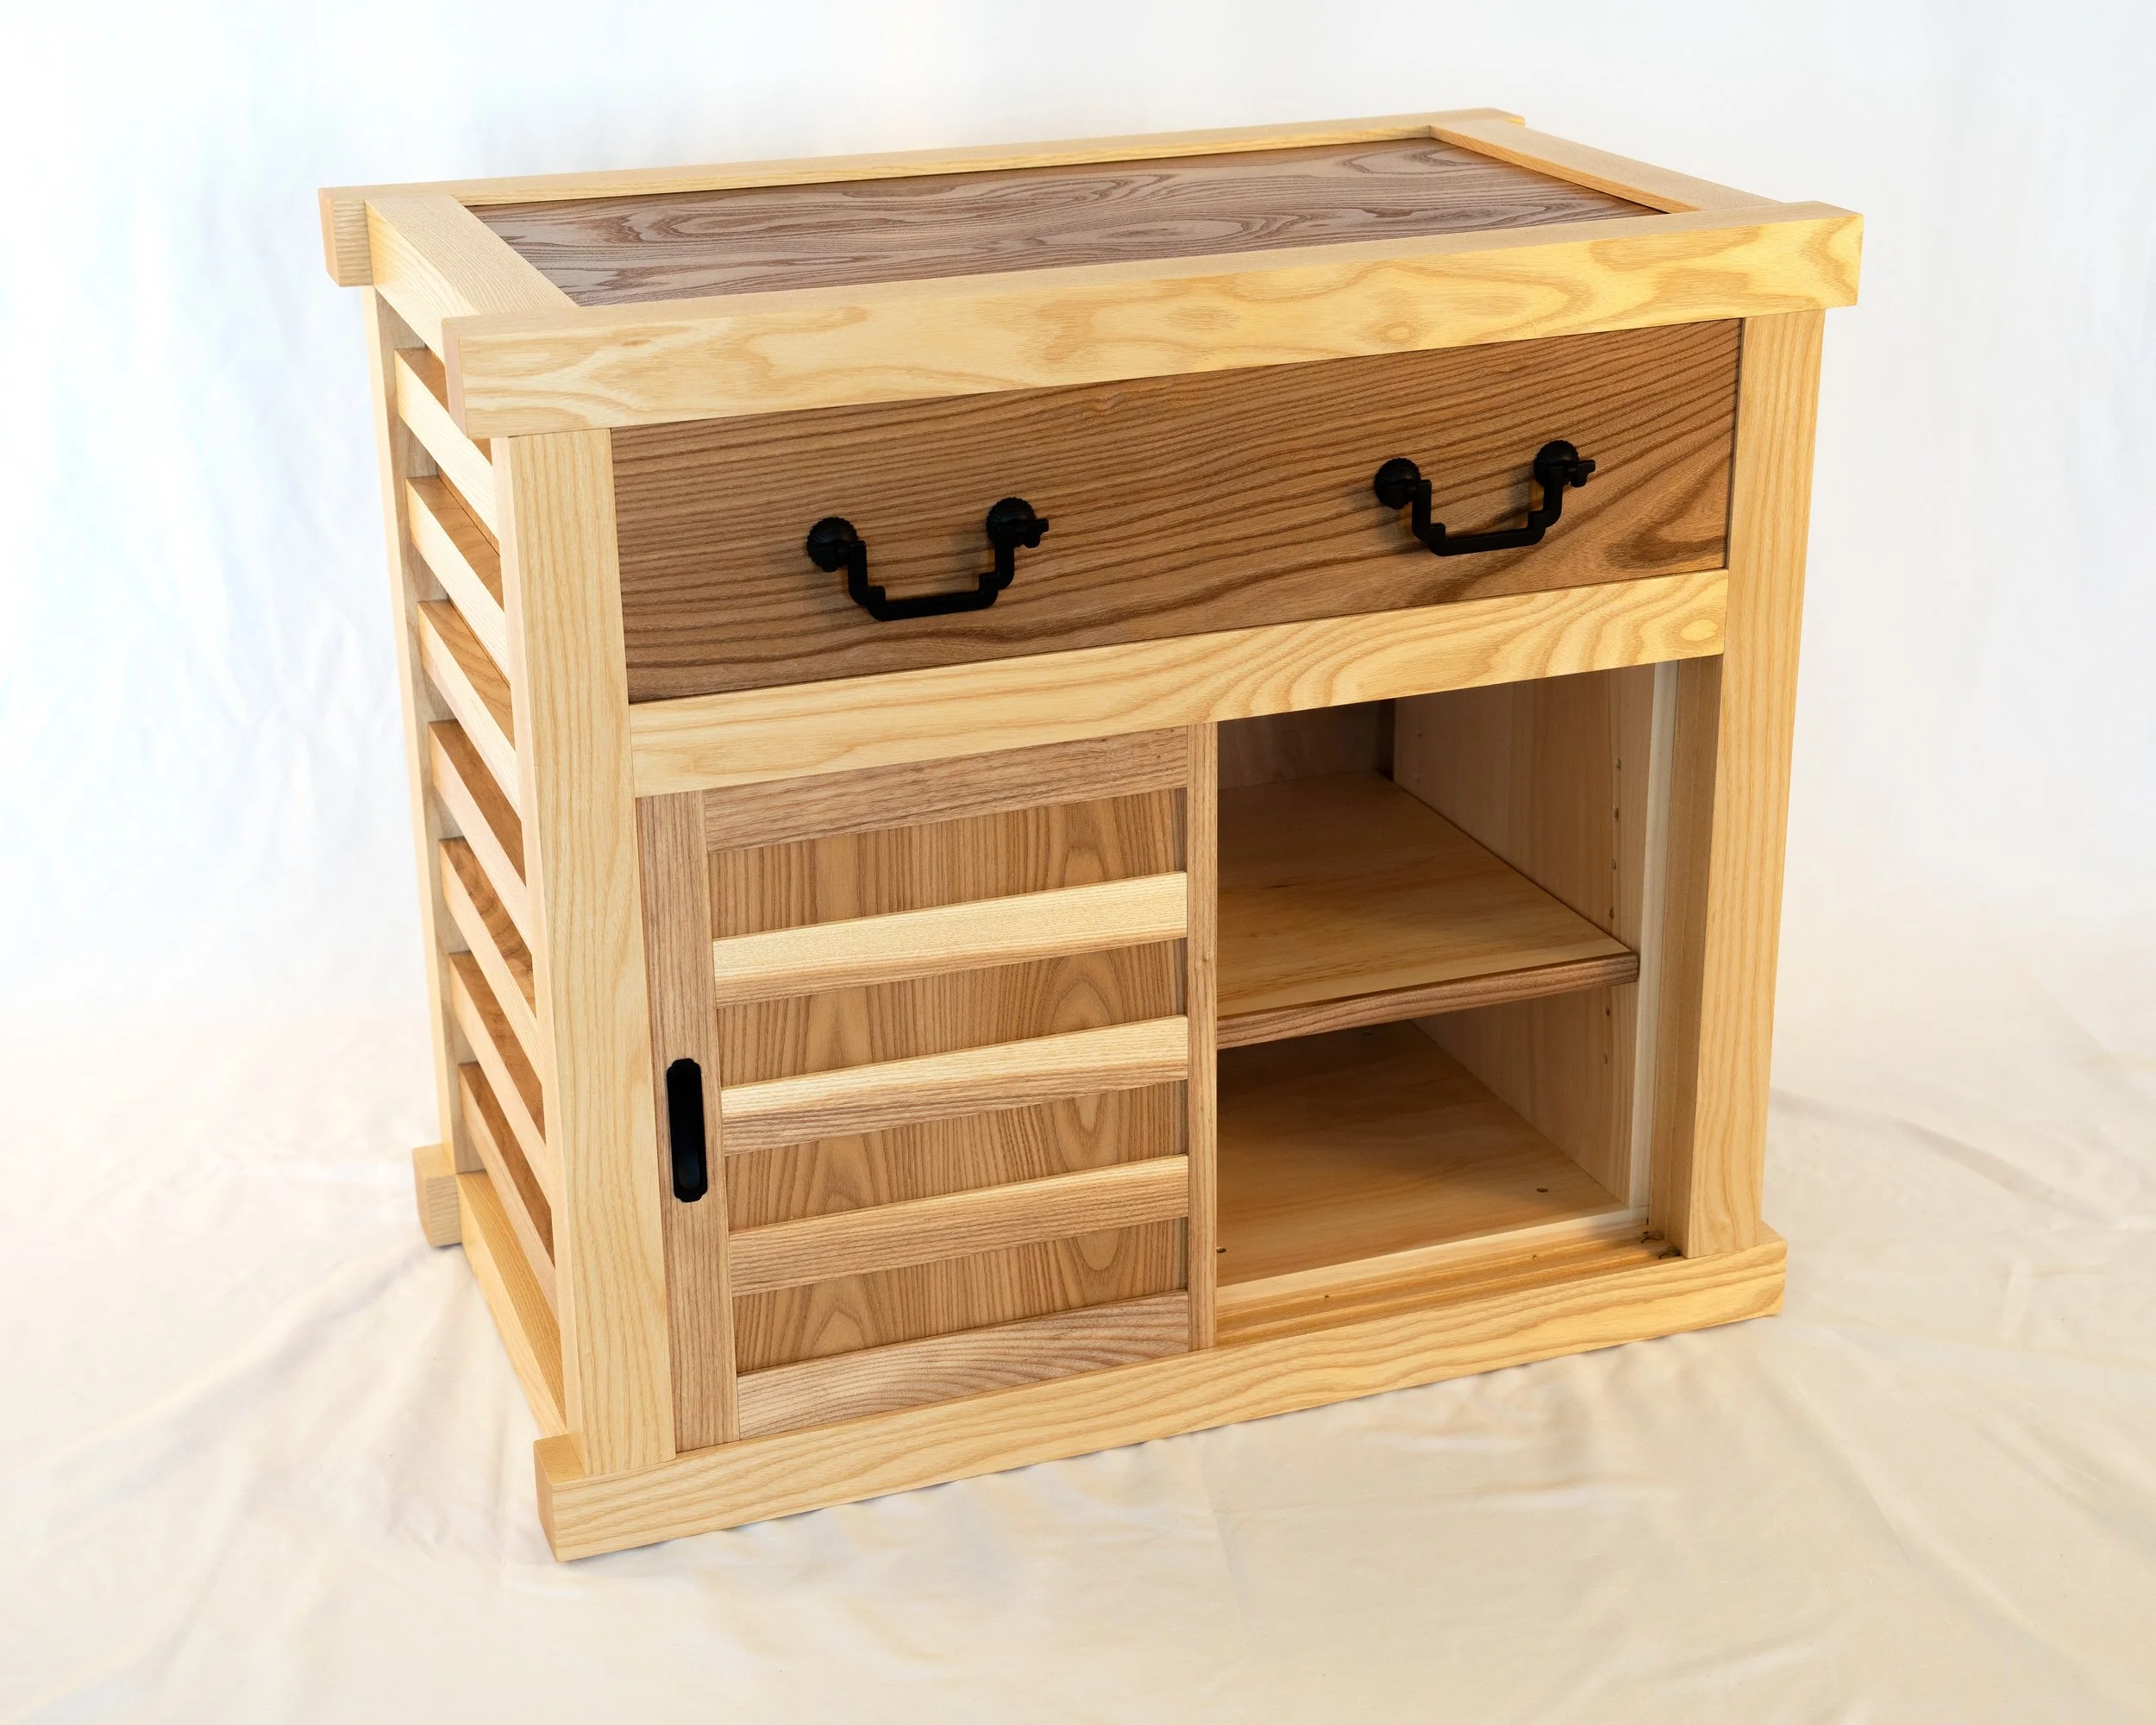
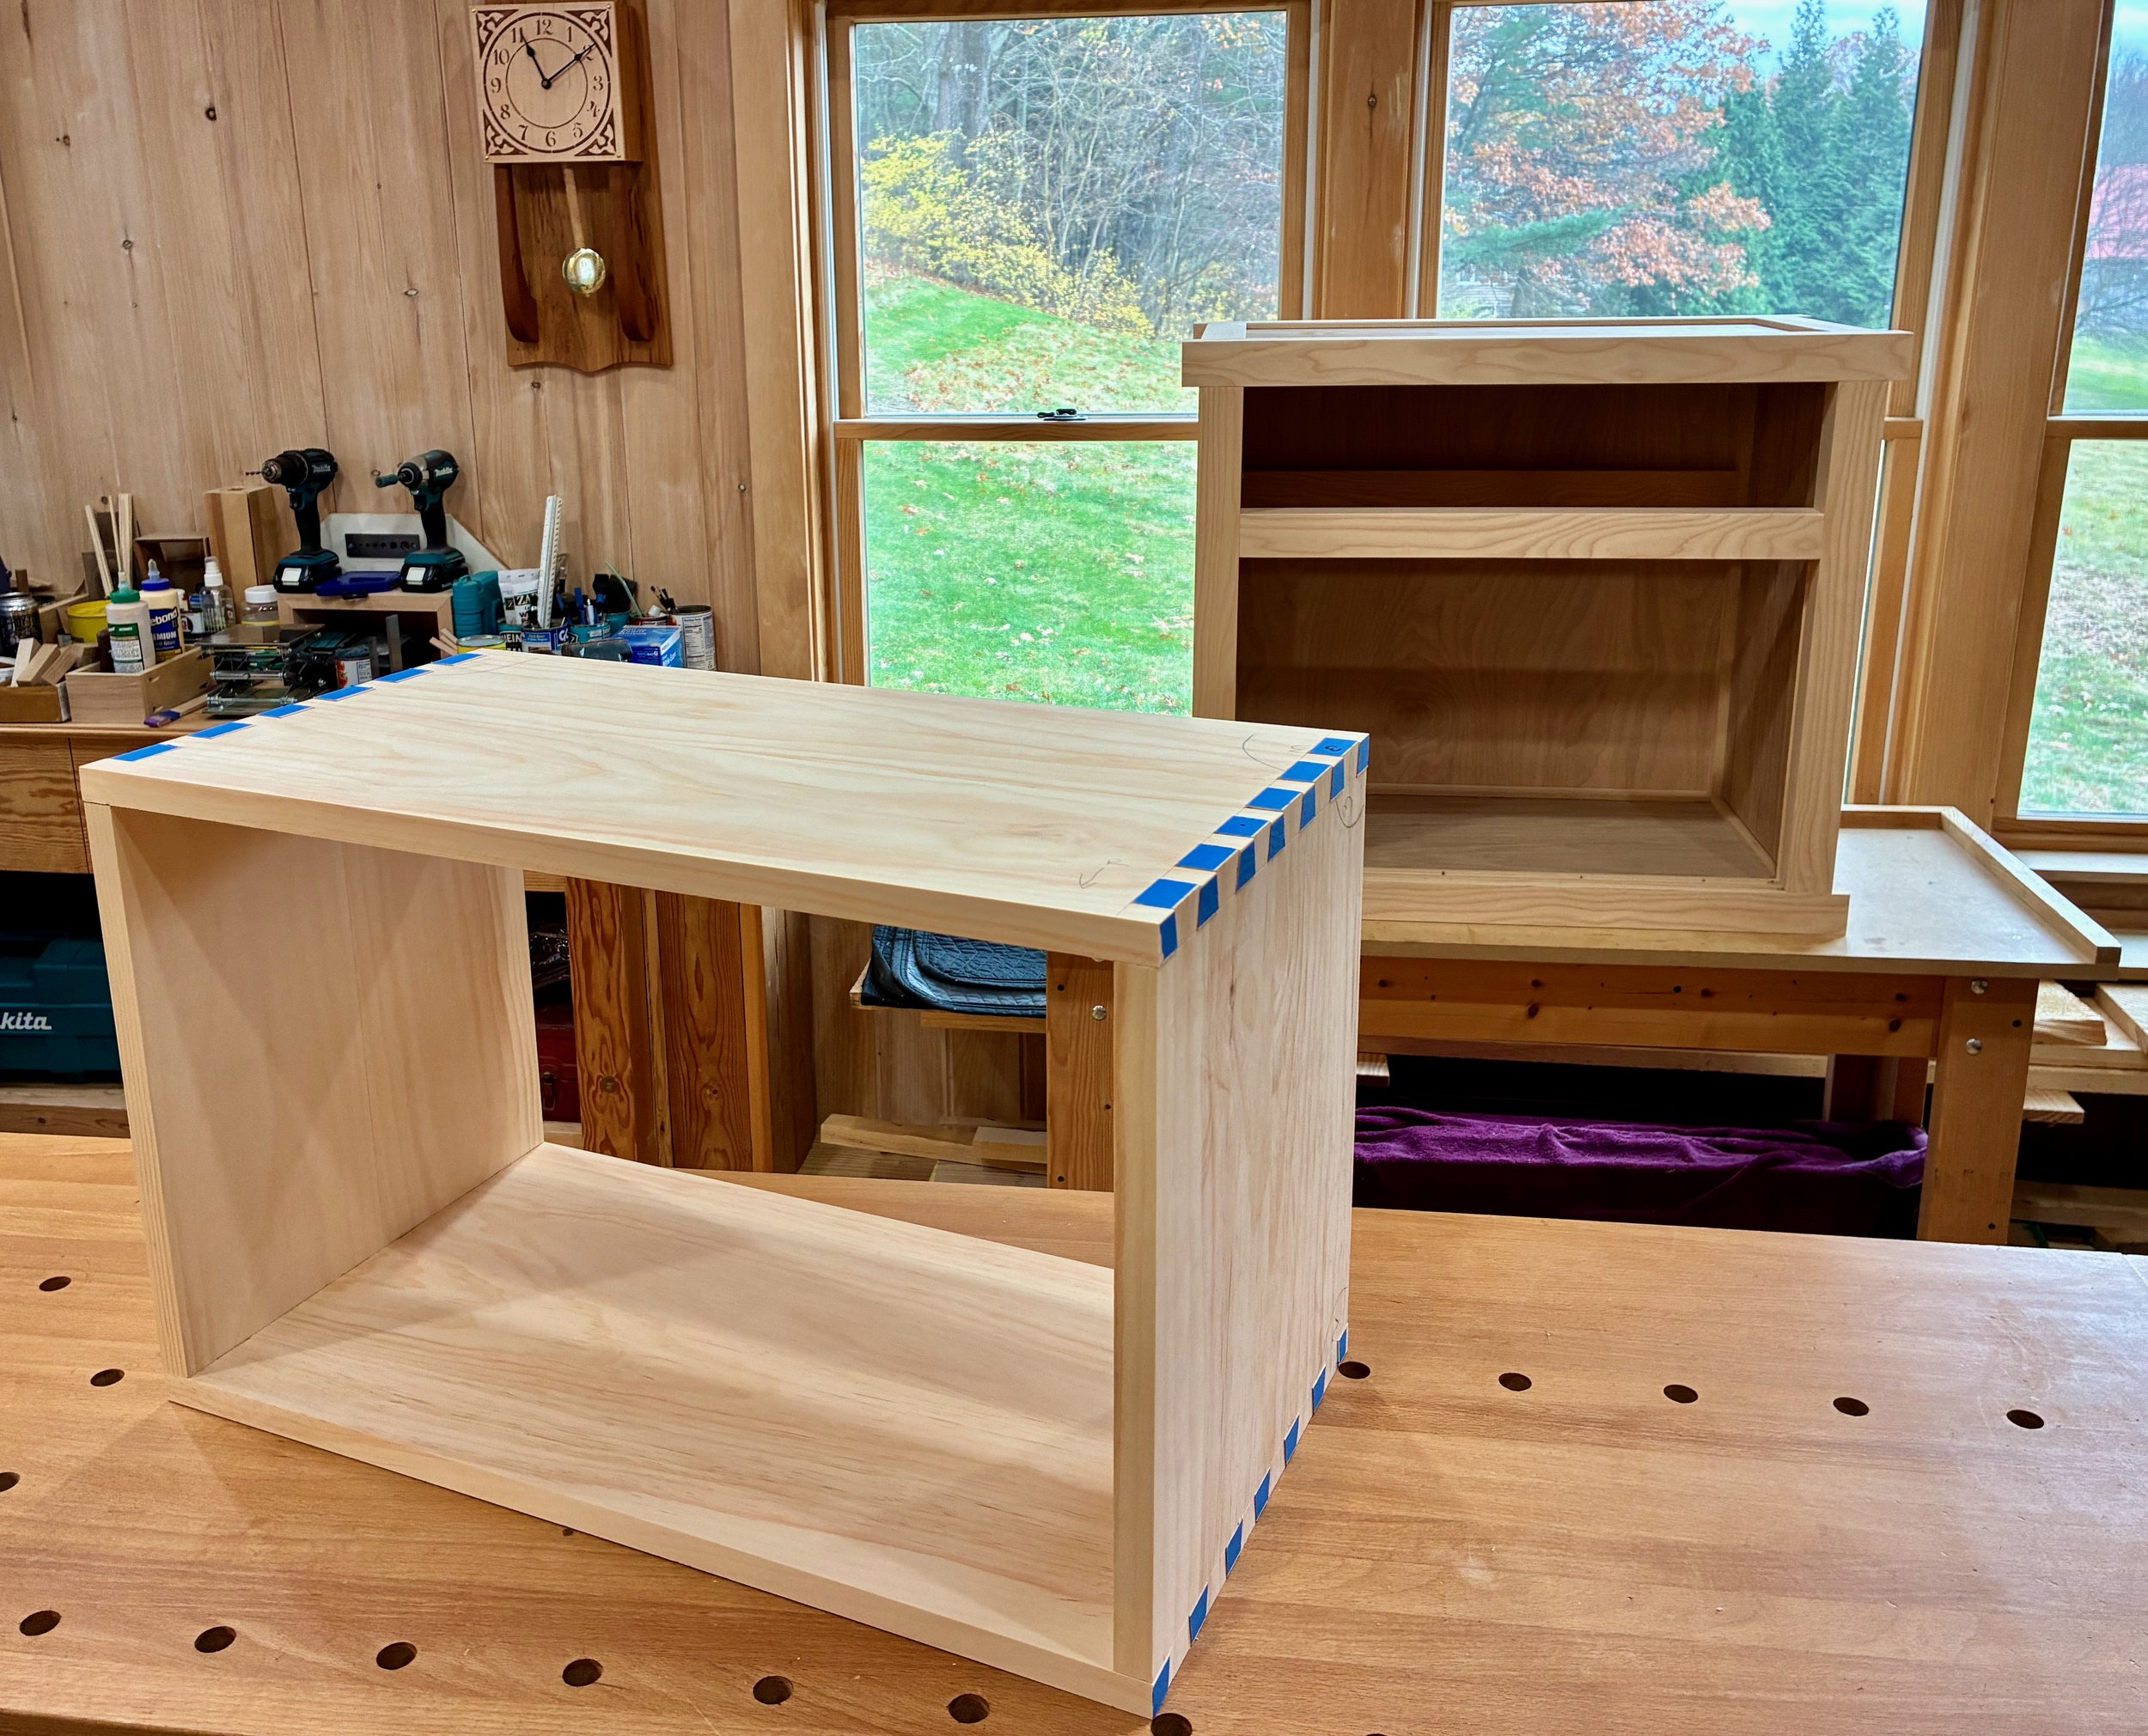
Once all of these modifications were complete, the box fit snug within the dry-fit case. Now, to fill up those cavities with drawers.

Box in a box
Interior Drawers
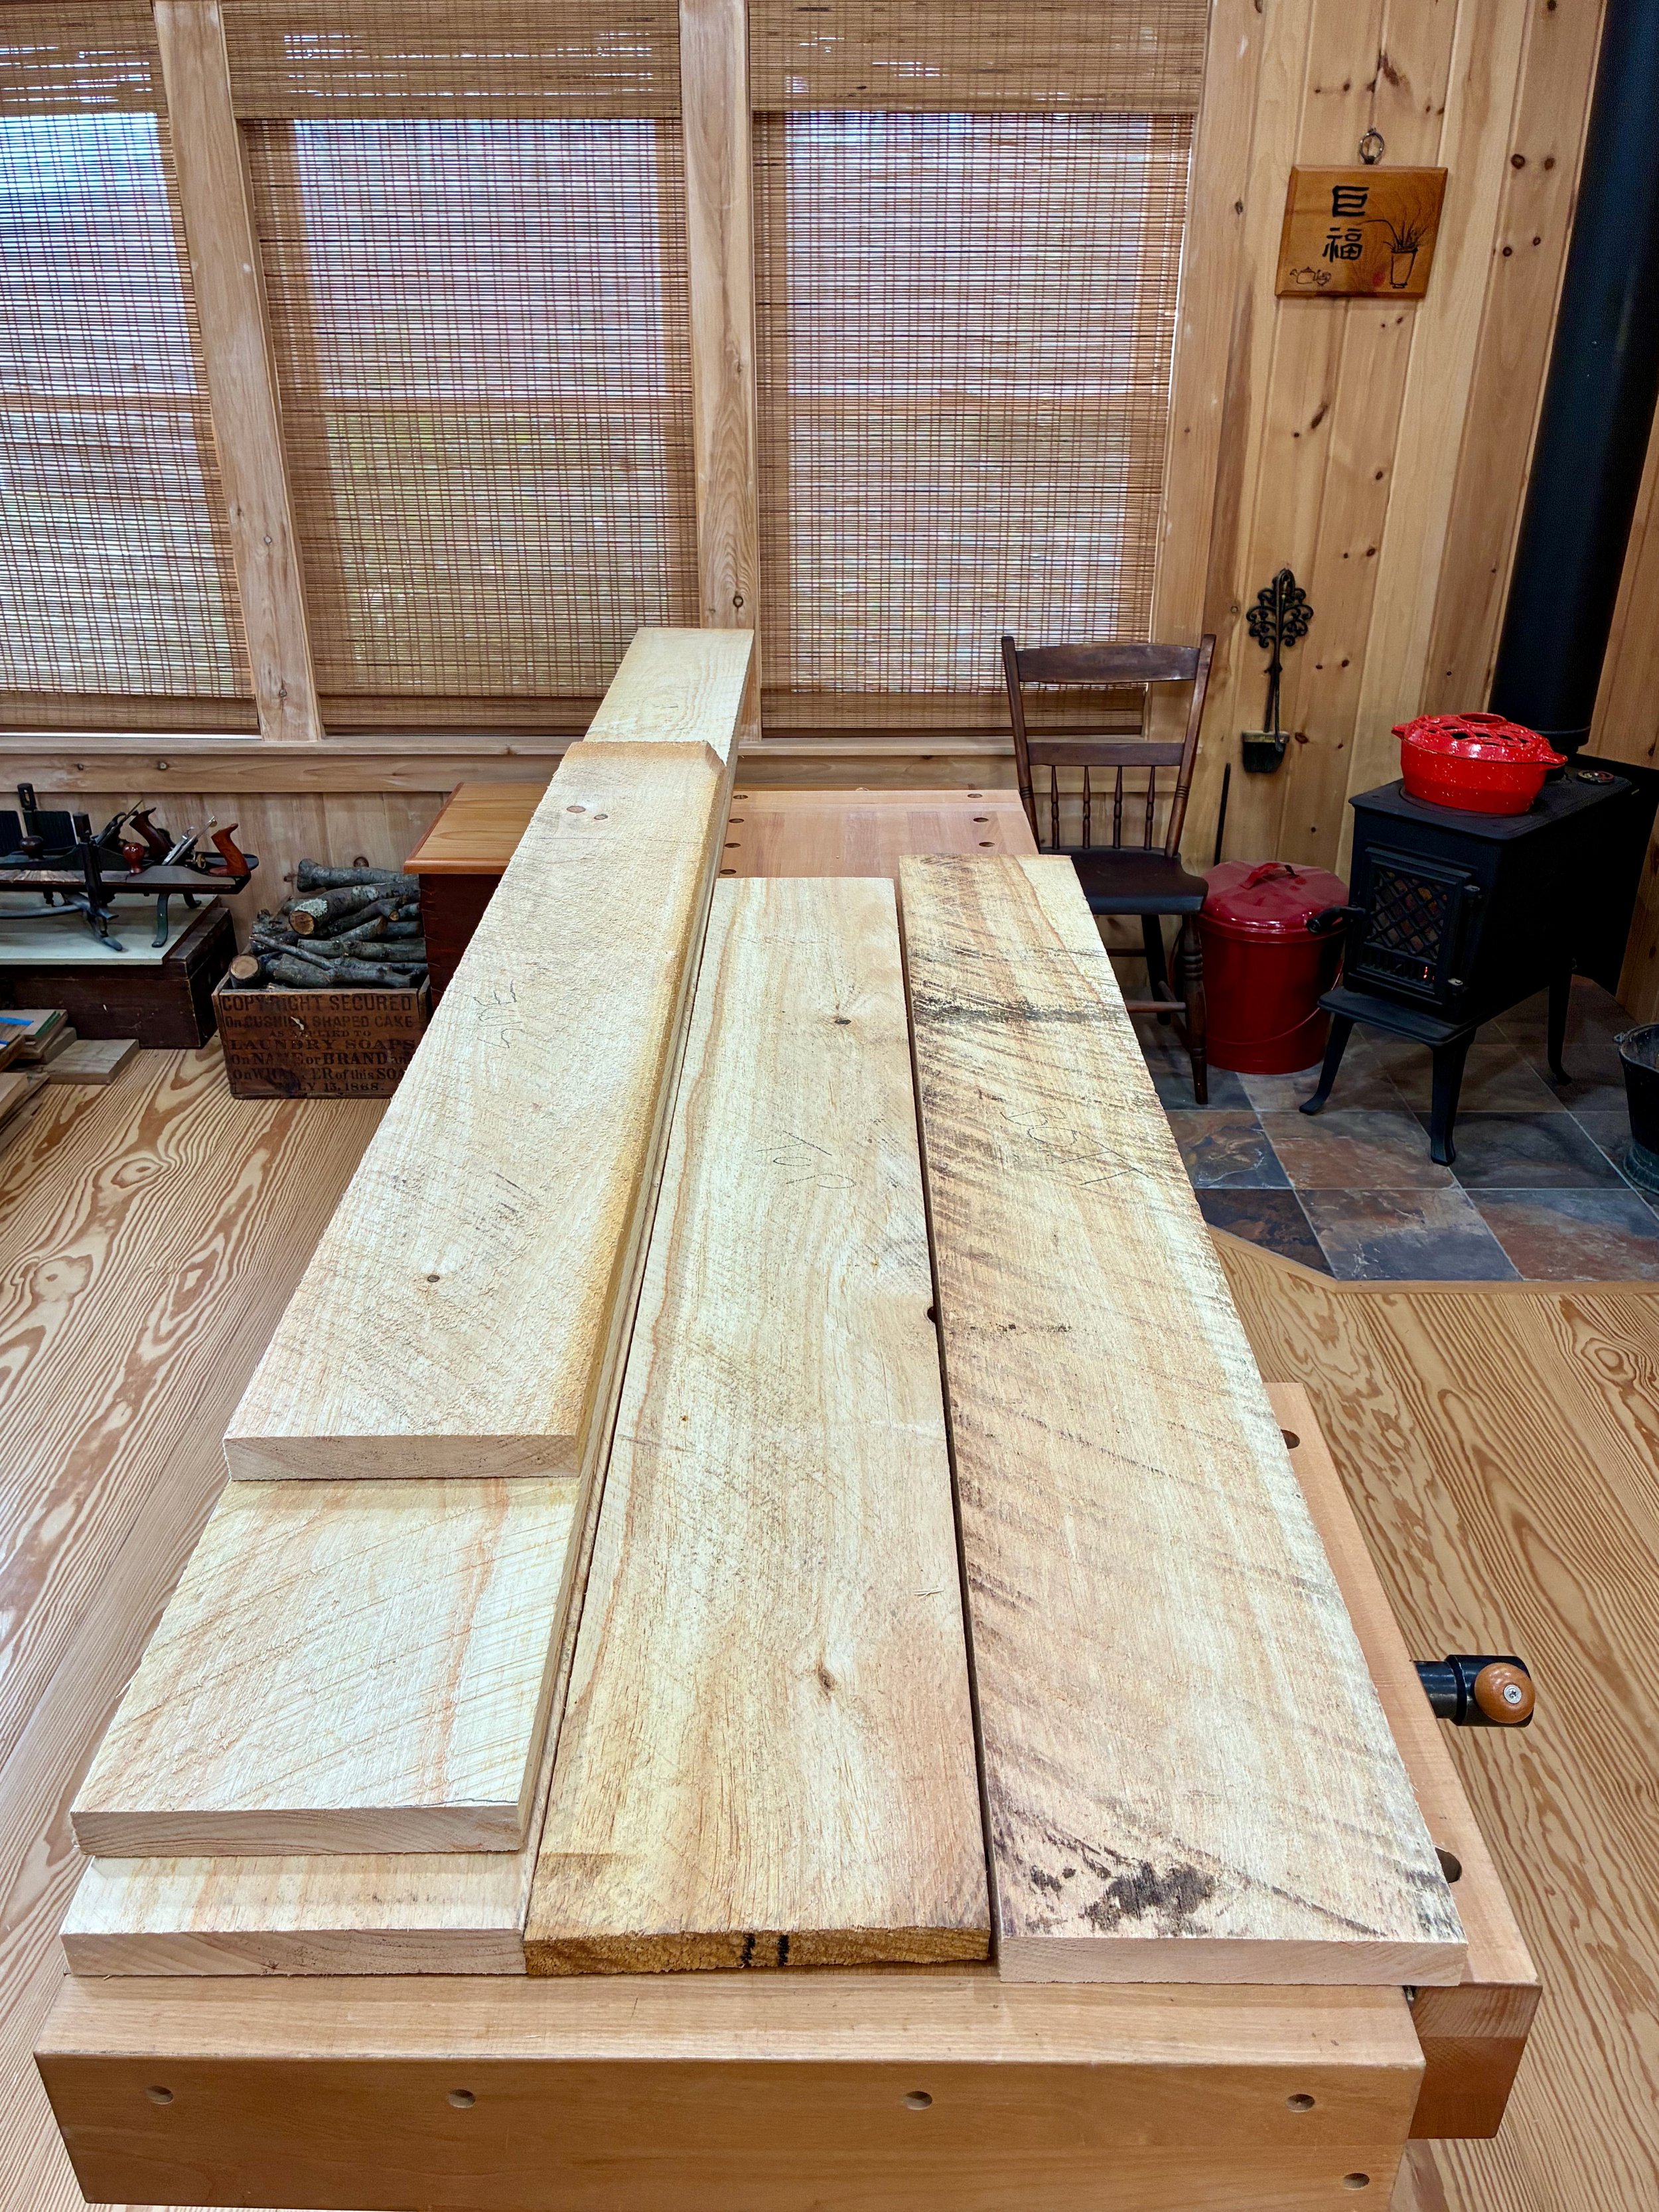
The five interior drawers came next, 4 small, 1 large. These would be made from three woods: red elm for the drawer fronts, poplar for the sides/back, and leftover pine for the drawer bottoms.
Drawer woods, L-R: pine (beneath the box); poplar; and elm
The design for these drawers would be inset, using rabbeted half-dovetail joints in the front and lock corner joints for the rear. But before going too far we had to decide on the drawer hardware. To permit the sliding door in front of the drawer bank to close, any protrusion of the drawer pull hardware would require that either the drawers be recessed into their chambers by that same amount, or the entire box, itself, be recessed within the case. Both of these solutions would make for an unsightly reveal upon opening the sliding door. Thus, flush pulls were chosen to bring both the box and drawers to the fore. Another consideration was color. We wanted the interior hardware to match the black iron tansu hardware planned for out front, and so black, flush drawer pulls were our quarry. This combination does not afford a wide selection but we found one that would work from an eBay vendor in China. I would need to have them in hand before dimensioning the drawer fronts so as to measure, and then accommodate, the drilled socket depth.
While waiting for the pulls to arrive, the drawer sides and backs were prepared. The ~1 in. poplar material was cut to rough width at the table saw, resawn down the spine at the band saw and then thickness planed to 5/16 in. for the sides. The backs were made at 1/2 in. thickness and the drawer fronts were prepped to rough dimensions. I also had time to re-paint a bathroom.
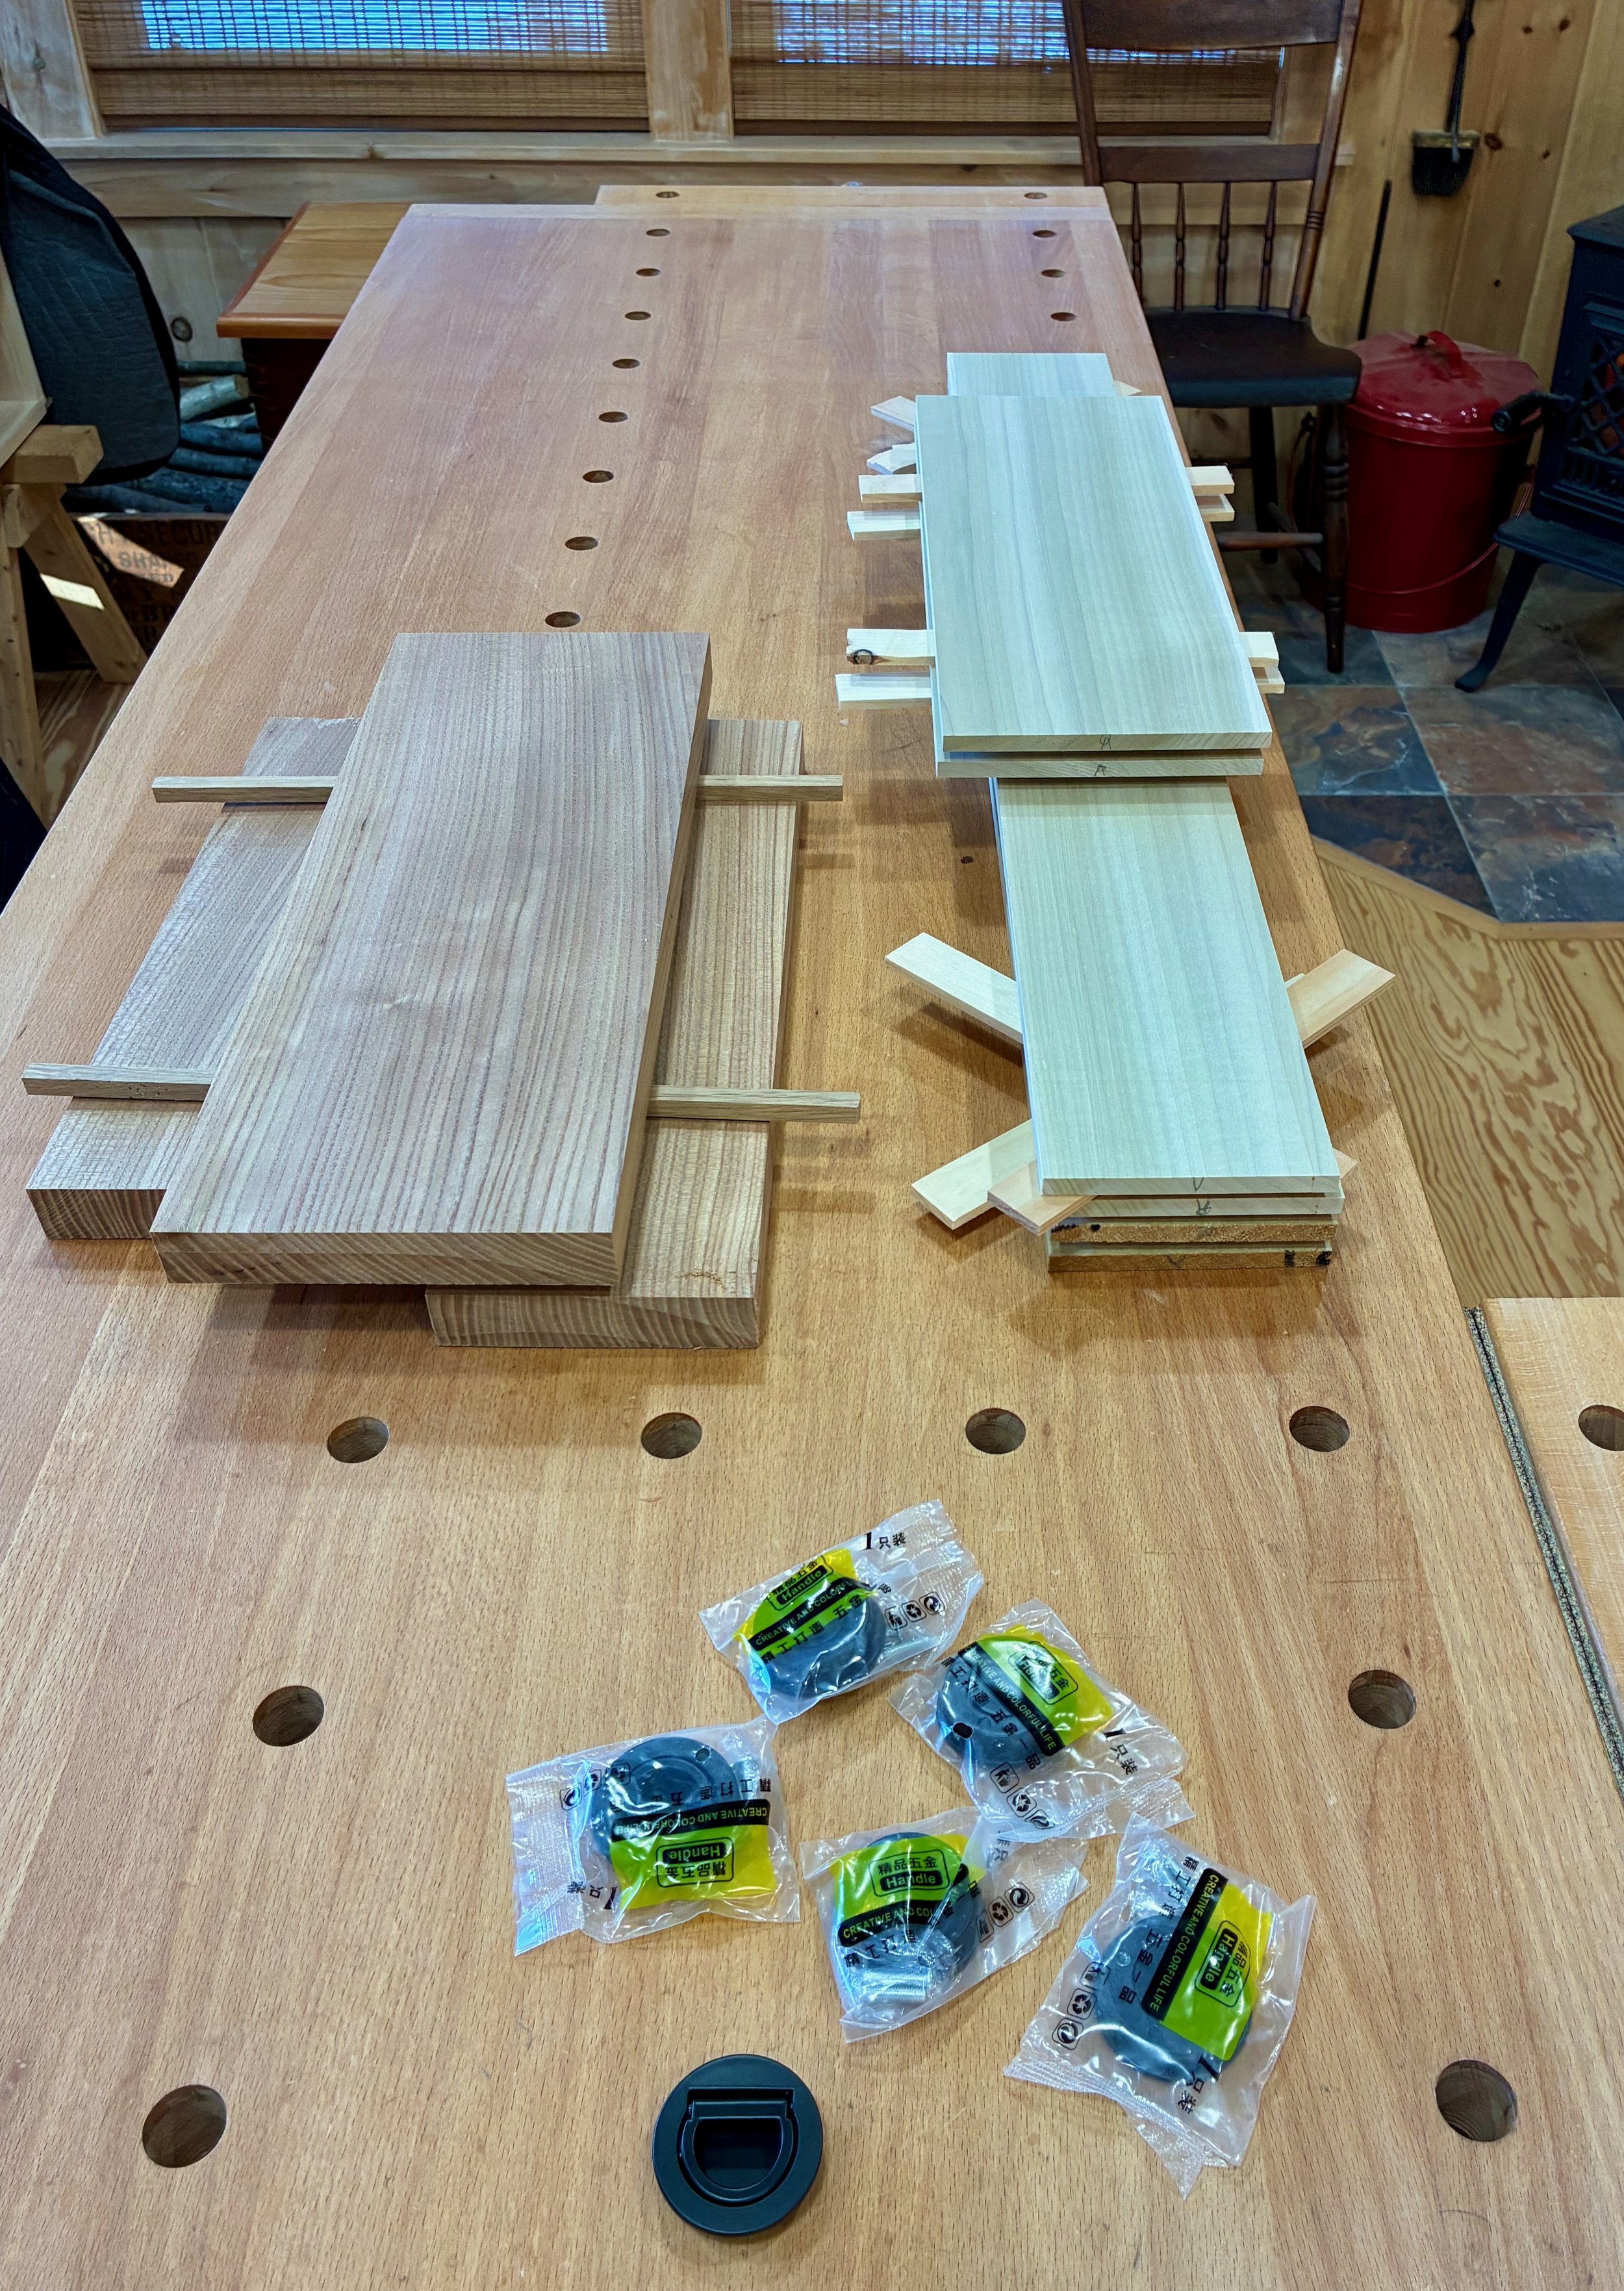
Interior drawer pulls and parts
It turns out that a socket depth of 5/16 in. was required for the pulls, thus the elm drawer fronts were milled “thicker” to 1/2 inch. I used a rift sawn plank for the fronts and kept the grain continuous along parallel drawers - it should flow together nicely. The drawer fronts were carefully dimensioned to their final width and height at the miter saw and table saw, respectively, and then that fence setting on the table saw was used to trim the corresponding drawer sides to a matching dimension.
After labelling all parts, the half-dovetail rabbet drawer front joinery was cut at the router table. This is an easy drawer construction method that is similar to (but a bit sturdier than) the pinned rabbeted drawers likely present on that original Tansu.
Cutting a half-dovetail rabbet into a drawer front at the router table
After making grooves for the drawer bottoms and backs at the table saw, the corresponding parts to fit those grooves were fashioned from pine and poplar.
Scene during drawer construction
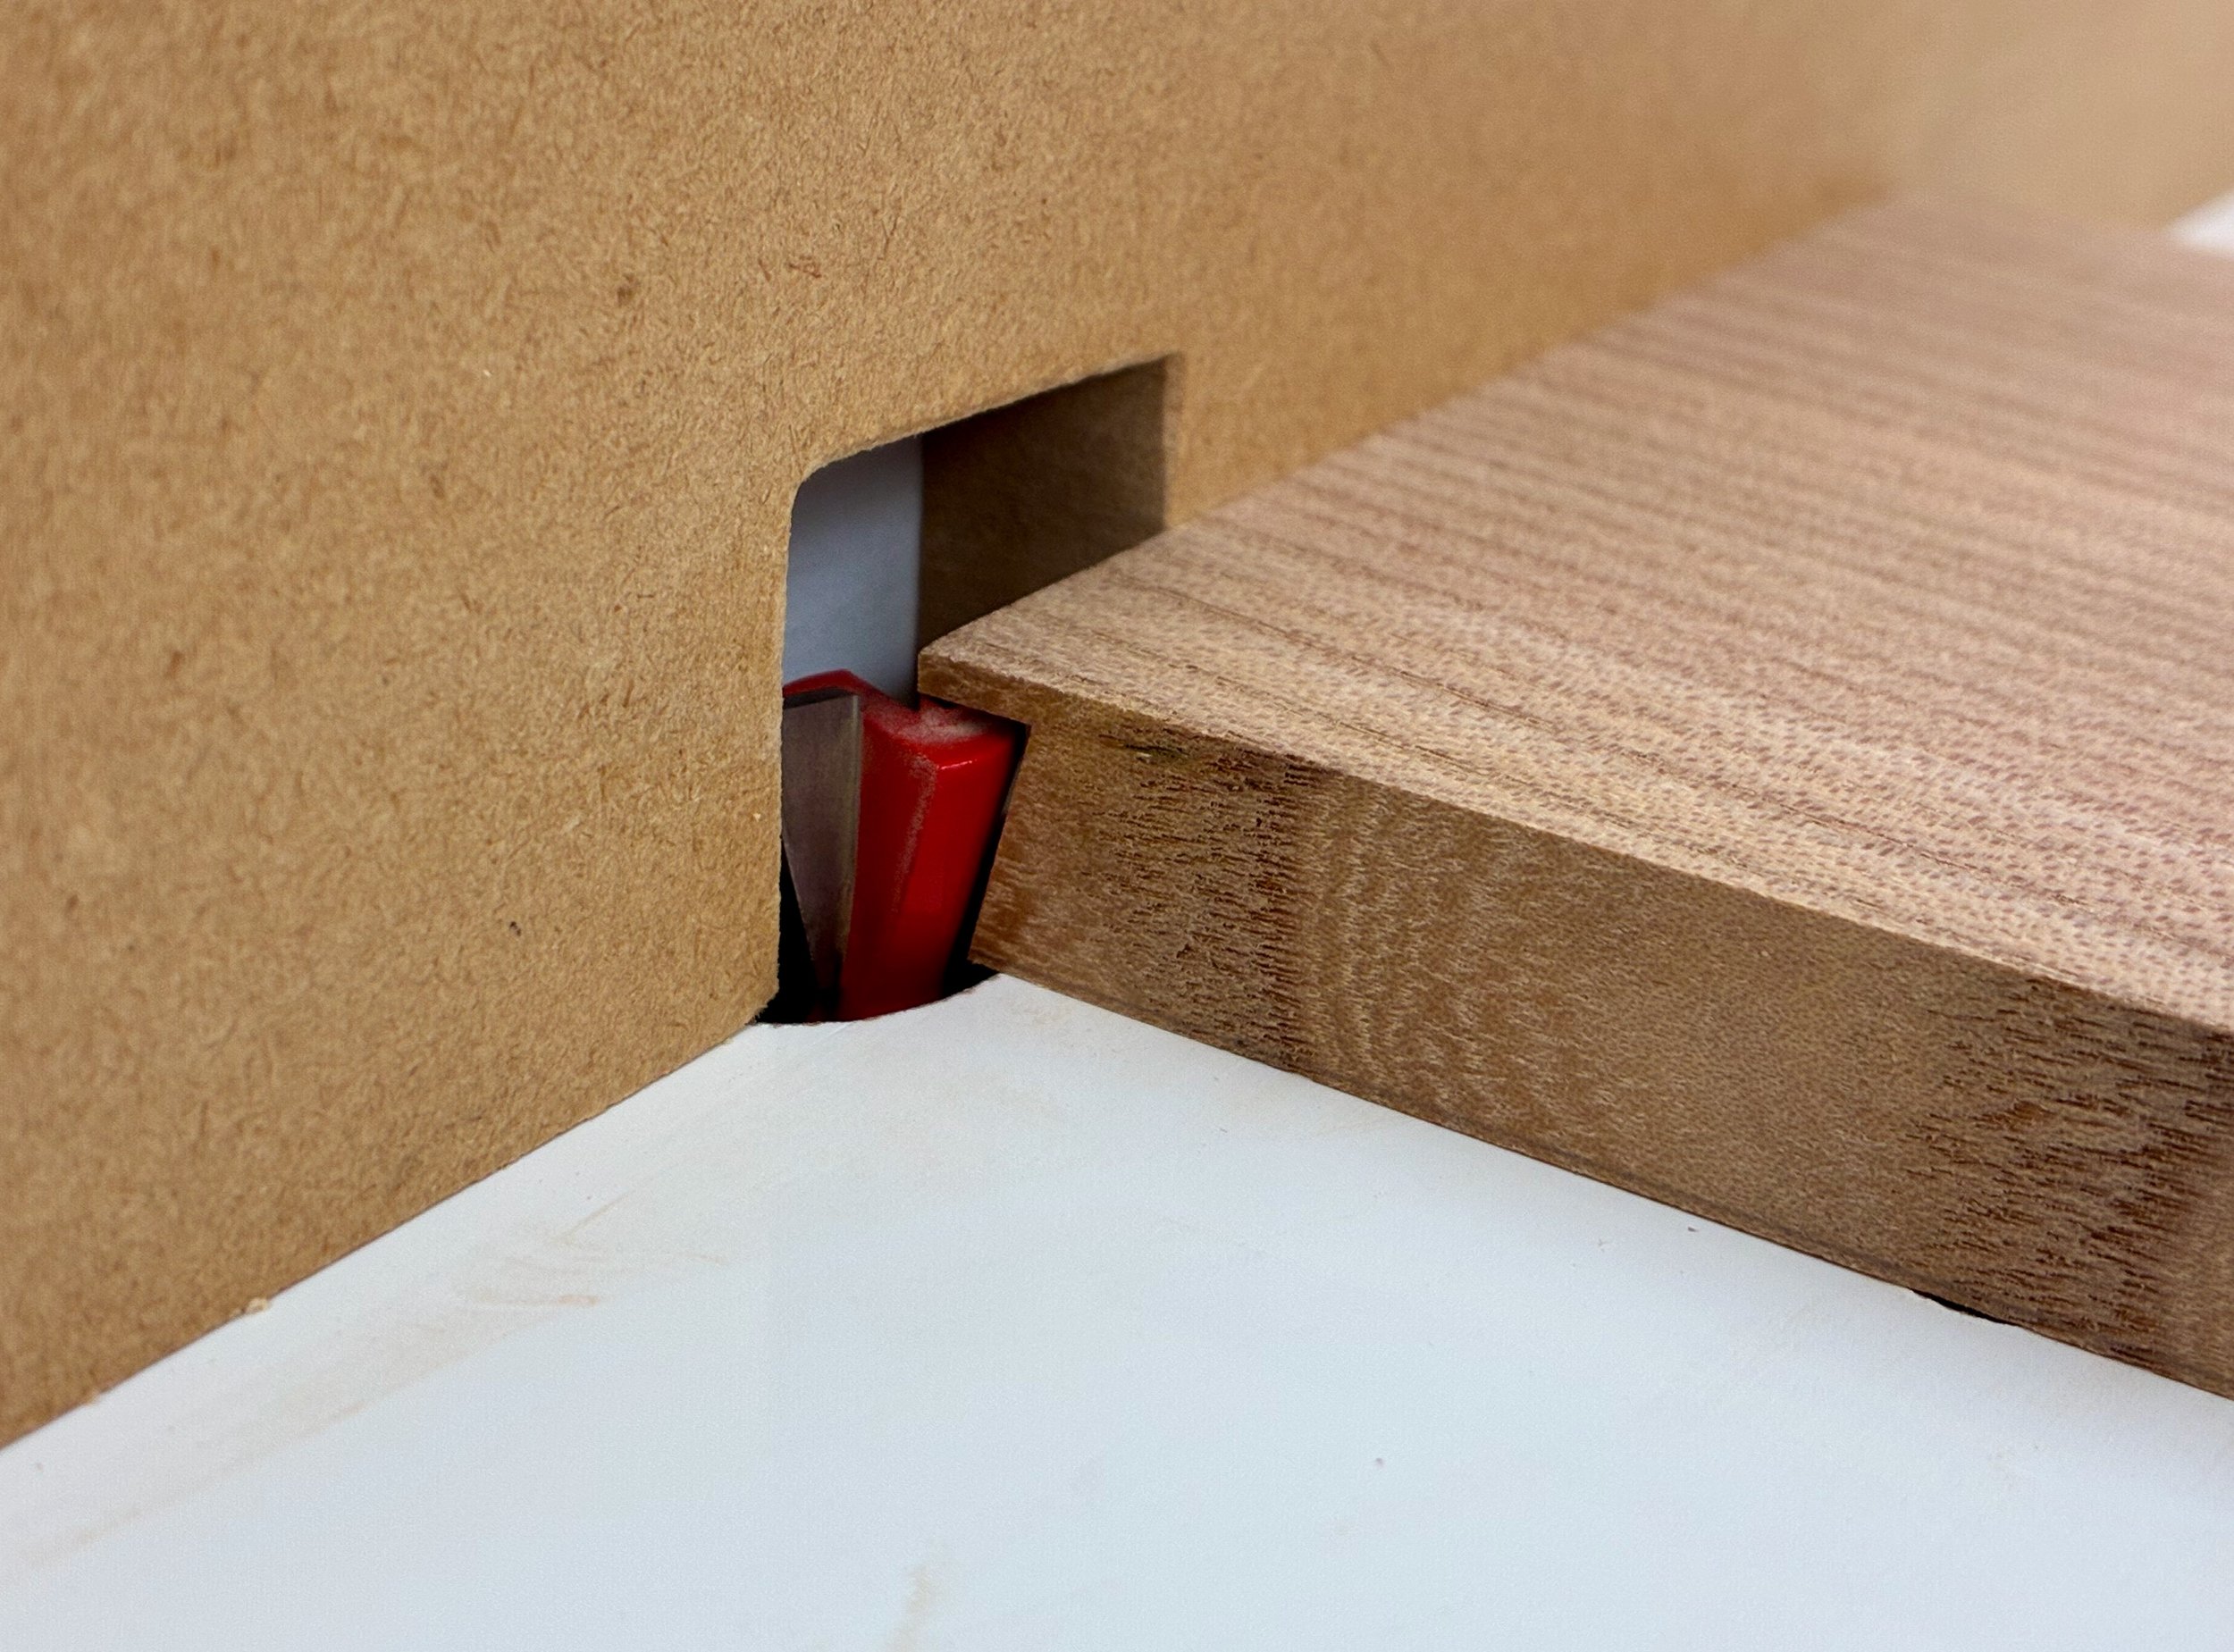
Finally, 35 mm dia. sockets were sunk into the drawer fronts using a Forstner bit at the drill press. I then drilled the mounting screw holes, 2 per socket.
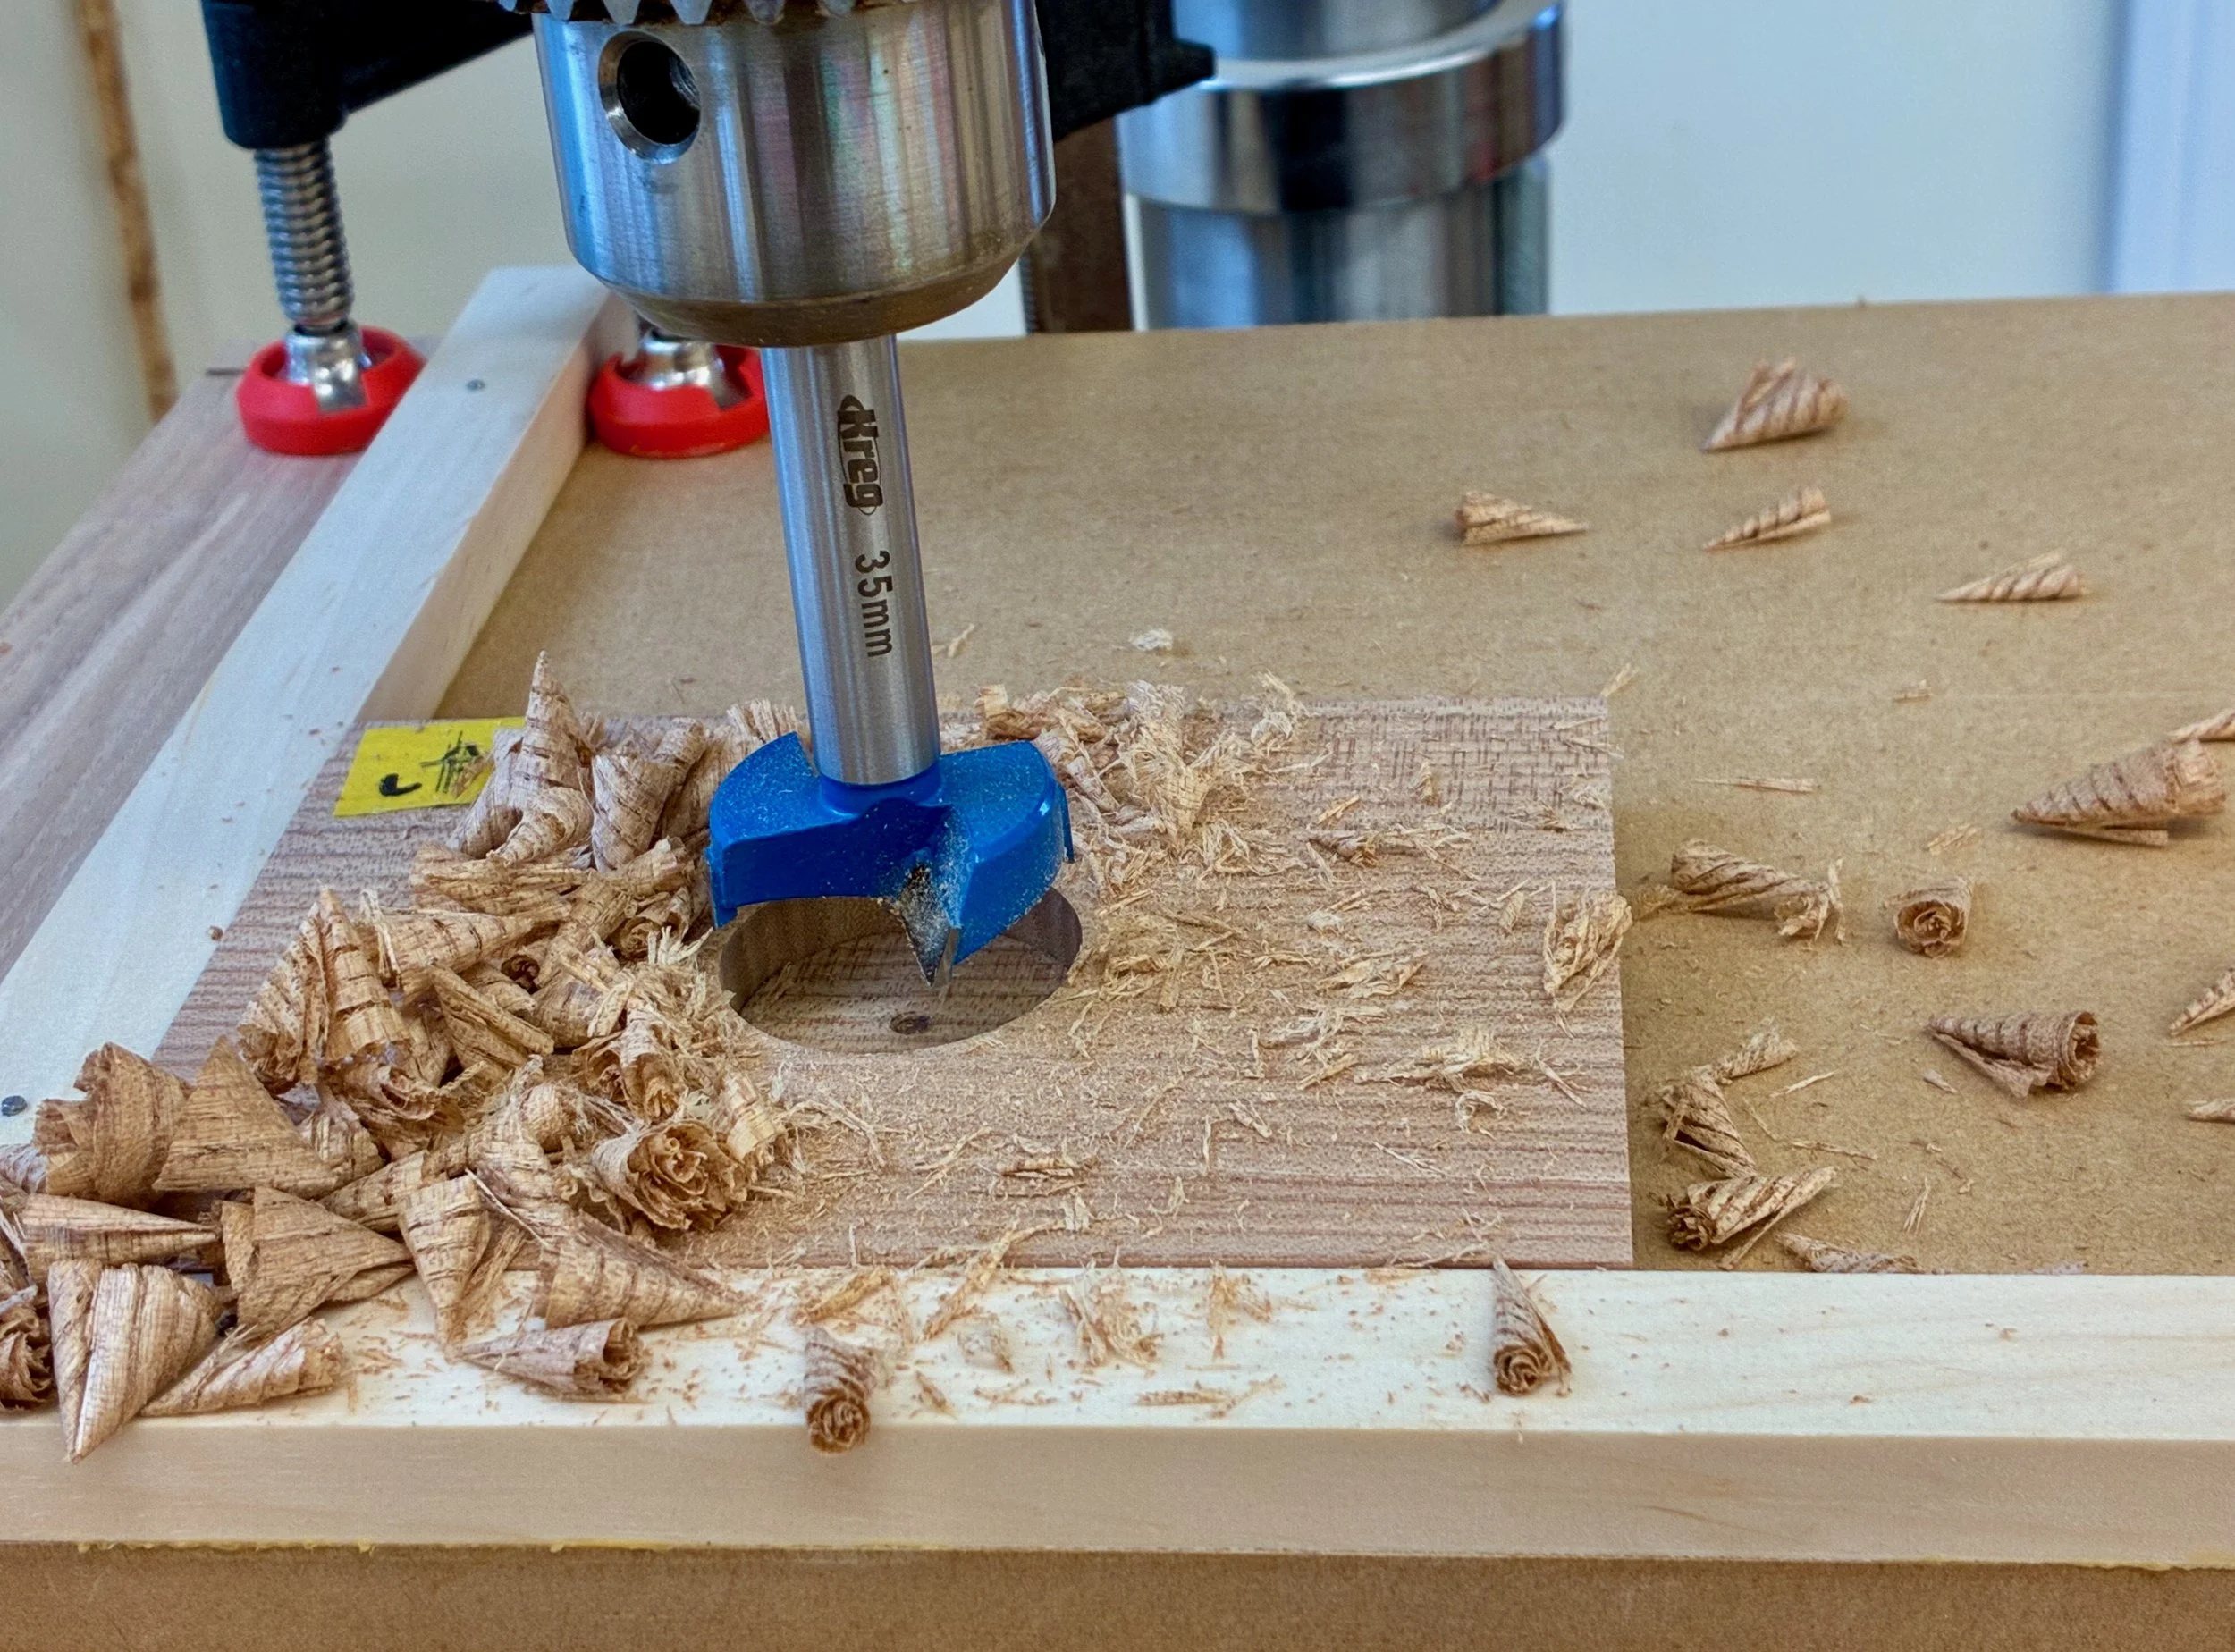
Drilling out for the pulls
Next, a coat of shellac was applied to the pine box followed by some furniture wax. When glueing drawers, I like to unclamp the squared-up constructs and then slide them into their cubbies to finish curing. This way I can double-check that the drawer sits properly in its home. The shellacking will keep the pine resin at bay, and the wax assures that an errant glue drip will not unintentionally cement the drawers in. With all 25 parts completed, the drawers were individually glued and tucked away.

5 drawers
The joints at the drawer fronts were then pinned with 3/16 in. diameter pegs hammered from scrap elm.
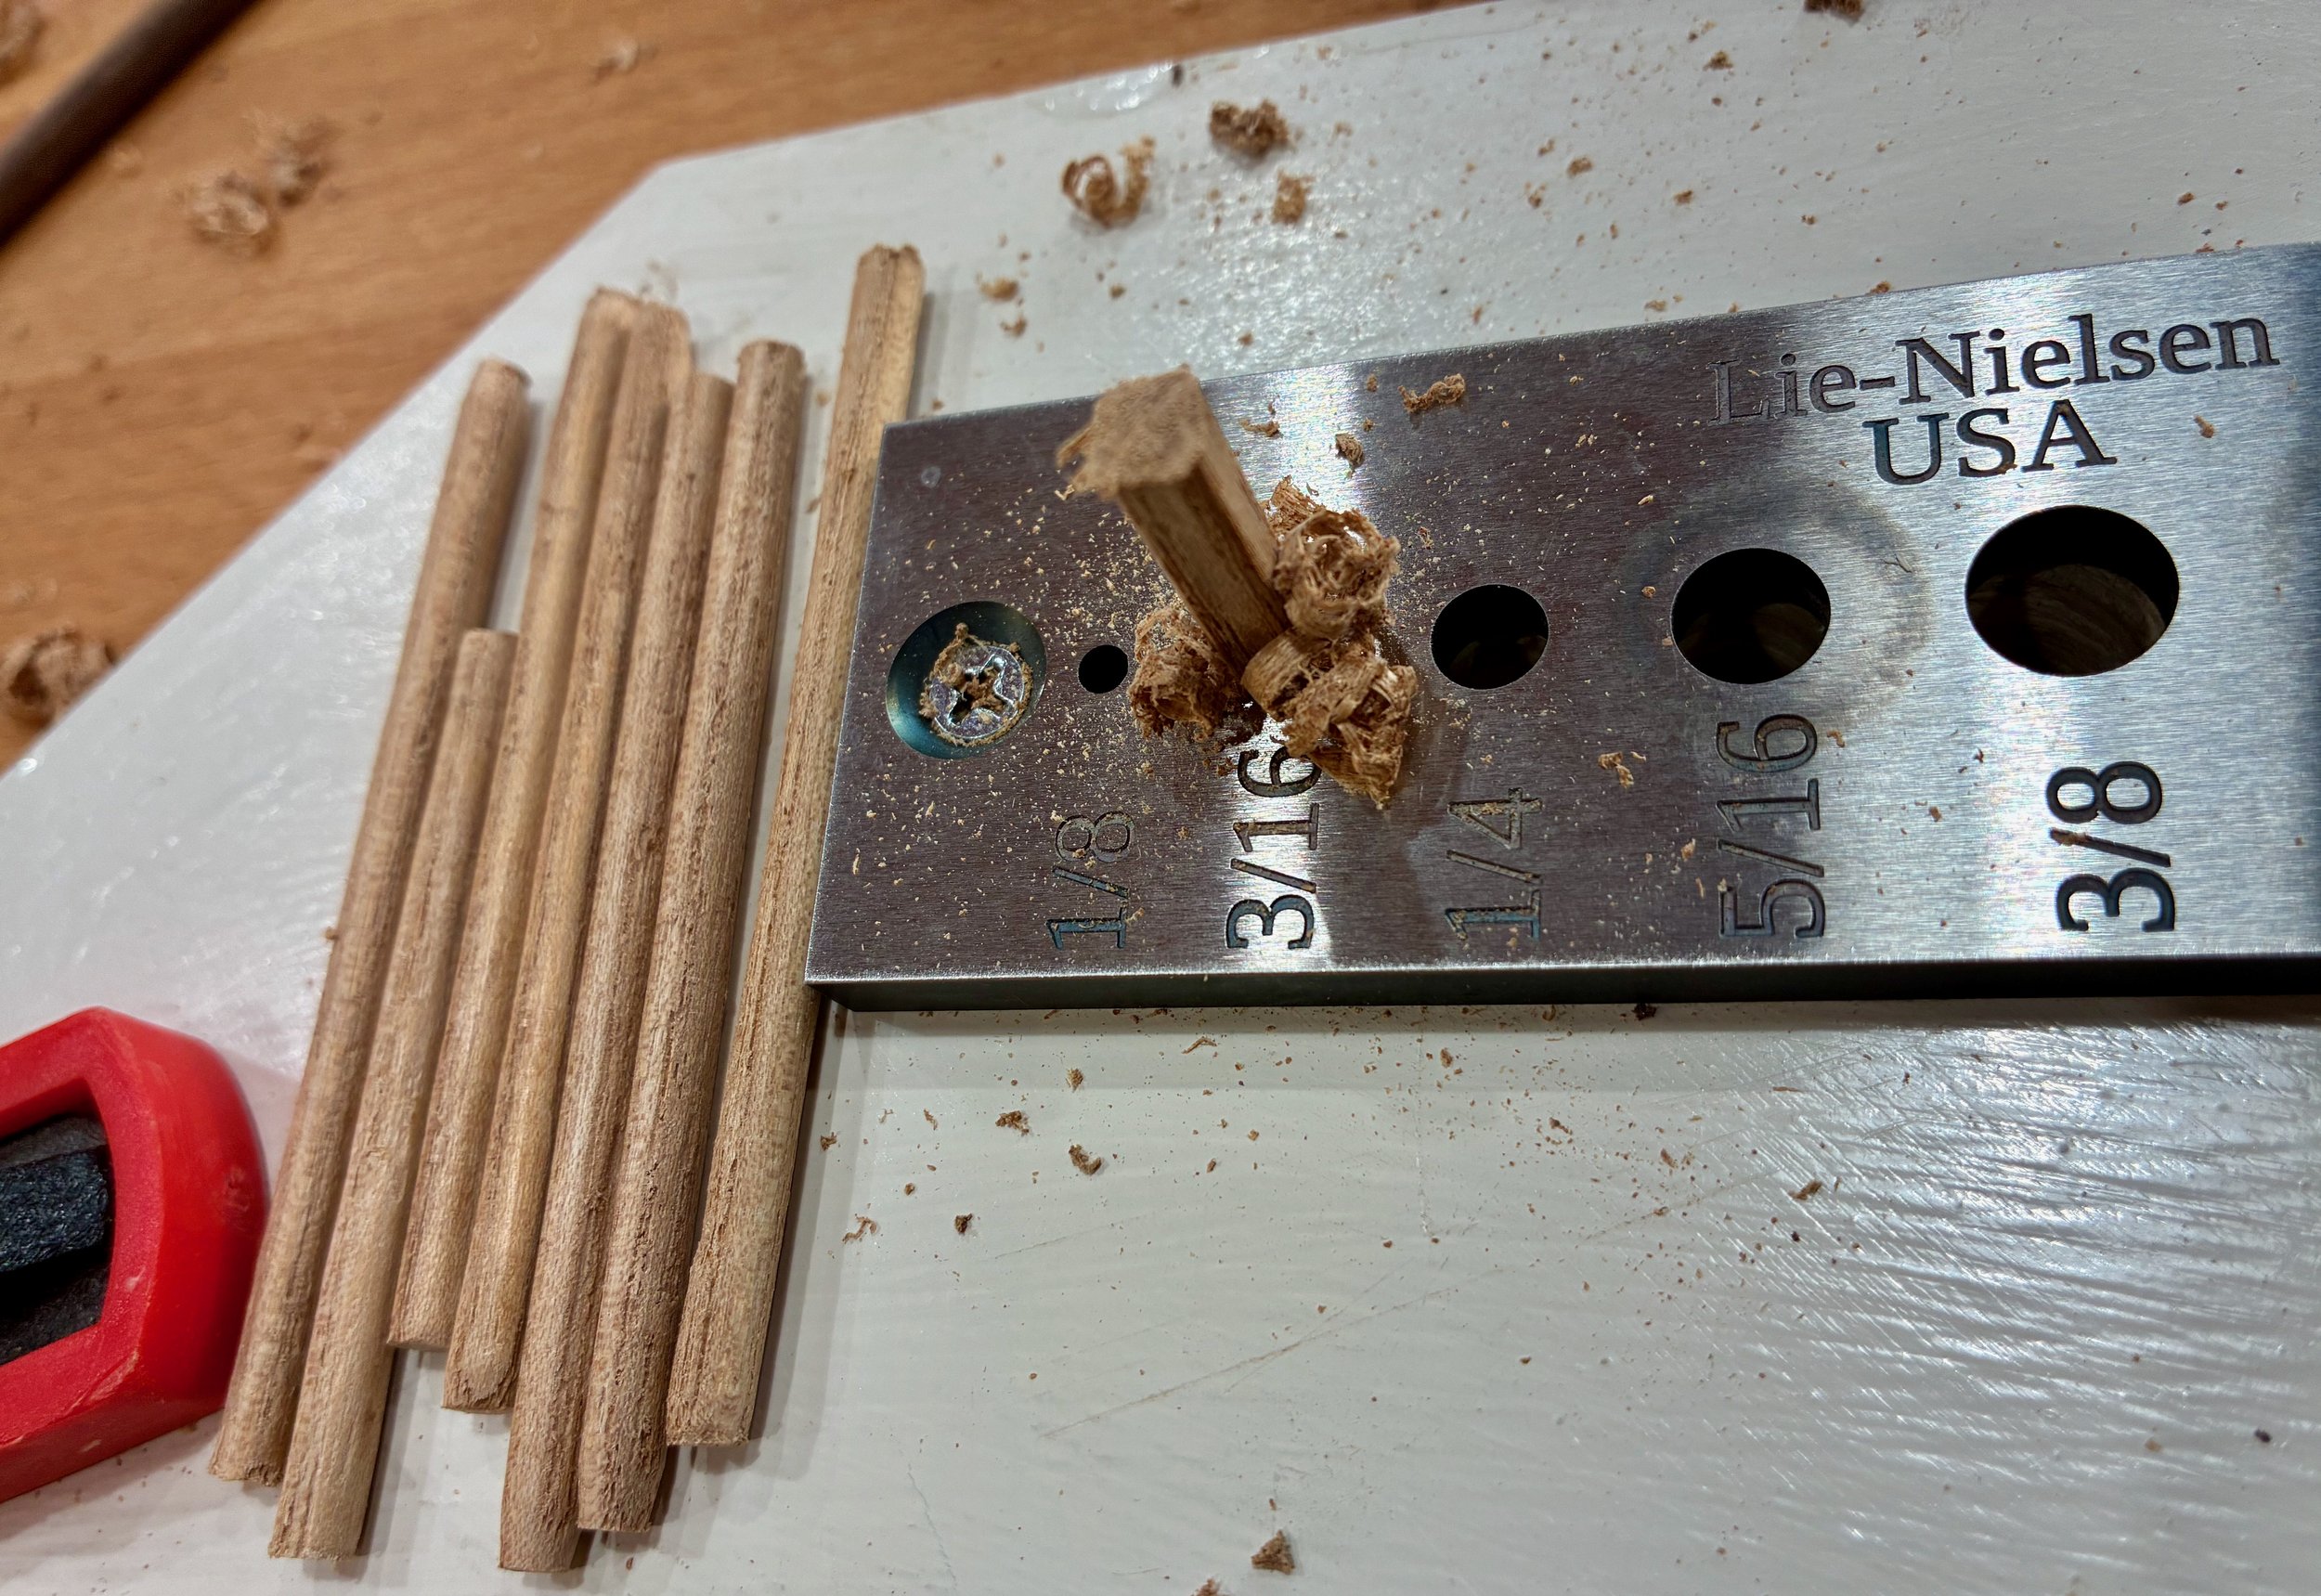
Pounding out the pegs
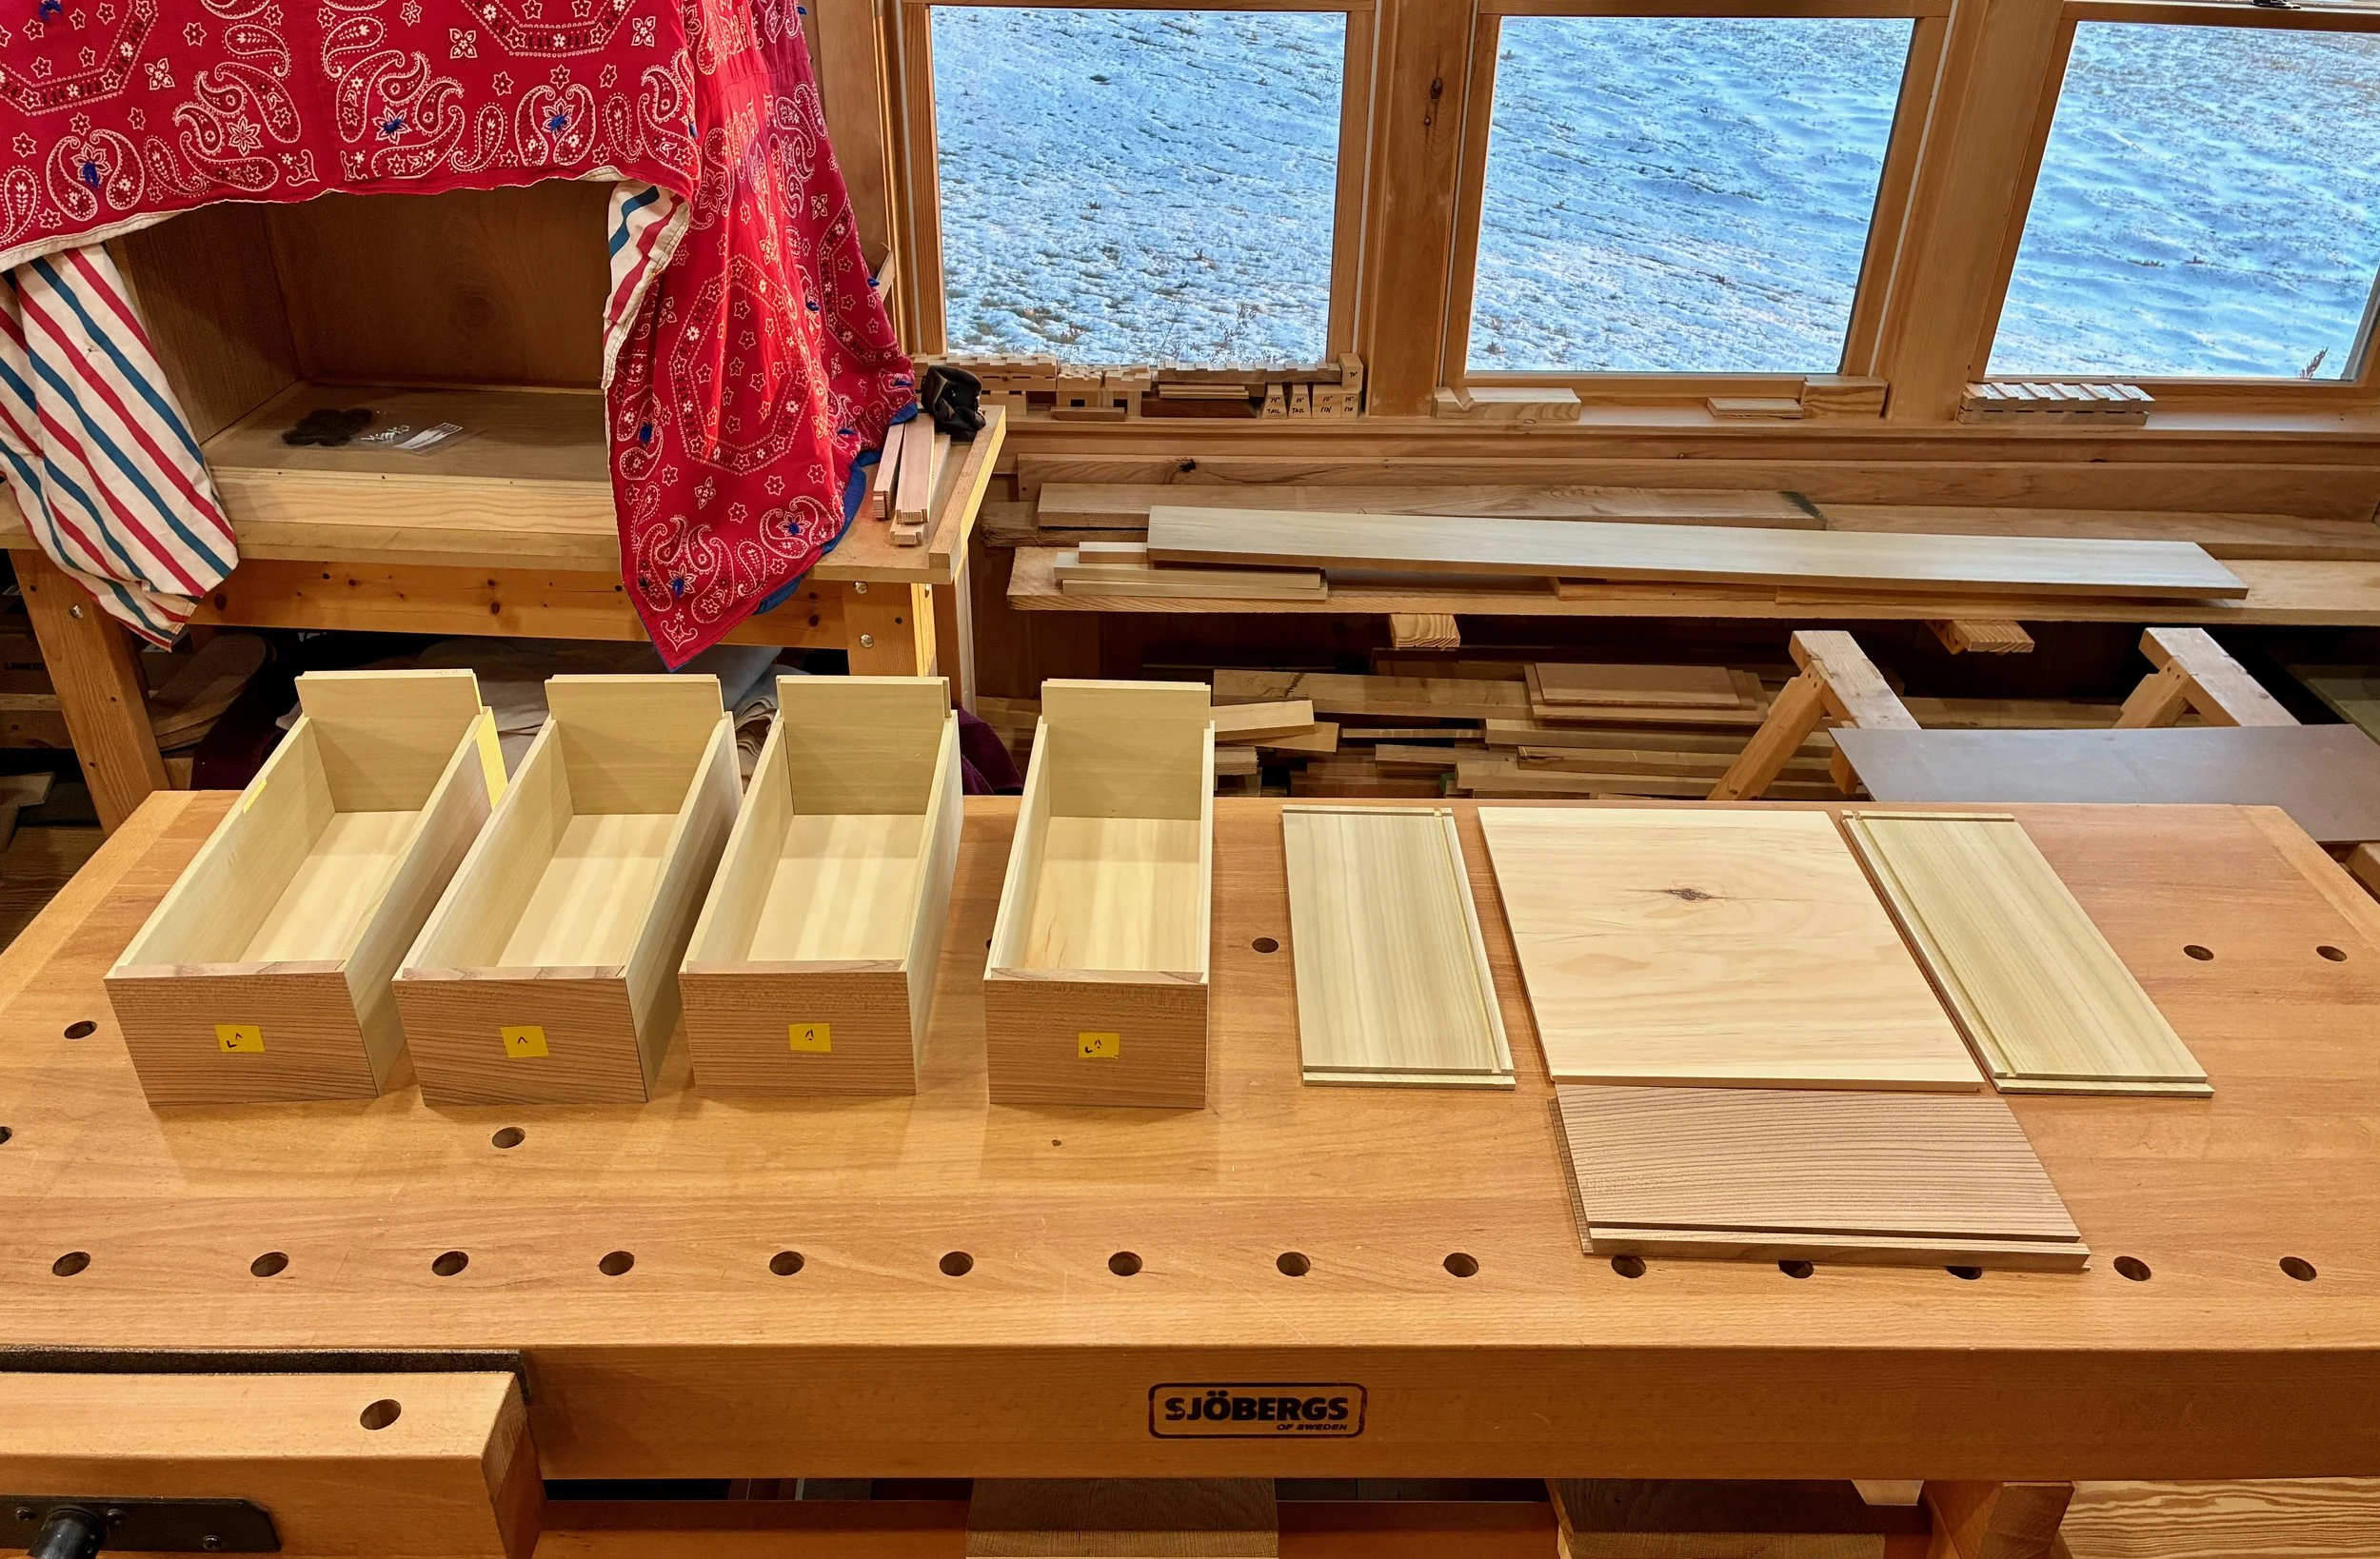
After sawing things flush, and some final sanding, the interior drawer construction was complete. Still deciding on a finishing scheme for these, I put off the hardware installation for now.
Drawers done
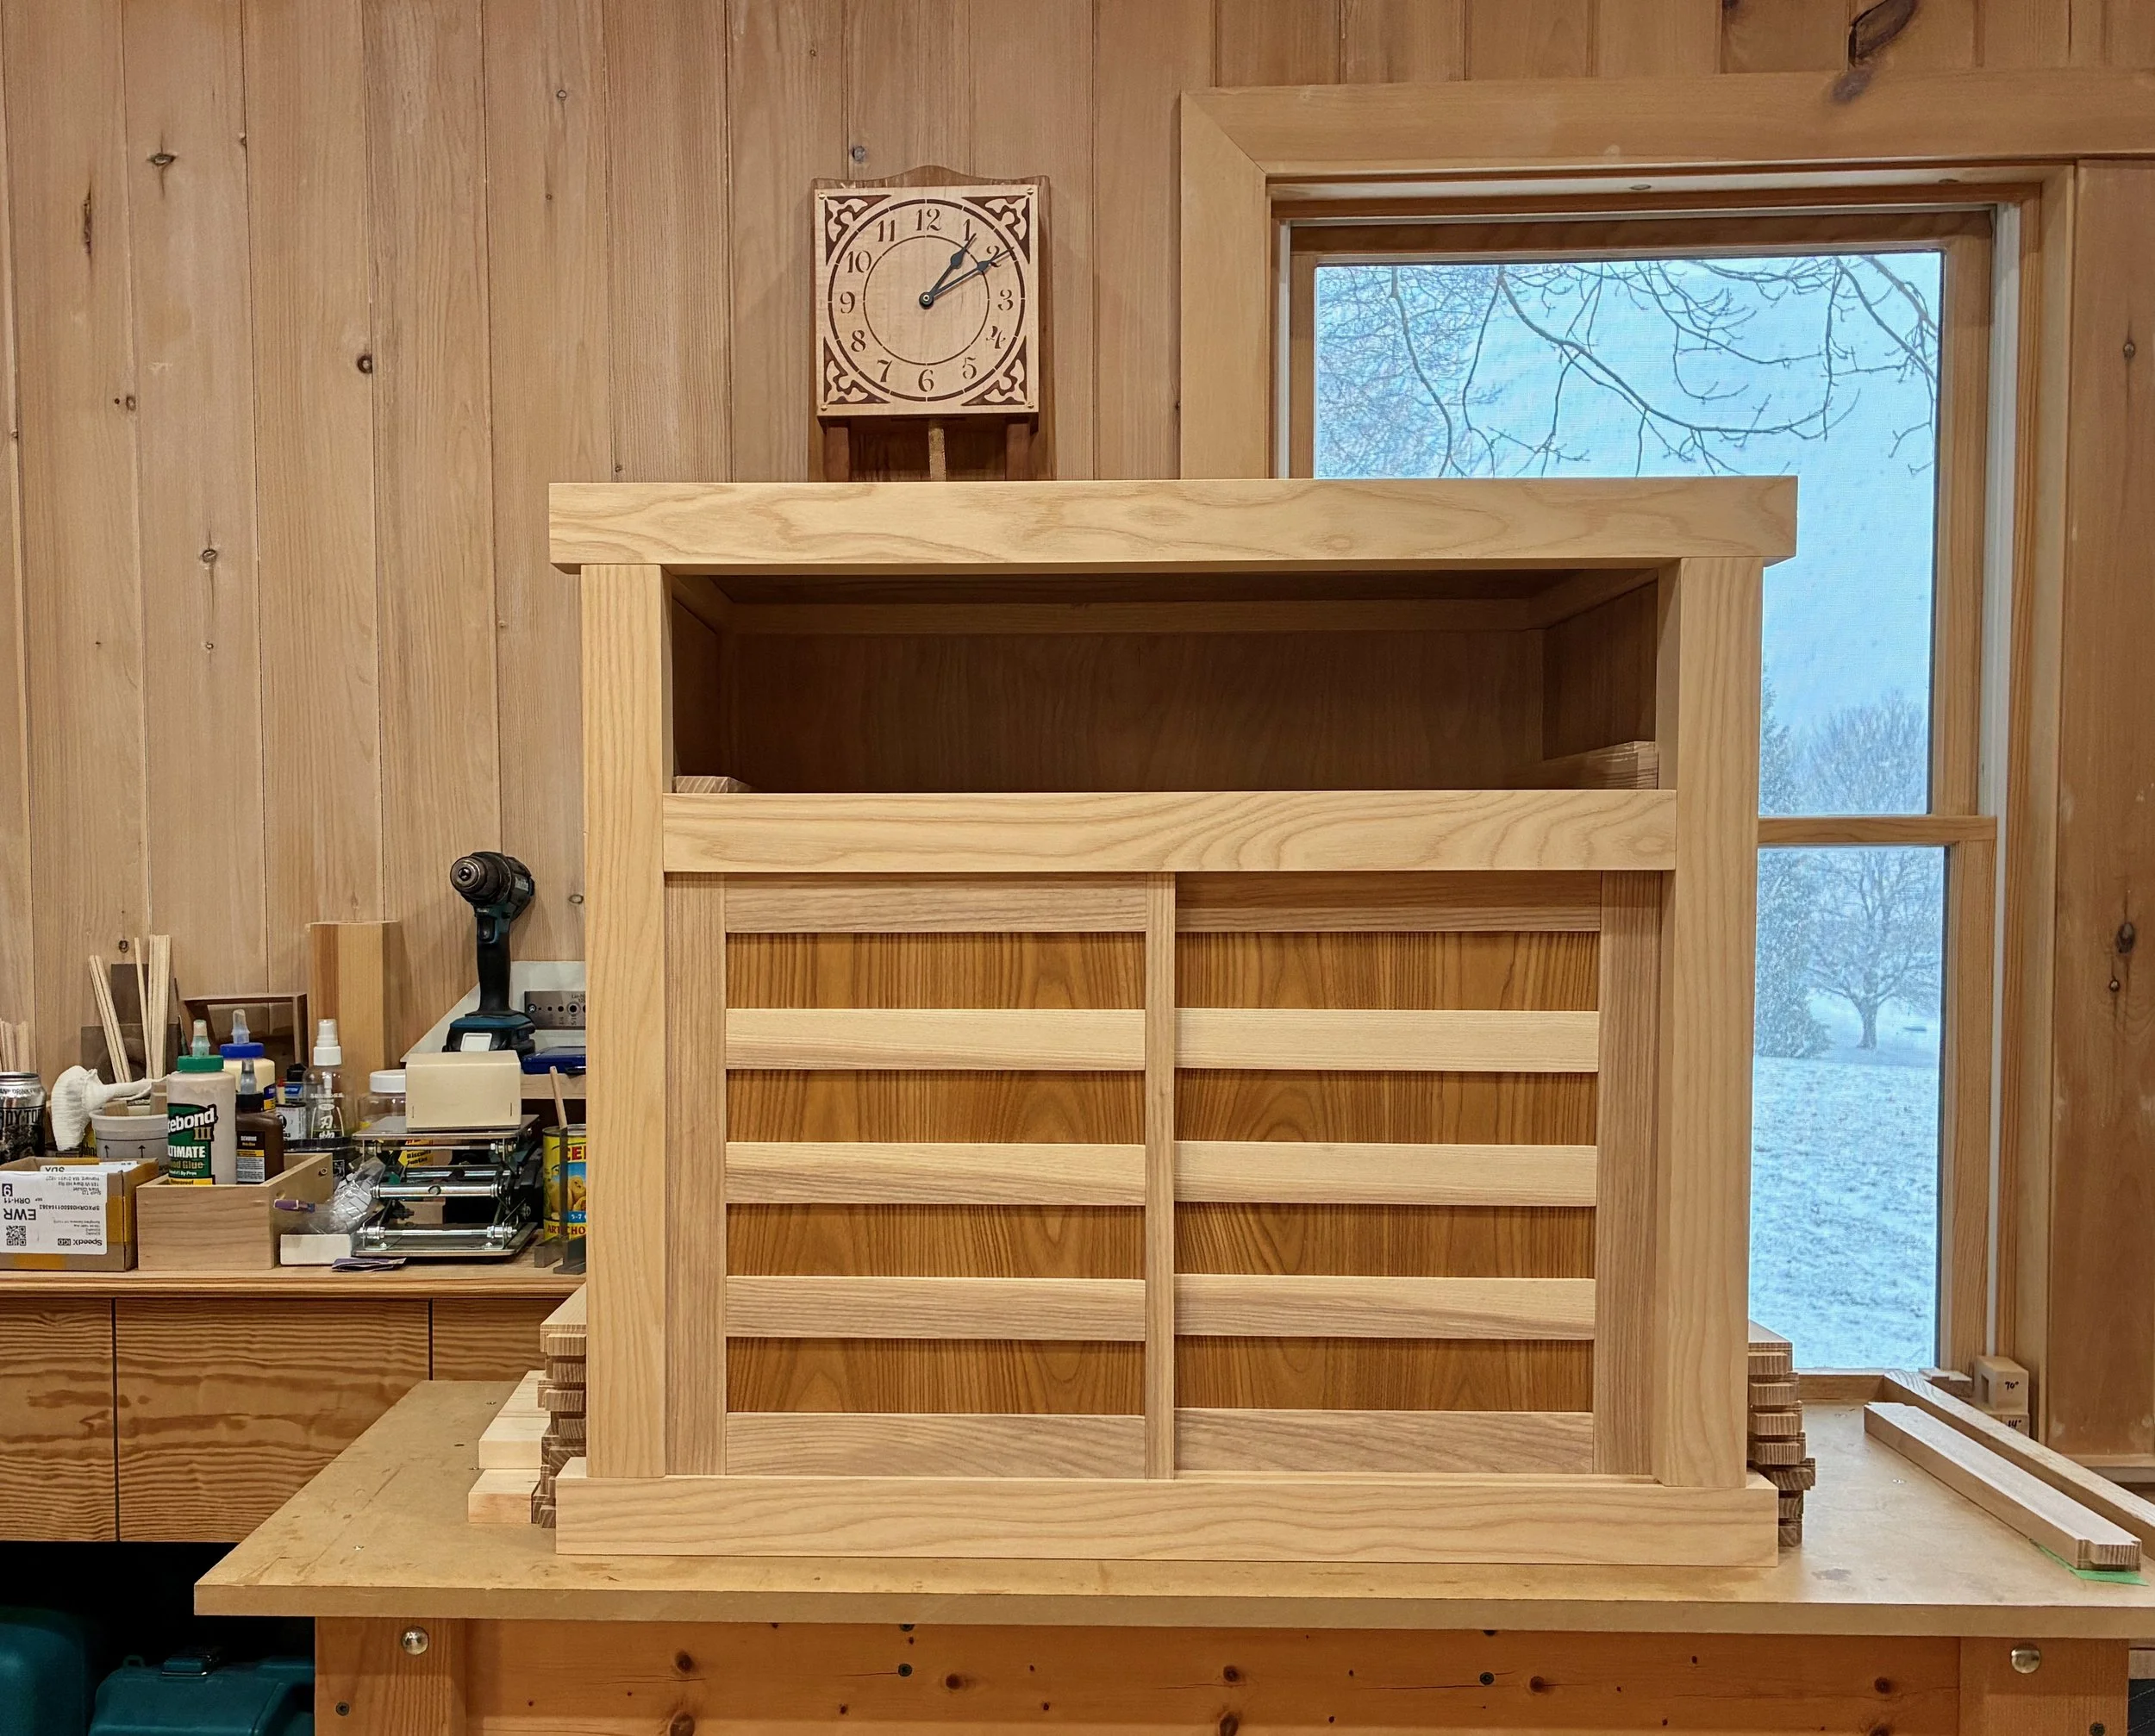
Sliding doors
Next came the sliding doors. These would be constructed from quarter sawn ash and elm to match the tansu sides.

Elm and ash door stock
It was at this point that I realized the door design would need to be changed, for I had failed to account for sliding door overlap in the initial plan. You see, to achieve the intended look, I should have made the divider between the drawer and the shelf cavities wider - but that ship had sailed. It’s not really an issue with an open cavity, but with drawers hidden behind a symmetrically divided space, each door’s width needed to essentially conceal/reveal half of the entire opening. And since the center divider in the drawer box was 3/4 in. wide, that meant, to achieve the desired sliding door overlap, the interior stile of each door would need to be that dimension, at a maximum. The original plan called for double that width, but I think it will be okay. Lesson learned.
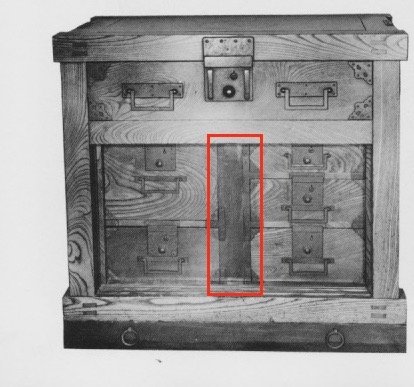
Picture of the exemplar tansu with doors removed. Note the extra wide central divider not included in my initial design.
from: Tansu: Traditional Japanese Cabinetry, by Ty and Kiyoko Heineken.
I used typical mortice and tenon joints for the door frames whose members were fashioned en masse at the table saw, jointer, thickness planer, miter saw and mortiser. A few hand tools were also employed - it’s fun to use all your stuff. The ash stiles and rails were grooved to accept 1/4 in. elm panels in between. These panels were prepared in the typical manner and, prior to assembly, they were chopped to size at the sliding miter saw, discarding a sacrificial 1 in. wide slice after each cut to keep the grain flowing naturally along the assembled door fronts.
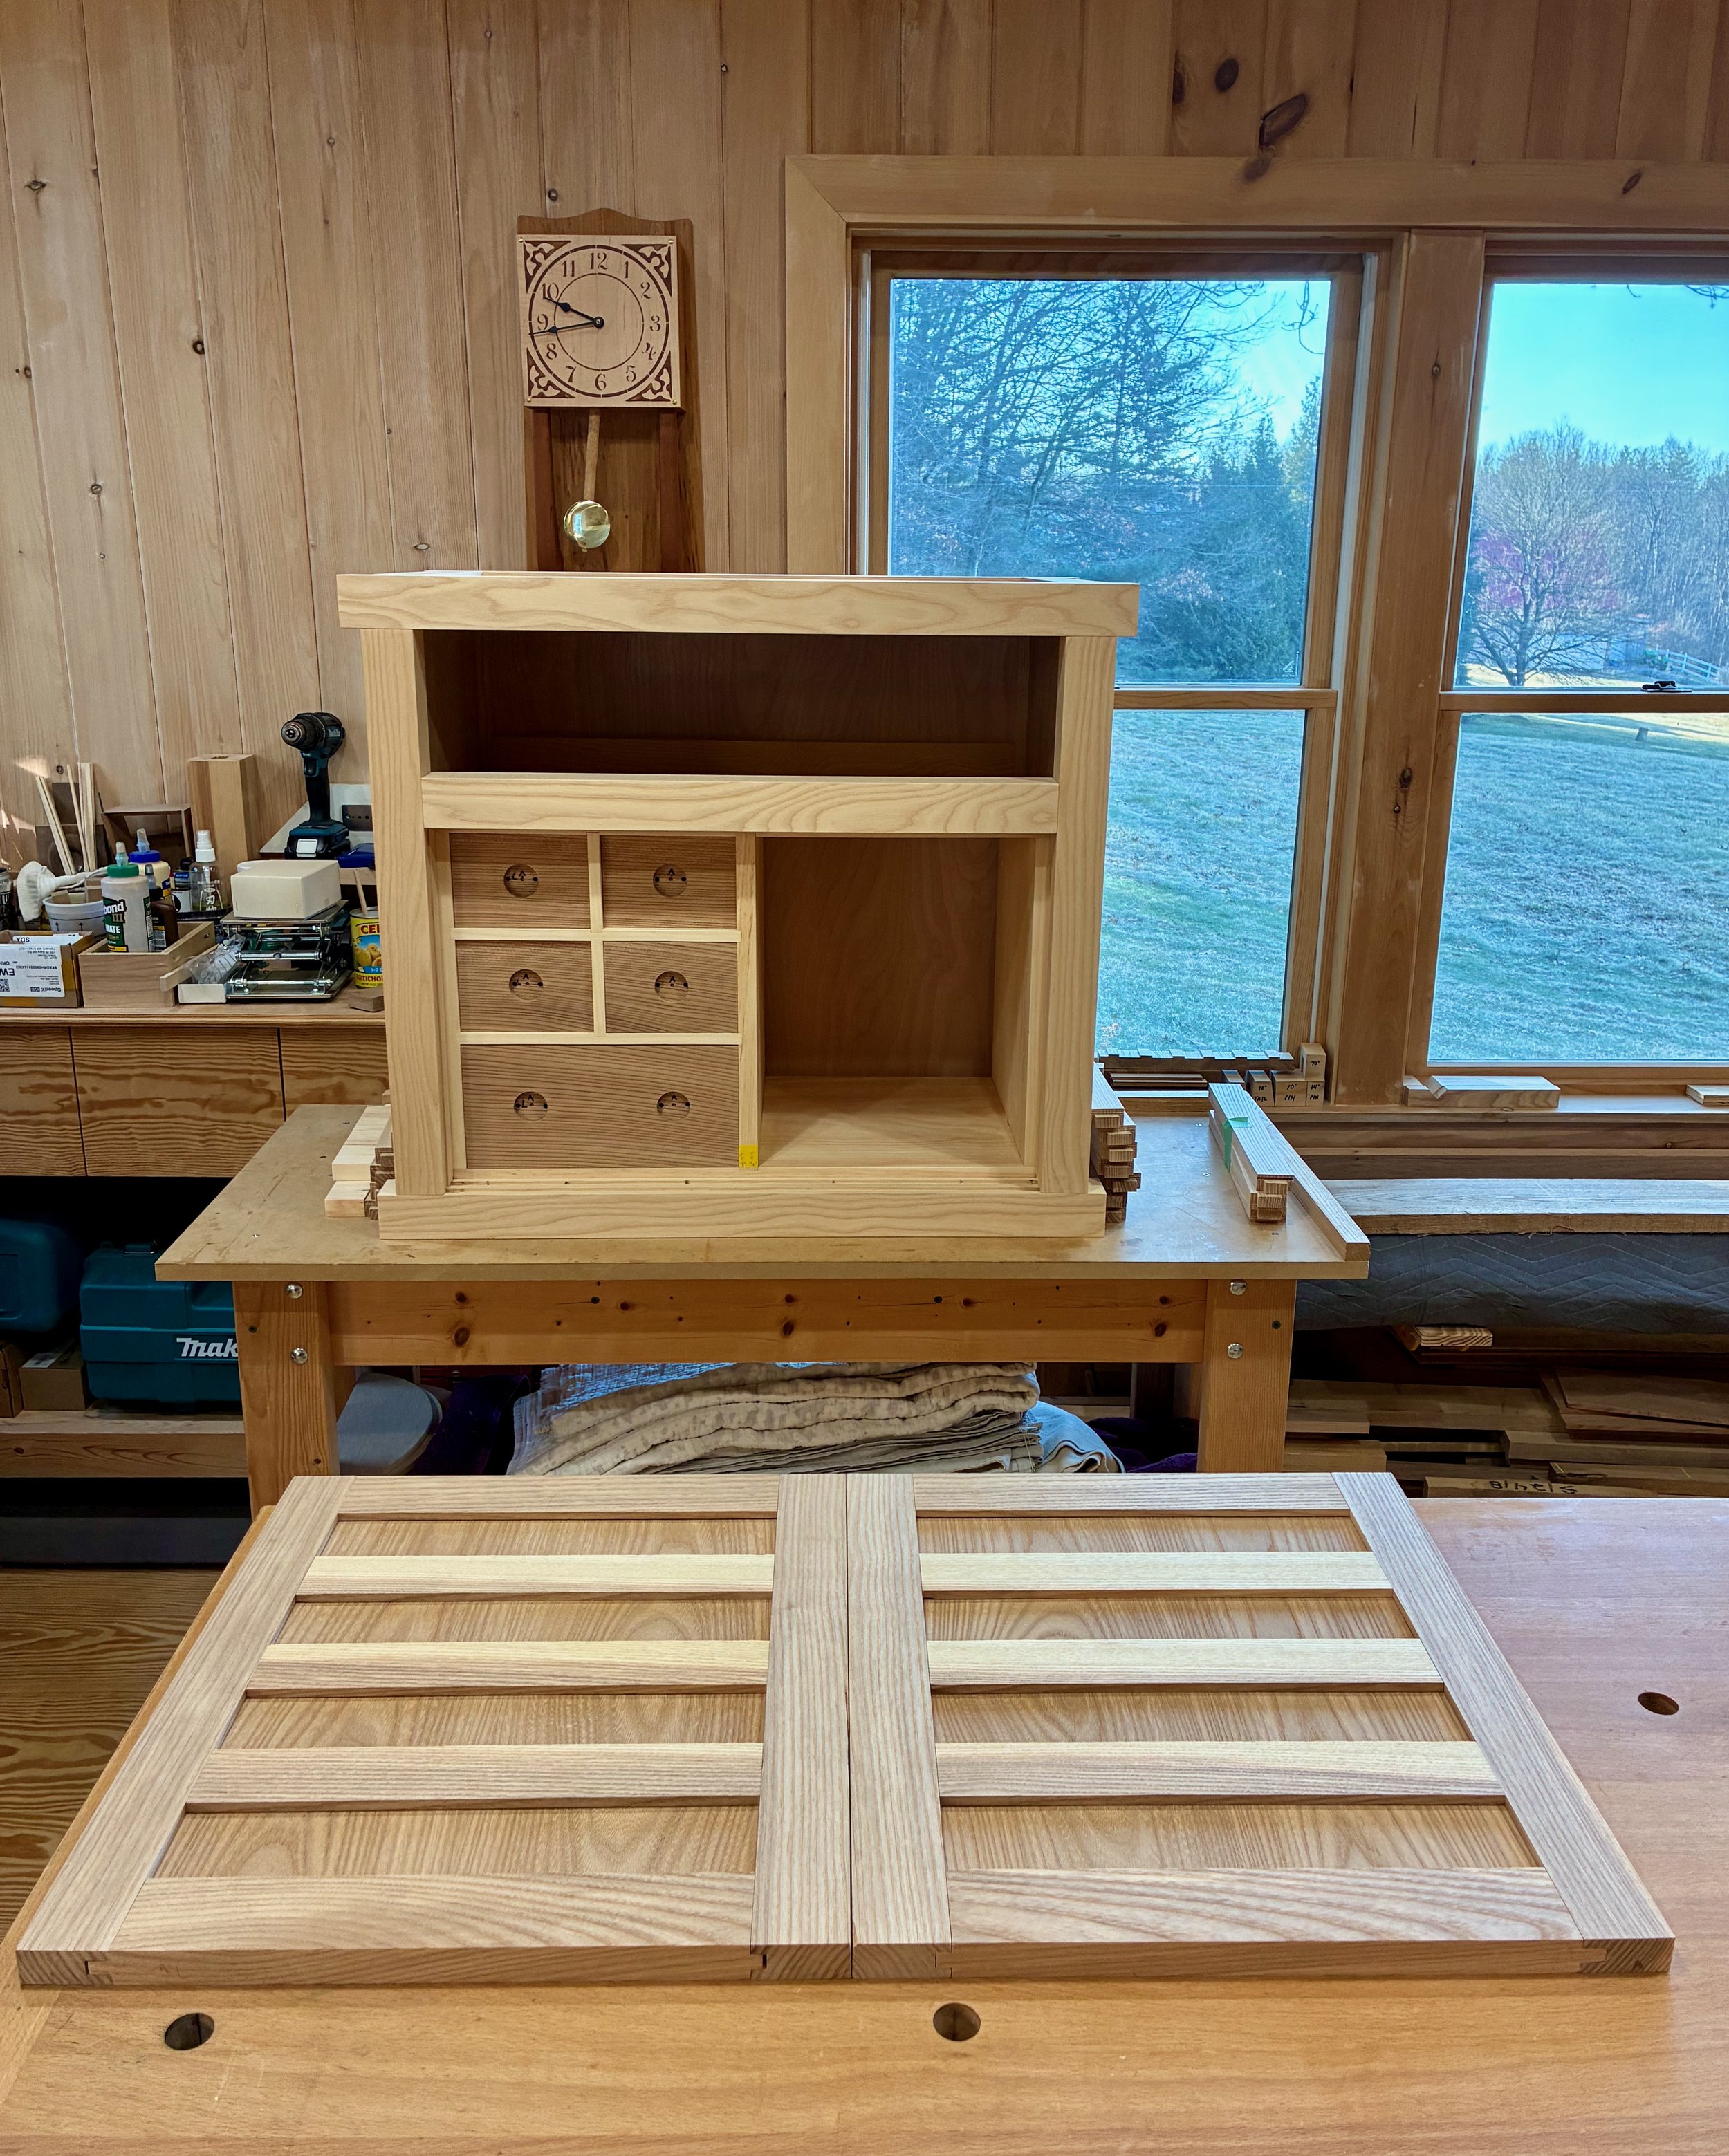
Dry-fit, un-trimmed doors
Prior to glue-up, the 8 door panels were treated with a coat of gel polyurethane. I also trimmed 3/16 of an inch off of each panel’s width to accommodate 1/4 in. foam rubber “plugs” along one side that, by compression, would ensure the panels fit tightly within their slots and still allow for humidity expansion. The doors were then assembled with glue.
To fit the doors in their channels, I needed to rabbet the backsides of the tops and bottoms. This was done at the table saw. Now sliding within their tracks, I could mark the interior stiles and cut the doors to their final width dimension at the table saw.
Doors in place
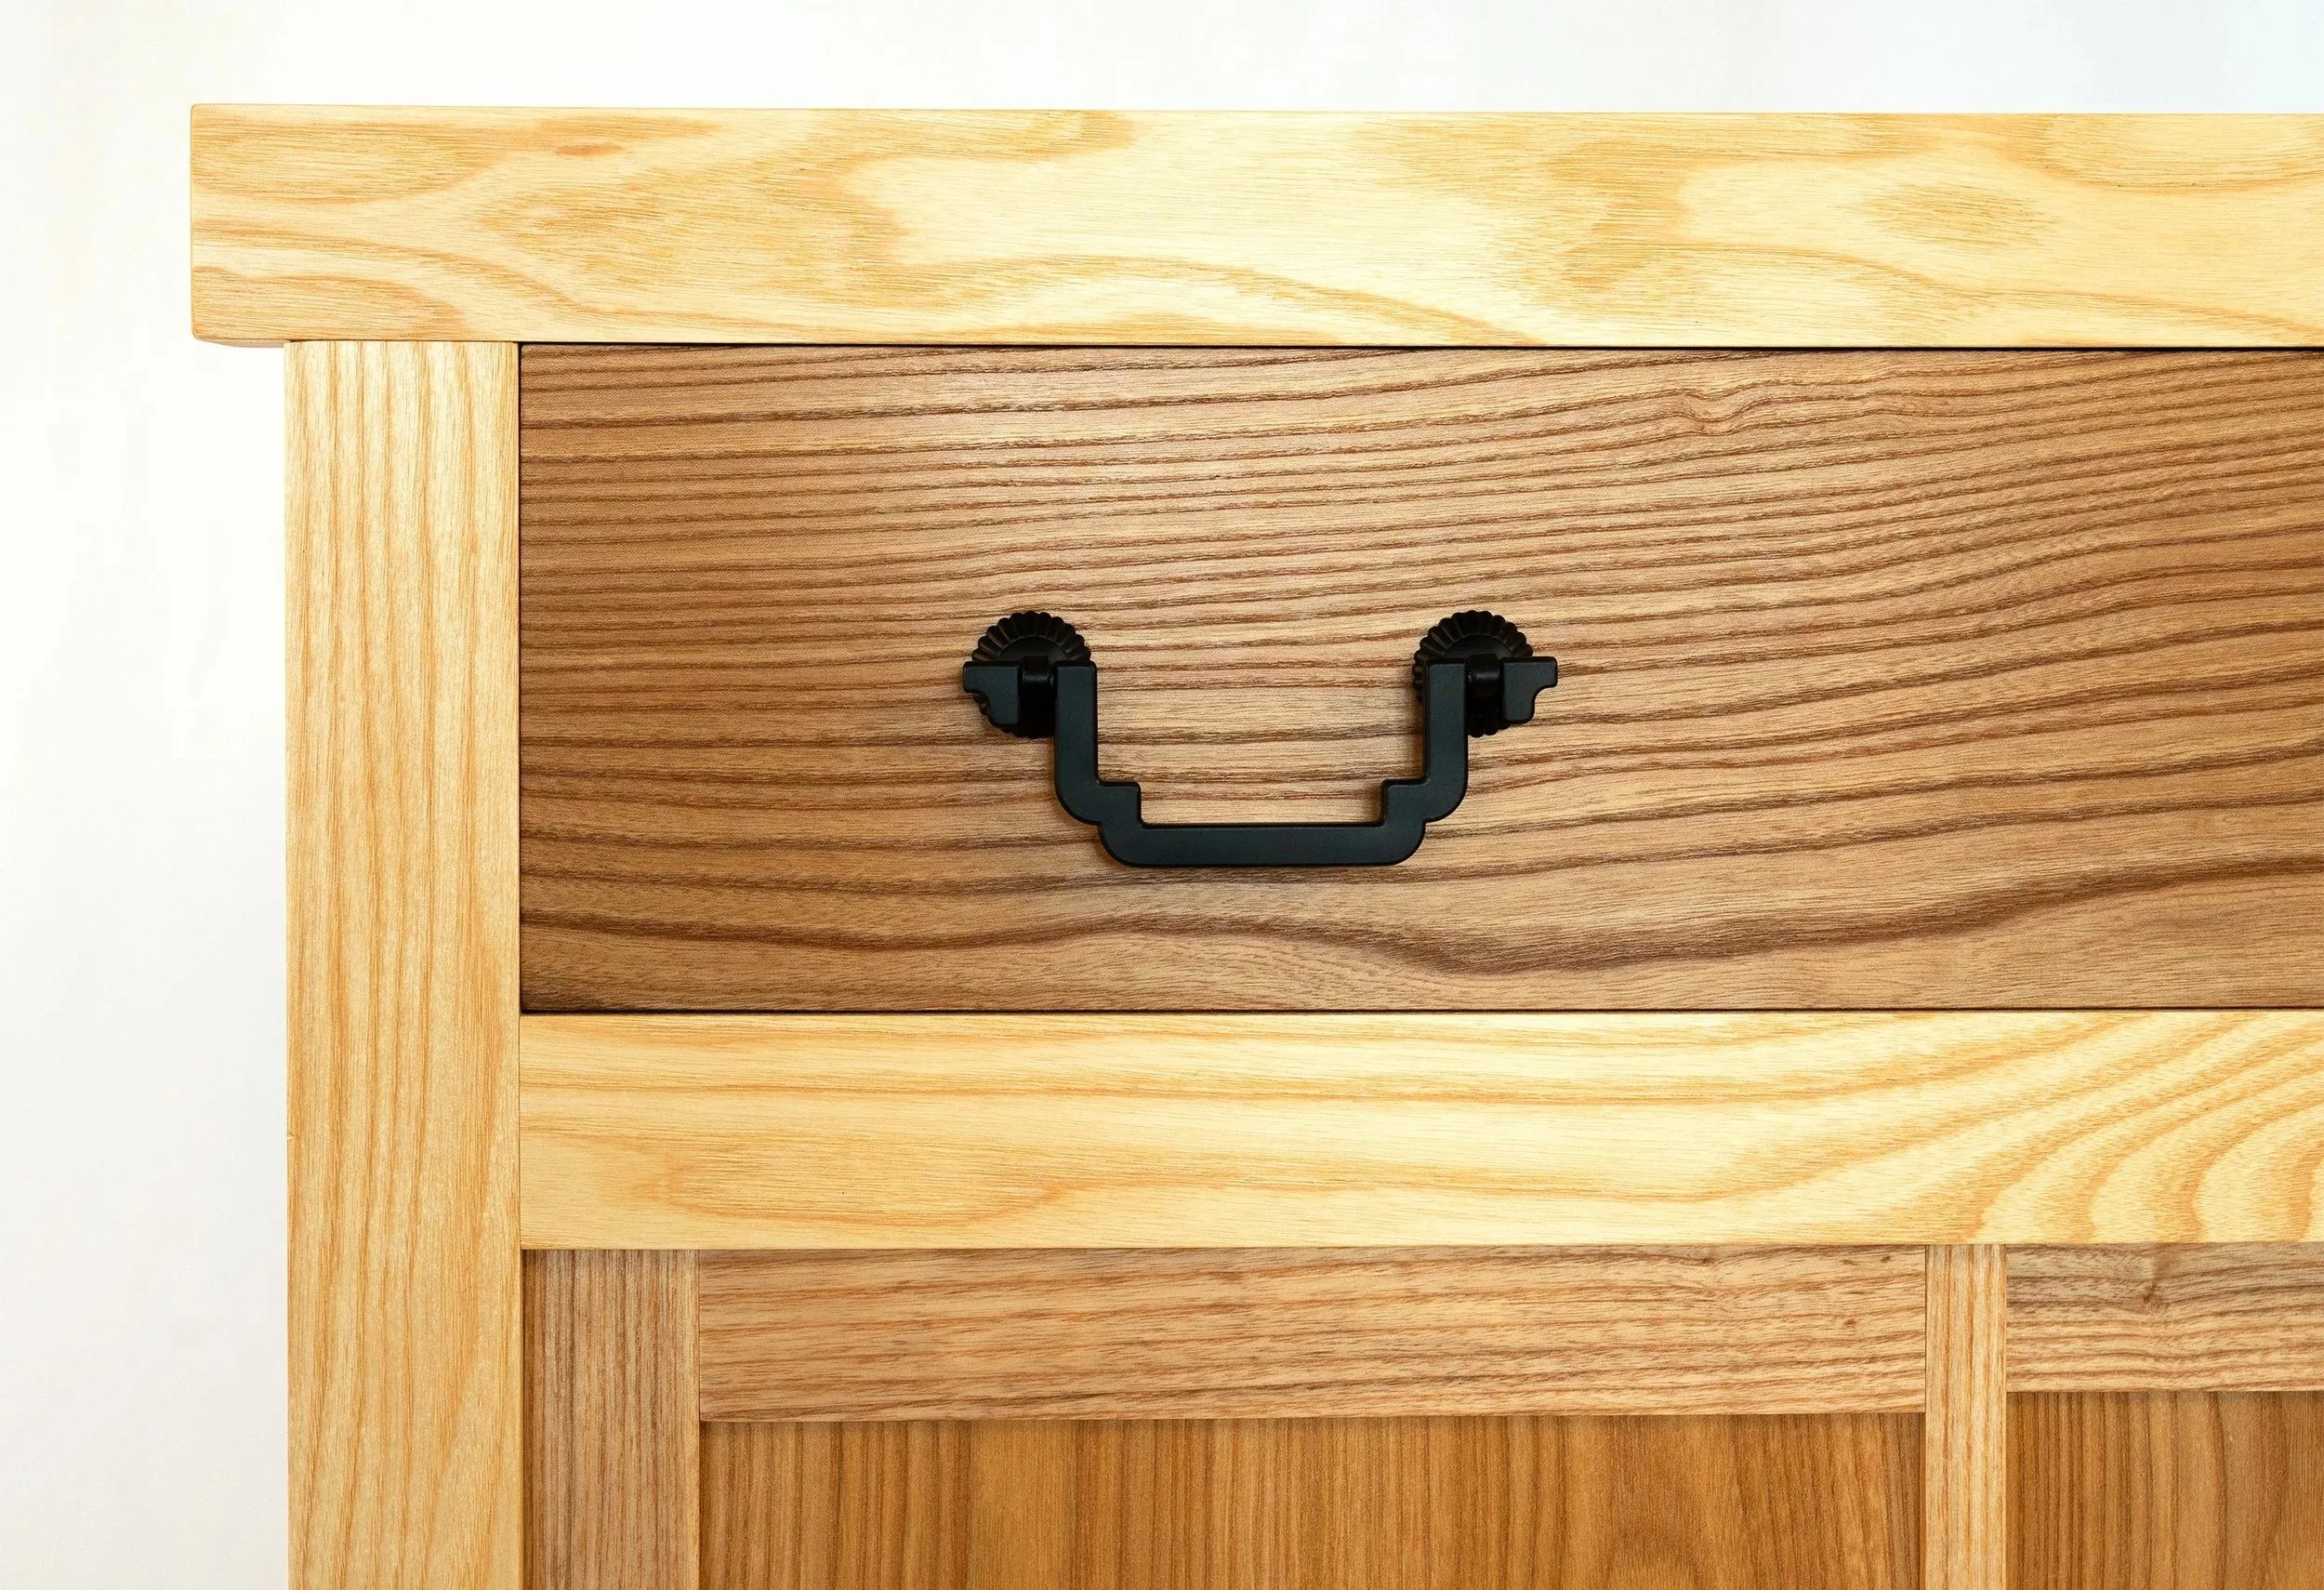
Before leaving the doors I created the sockets that would house the pulls. These pulls, along with the big drawer handles were procured from Japan via the internet and a nice tansu hardware store called Morikuni. A 5/8 in. wide by 5/16 in. deep cut-out was needed here, and for this I used my small plunge router and a 5/8 in. diameter bit. To keep the socket parallel with the door edge I also made a simple jig out of scrap wood to guide the cut. The round ends of the groove were squared off using a chisel and it all went well.

Far: plunge router cut guided by a simple jig
Near: squaring-off the cut with a chisel
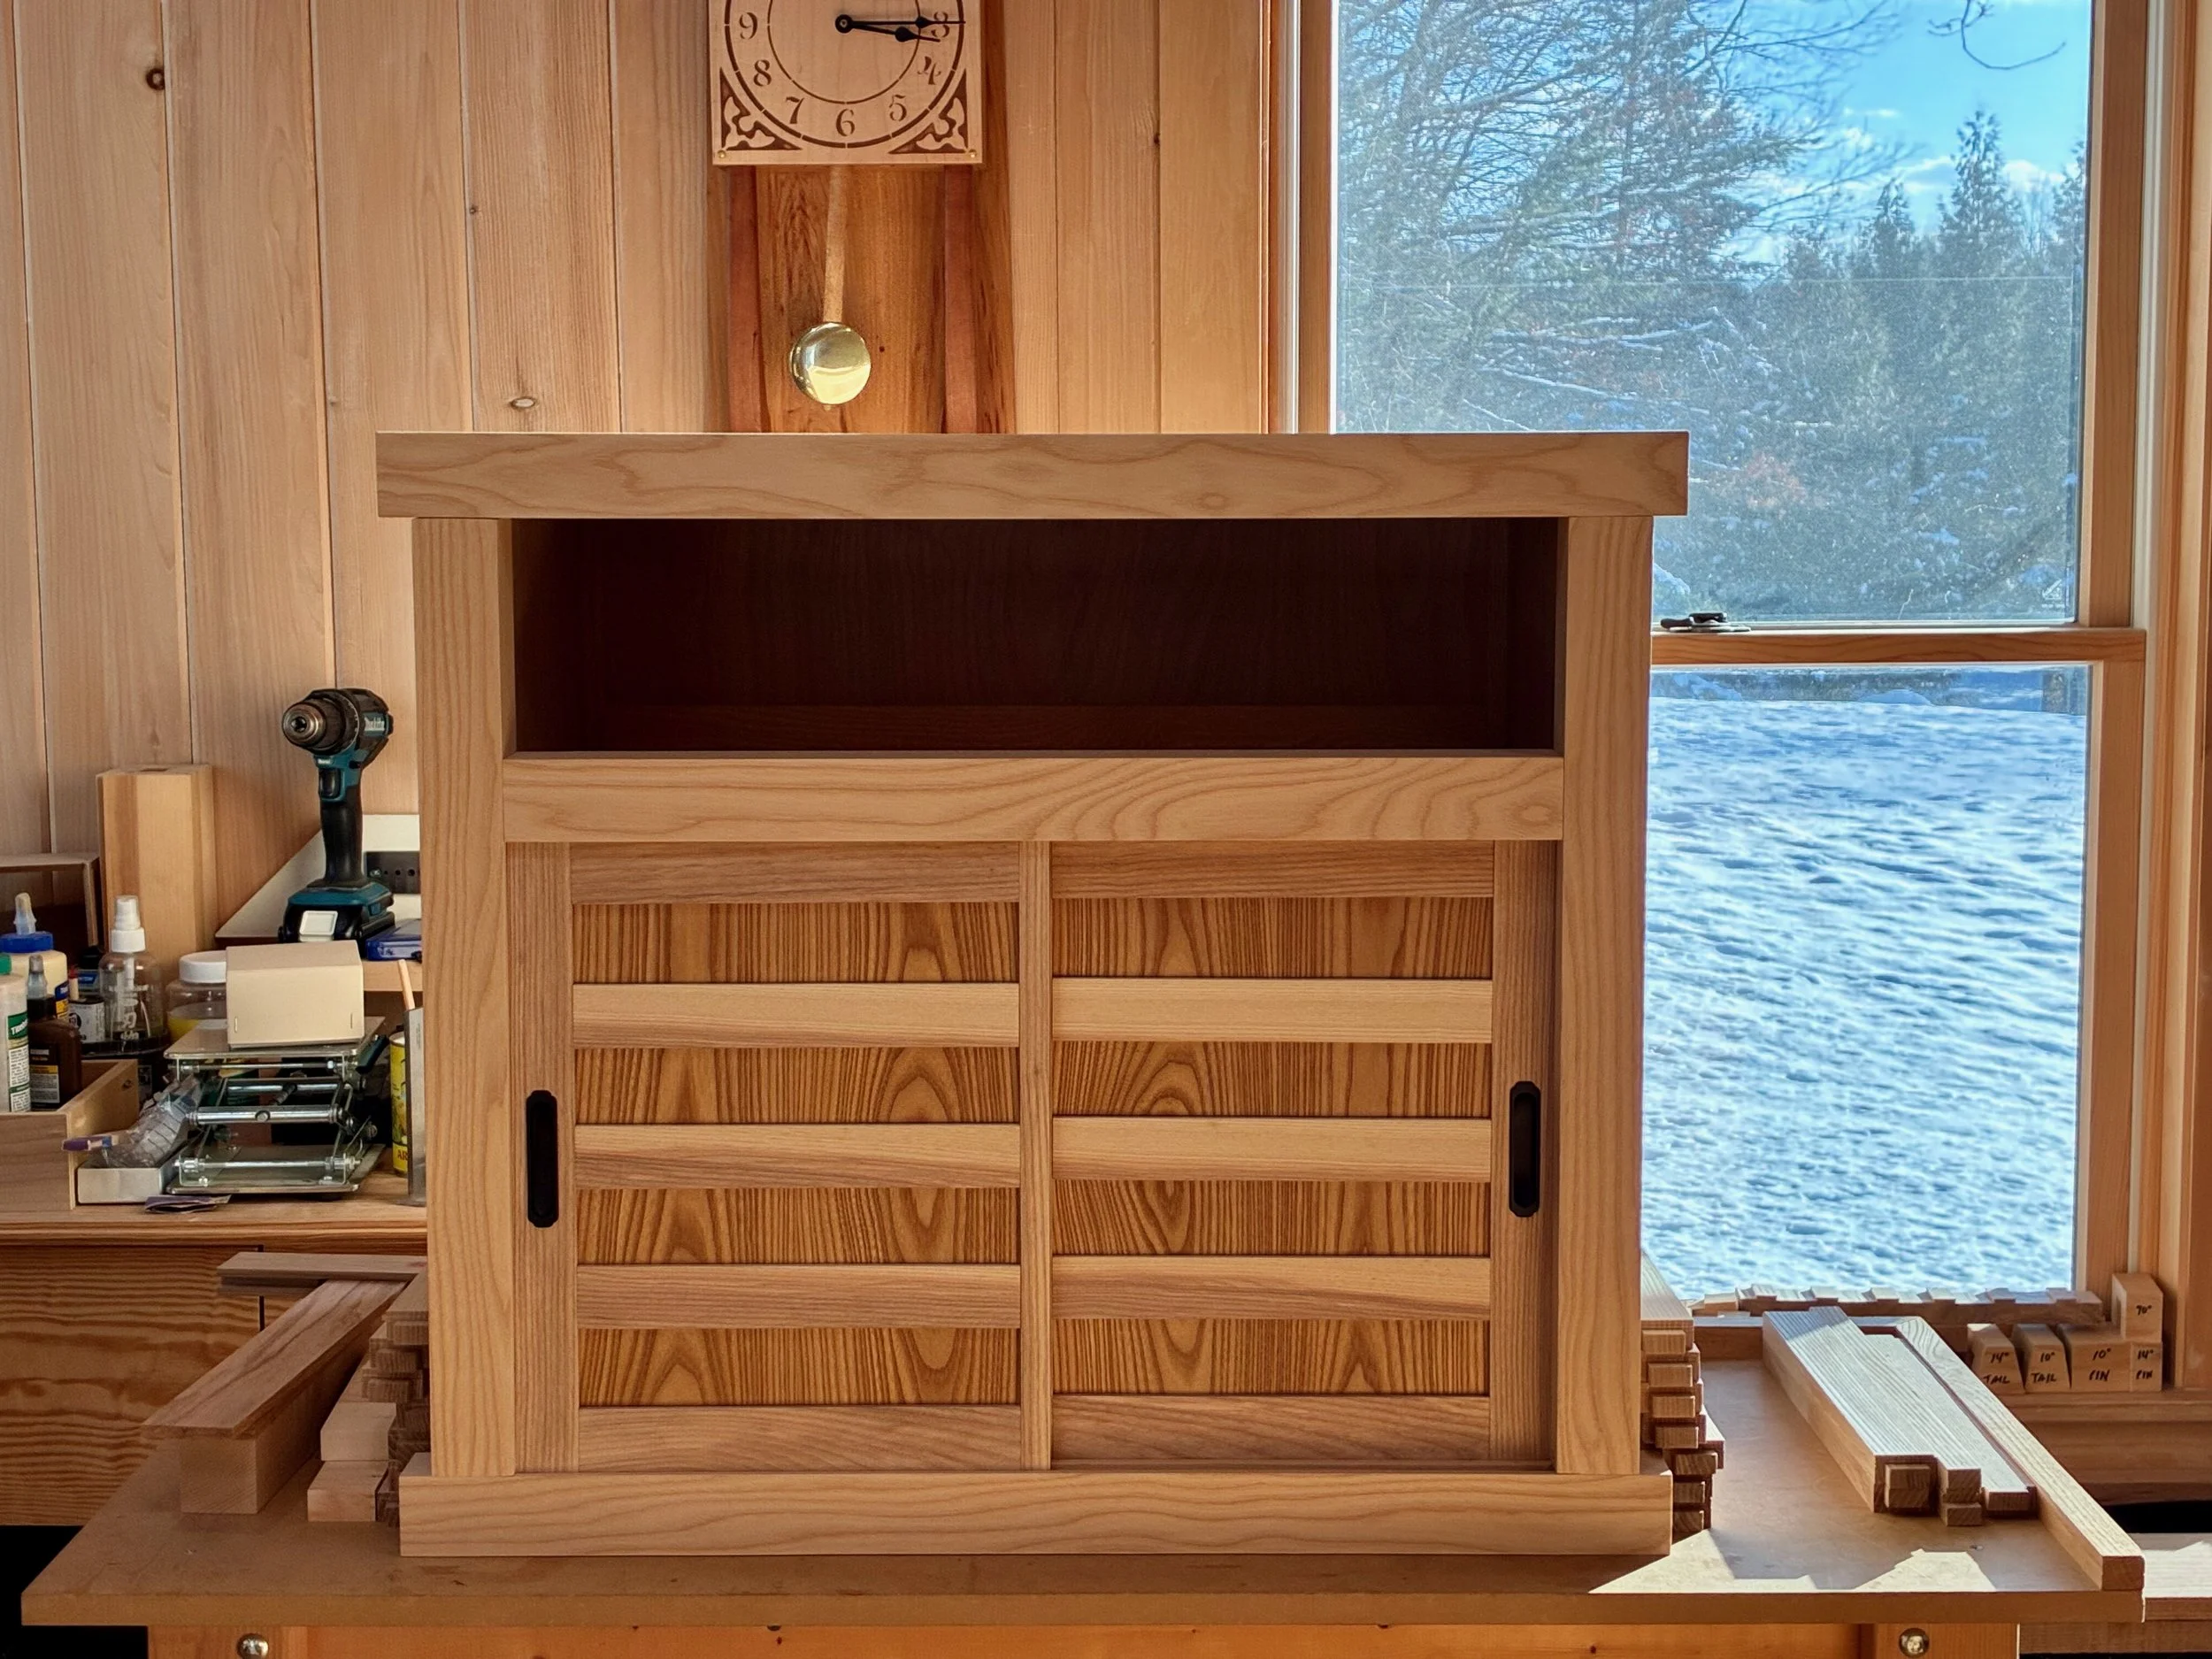
Pulls installed
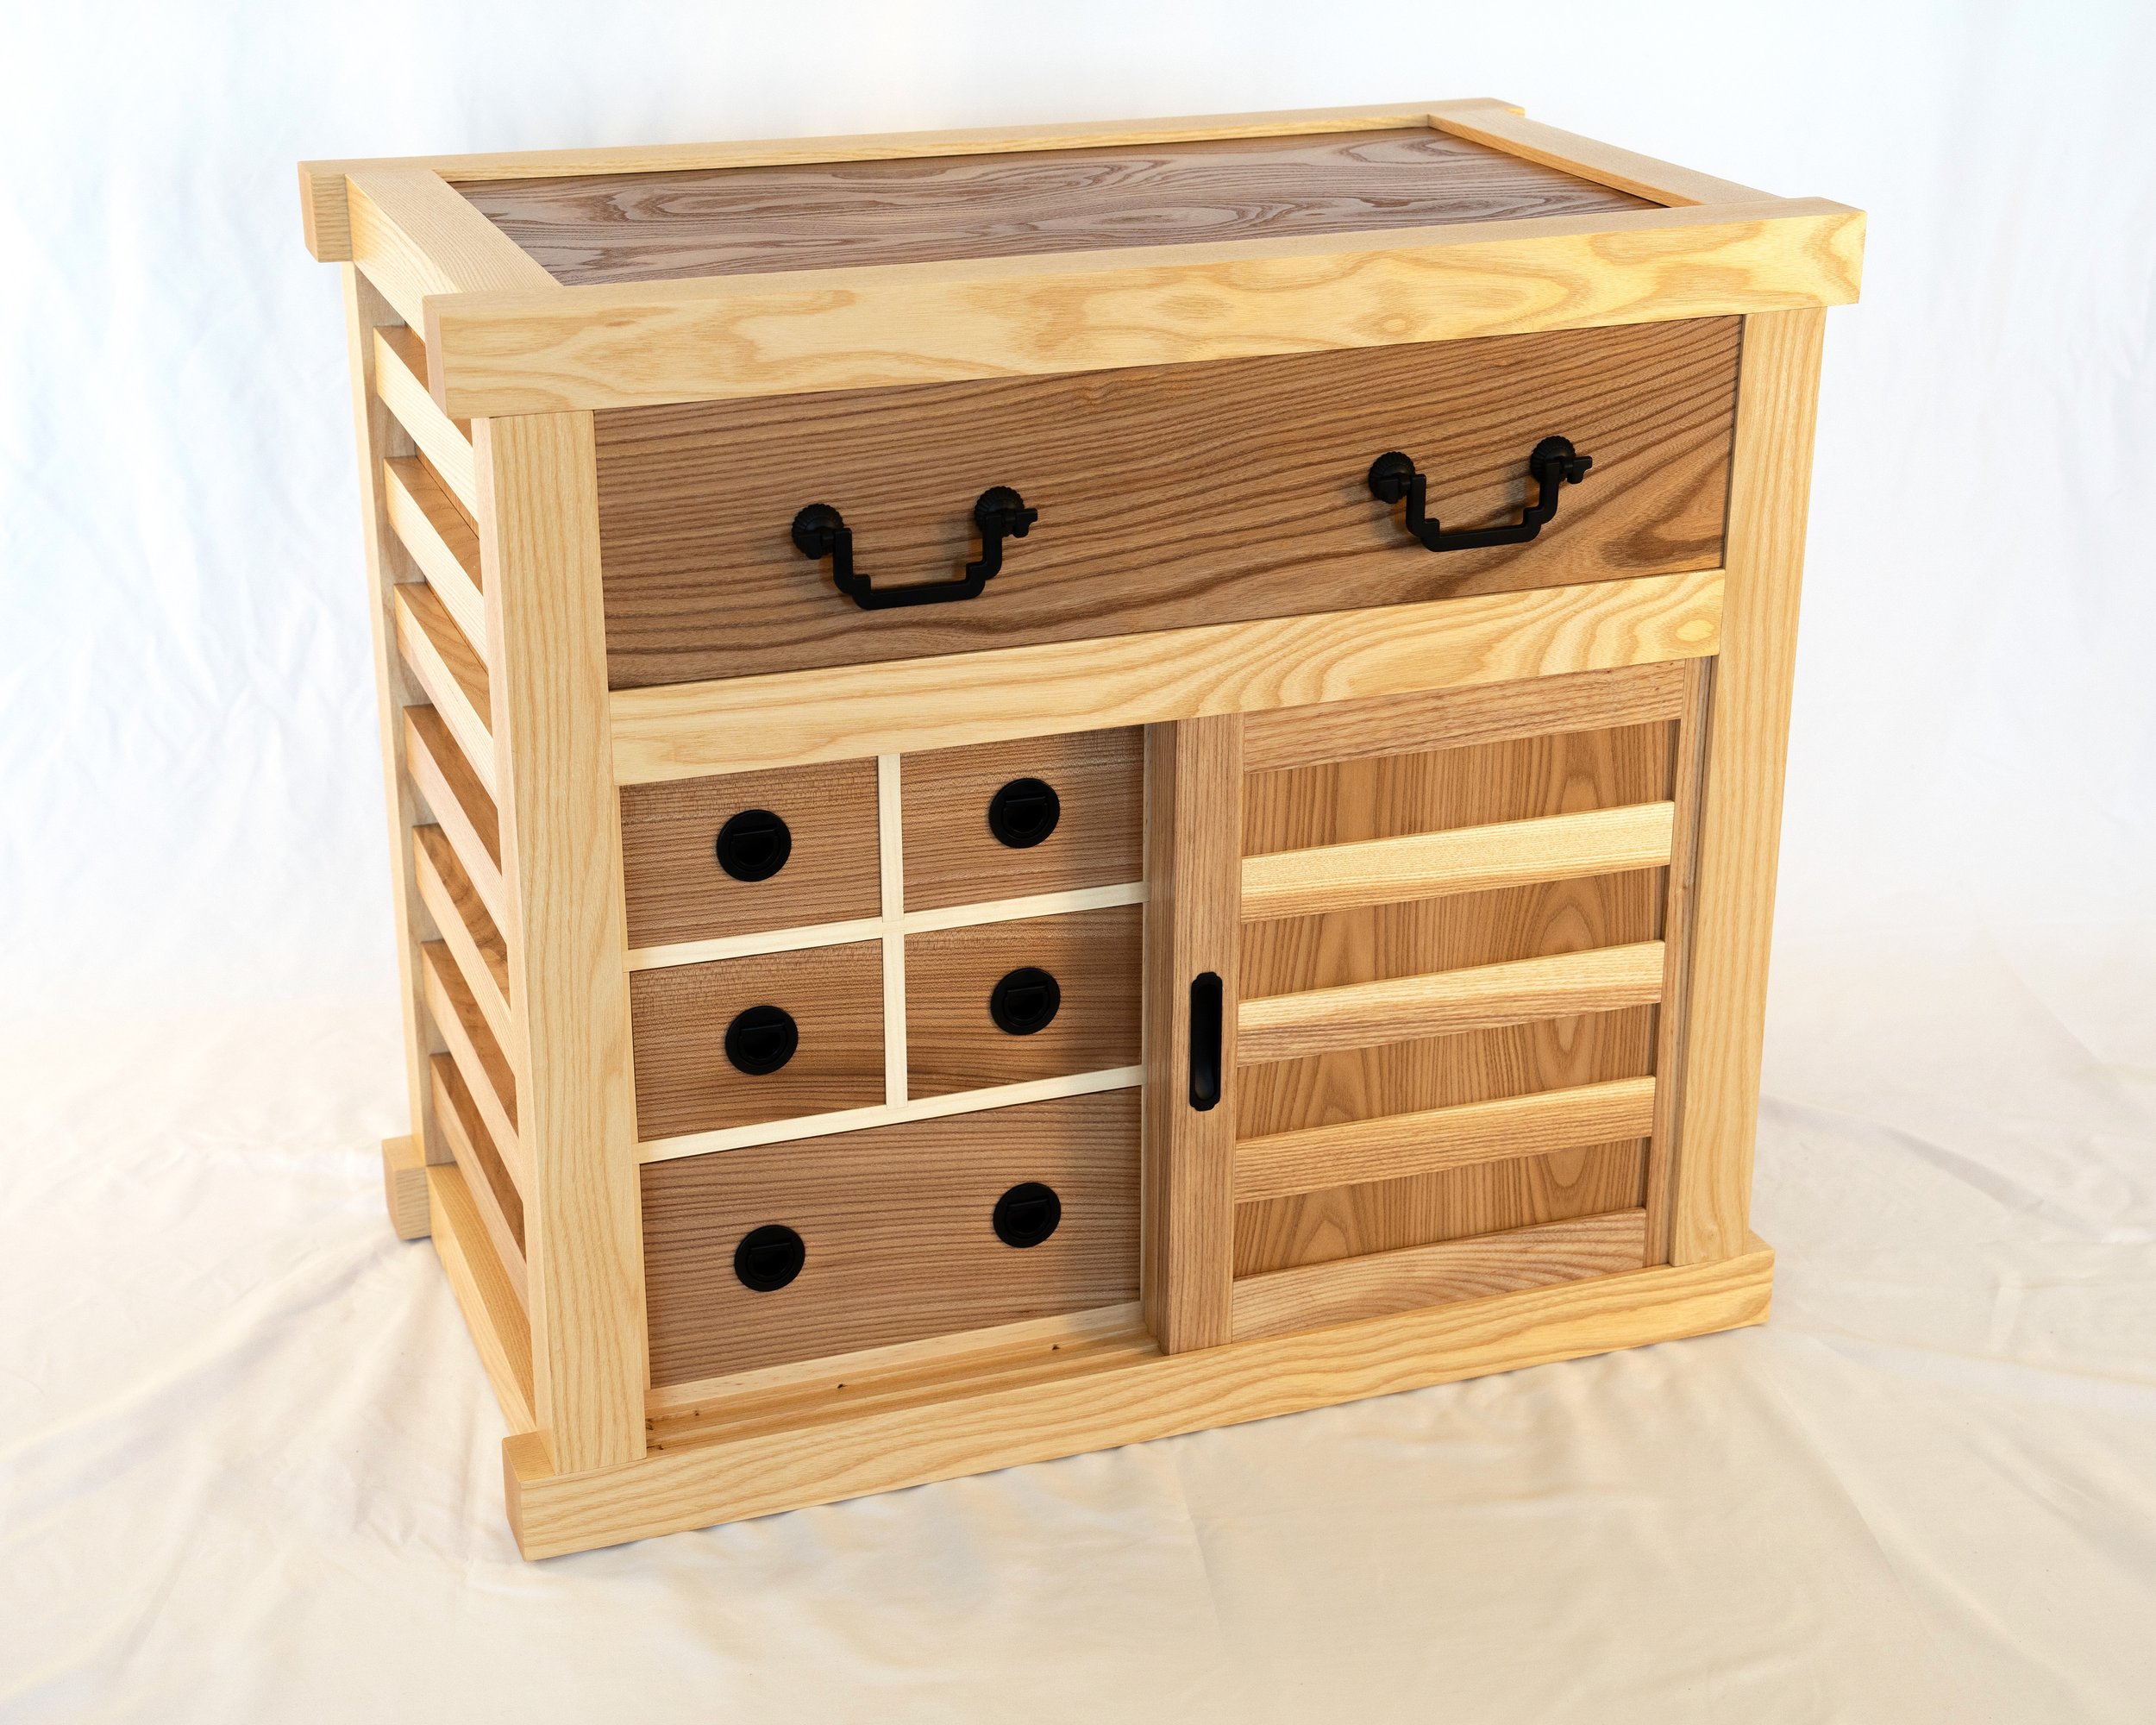
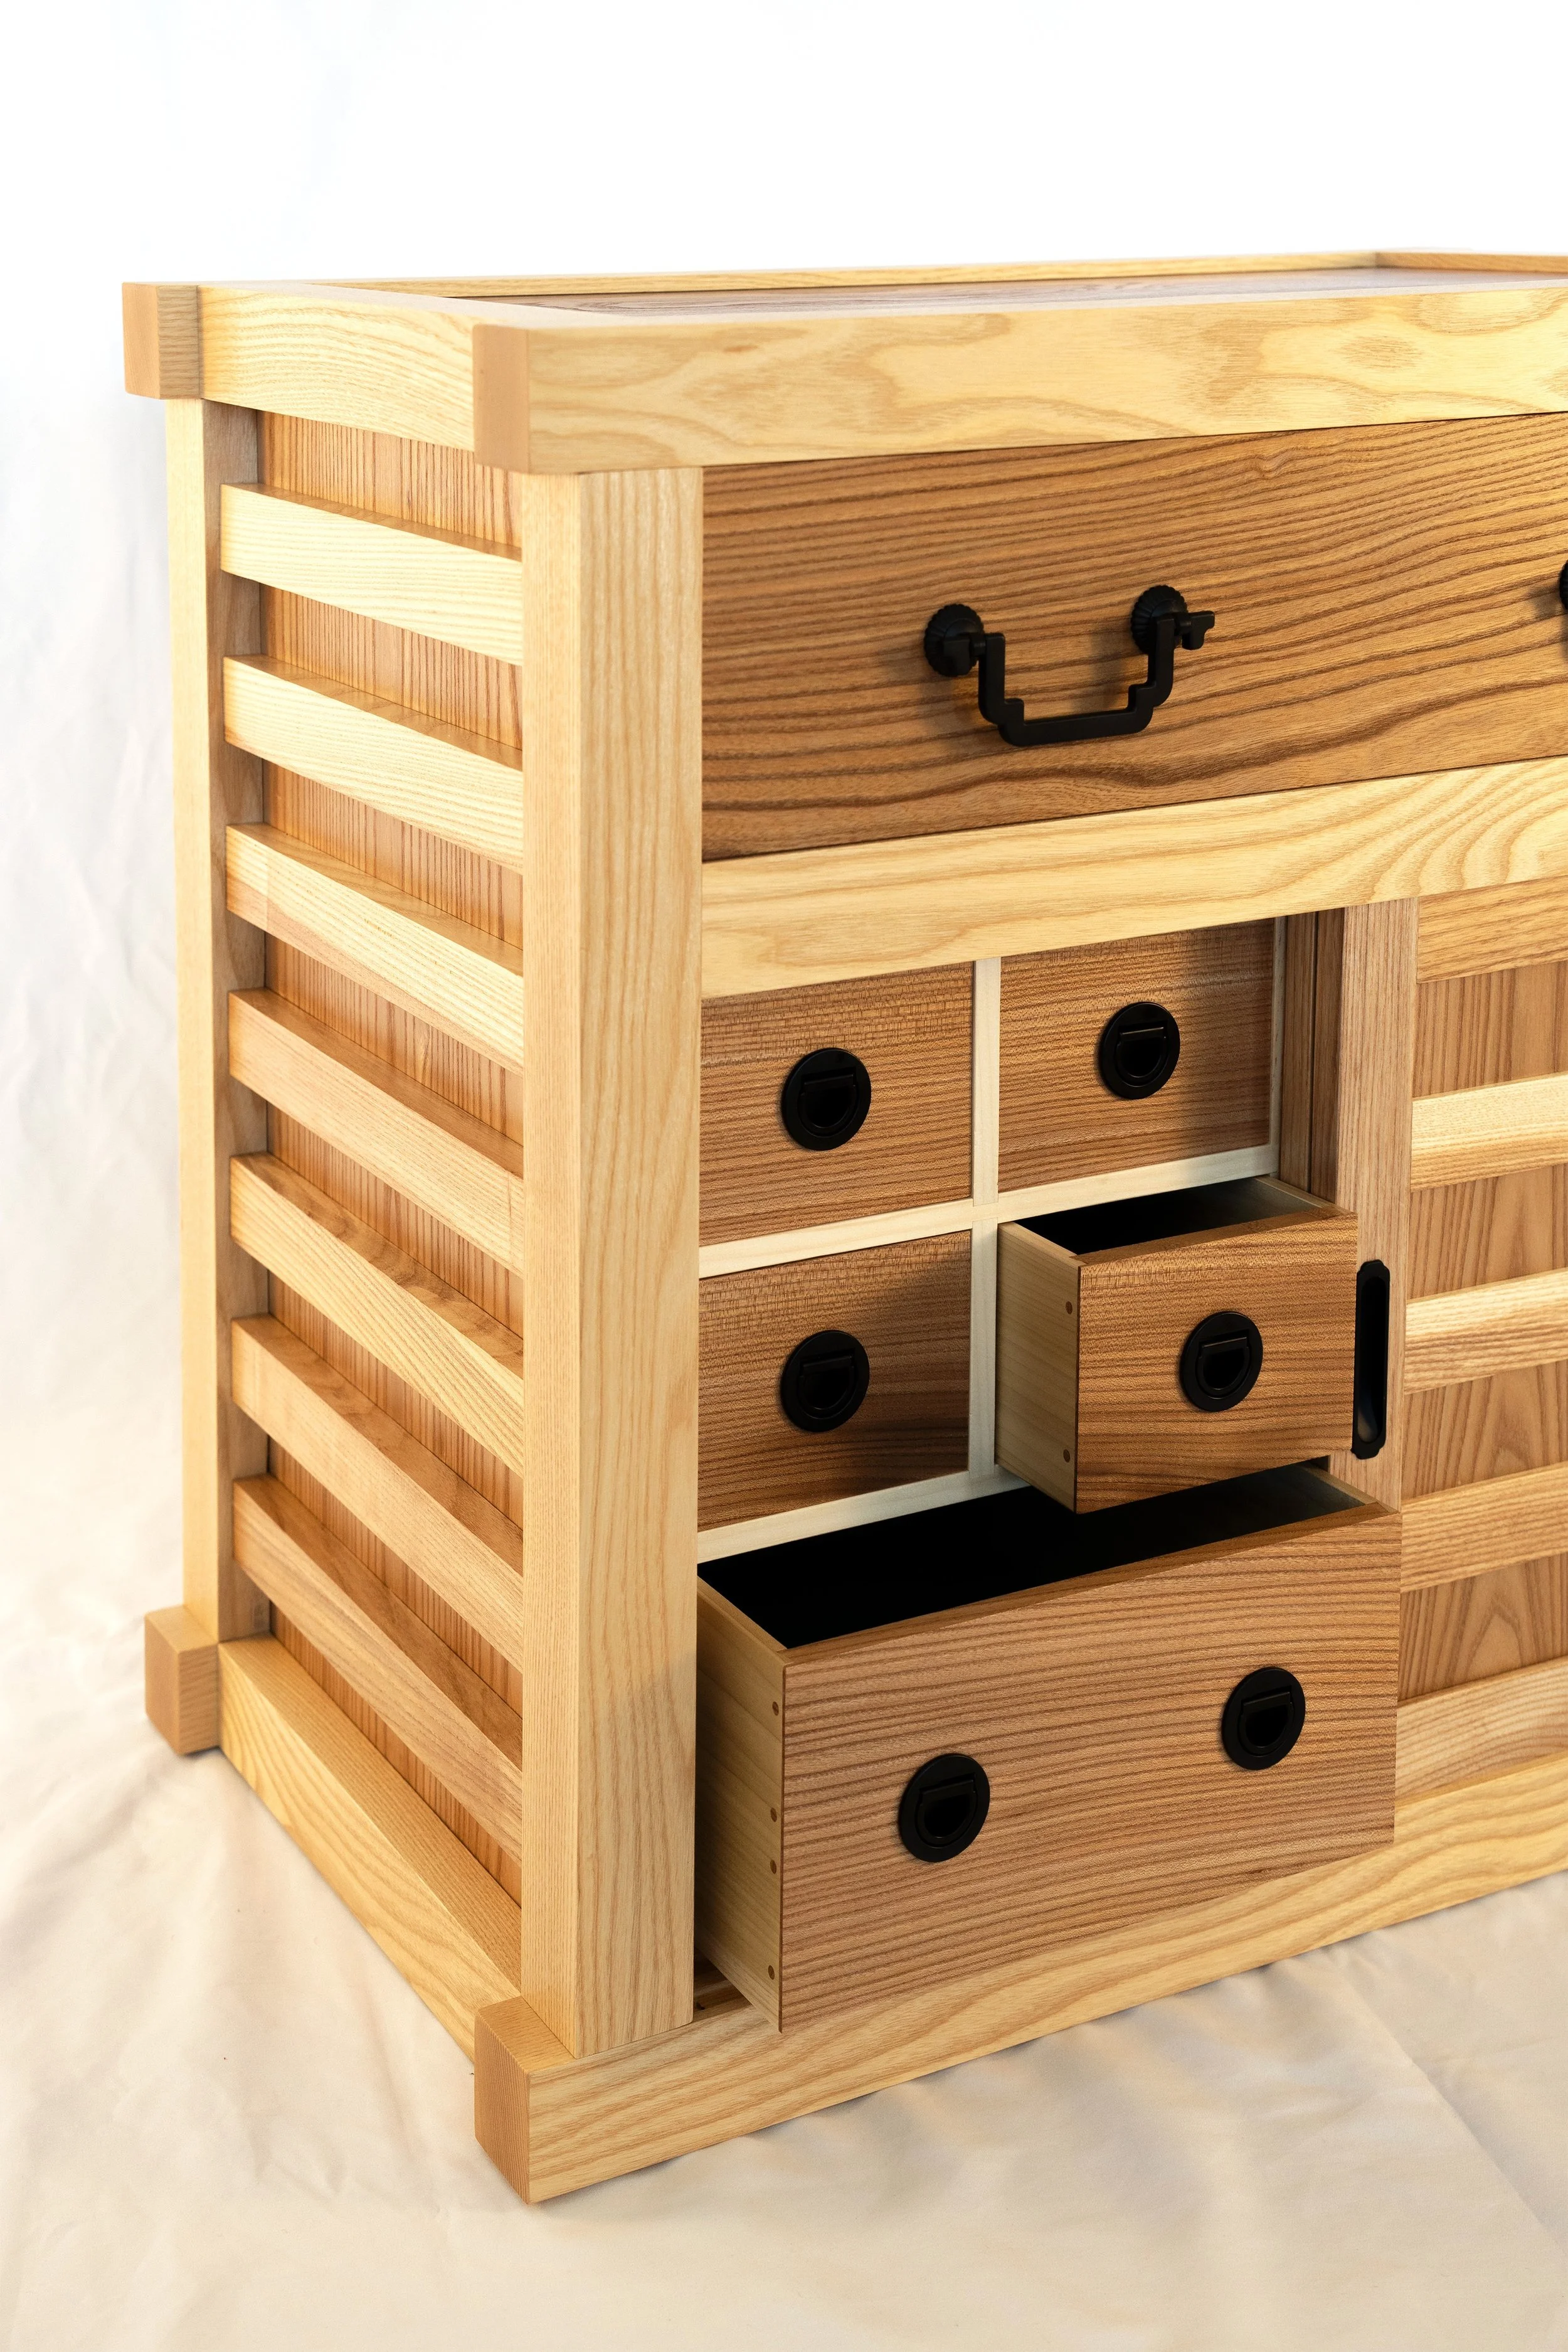
Central Drawer
The final sub-assembly project was that large central drawer. This would be made from elm and poplar in a manner similar to those smaller drawers; just the front joints (double rabbet) and drawer bottom (birch plywood) would be changed. I selected a charming elm board for the drawer front and it all came together nicely.
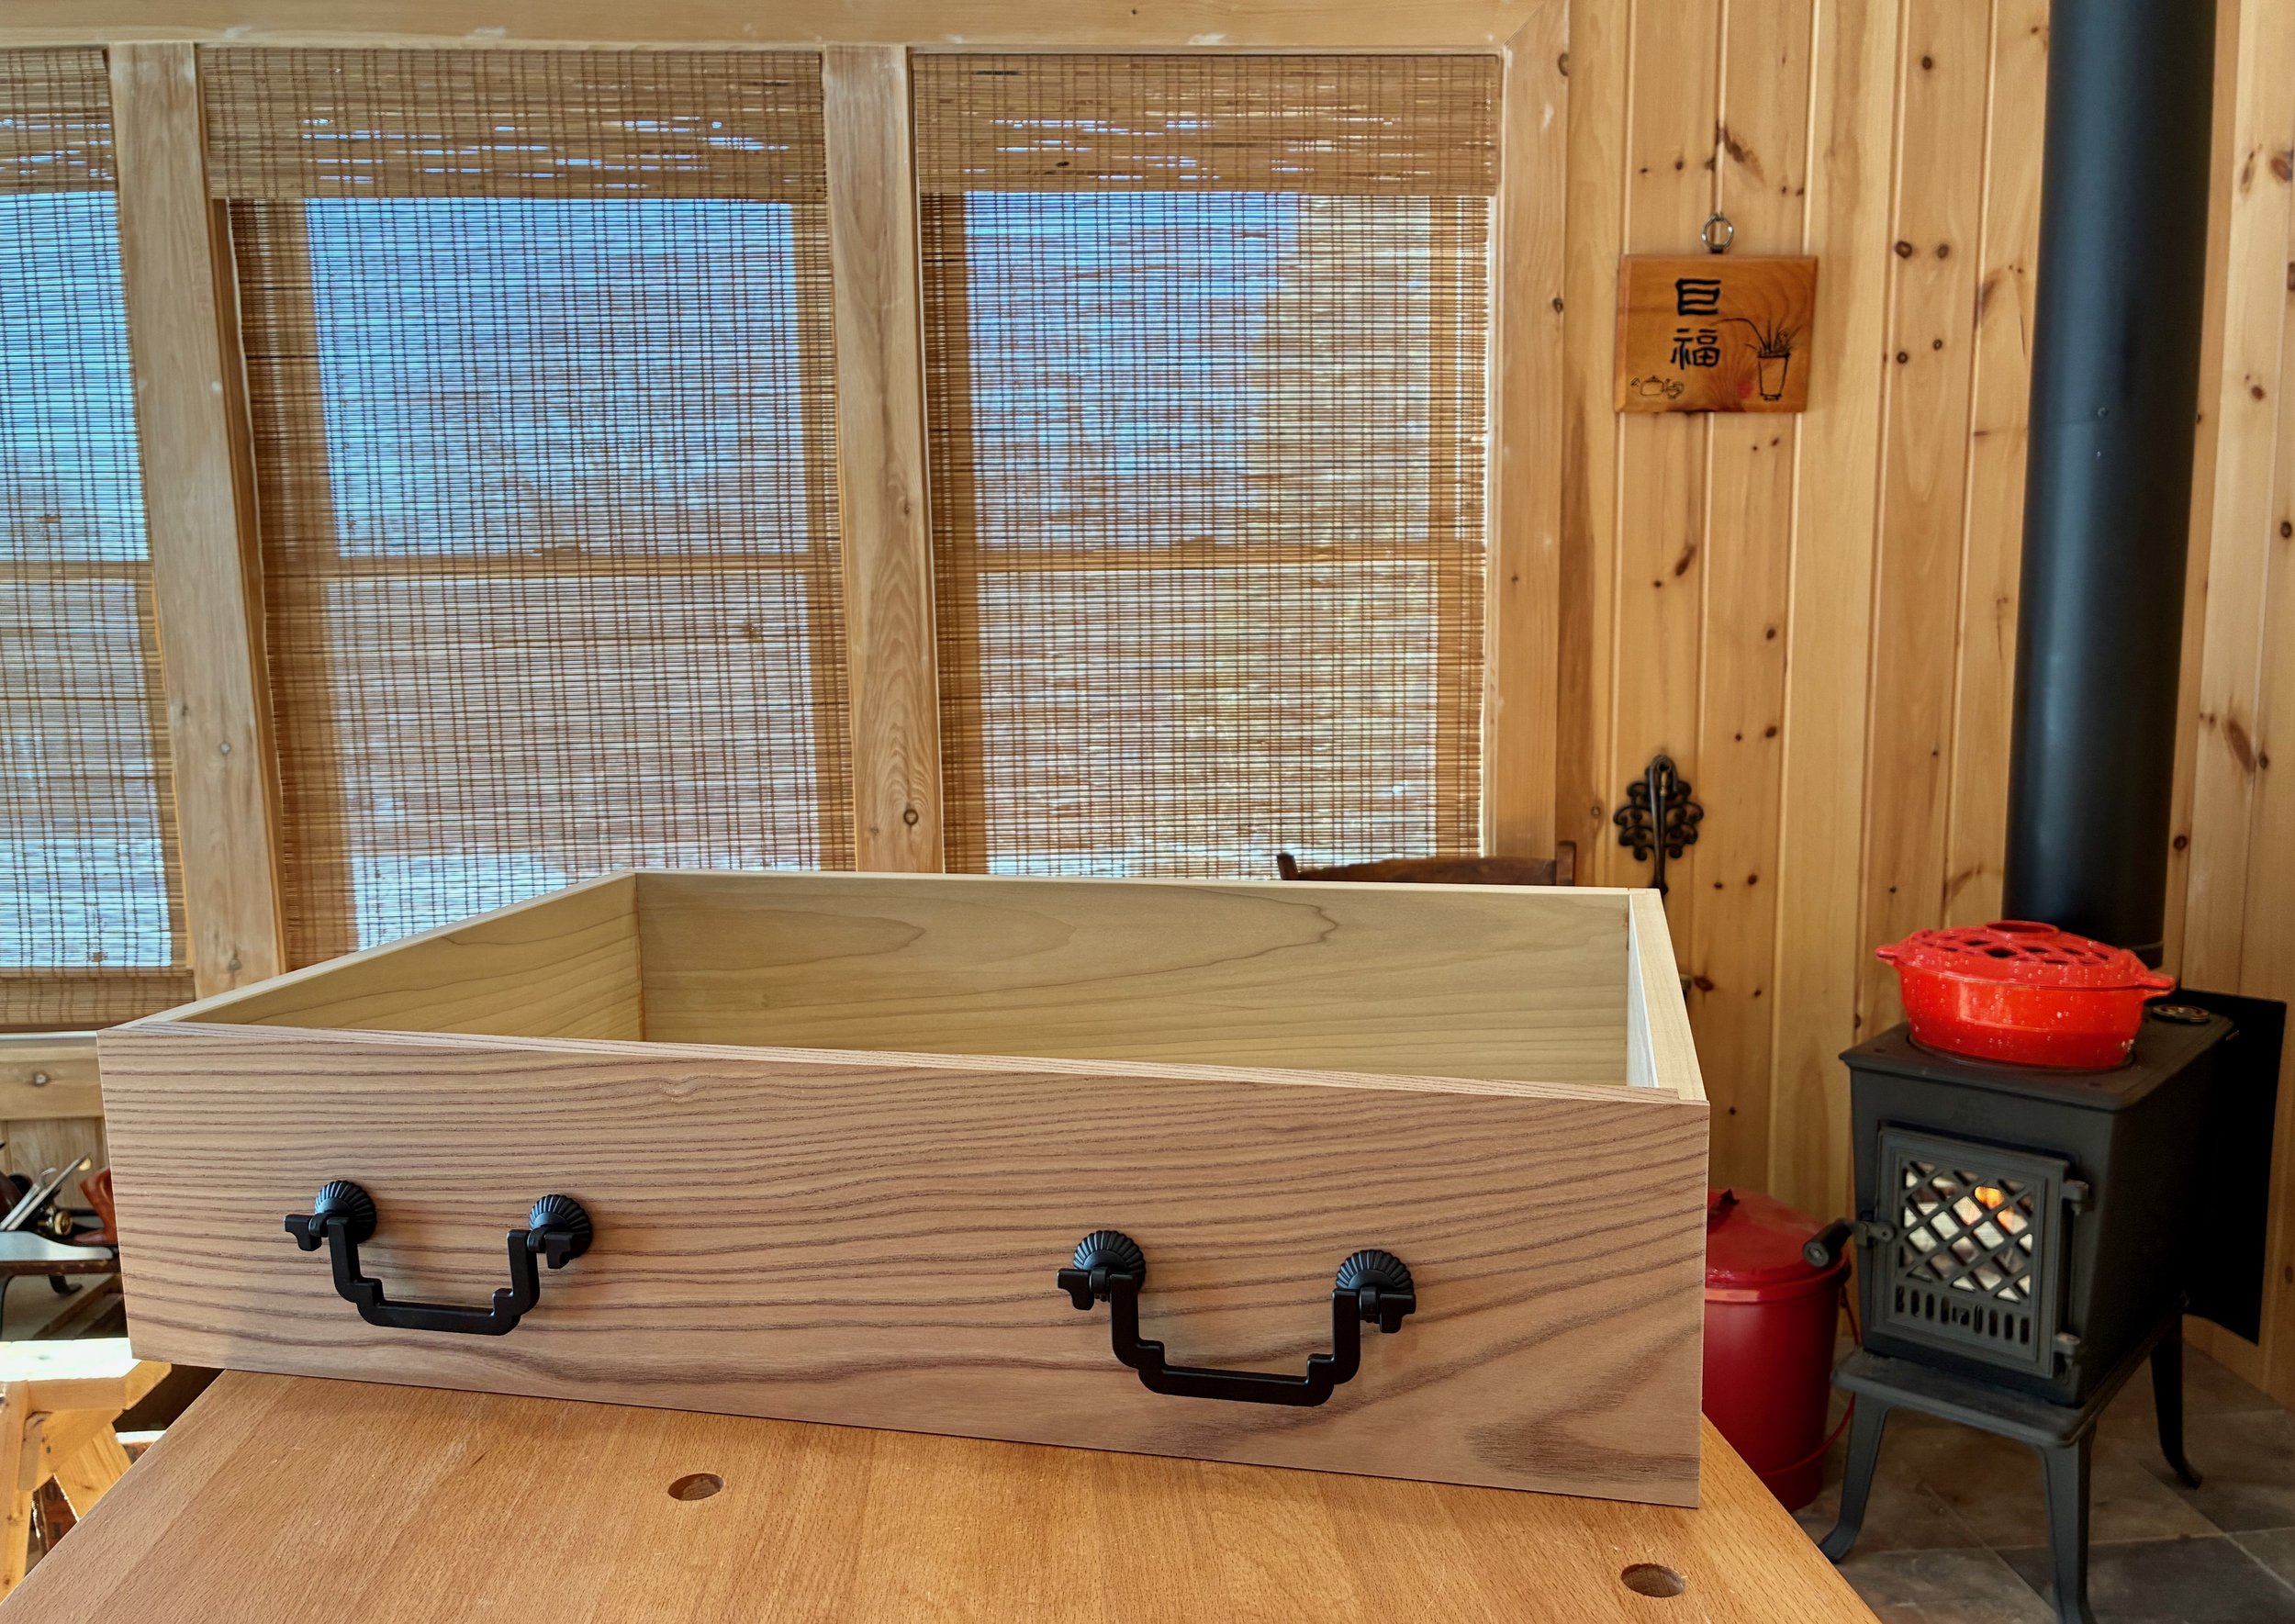
Big drawer
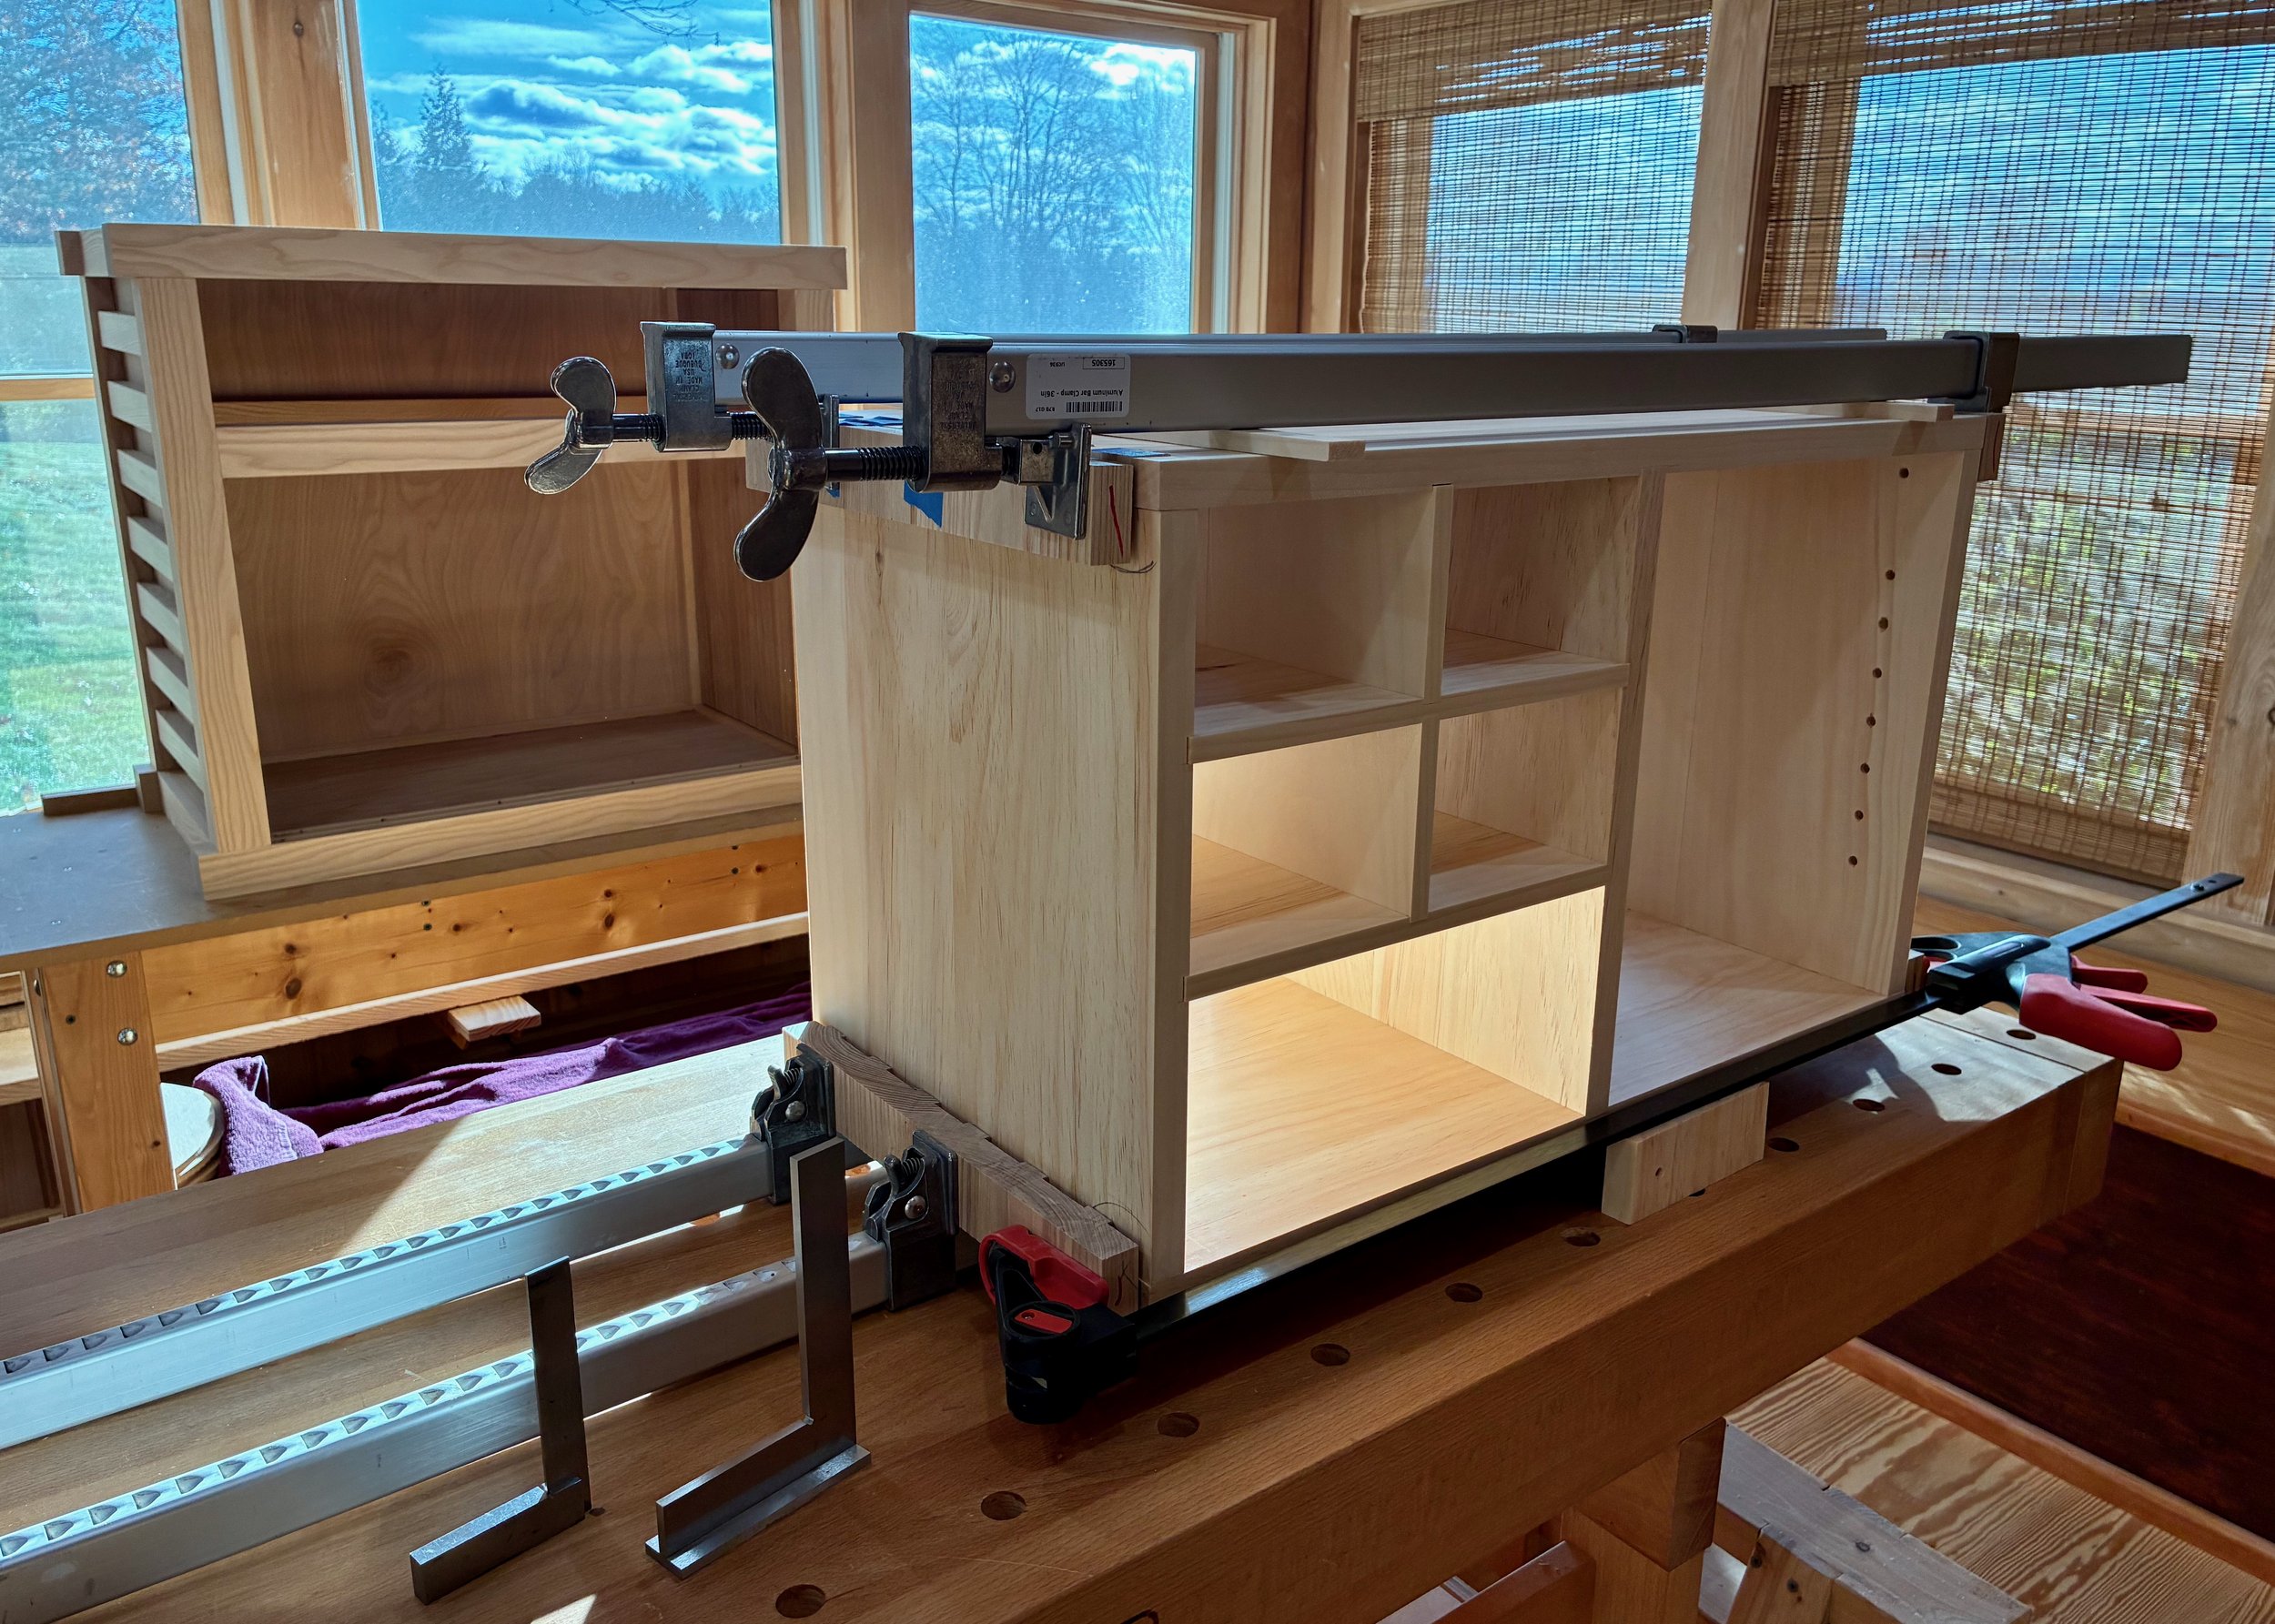
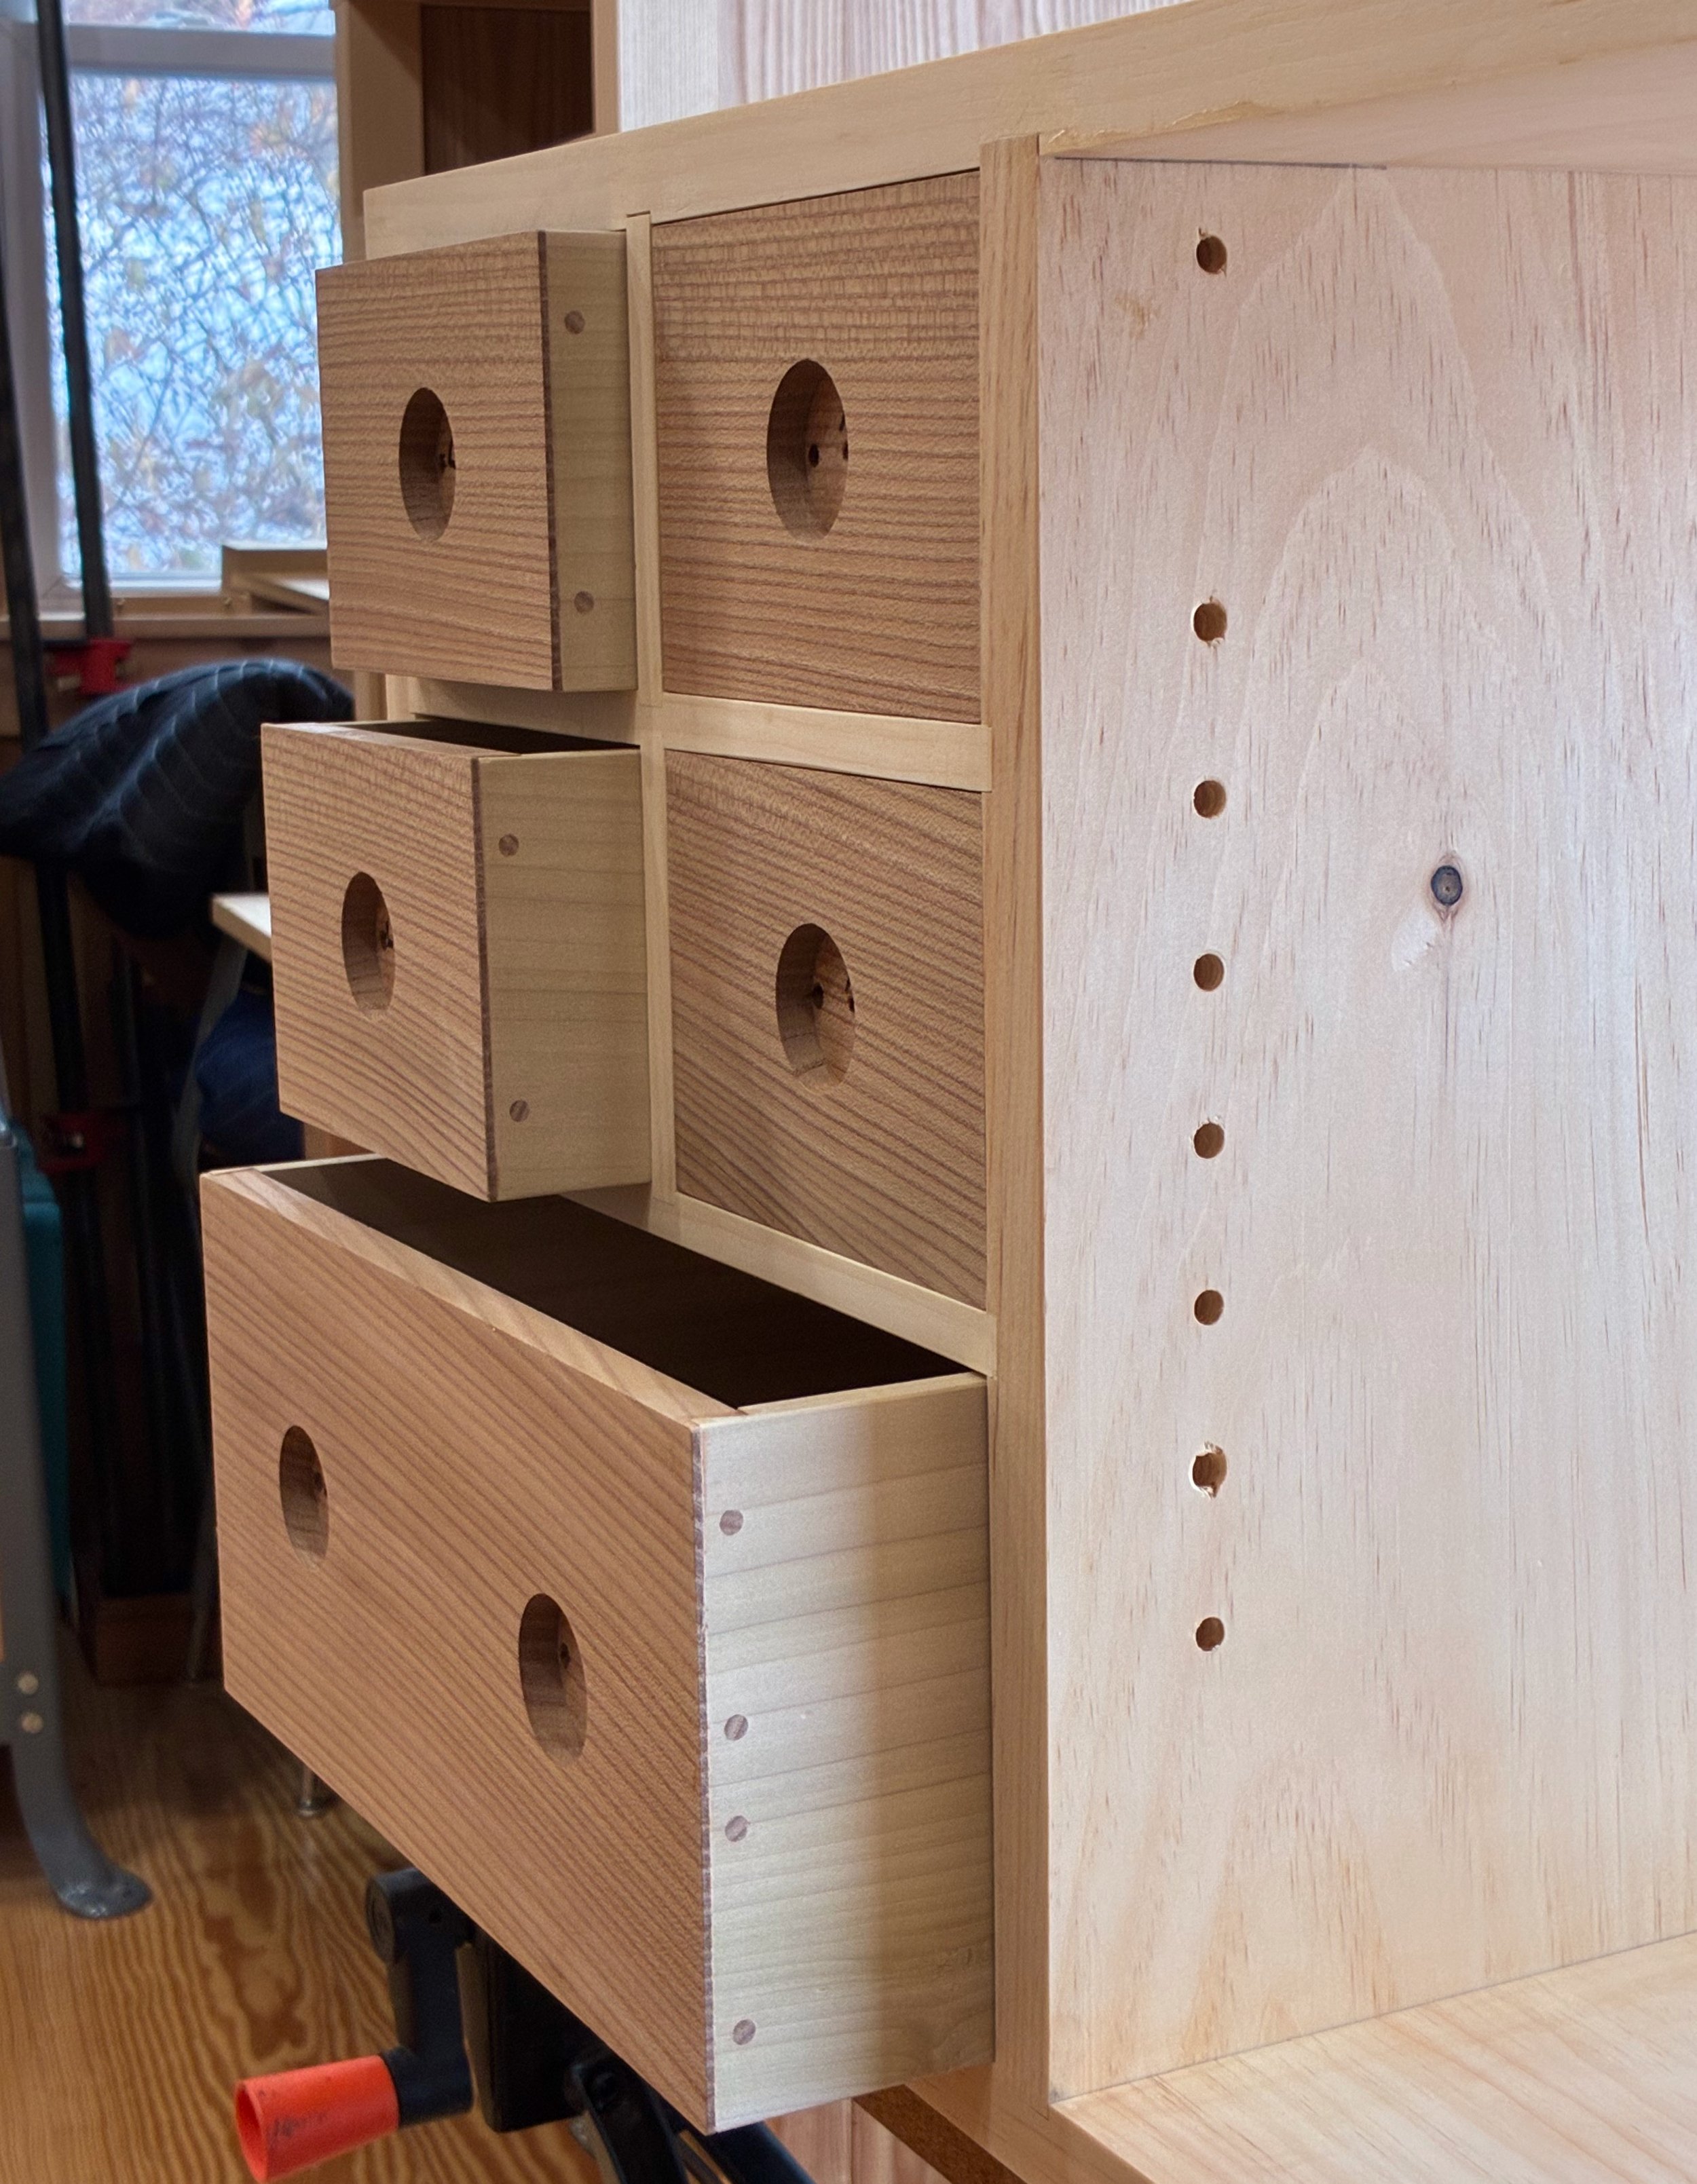
Just a few details to take care of now. First, a shelf for the open cavity was prepared from 5/8 inch white pine, trimmed in elm. Next, six small ash boards were milled to serve as runners and kickers for the big drawer. These would be installed to the case interior during assembly, after which the final drawer fitting would take place. I also wanted to make stops for the interior drawers so that they would rest uniformly in their cubbies. These were fashioned from scrap pine and then glued into place. Lastly, the bottoms of those small drawers were lined with a blue felt.
Drawer parts (pulls, stops and felts) and shelf in place
Final Assembly & Finish
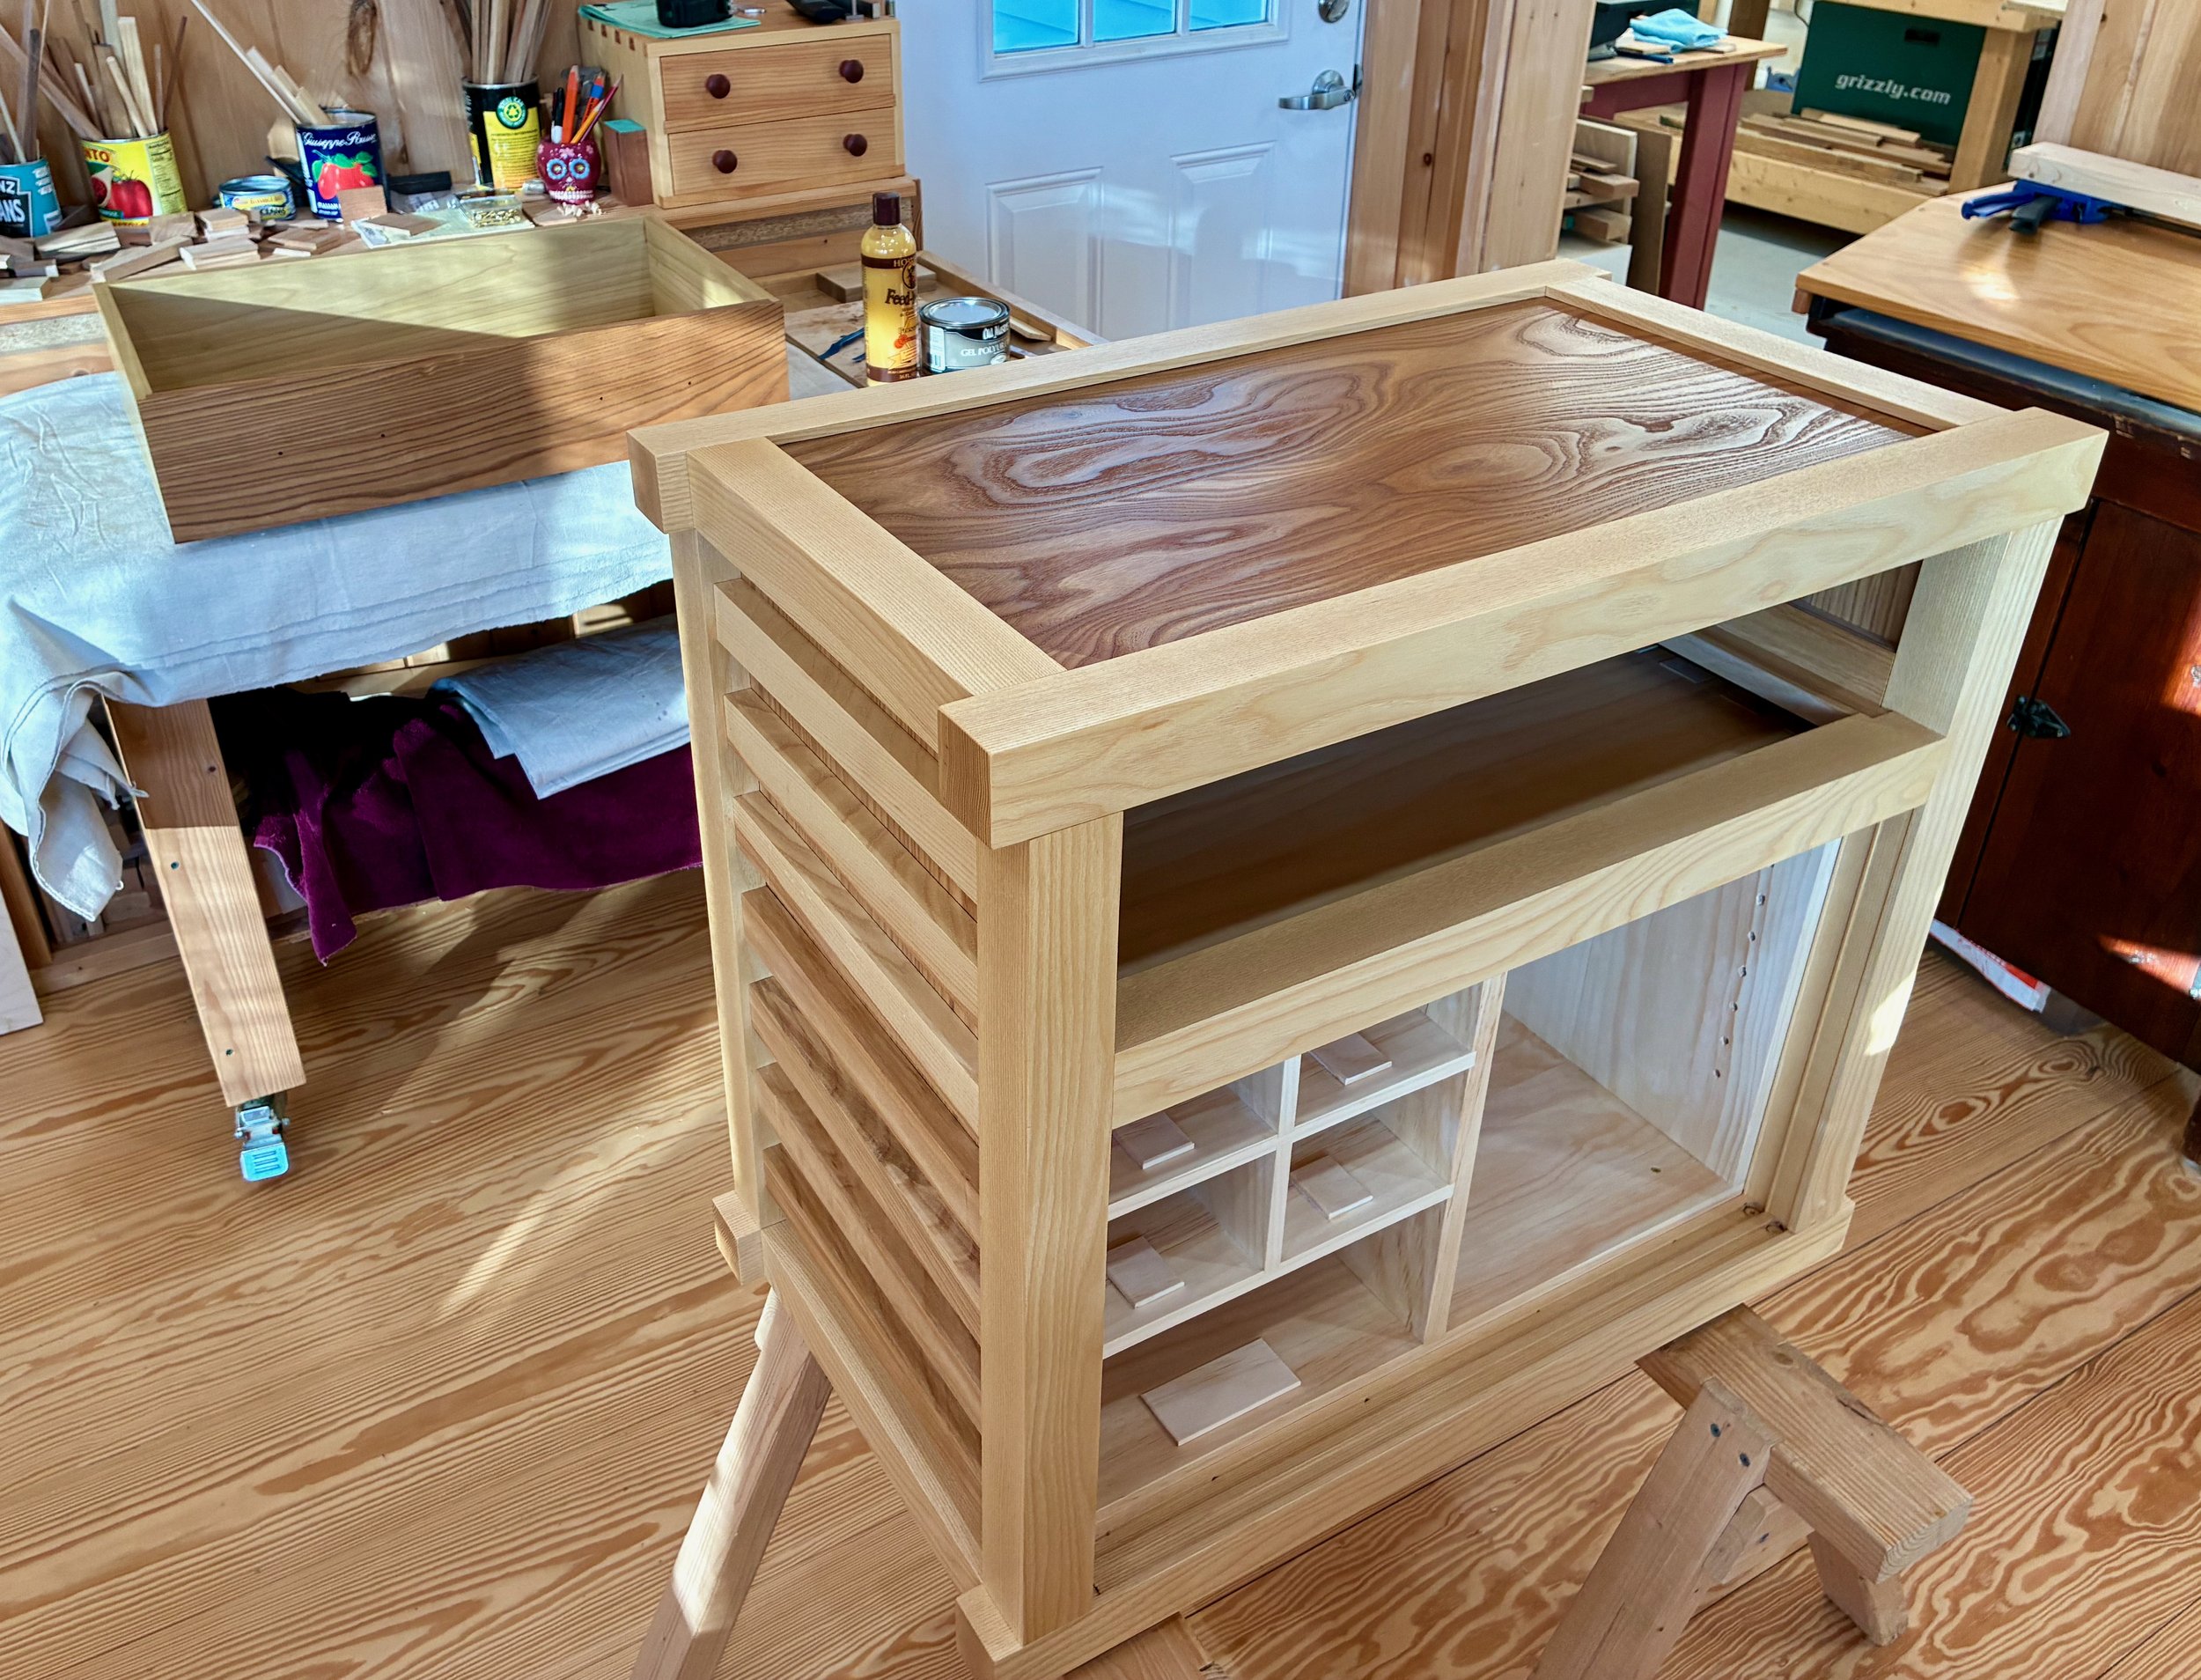
It was now time to take the dry-fit carcass apart and reassemble it with glue applied at the joints. For starters, the workbench was moved out of the way, the doors and drawers were set aside, and the remaining 42 parts arrayed in a manner to facilitate their orderly coupling.
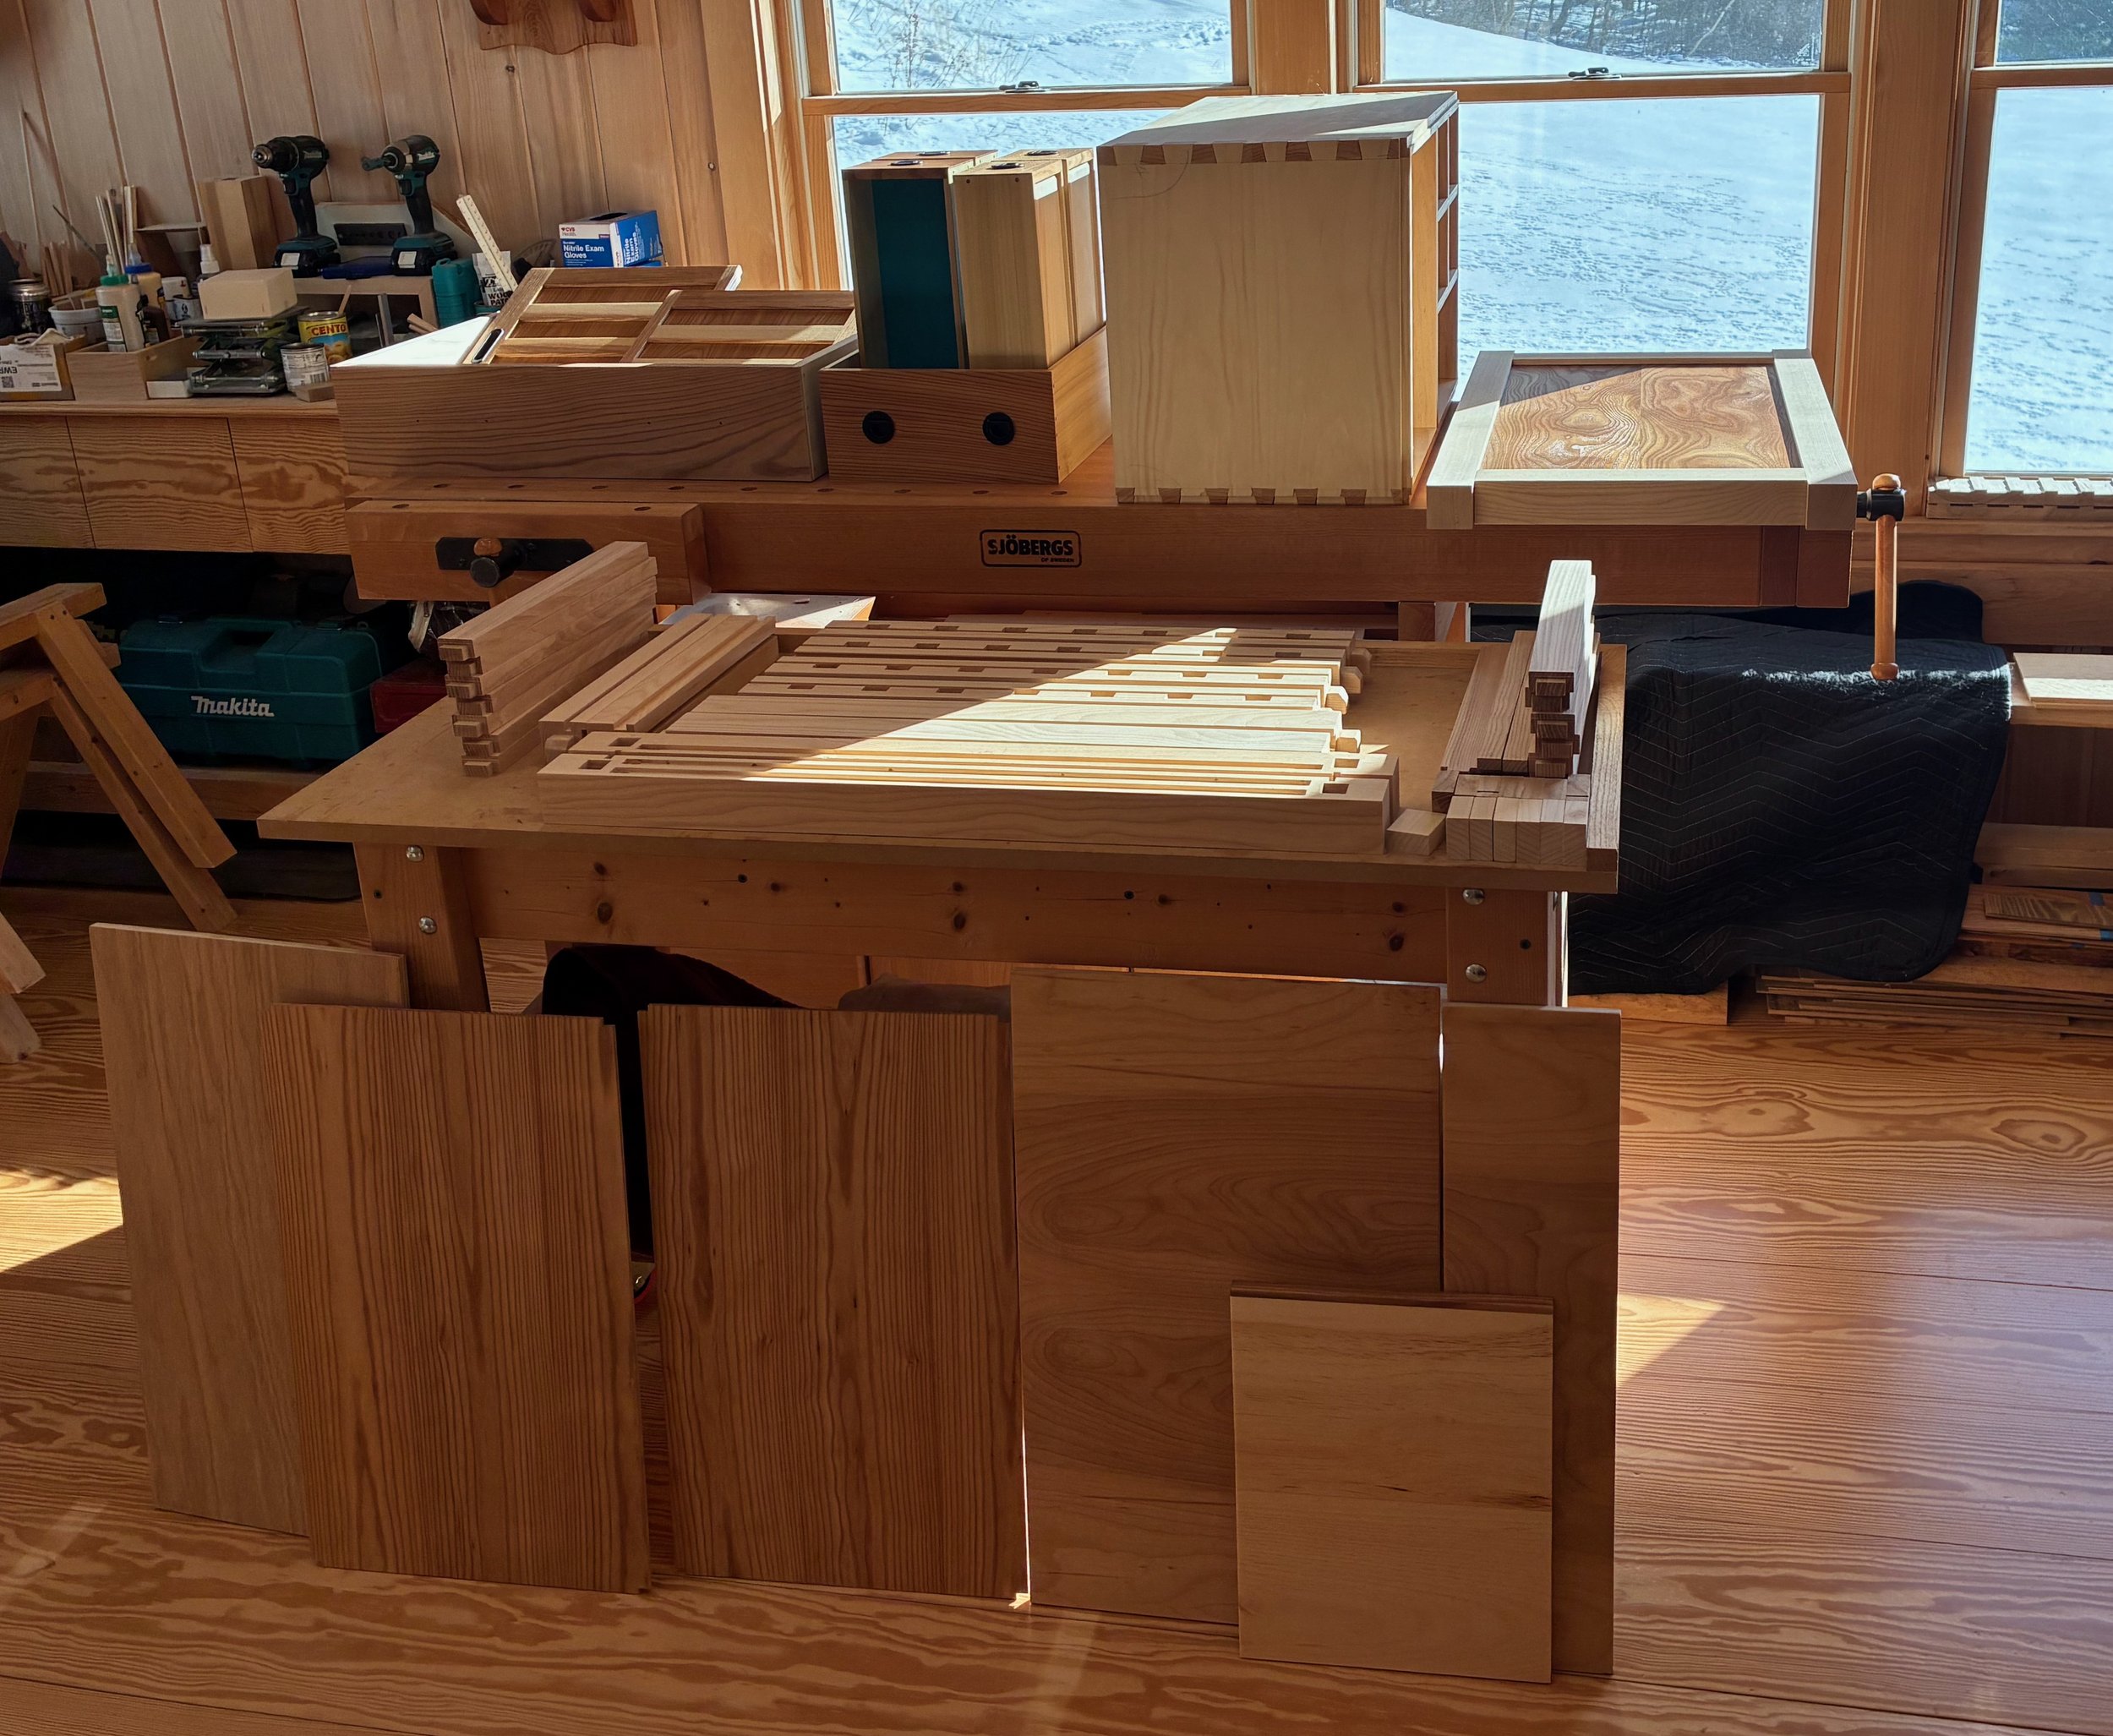
Pre-assembled state
There are a lot of things to get “right” during assembly (while the glue clock ticks) and so I enlisted the help of my two sons. Together, we managed to agglutinate/hold/hammer/clamp the structure into being. Construction began with the top sub-assembly, followed by the bottom, back and sides. Next, the pine box was inserted and then enveloped as the front frame came together. Lastly, the top was lowered into place and the clamps applied. This was Super Bowl Sunday, and before my team even took the field it felt like we had already won! In fact, ours was a rare victory party on that sad day for New England.
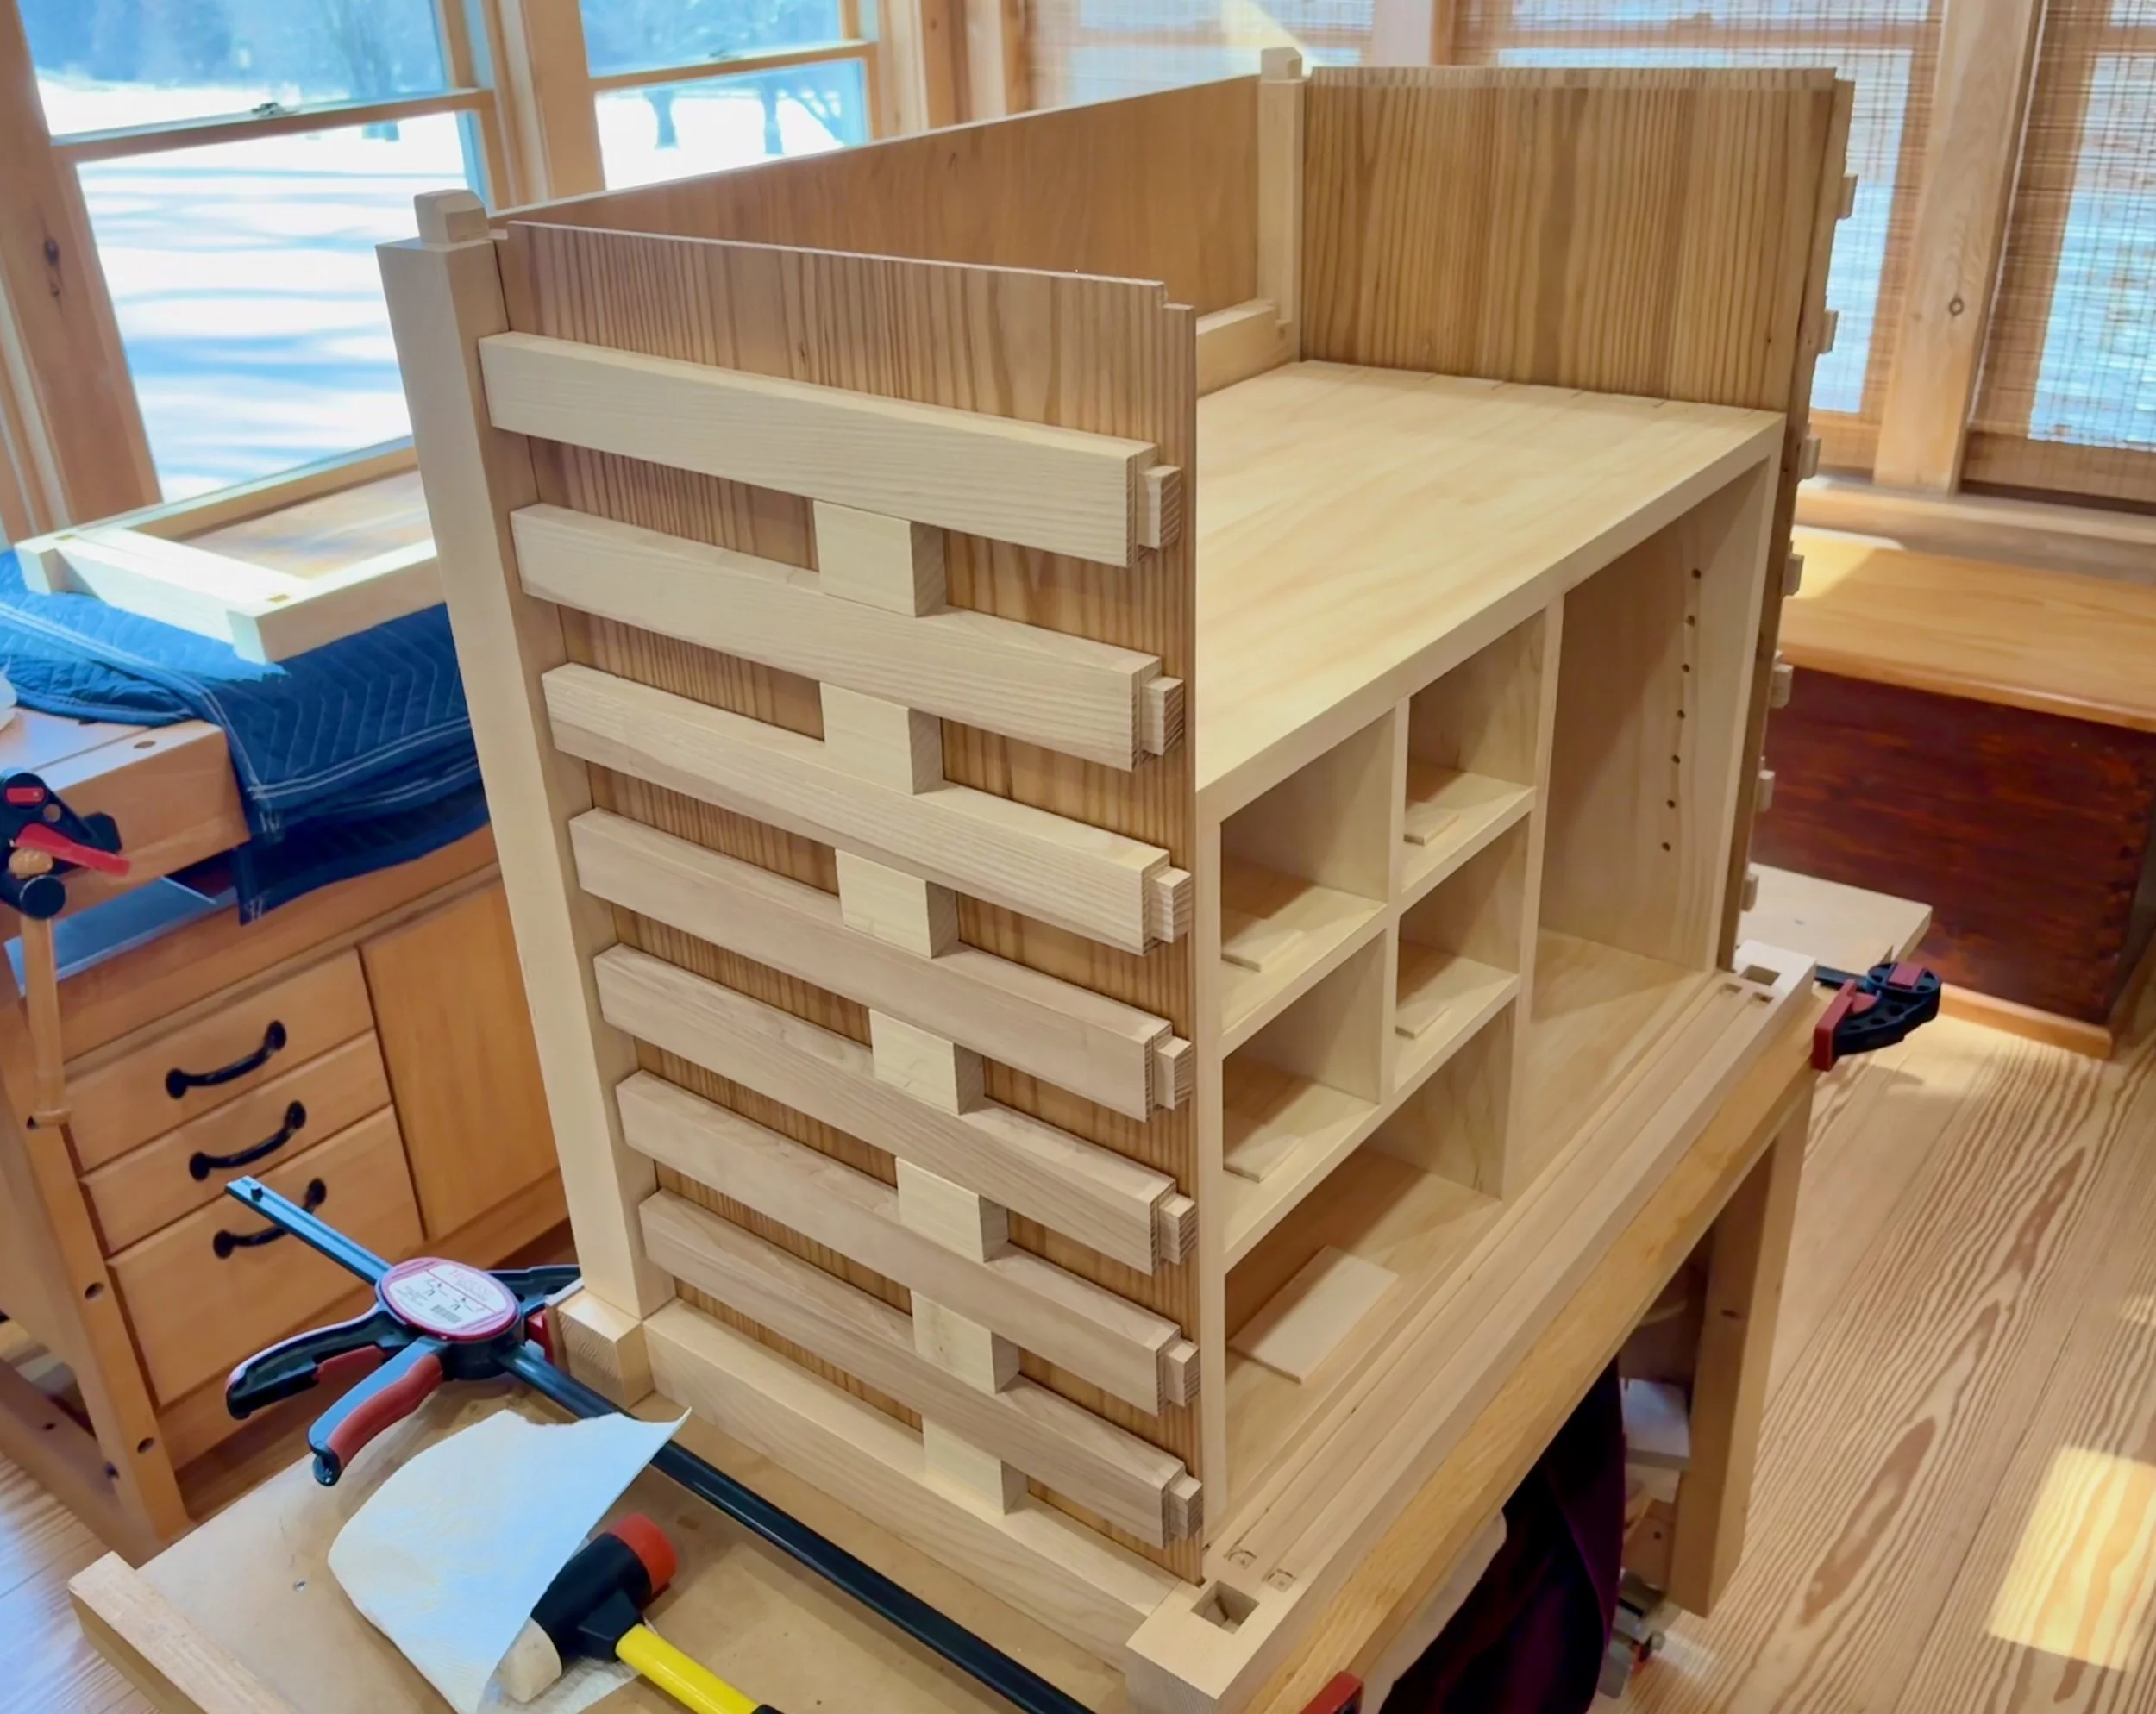
Halfway there …
Box inserted
Spacer blocks used to register the slats
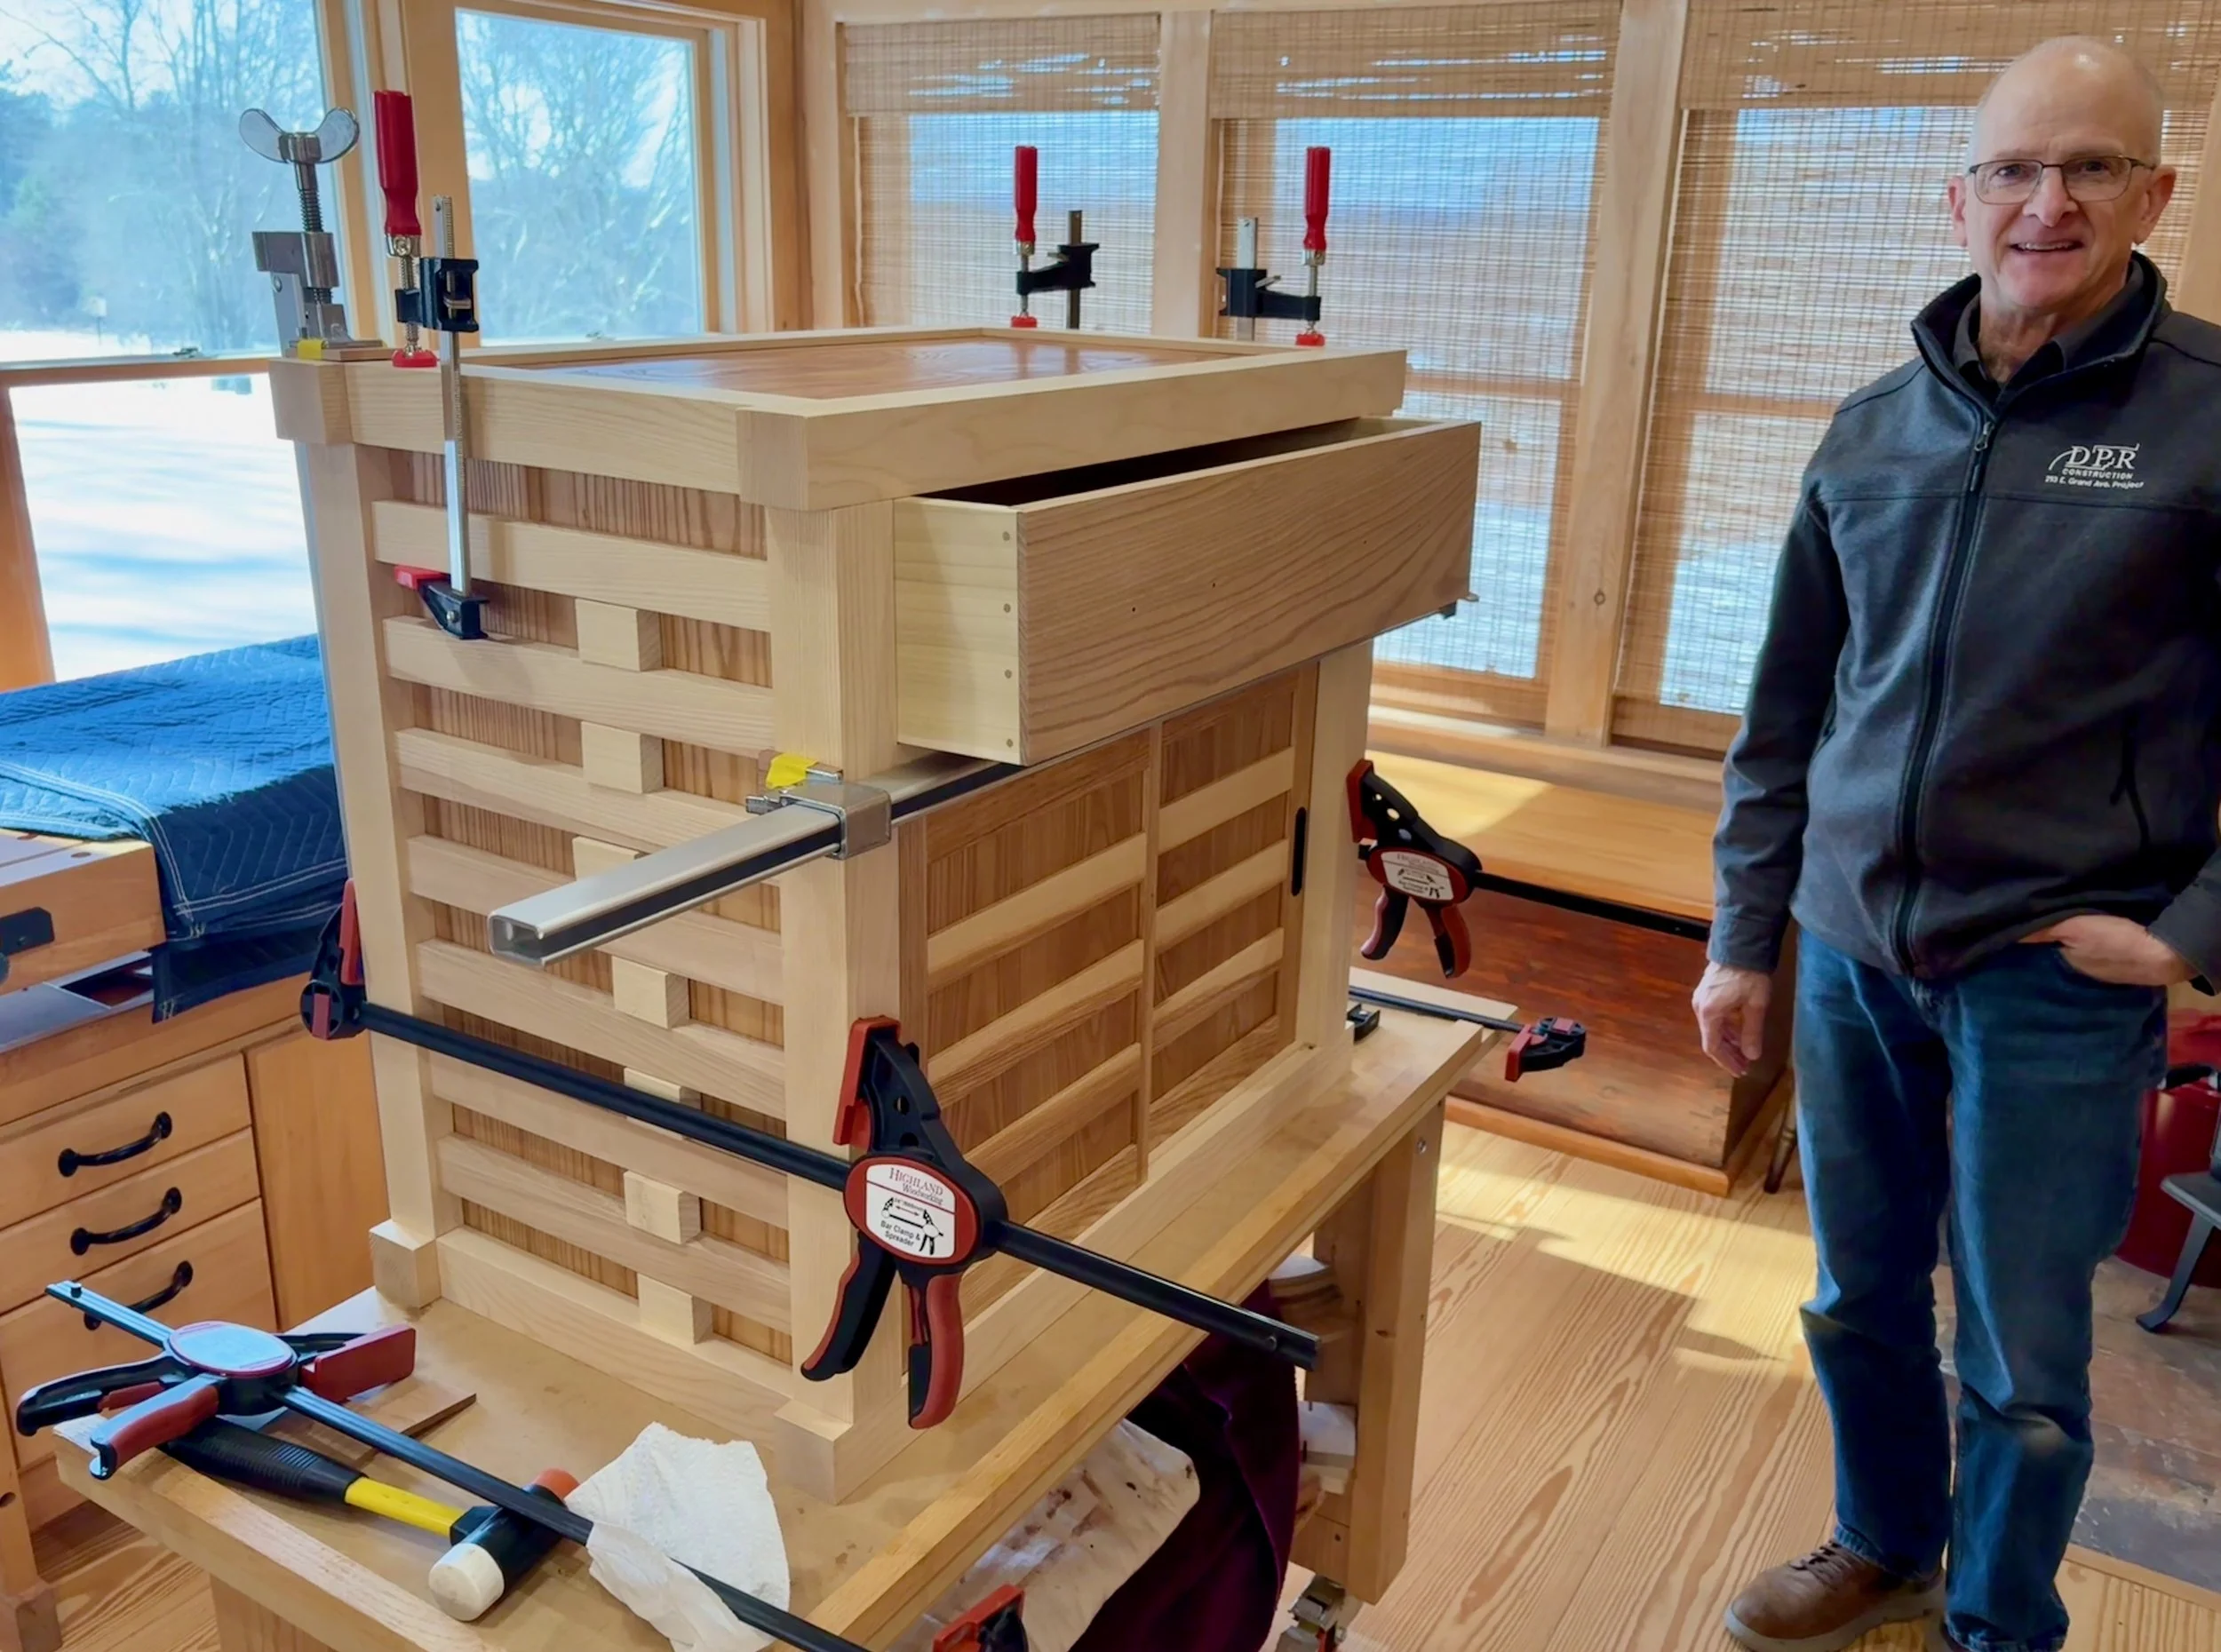
Glue-up lockdown
Following assembly, the runners and kickers were glued in place and the case was sanded to remove clamp marks/even the joint seams. Finally, the big drawer was planed and sanded to achieve a cozy fit. The doors and drawers were then removed for the final finishing.
You may have noticed that the elm panels and the small drawers and doors had been finished earlier in the work. Prior to that I had experimented on a few finishing schemes. The desired goal was to highlight the wood grain, give the object some wear protection and keep the sheen warm but not glossy. I ended up preferring the look of satin gel polyurethane followed by treatment with Howard’s Feed-N-Wax. I have used this duo on a few of my recent Projects and have been pleased with the ease of application and, more important, the final look & feel. It may not be the best for either elm or ash, but seemed to work well on the combo.
Only the carcass and big drawer were left to finish. Over the next few days, two coats of gel poly, a light caress with a gray Scotch-Brite pad followed by a good kneading with Howard’s brought out the beauty in these woods. And as an encore, the contacting door and drawer surfaces received a layer of furniture wax to keep things running smooth.
Finishing the wood
Whew! That was a long build, but a fun one all the way. Thanks for sticking it out.
Over the course of five months, a pre-planned series of sub-assemblies, along with some on-the-spot problem solving, has combined to produce a solid storage space and lovely piece of furniture. That’s the appeal of furniture making: applying one’s mind and hands in the manipulation of raw materials to create new and useful treasures. Now it’s your turn to have some fun, Mike. Enjoy!
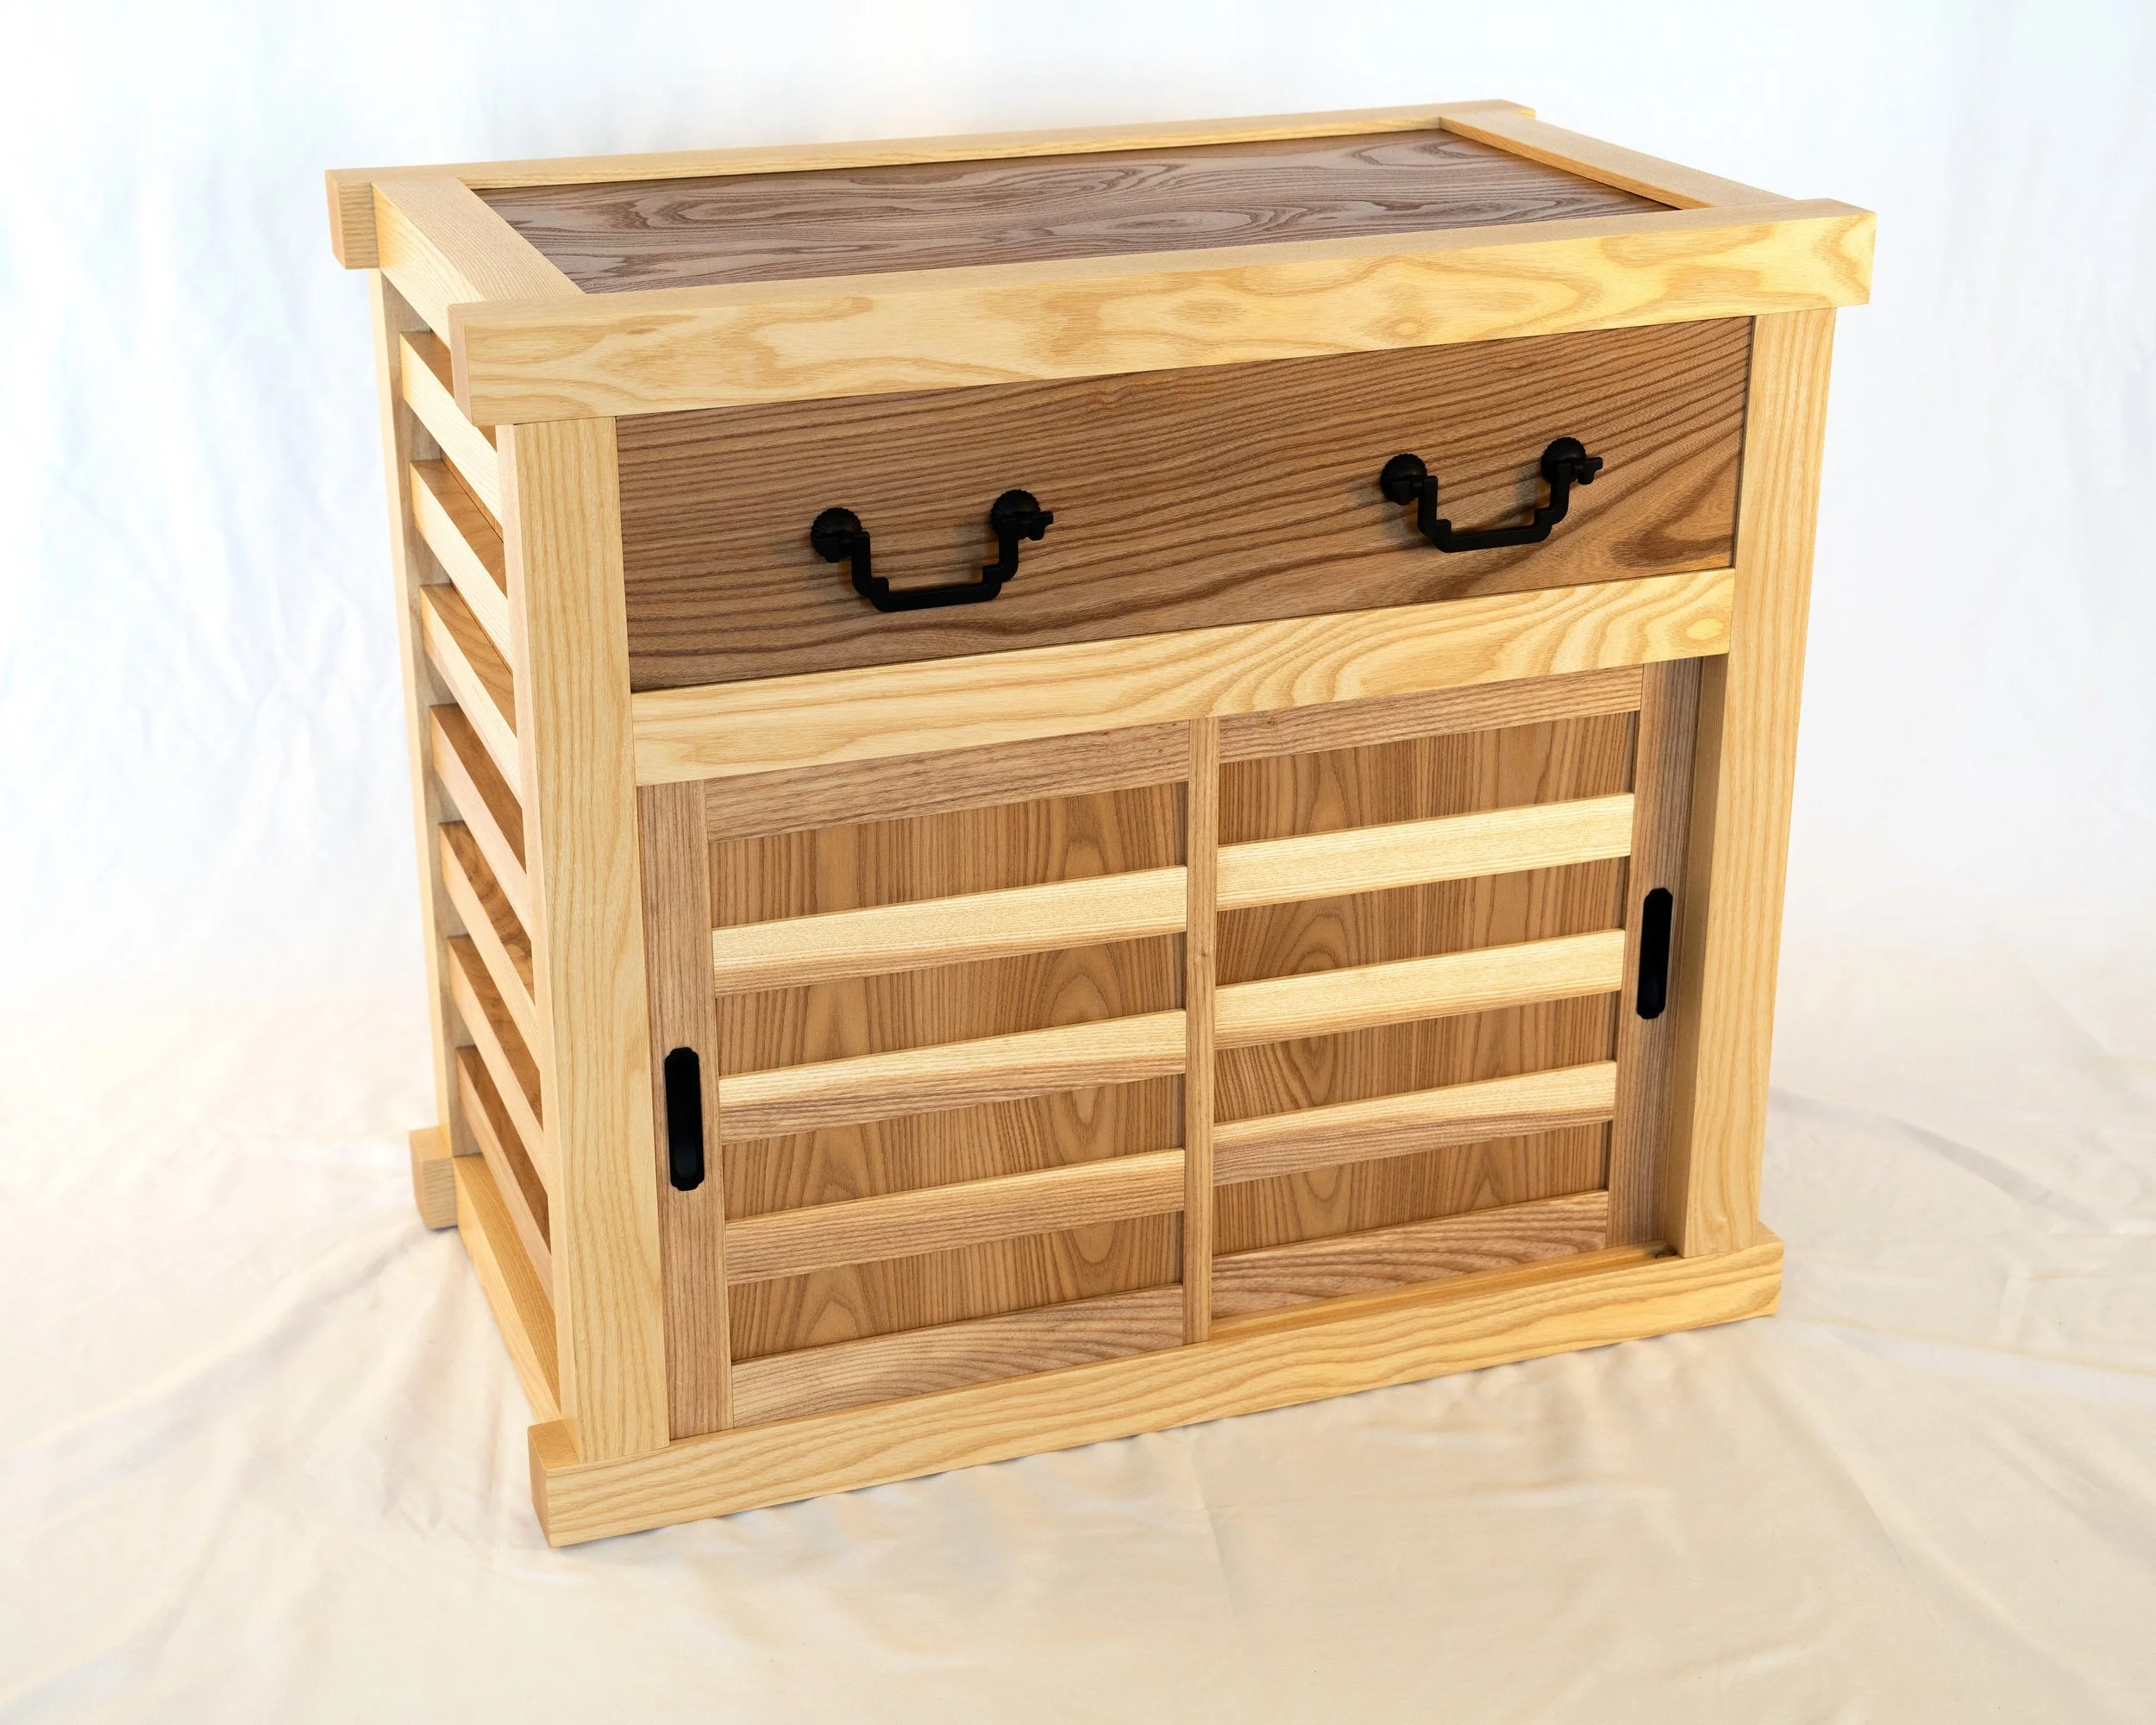
Coin Chest complete