

Walker’s Cabinet

“A place for everything and everything in its place.”
– Benjamin Franklin (among others)
Biologists refer to it as “exaptation” when a particular feature of an organism assumes a new function over time. The term was introduced in 1982 by paleontologists Stephen Jay Gould and Elisabeth Vrba, and was meant to account for evolutionary changes not derived from conventional “adaptation”. Feathers (heat regulation → flight) and the swim bladder (respiration → buoyancy) are popular examples. I have even seen this term applied to inanimate objects such as wheels (locomotion → machine components), but never furniture, although it could. These are the questions that tickle academics and their ilk.
I believe the current Project counts as an “exaptation”. It is a repurposing of those specialized early twentieth century cabinets (e.g., Smoker’s Cabinet) to serve the modern function of footware storage - what we will call a “Walker’s Cabinet”. Largely extinct today, purpose-built cupboards such as the Smoker’s Cabinet were once popular, well-made furniture pieces designed to store items valued by their owners, in this case pipes and tobacco products. Other cabinets were produced specifically for piano sheet music (Music Cabinet), phonograph cylinders (Record Cabinet), dinnerware (China Cabinet); and more. Our cabinet will store the shoes and boots used by walkers; a function not even dreamed of 100 years ago when, at least in America, the few shoes owned were generally worn both indoors and out. It will retain external proportions similar to those earlier pieces but include suitably-spaced shelves on the interior. Of course, products to keep shoes do exist today, and some of these are made of wood. They tend to be either open, cubby-holed structures or possess doors on drop-down hinges, evolutionarily distant from the smoker’s cabinet.
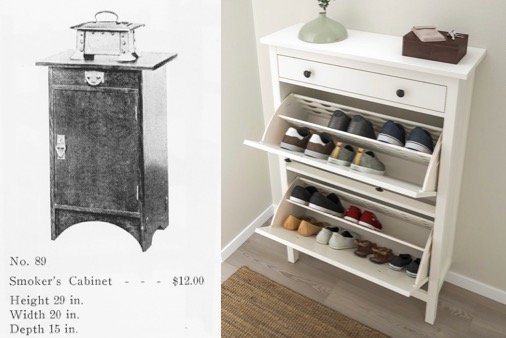
Smoker’s cabinet listed in Gustav Stickley’s 1910 furniture catalog alongside a modern day shoe cabinet of similar proportions
The Walker’s Cabinet is a commission from my brother-in-law, Brooks, as a gift for his wife, my sister Kathy. I have long wanted to build something special for her and now I have the opportunity. In their cozy home they have a spot next to the door that is used for shoe storage, and this piece is intended to replace the existing open shelf unit there. My mission: make it nice.
Design
I was introduced to the Smoker’s Cabinet by way of Gustav Stickley’s 1910 Craftsman furniture catalog piece No. 89 (shown above) but intend to use an item found in his other publication as inspiration for this Project. In addition to furniture catalogs, Stickley produced a magazine, The Craftsman, from 1901 to 1916 that he described as: “An illustrated monthly magazine in the interest of better art, better work and a better more reasonable way of living." Hard to argue with that mission. Adopting, and then adapting, tenets of the British Arts and Crafts movement, Stickley and other writers in The Craftsman worked to open the eyes of a rapidly mechanizing America to the enduring value of craftsmanship and honest work. Even today, these insightful articles retain their punch. Many issues contained a feature article titled: Home Training in Cabinet Work, in which the plans and some helpful hints for building useful furniture pieces were described. Stickley’s intention was for his readers to make some of their own furnishings and, thereby, come to appreciate the pleasure of handicraft. Not the best for business you might reckon, but Stickley, like the other Arts and Crafts leaders, dealt in ideals as well as chattel. In the August, 1907 issue the plans for a Phonograph Stand and Record Cabinet were published. I prefer the style of this one-door cabinet to the Smoker’s version and will use it as the starting point for the Walker’s Cabinet.

Record Cabinet plans, reproduced from The Craftsman, Vol. XII, No. 5, 1907. pp. 562-563.
Rough plans for our cabinet were derived from the Stickley drawing. However, to fit the intended space, the piece would be made narrower and a bit taller. Also, the door swing would be reversed to best accommodate the setting, and the phonograph stand eliminated, too, but all other features would be faithfully maintained (ha!). Such are the perquisites of custom-made furnishings. Two adjustable shelves would be contained within.

Walker’s Cabinet rough plan
Materials
Quarter sawn white oak would be the wood used for this Stickley inspired cabinet, of course. A nice 6/4 and some 4/4 boards were procured from Highland Hardwoods. The hinges and a knob would be selected later, as the piece came together.
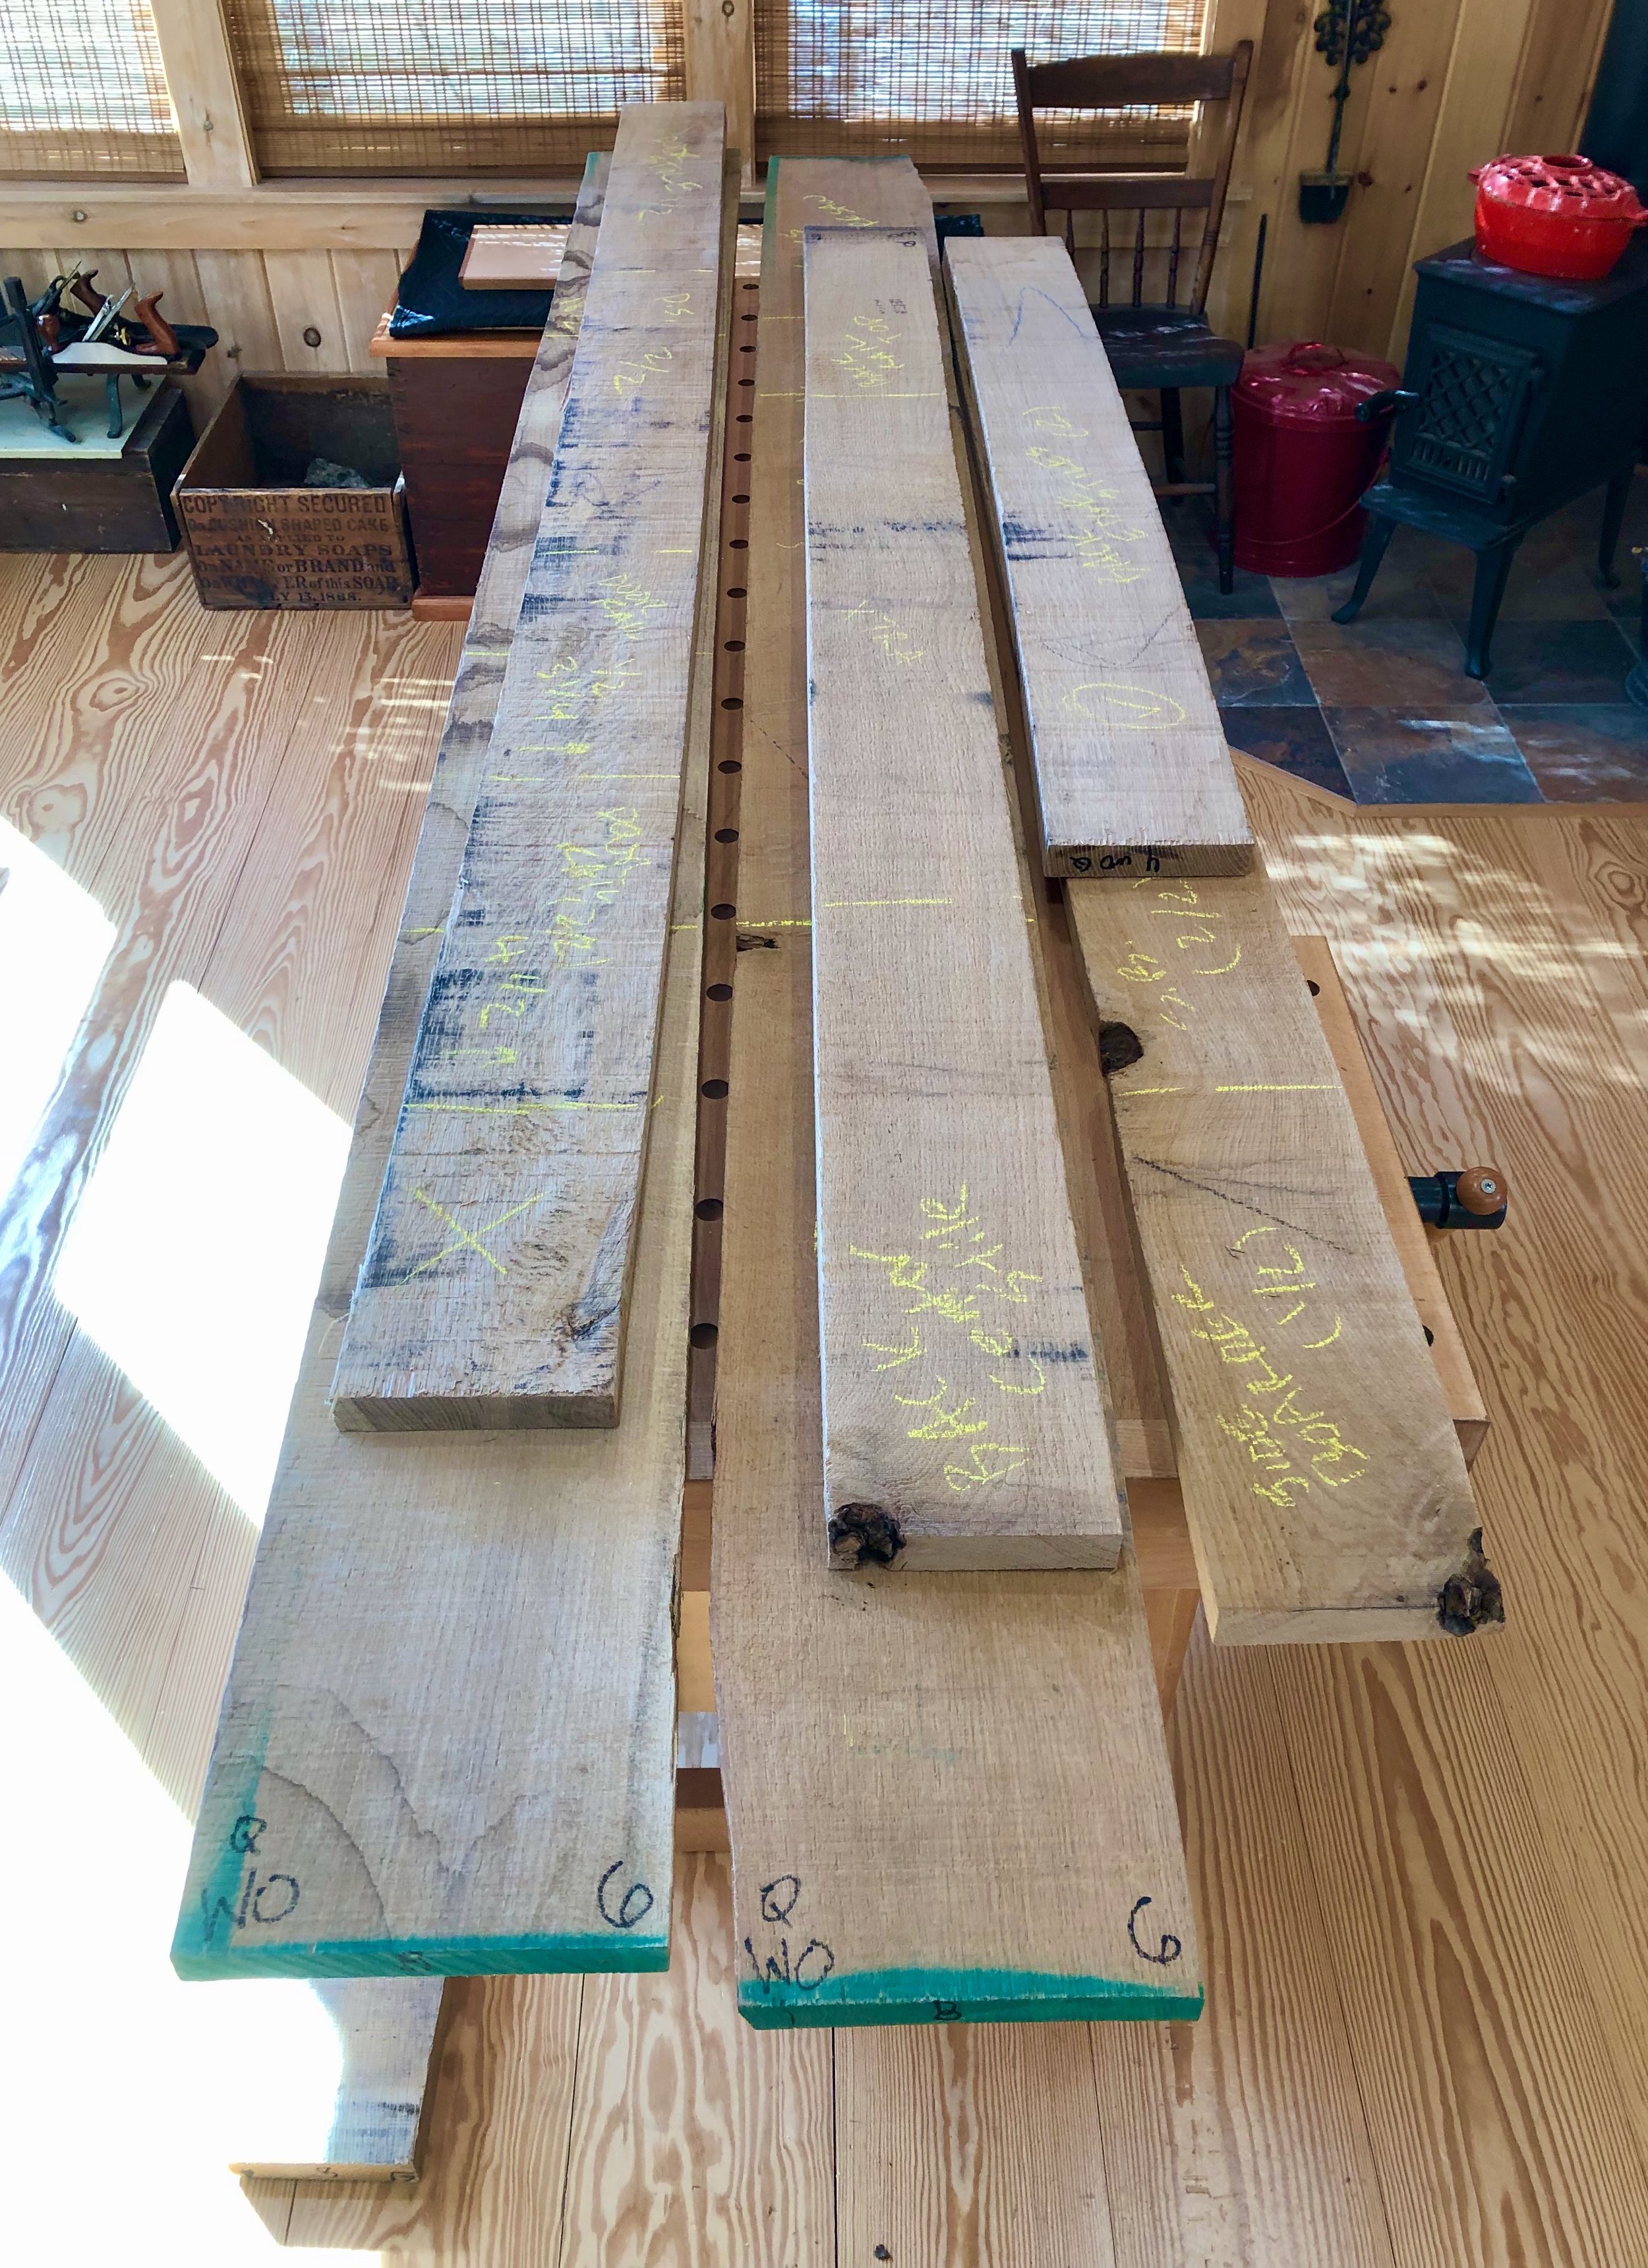
Marked-up oak
Dimensioning
To get started, the post-like legs were cut from that hefty 6/4 board. In the end they will be 1 1/4 in. square, but it will take a bit of work to get there. The goal is to have two adjacent and exposed sides of each leg feature that charismatic quarter sawn “look”, formed by the interaction of oak’s coarse grain with the delicate medullary rays exposed by this lumber mill cut. And to achieve that goal it was decided to veneer a thin strip of this so-called “face grain” onto the homely “edge grain” for one side of each post. Stickley, himself, often employed this method for improving upon Nature. Thus, the cross-section of our initial posts would be ~1 1/4 in. x ~1 1/8 in. After applying a thin face grain veneer, cut at the band saw, the proud edges could be hand planed and then the entire pole thickness planed to a uniformly square 1 1/4 in. dimension.
Glueing veneer onto a leg while the other parts wait their turn
With the legs in shape they could be trimmed to final height (36 in.) and then marked as to their final position (Left/Front, etc). These could now be modified with stopped dado grooves to hold the stiles of the frame. The front legs get one groove each, while the backs get two. To begin, a 3/8 in. square mortise was cut at all termini and then a 3/8 in. deep groove was plowed in between at the router table. Finally, at the ends of each groove, deeper sockets were mortised to receive the rail parts.
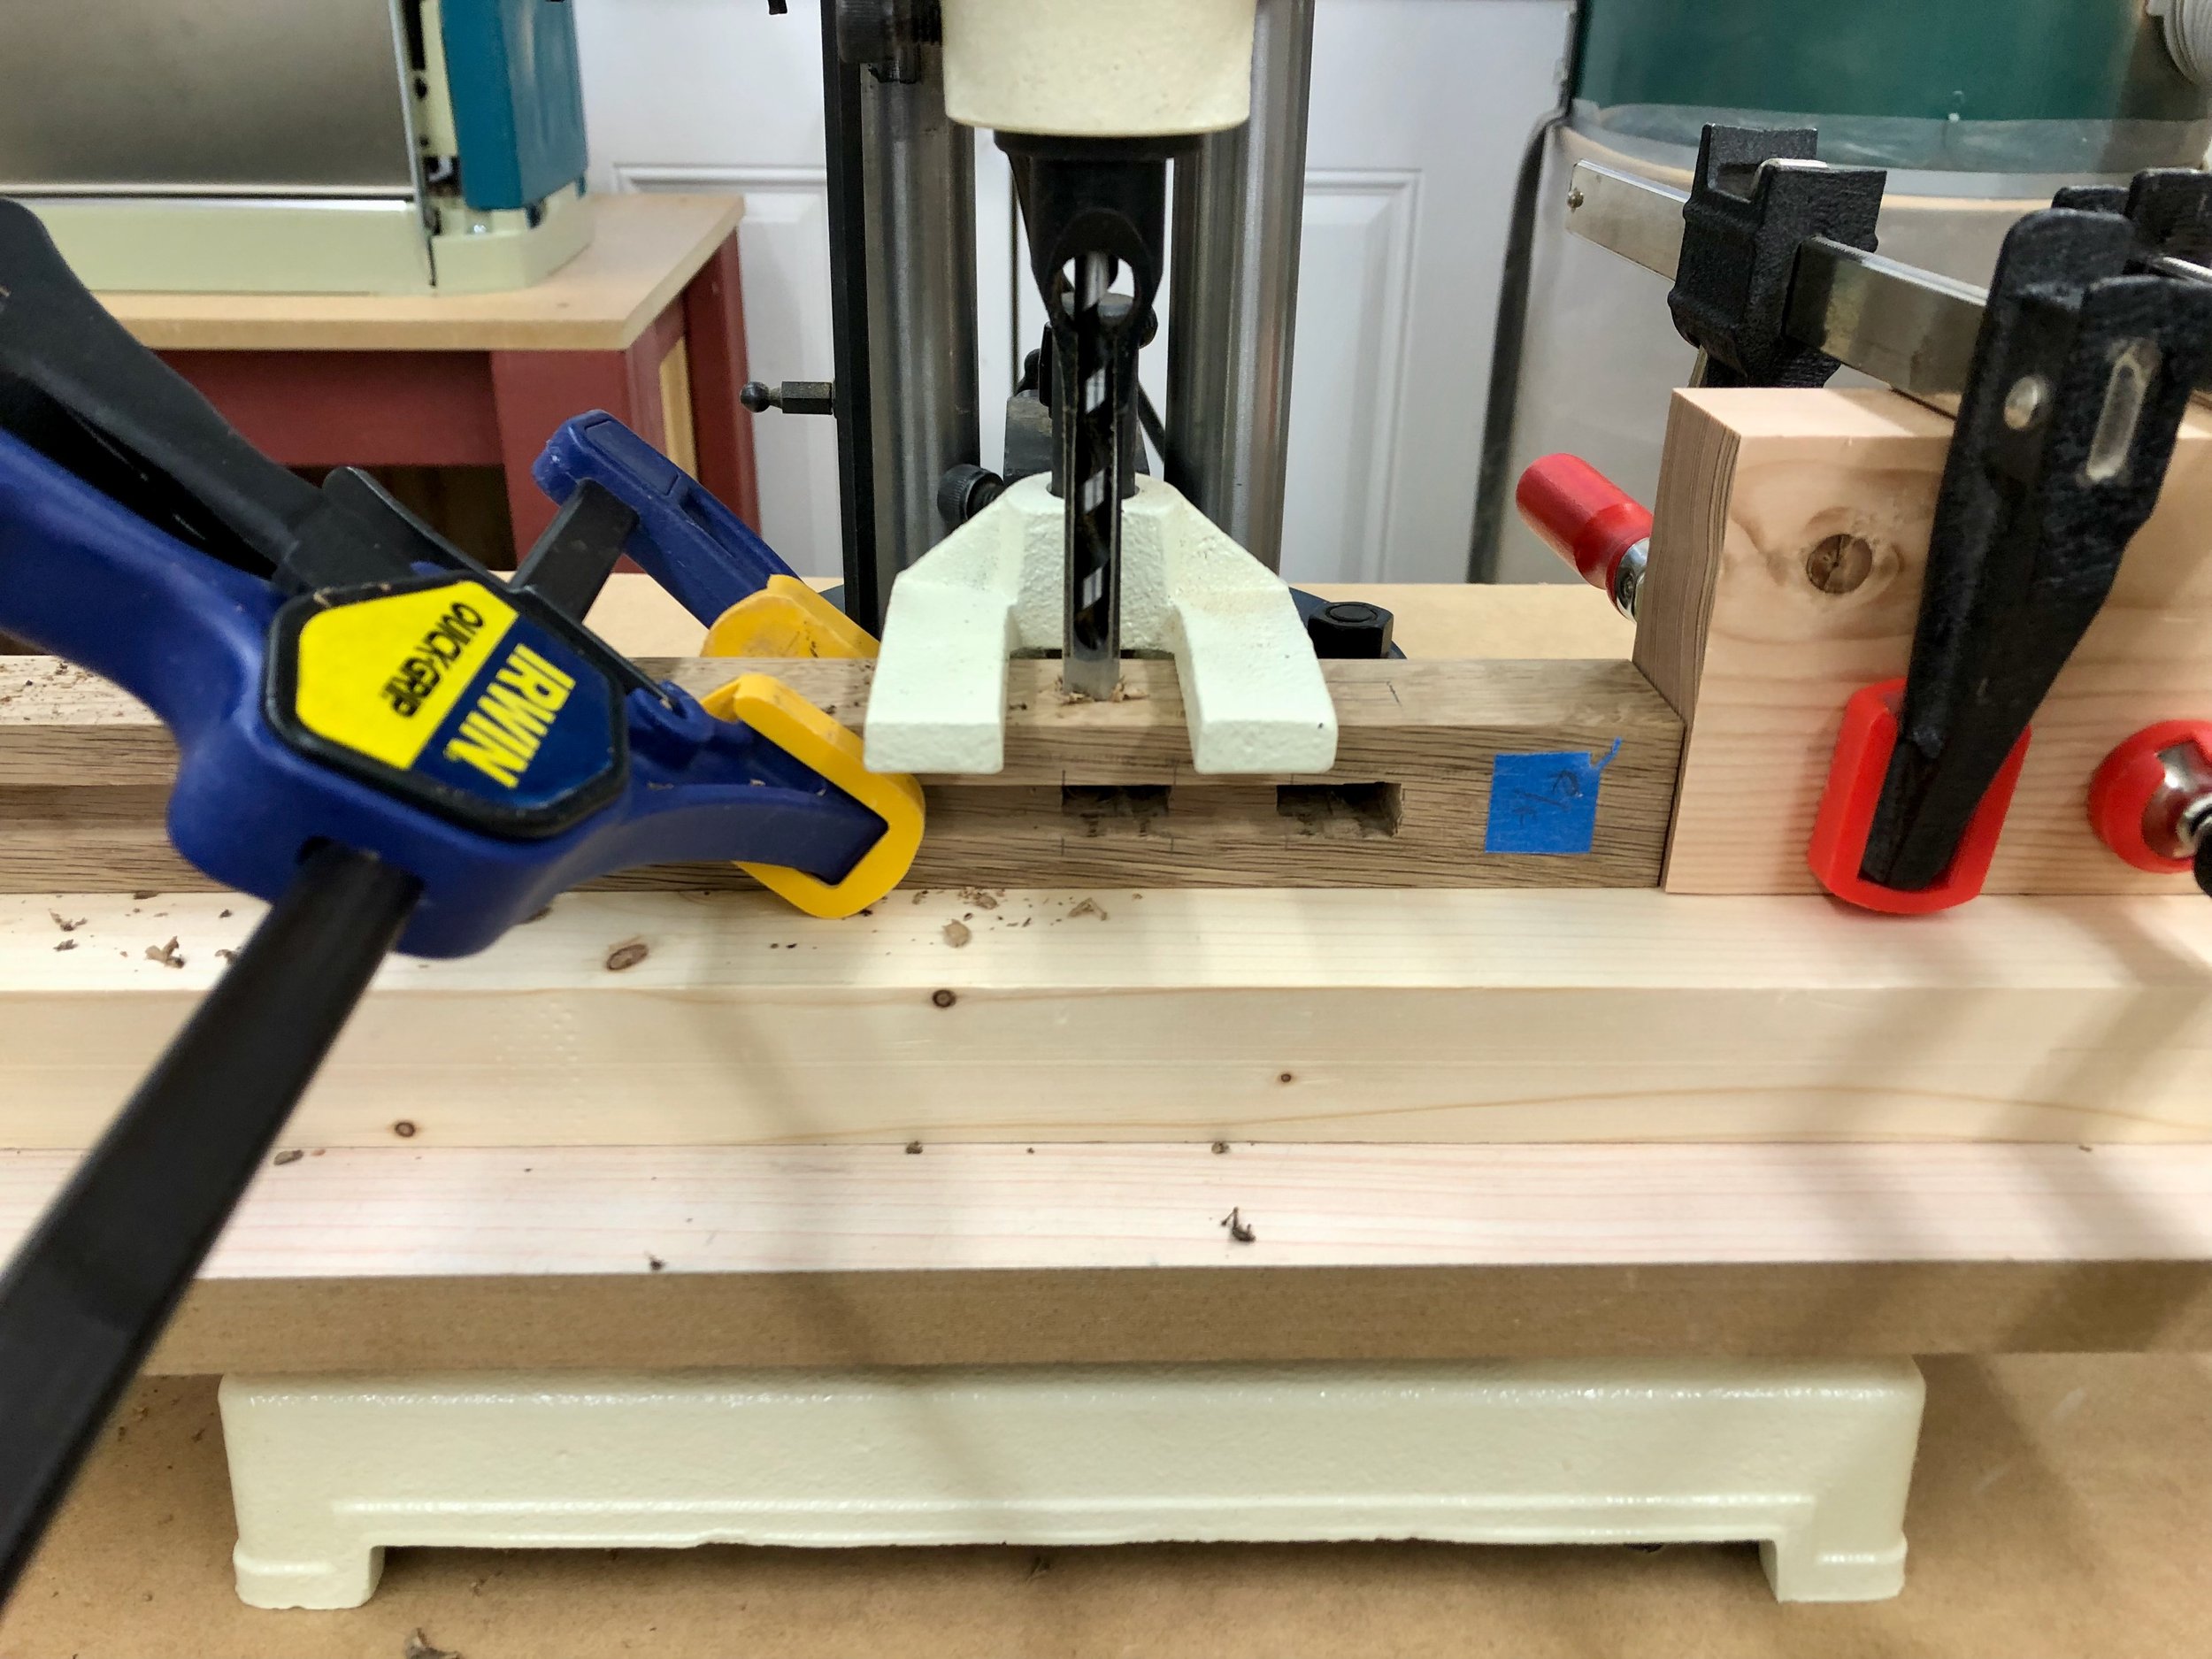
Cutting mortises within the grooves
Next, the various frame and panel parts were prepped from those 4/4 boards, 23 in all. I have to say that shaping white oak boards, first the smell, then the feel and finally a glimpse of newly planed grain, can be a transcendental experience. It never gets old. The process goes like this: 1. prepare a board flat & square; 2. thickness plane to a uniform dimension (in this case either 3/4 or 5/8 in.); 3. cut to final length and width; 4. fashion the joint element (mortise or tenon) using power tools; 5. refine the joining parts using hand tools for a snug fit - all while correcting mistakes as you go. The first steps are done in batches to assure dimensional uniformity for the parts that fit next to each other, whereas the final hand work is done joint-by-joint. This is woodworking and, much like any sport, it contains enough variety with endless opportunities for improvement to keep the committed coming back for more.
That’s enough pre-game, here are a few memorable shots from the event.

Bench scene during the joint work

One of many dry-fits

Creating a template for the arched rail

Drilling holes for the adjustable shelves

Edging the plywood floor board with white oak
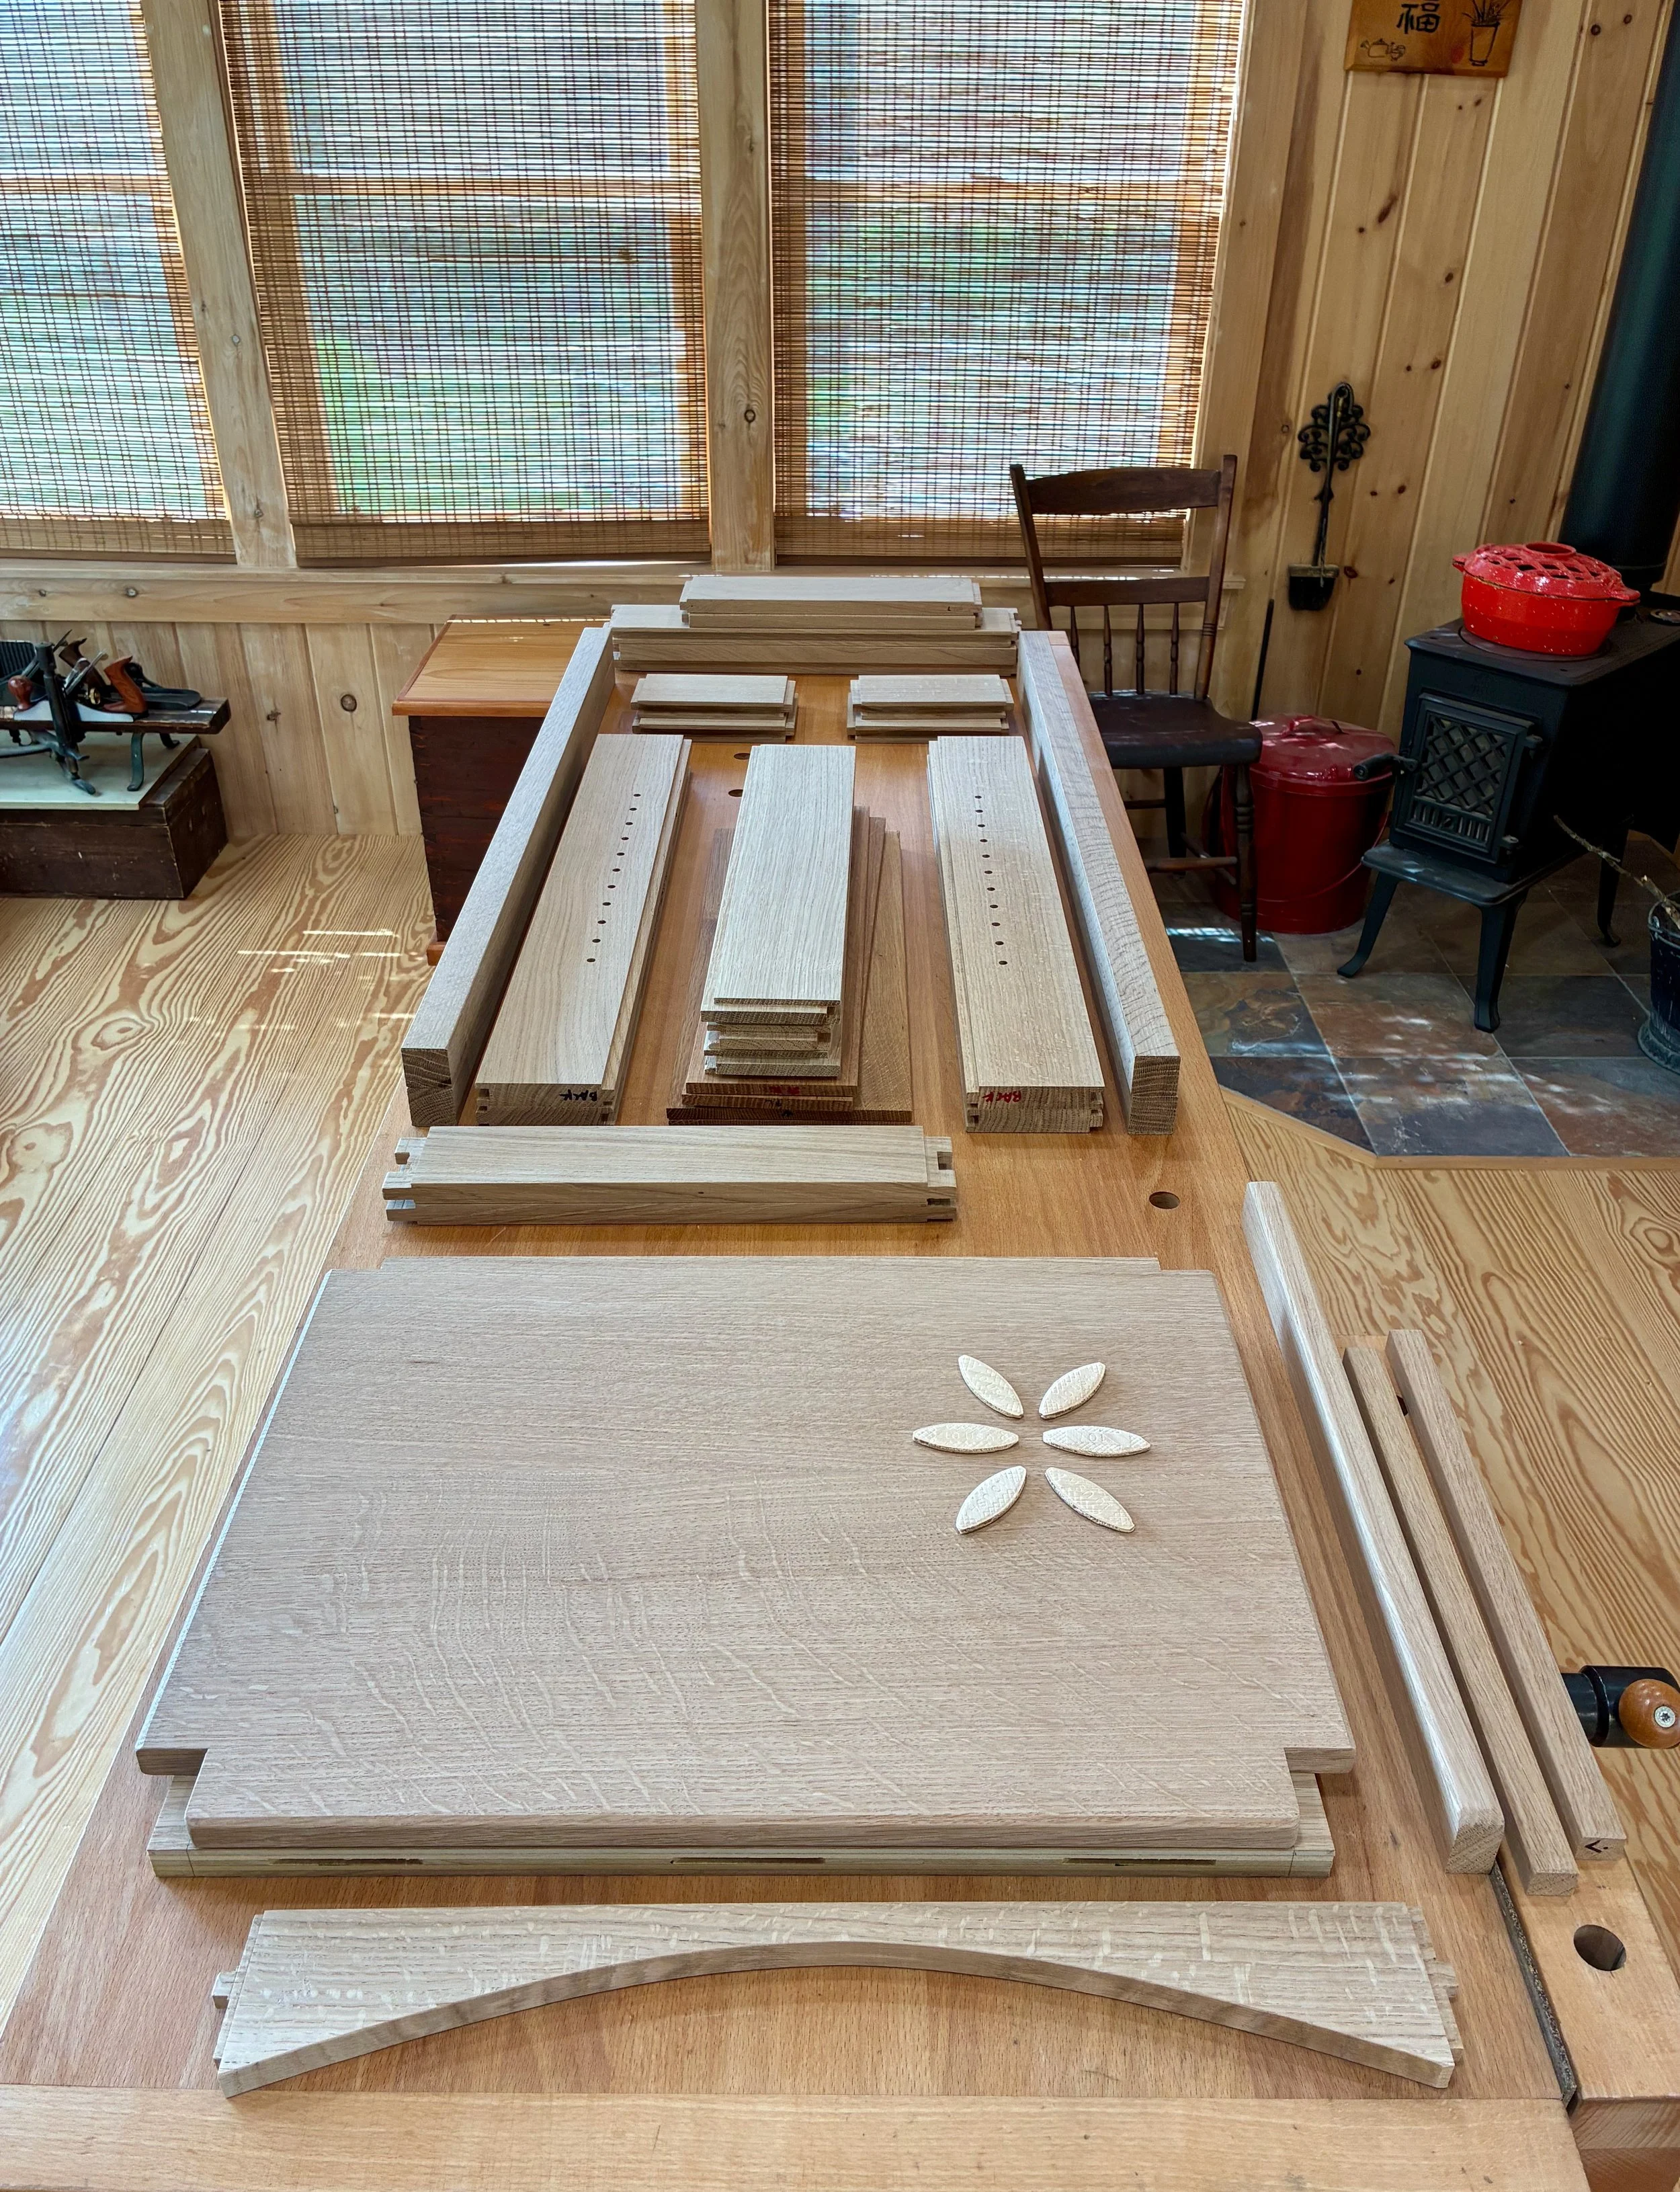
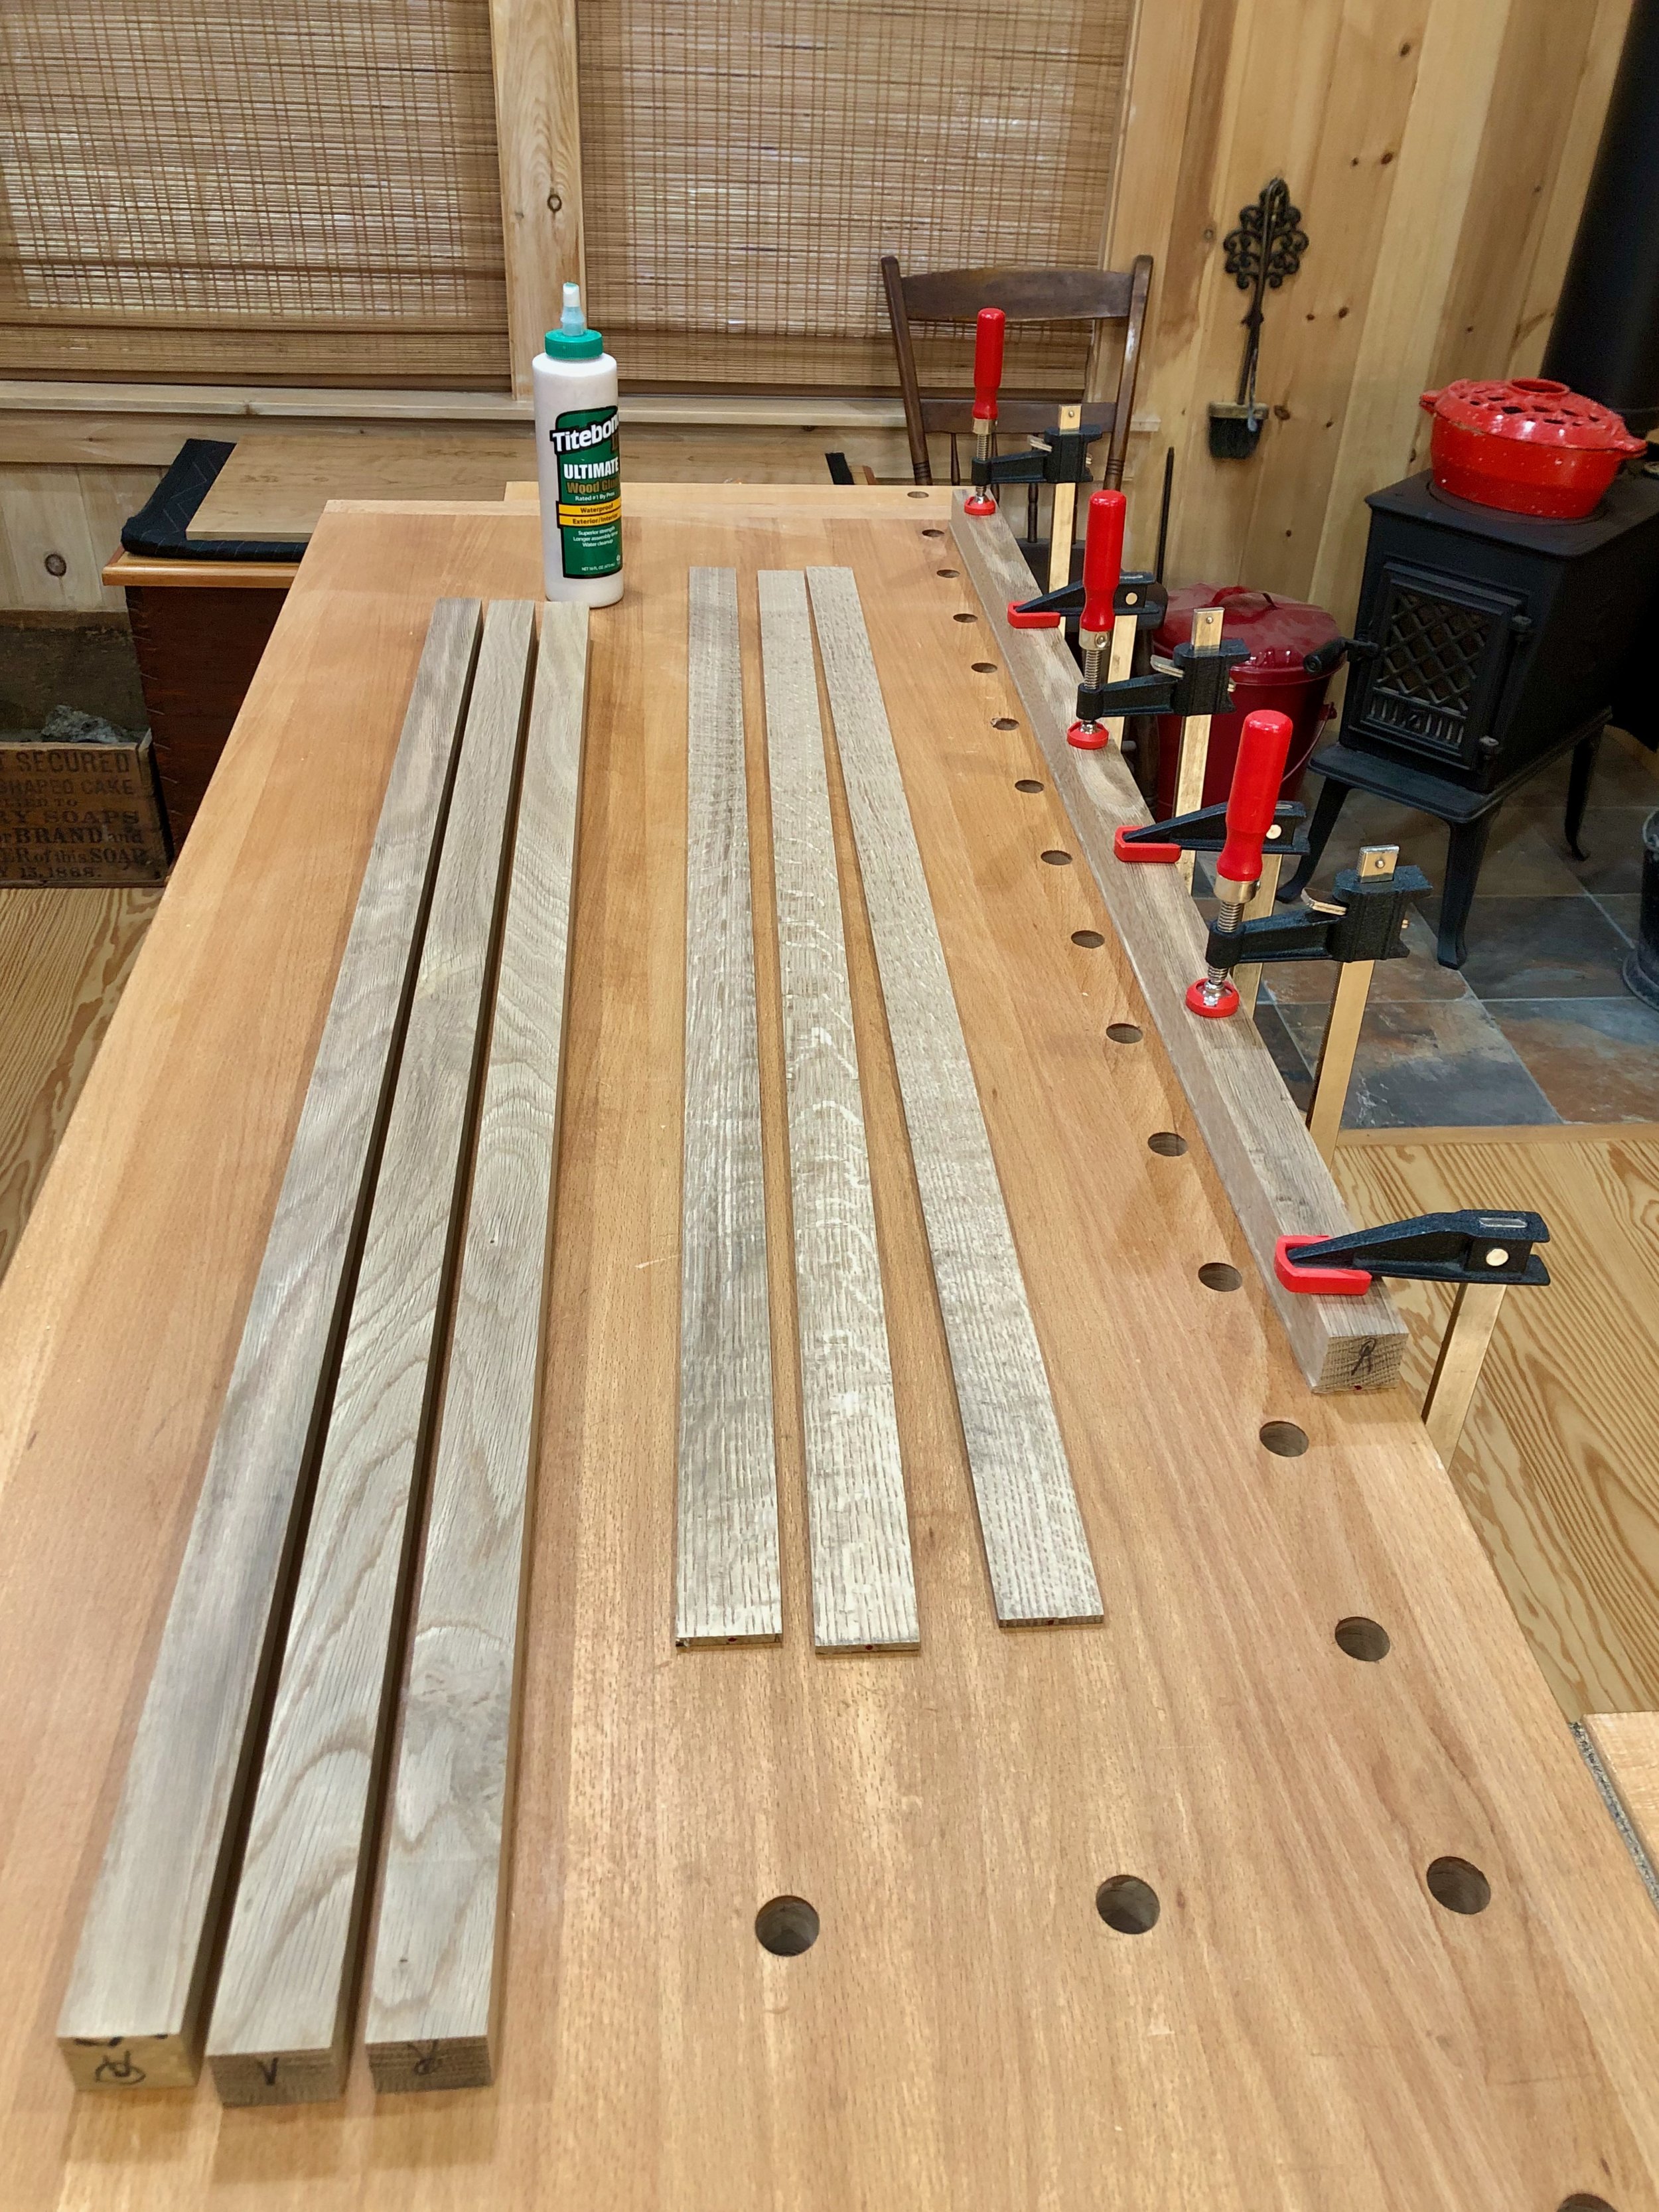
All parts smoothed and ready for assembly
Assembly and Finish
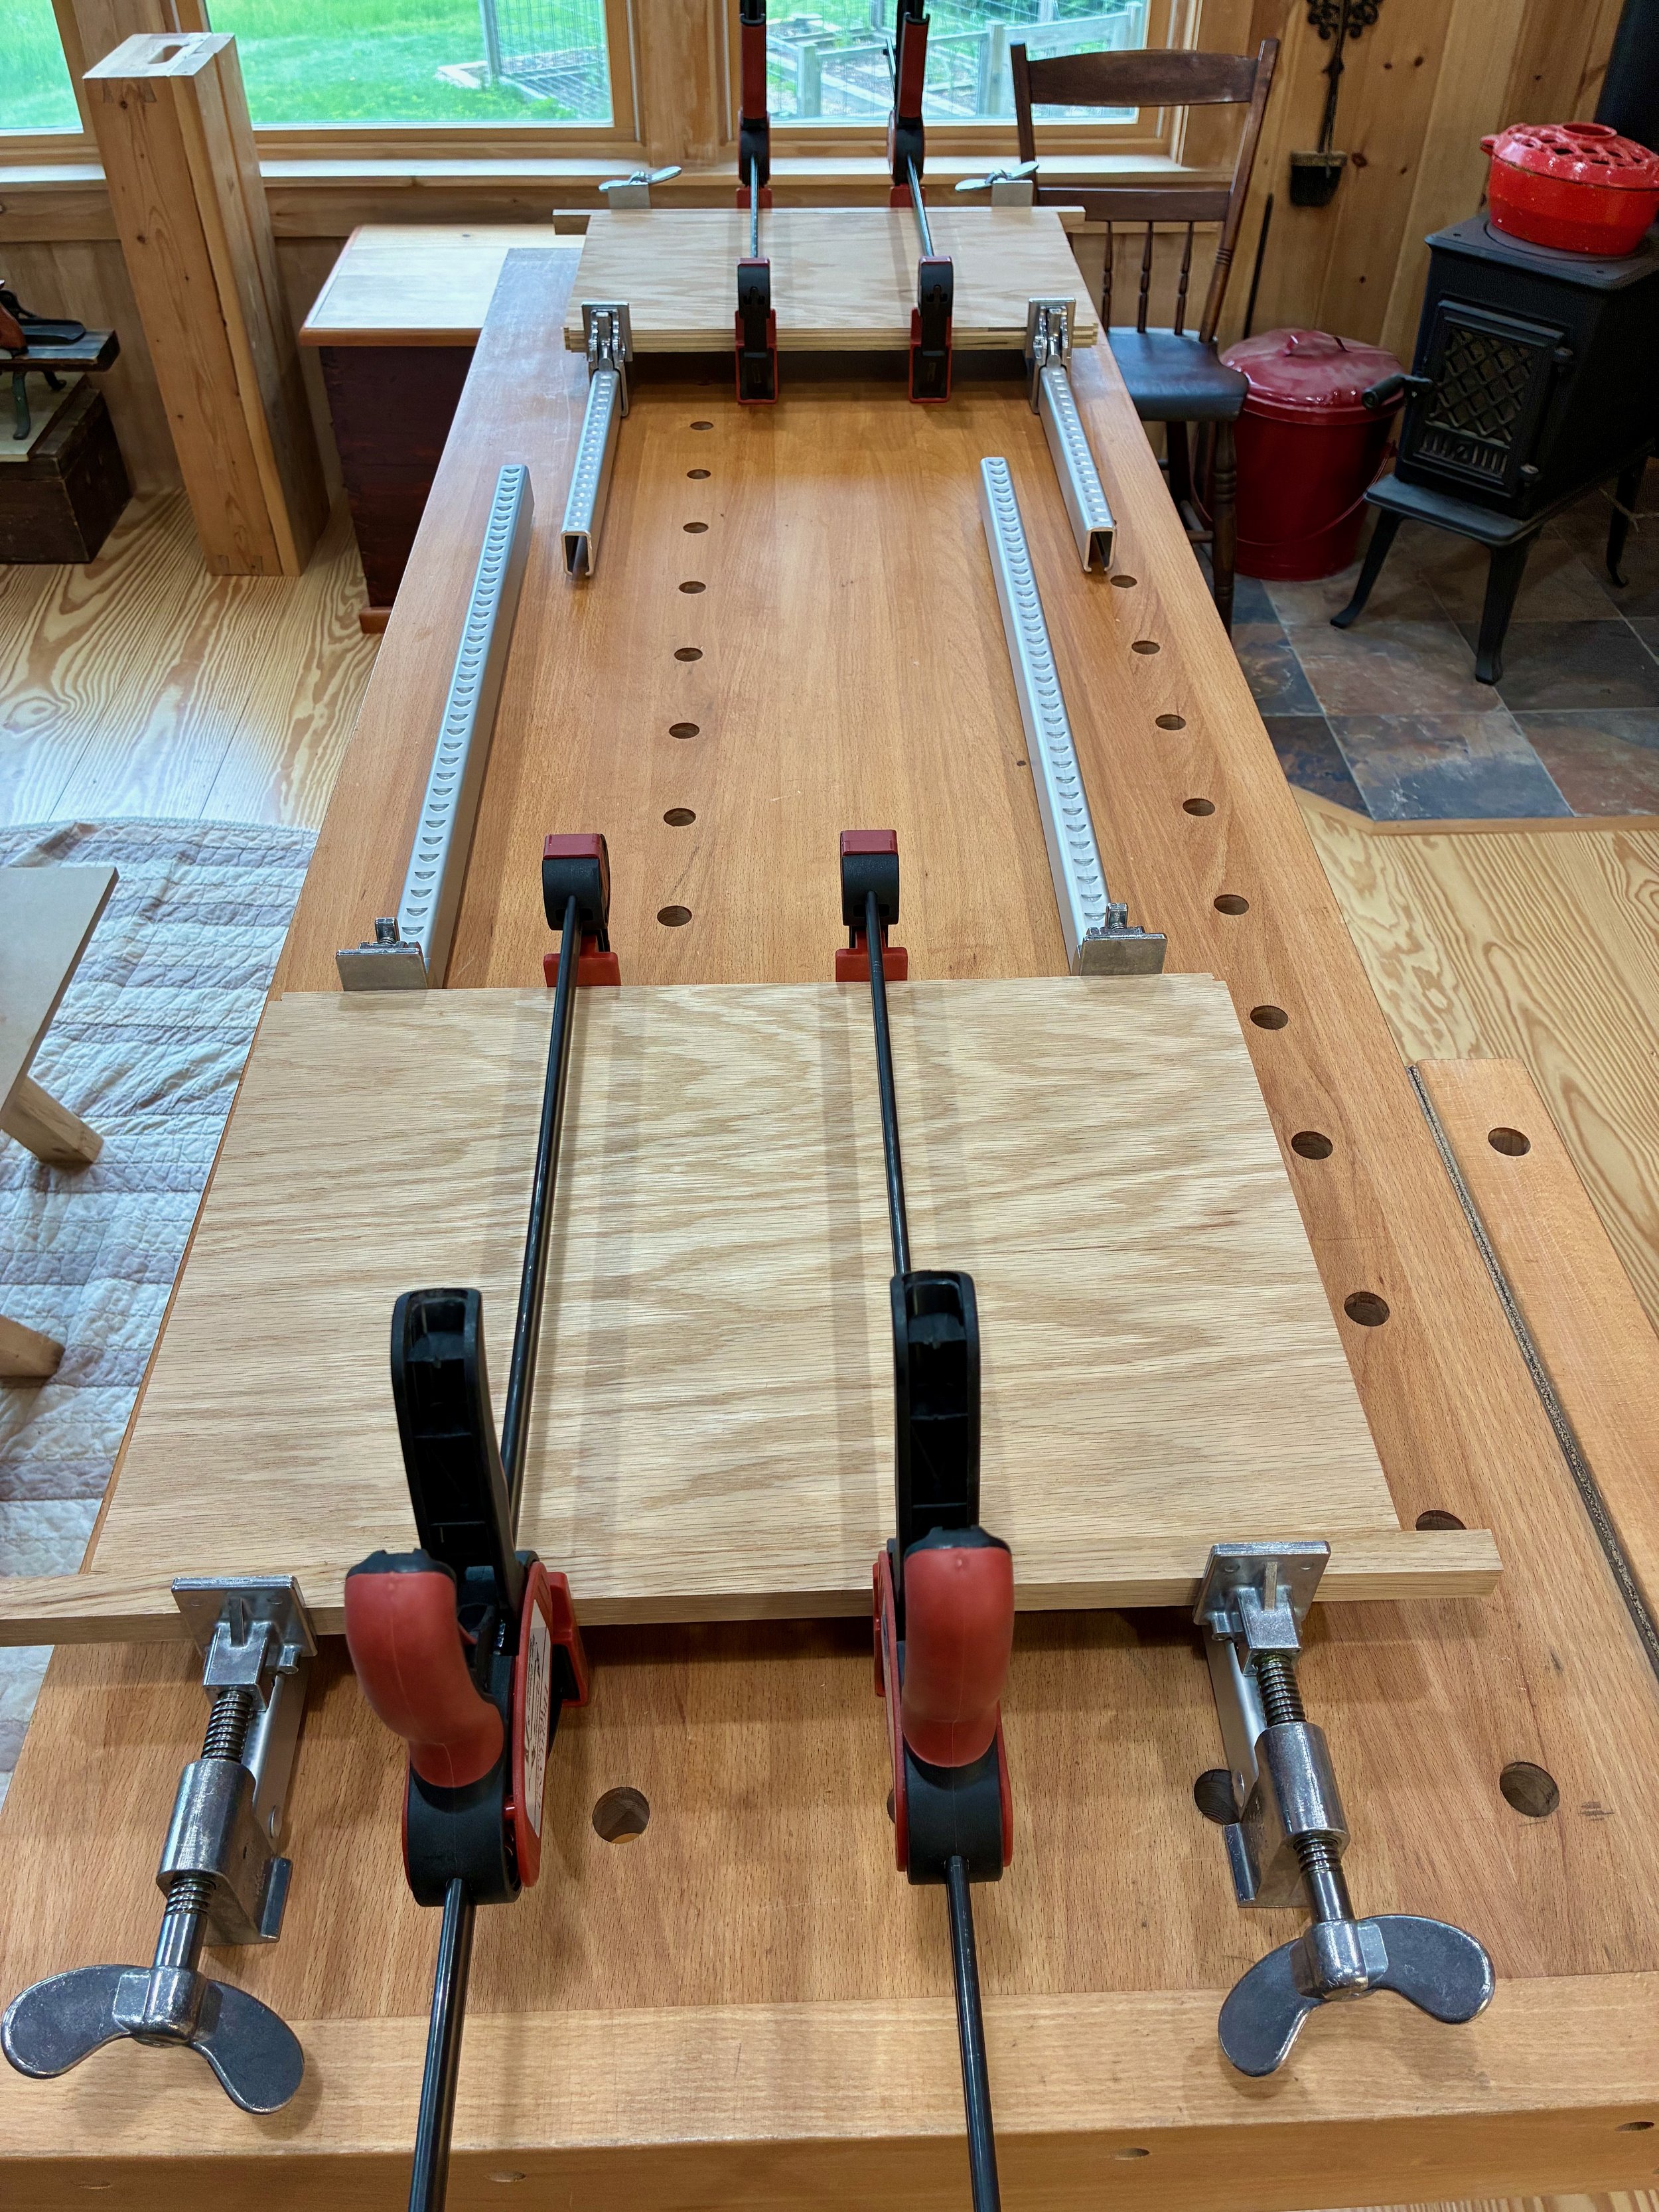
After giving the panels their first treatment of boiled linseed oil finish, the whole thing was glued-up and clamped. For this piece, all 32 cabinet parts would be put together in a single act and so I decided to use Titebond’s Genuine Hide Glue for the early joints. Back in Stickley’s day, hide glue was the only useful adhesive for wood. We now have a host of options but I chose this product for its extended “open” time, making the glue-up easier to get right. To begin, the back section was assembled, flat on the workbench. The cabinet top and bottom were then slotted into place, followed by the underlying rails, and from there the two side sections could be constructed, piece-by-piece. The final steps were to attach the front leg poles and arched rail, and for this I used the stronger Titebond III adhesive. Once hammered tight and clamped, the hefty cabinet was lowered to the floor to be sure that all four legs could touch at the same time, and then left to cure in that position. This was a full 30 minute operation, helped tremendously by my wife, Joung’s, participation. Once the case was cured and sanded, the oak edge pieces were applied to the floor using biscuits.

Cabinet glue-up (note biscuit slots for the front floor edge)
With the cavity’s opening now defined, the door could be fashioned using the same tenoned-rail and stile method as the cabinet frame. With every build, the sequence of cuts to construct a 5-part, framed panel door becomes a smoother production. But this efficiency does nothing to subtract from the joy.
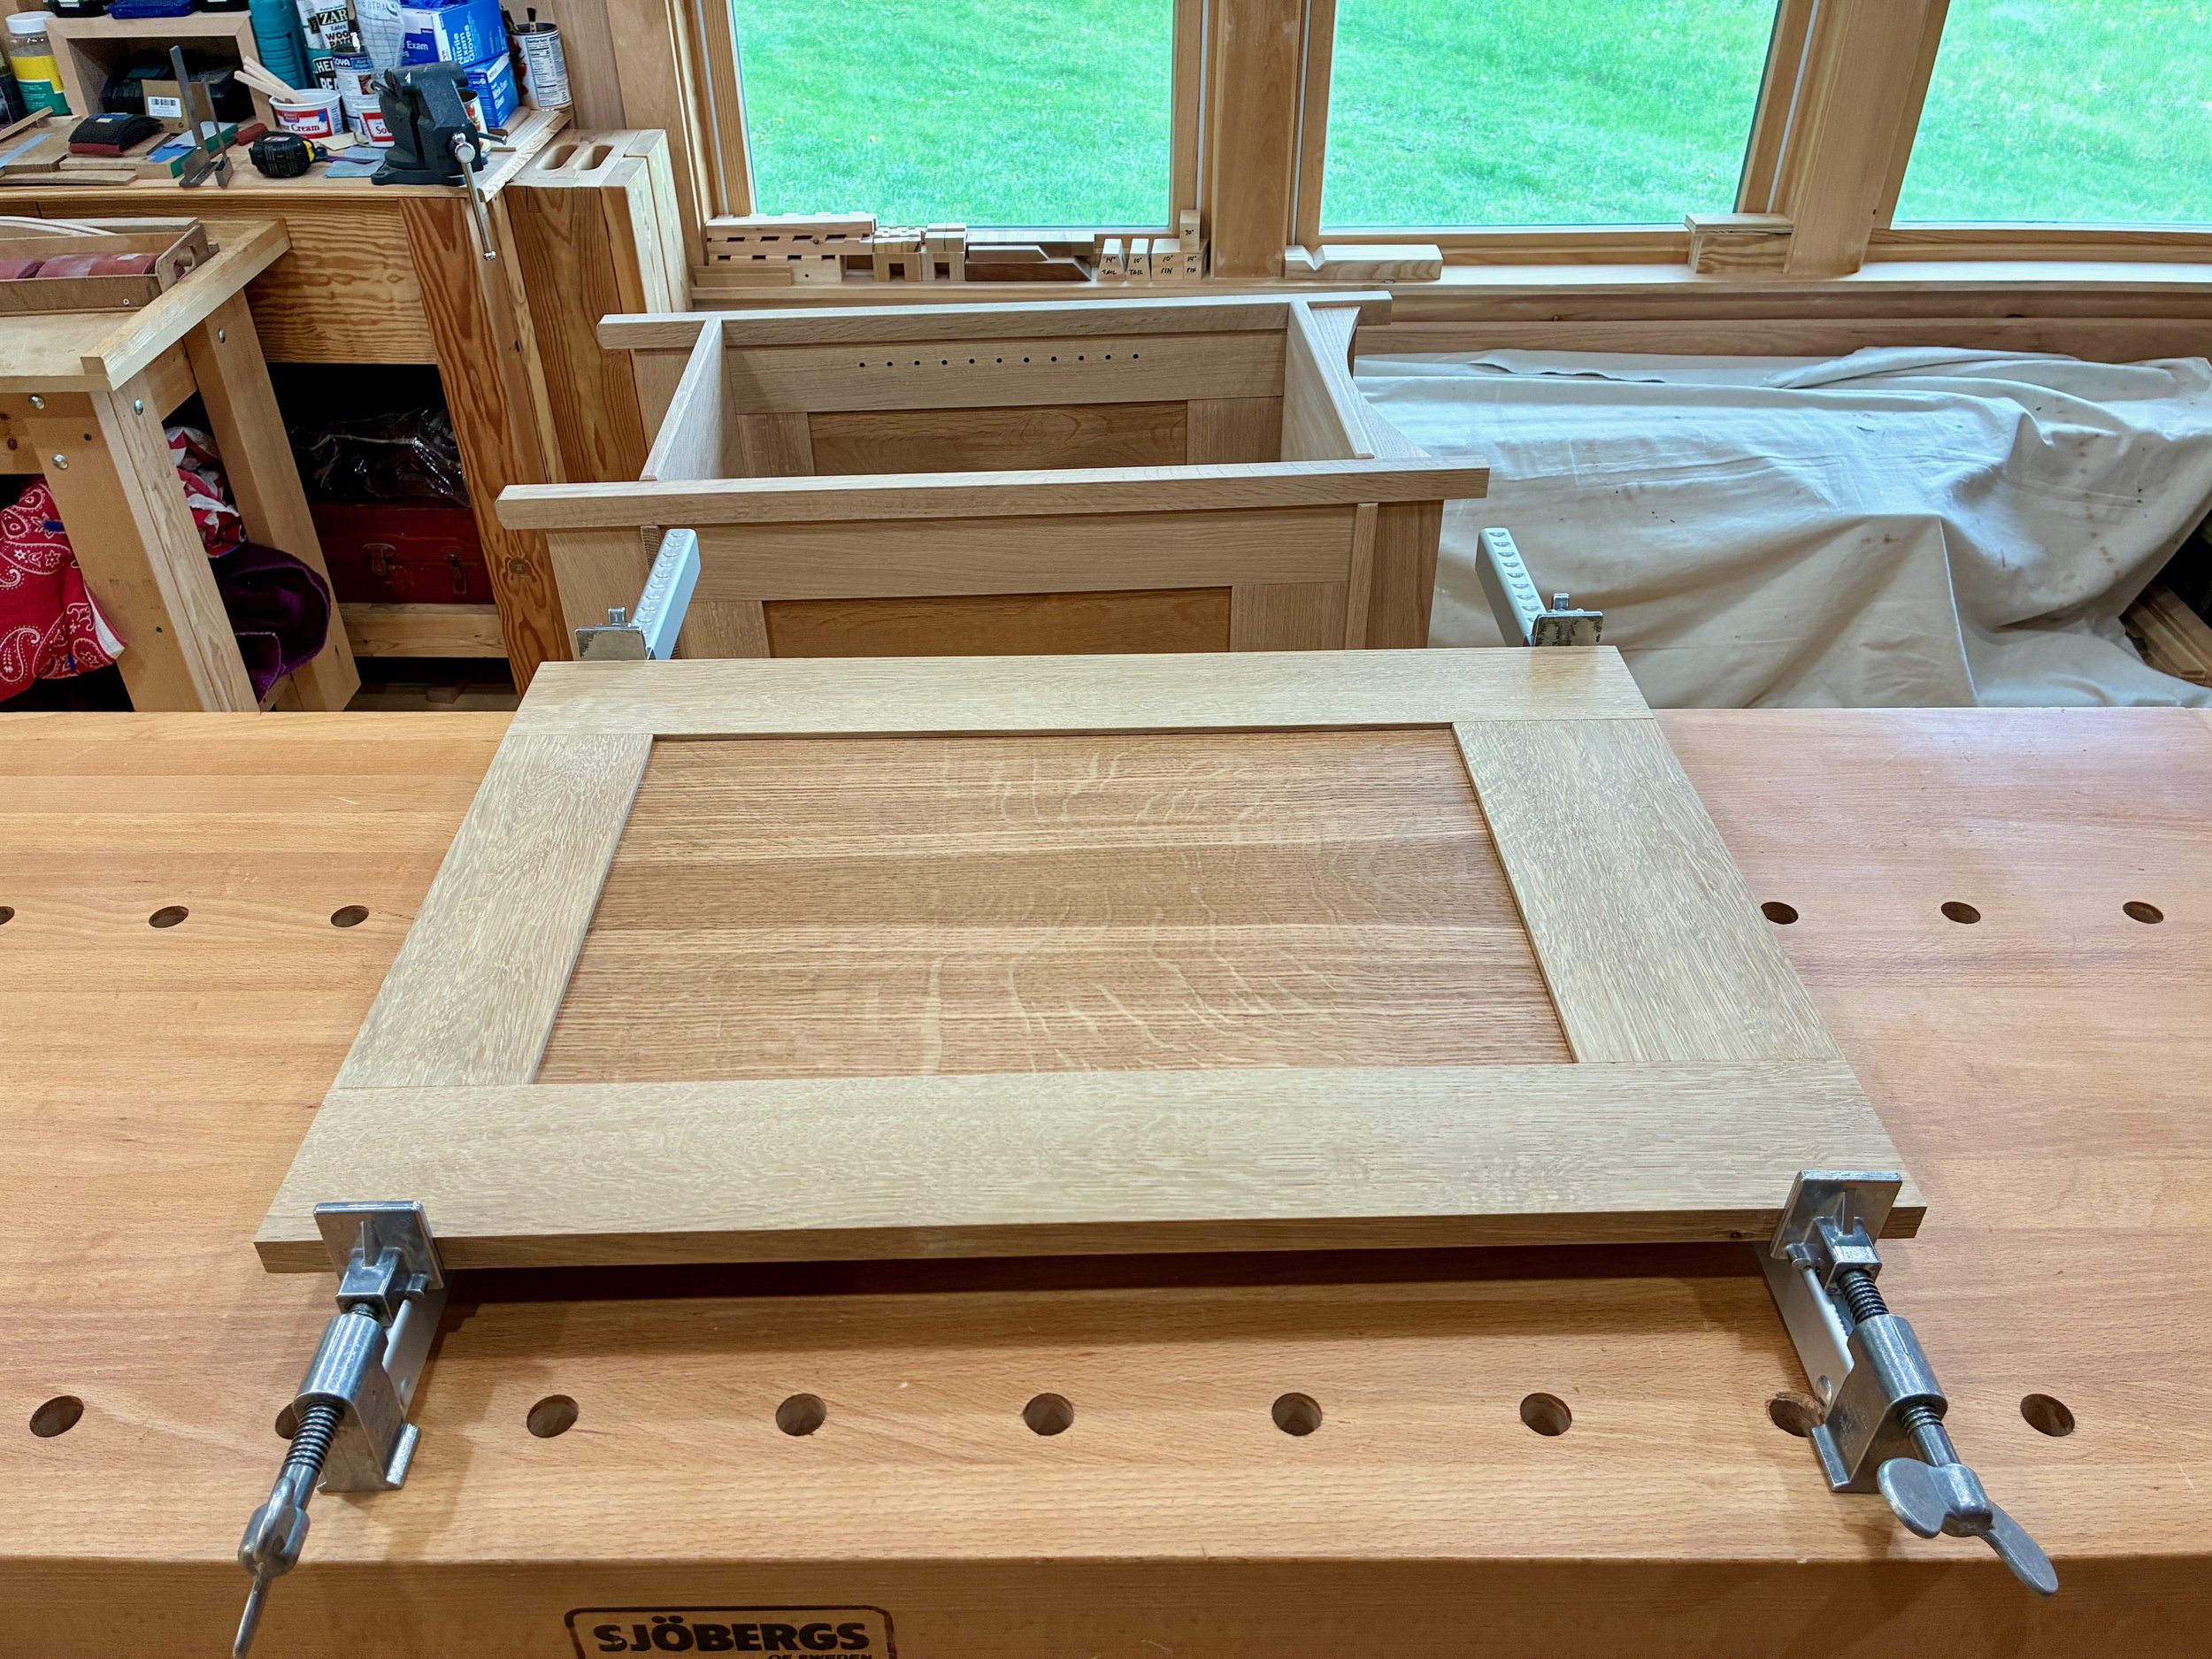
Door frame glued-up around an oiled panel
The door hardware was procured online from a nicely run hardware business, Hardwick & Sons: ball tipped hinges and a Craftsman style drop pull. These designs, in a copper finish, are very close to the Stickley originals.

Door hardware
Fitting the door presented an interesting problem. My desire was to recess the frame from the leg poles by 1/4 in. to match the profile of the sides, but I was at a loss for how to accomplish this. (Stickley’s one-page construction blurb does not bother with such details.) Without a good idea for how to achieve the recess, and pressed by a delivery deadline, I resorted to mortising the side of the left pole for hinges that would, in the end, present the door not recessed, but flush. About the time I finished this procedure it dawned on me that auction websites might provide an answer to the recessed door question, and 5 minutes later I had another “mistake” to correct. Lesson: when confronted with a problem never stop researching until you find the solution, or to use the sardonic graduate school version, “A week in the lab can save you an hour in the library.” Anyway, I found a classic Stickley Cellarette (another extinct cupboard, part ice box and part liquor cabinet) with a recessed door at my favorite site for Stickley. Close inspection revealed that a thin plate had been applied to the leg post, recessed to the proper depth, into which the door hinges were mortised in the typical fashion. Voila!

Close-up of a 1910 Stickley cellarette showing hinge detail, reproduced from California Historical Designs website
To get back on track, I filled-in the mortise cavities with some scrap oak and, after planing things flush, applied a pre-mortised plate along the left side of the door opening.

Applying the new, recessed hinge “plate” to the cabinet interior
The door was then carefully fitted to this opening by a loop sequence of test fit, edge plane, repeat. I used the jointer for most of the heavy shaving, and then a block plane and card scraper to finish things off. Once sized appropriately, the hinge positions were marked on the door and mortises cut to receive the 2 in. leaves. The drop pull was temporarily mounted at this point to make it easier to manipulate the heavy door. All good.
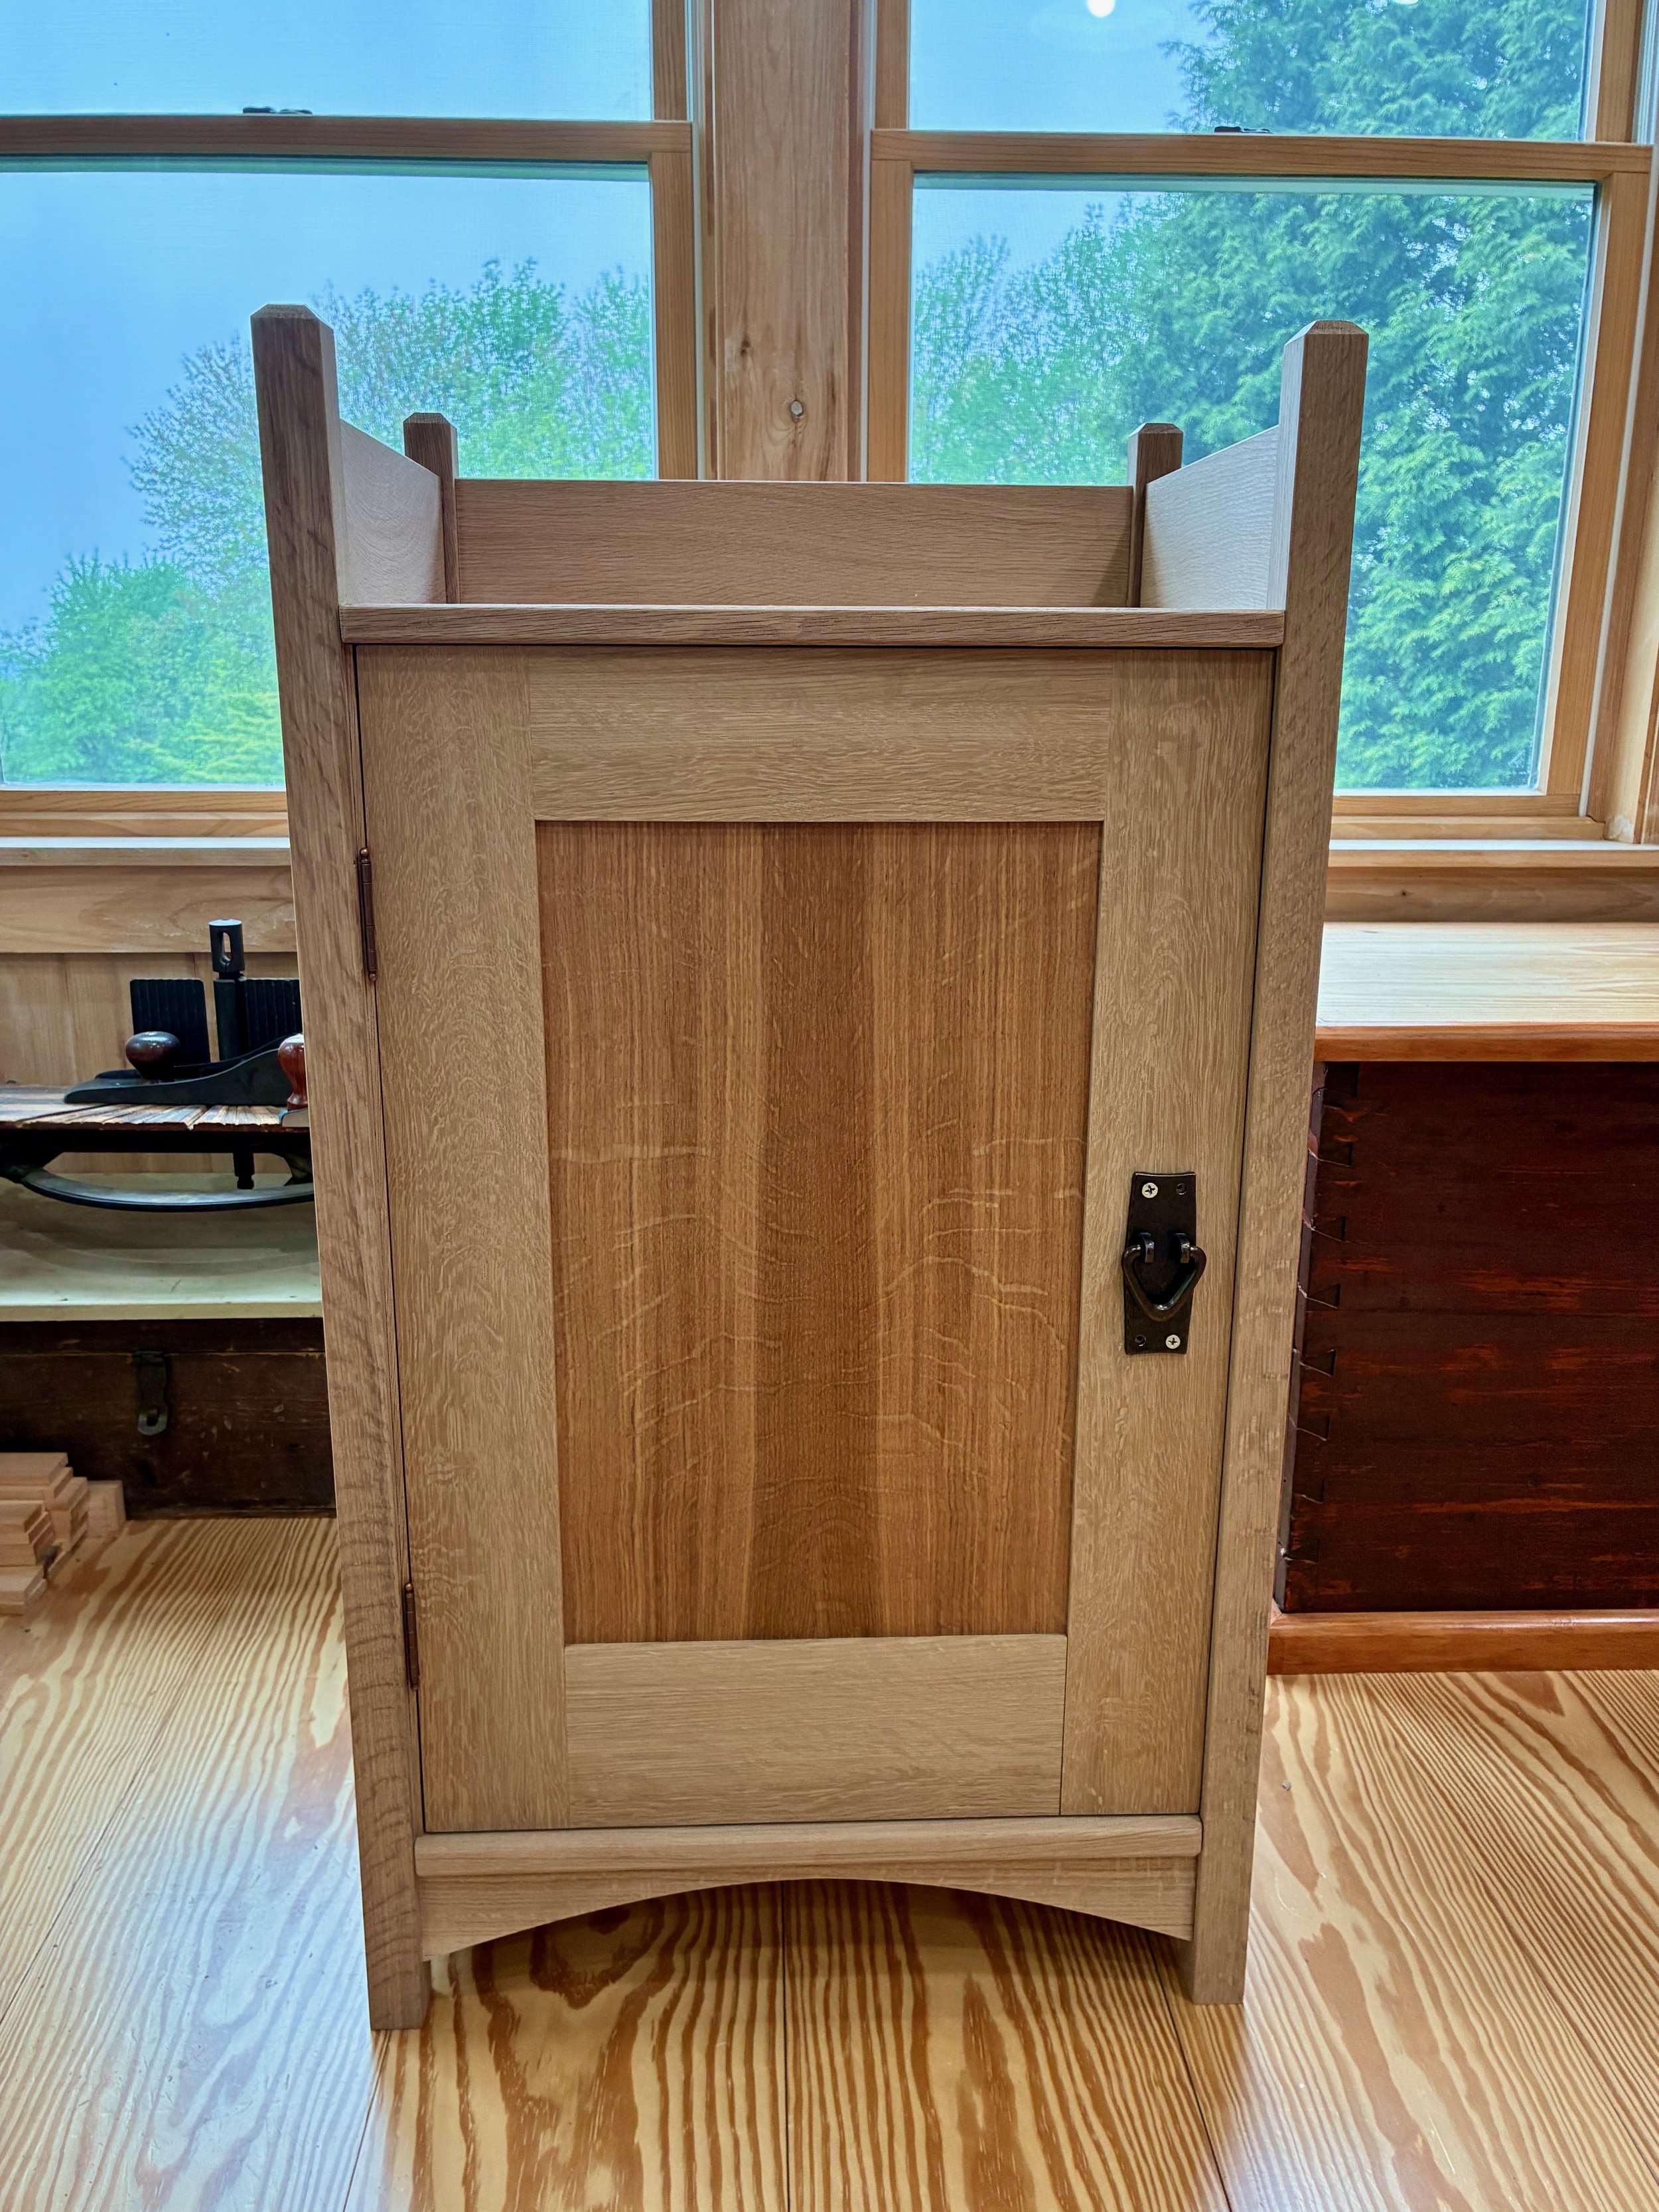
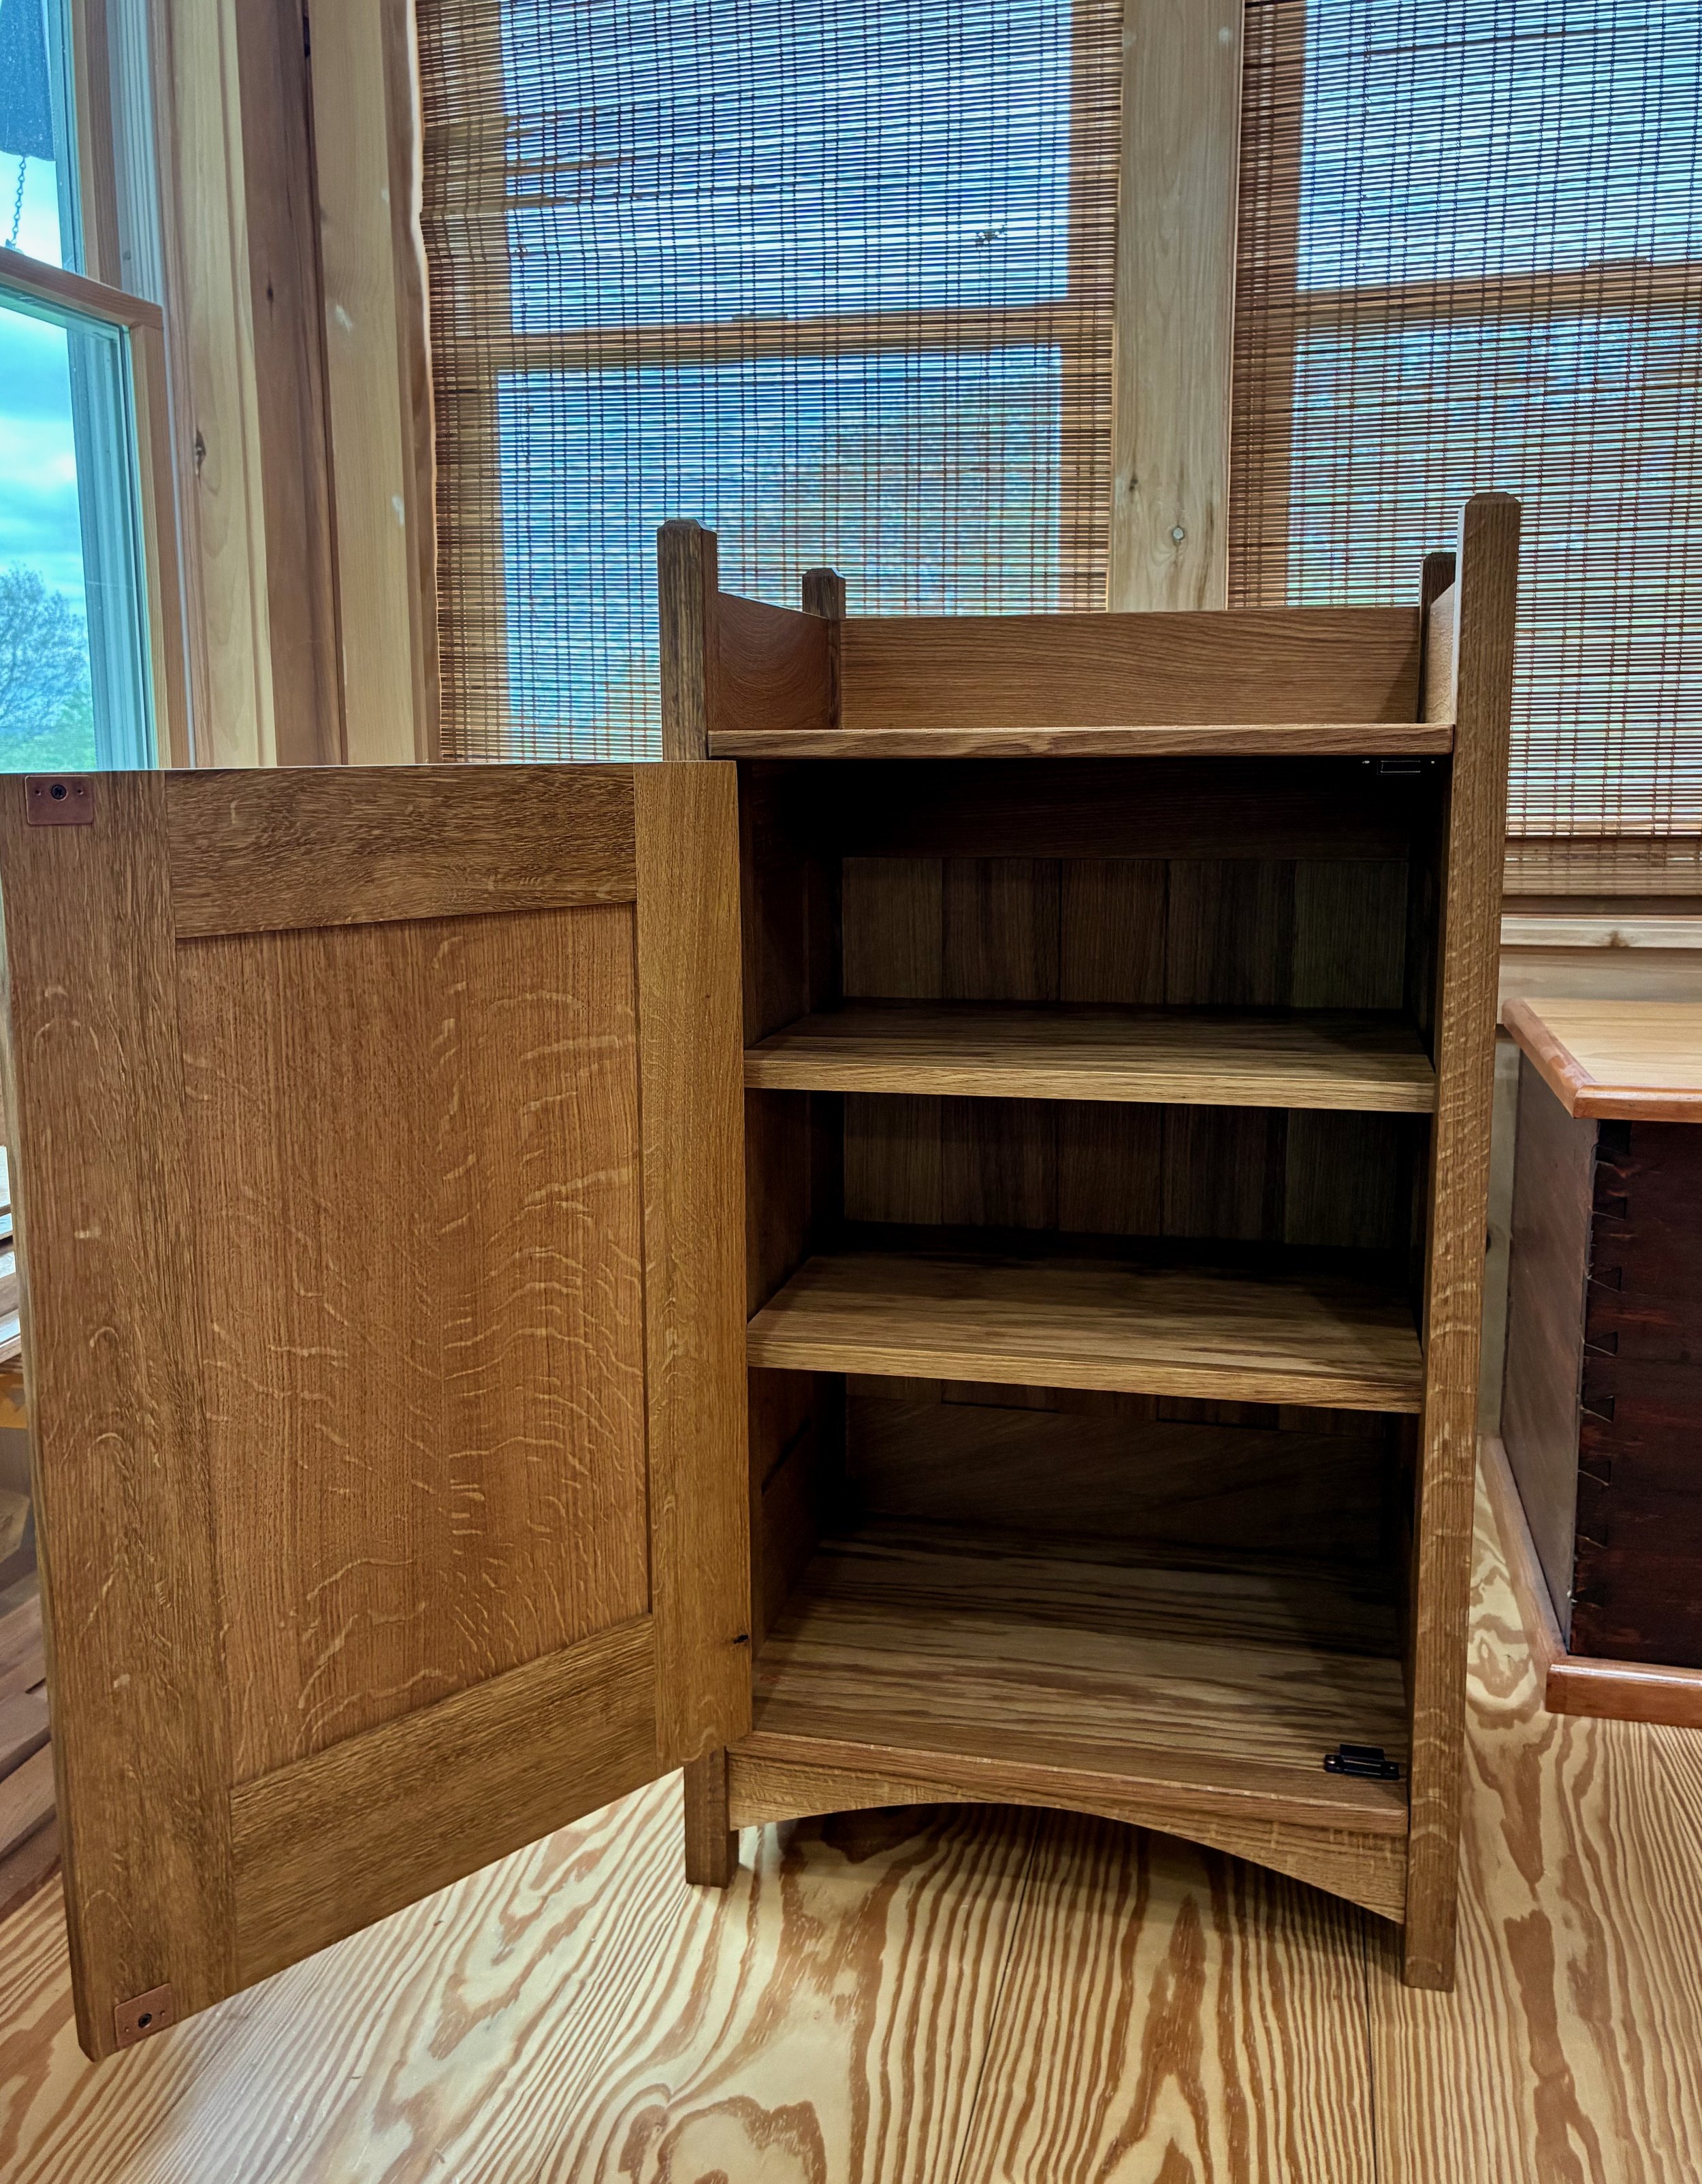
Cabinet construction complete
Lastly, I made the shelves using 3/4 in. red oak veneered plywood. These were cut to their final size and then a strip of white oak “trim” was glued along the front to hide the plywood laminations. A final task was to install two magnetic door catches (top and bottom) before all metallic parts were removed for the finishing protocol.
Trimming the shelves
In total, two applications of boiled linseed oil were used to bring out the beautiful grain features of white oak. Typically, a table or chair would be given a varnish coat at this stage to protect from water and wear, but I decided to cease adulteration of the cabinet wood here and only coat the plywood shelves with polyurethane, as they would receive the wear. A final wipe down with Howard’s Feed-n-Wax was enough to make the whole piece glow yet still retain that warm wood feeling when touched.
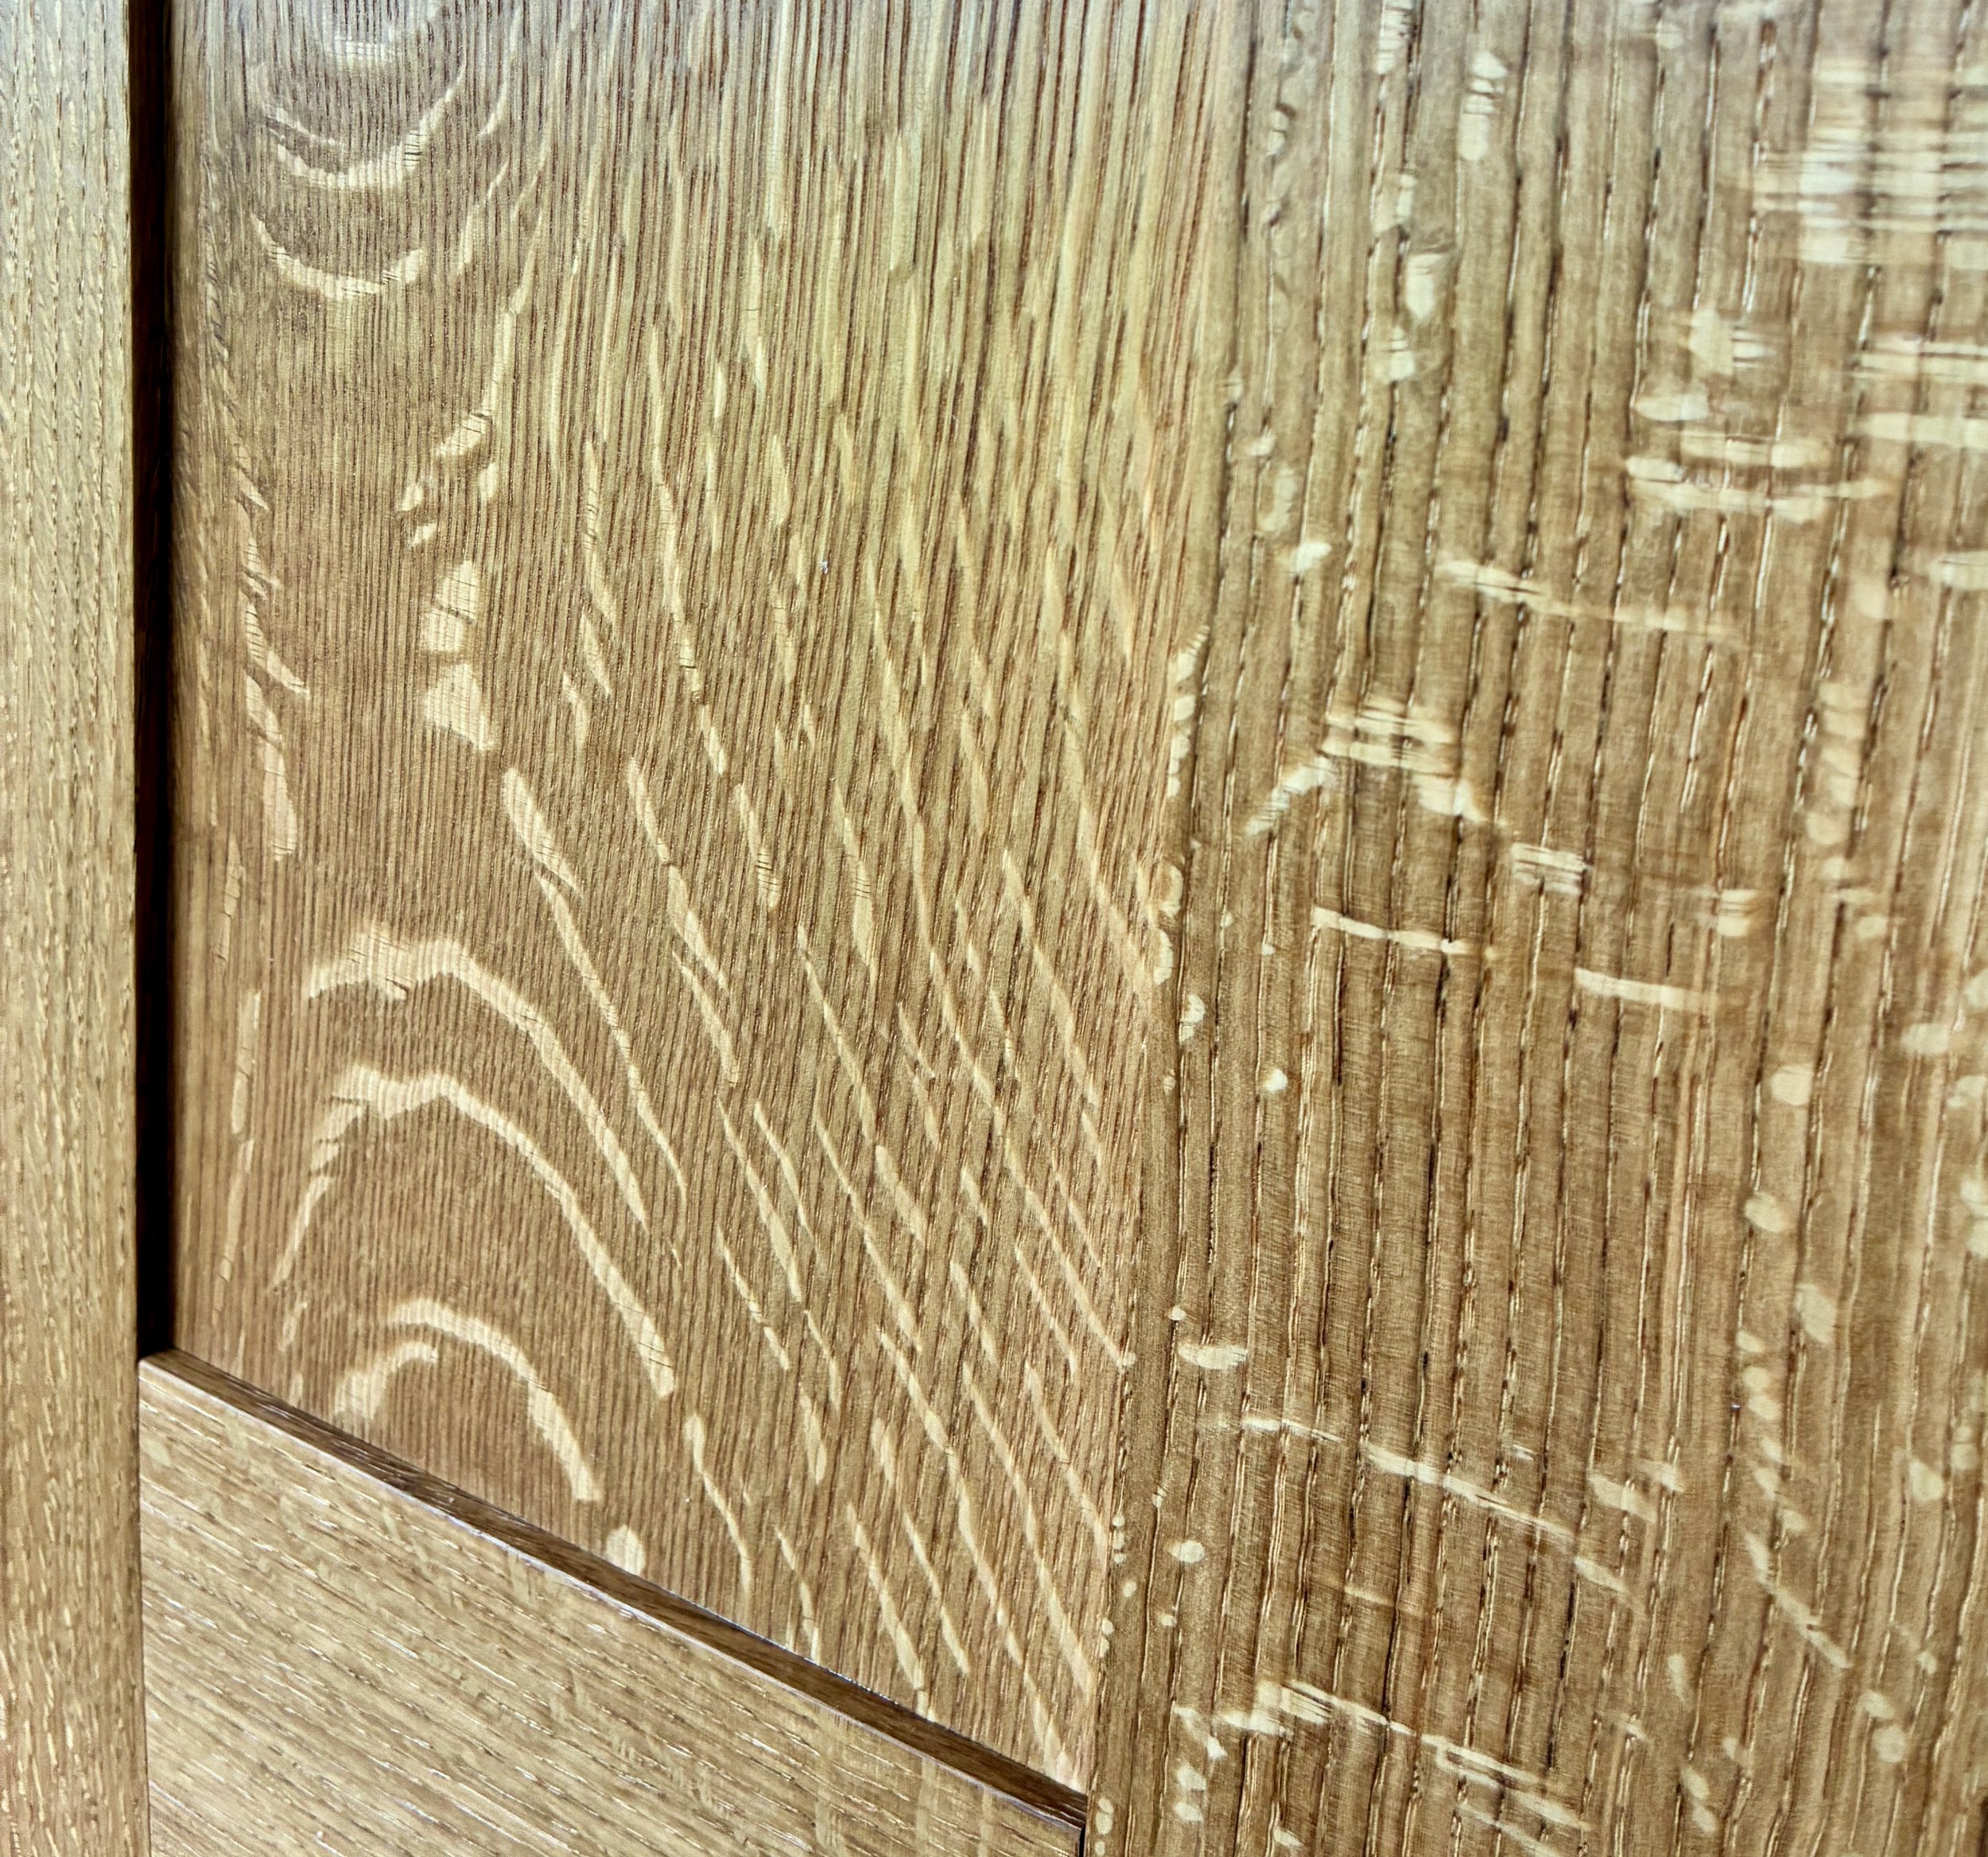
Wonderful white oak
Re-installation of the hardware completes the Walker’s Cabinet, a 120 year-old Arts & Crafts article co-opted to provide a new function in today’s home. Enjoy!

The Walker’s Cabinet
… an exaptation in oak.
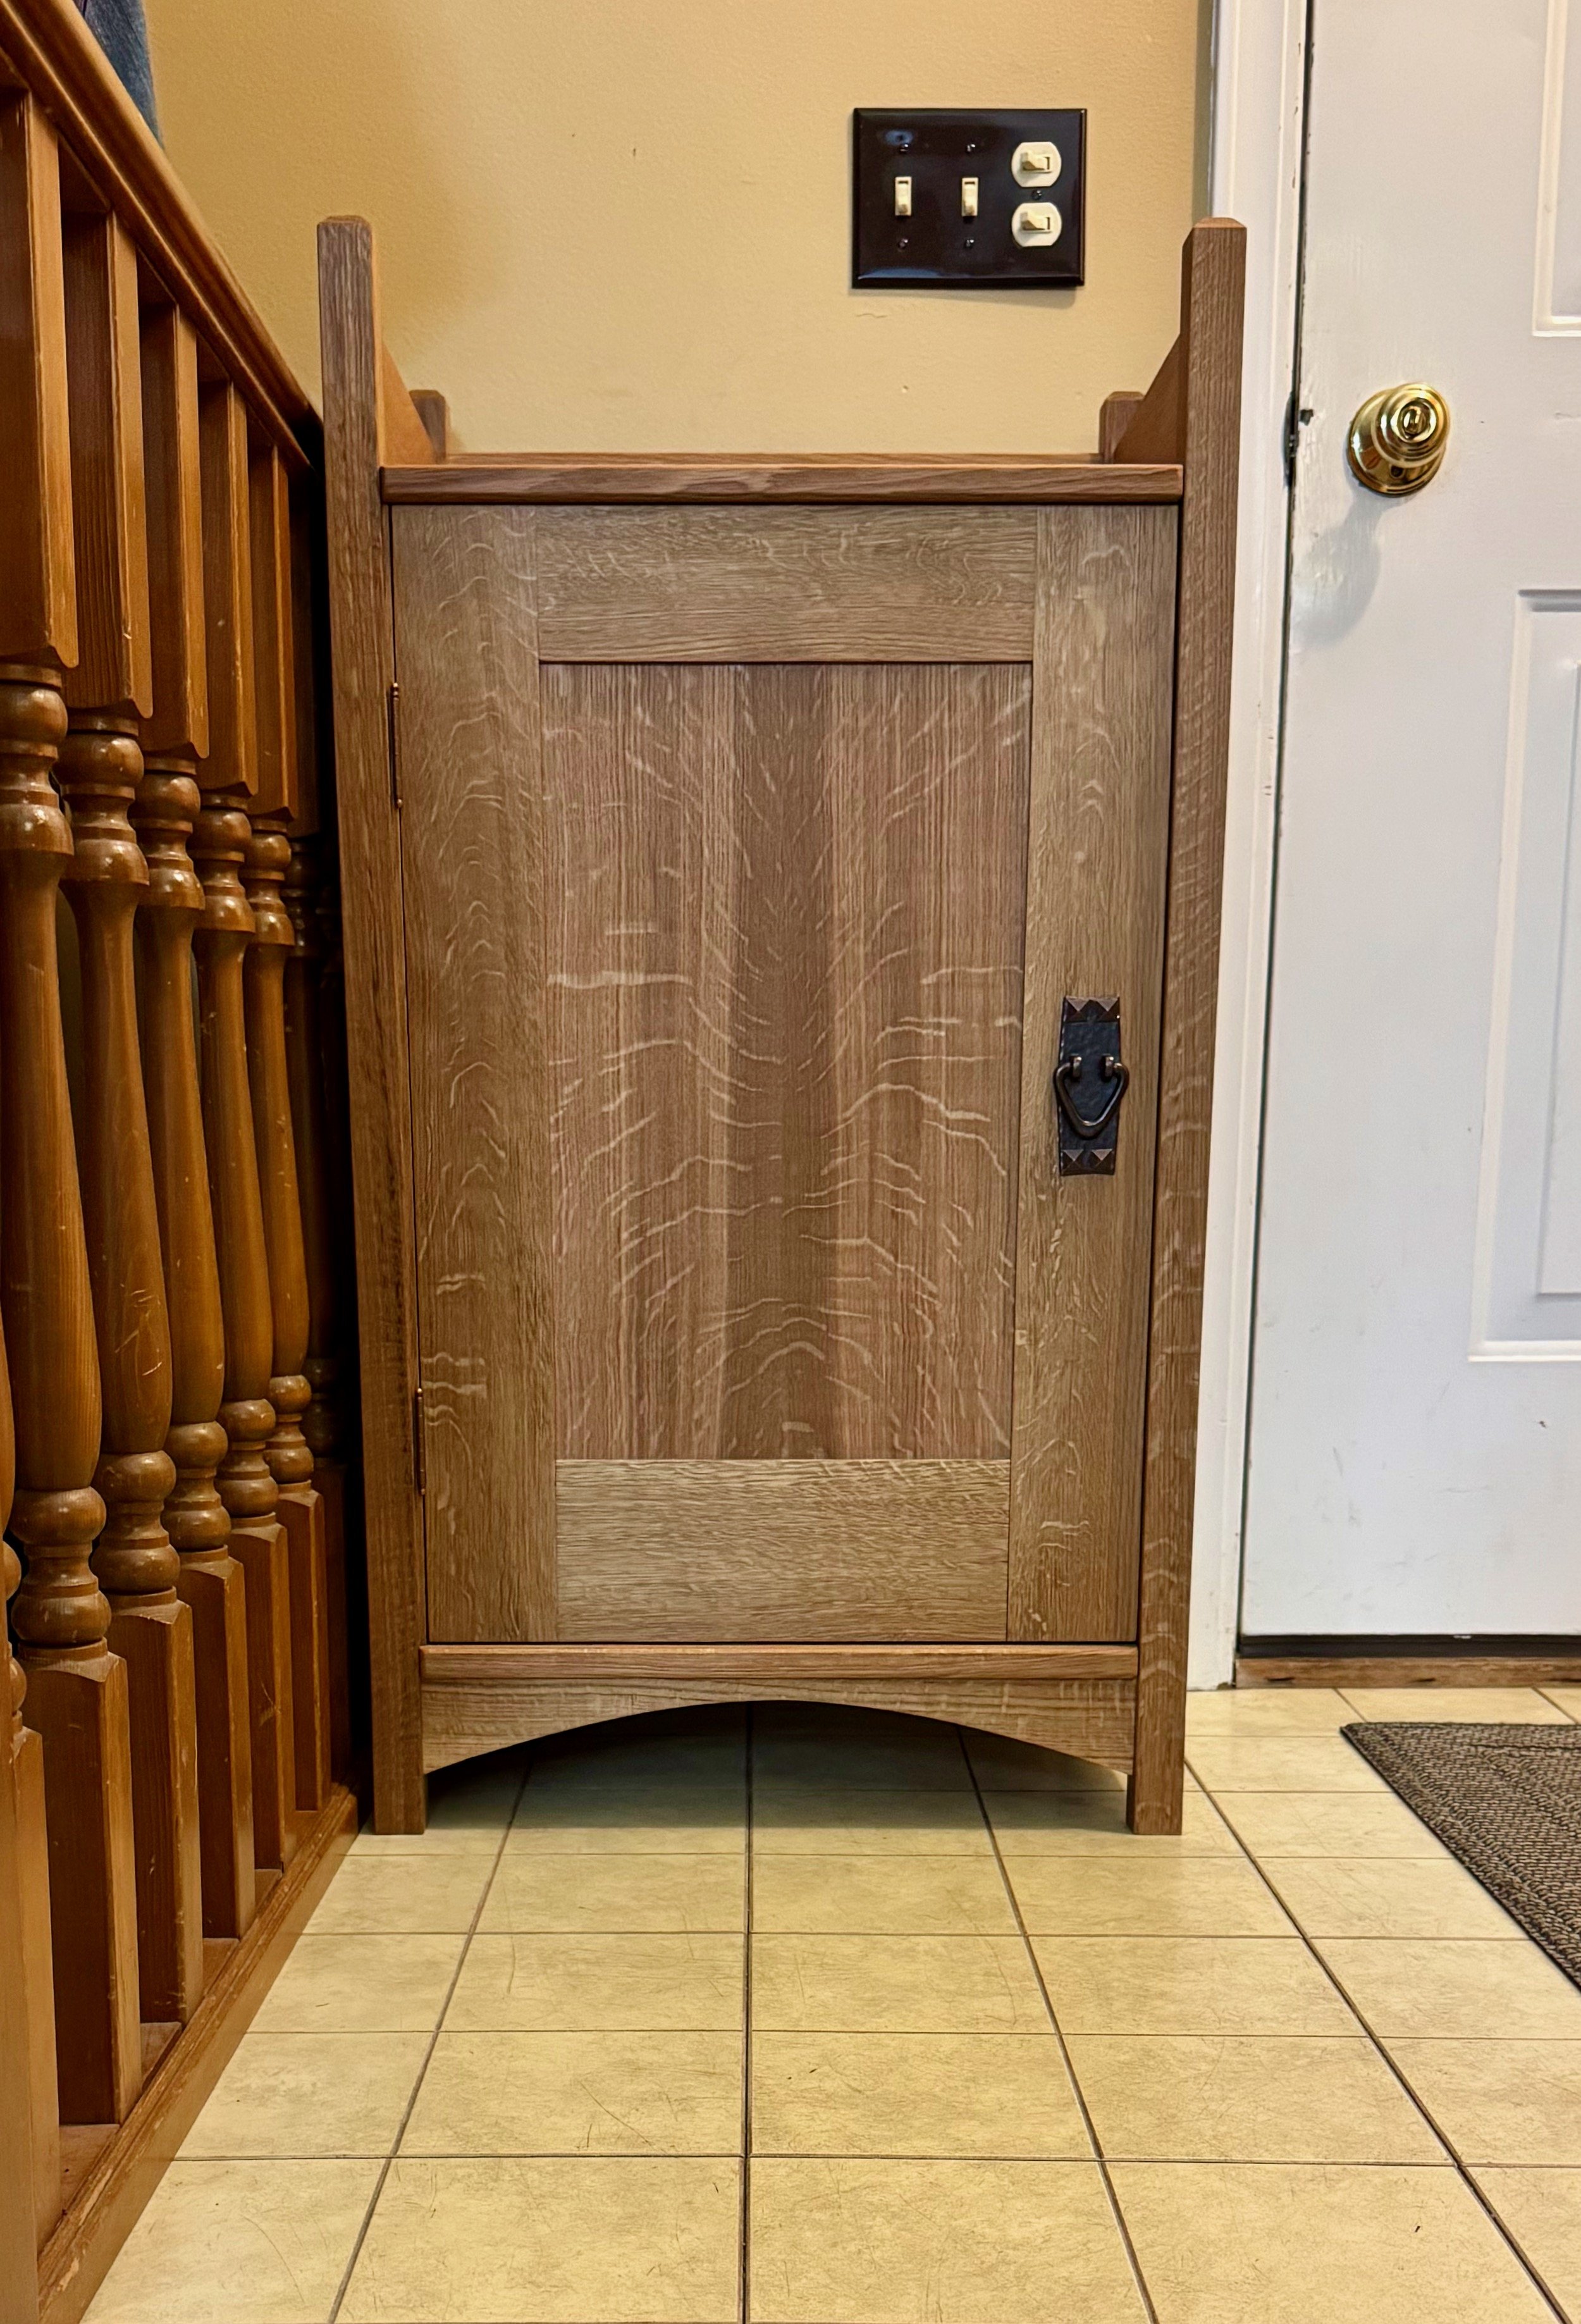
Cabinet at home