

The Coin Chest ep.1

In for a penny, in for a pound
Growing up, my brother Mike and I collected coins - in addition to stamps, fossils, baseball cards and other treasures common to a 1960s-70s youth. Curating our small collections taught us a lot of things not covered in school, and spawned many happy memories in the process. Those passions were precipitously “parked” to make room for college and subsequent responsibilities but, following 45 years of adulthood, Mike is back into his coins and now has the resources to move them out of their cigar box abode. He has requested a suitable cabinet to store his collection and I am most happy to oblige.
Design
Where to begin? Well, it turns out there is a canonical “coin cabinet” that has been around for ages. It is a fine wooden case, typically made from mahogany, with layers of thin drawers that feature circular cut-outs to nestle each individual member of your collection. Beautiful, but that’s not what he was after.
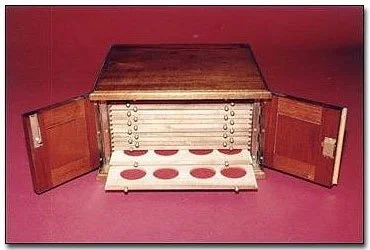
Mahogany coin cabinet from the fine craftsmen at coincabinets.com
You see, Mike intends to enjoy his collection, not entomb it. He needs a place to keep things organized, and one that can handle a variety of coin holders, rolls, books and small boxes. A cabinet for this purpose needs to provide small storage spaces with easy access and room to grow. Considering this mission not a lot of Western furniture items come to mind, however, there are some East Asian pieces that could readily do the job. The multi-drawered Asian apothecary cabinets could work, but their monotonous configuration might not suit the access requirement so well. (Where did I put those buffalo nickels, again?) Various Japanese merchant chests, a version of which I have made previously, might also serve the new purpose of housing a coin collection.
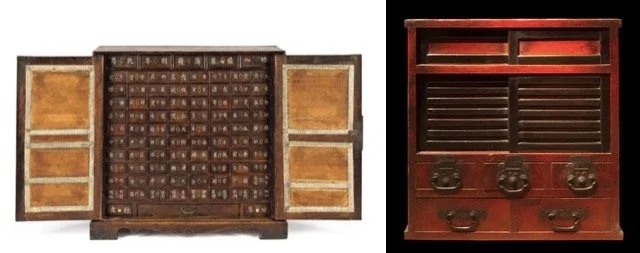
Apothecary cabinet (Korean) and Merchant chest (Japanese), examples of small, multi-compartment furnishings found online
The Japanese chests (tansu) seemed most appropriate, and there are many to choose from. Over time, the versatile tansu form has been adapted for the storage of almost everything, with some providing safe-like security. And every tansu type has distinct sub-species that differ by their geographic region of production, which means there is a lot of design inspiration out there. After some back and forth, we decided that a specific merchant’s chest, a zeni to-dana (translation: money chest with sliding doors), from the Echigo province would be a great choice. This particular specimen from the early Meiji era (1868-1912) was also a wheeled chest (karuma dansu), useful for exiting a burning dwelling with your most valuable possessions in tow, but we plan to omit the wheeled base on ours.
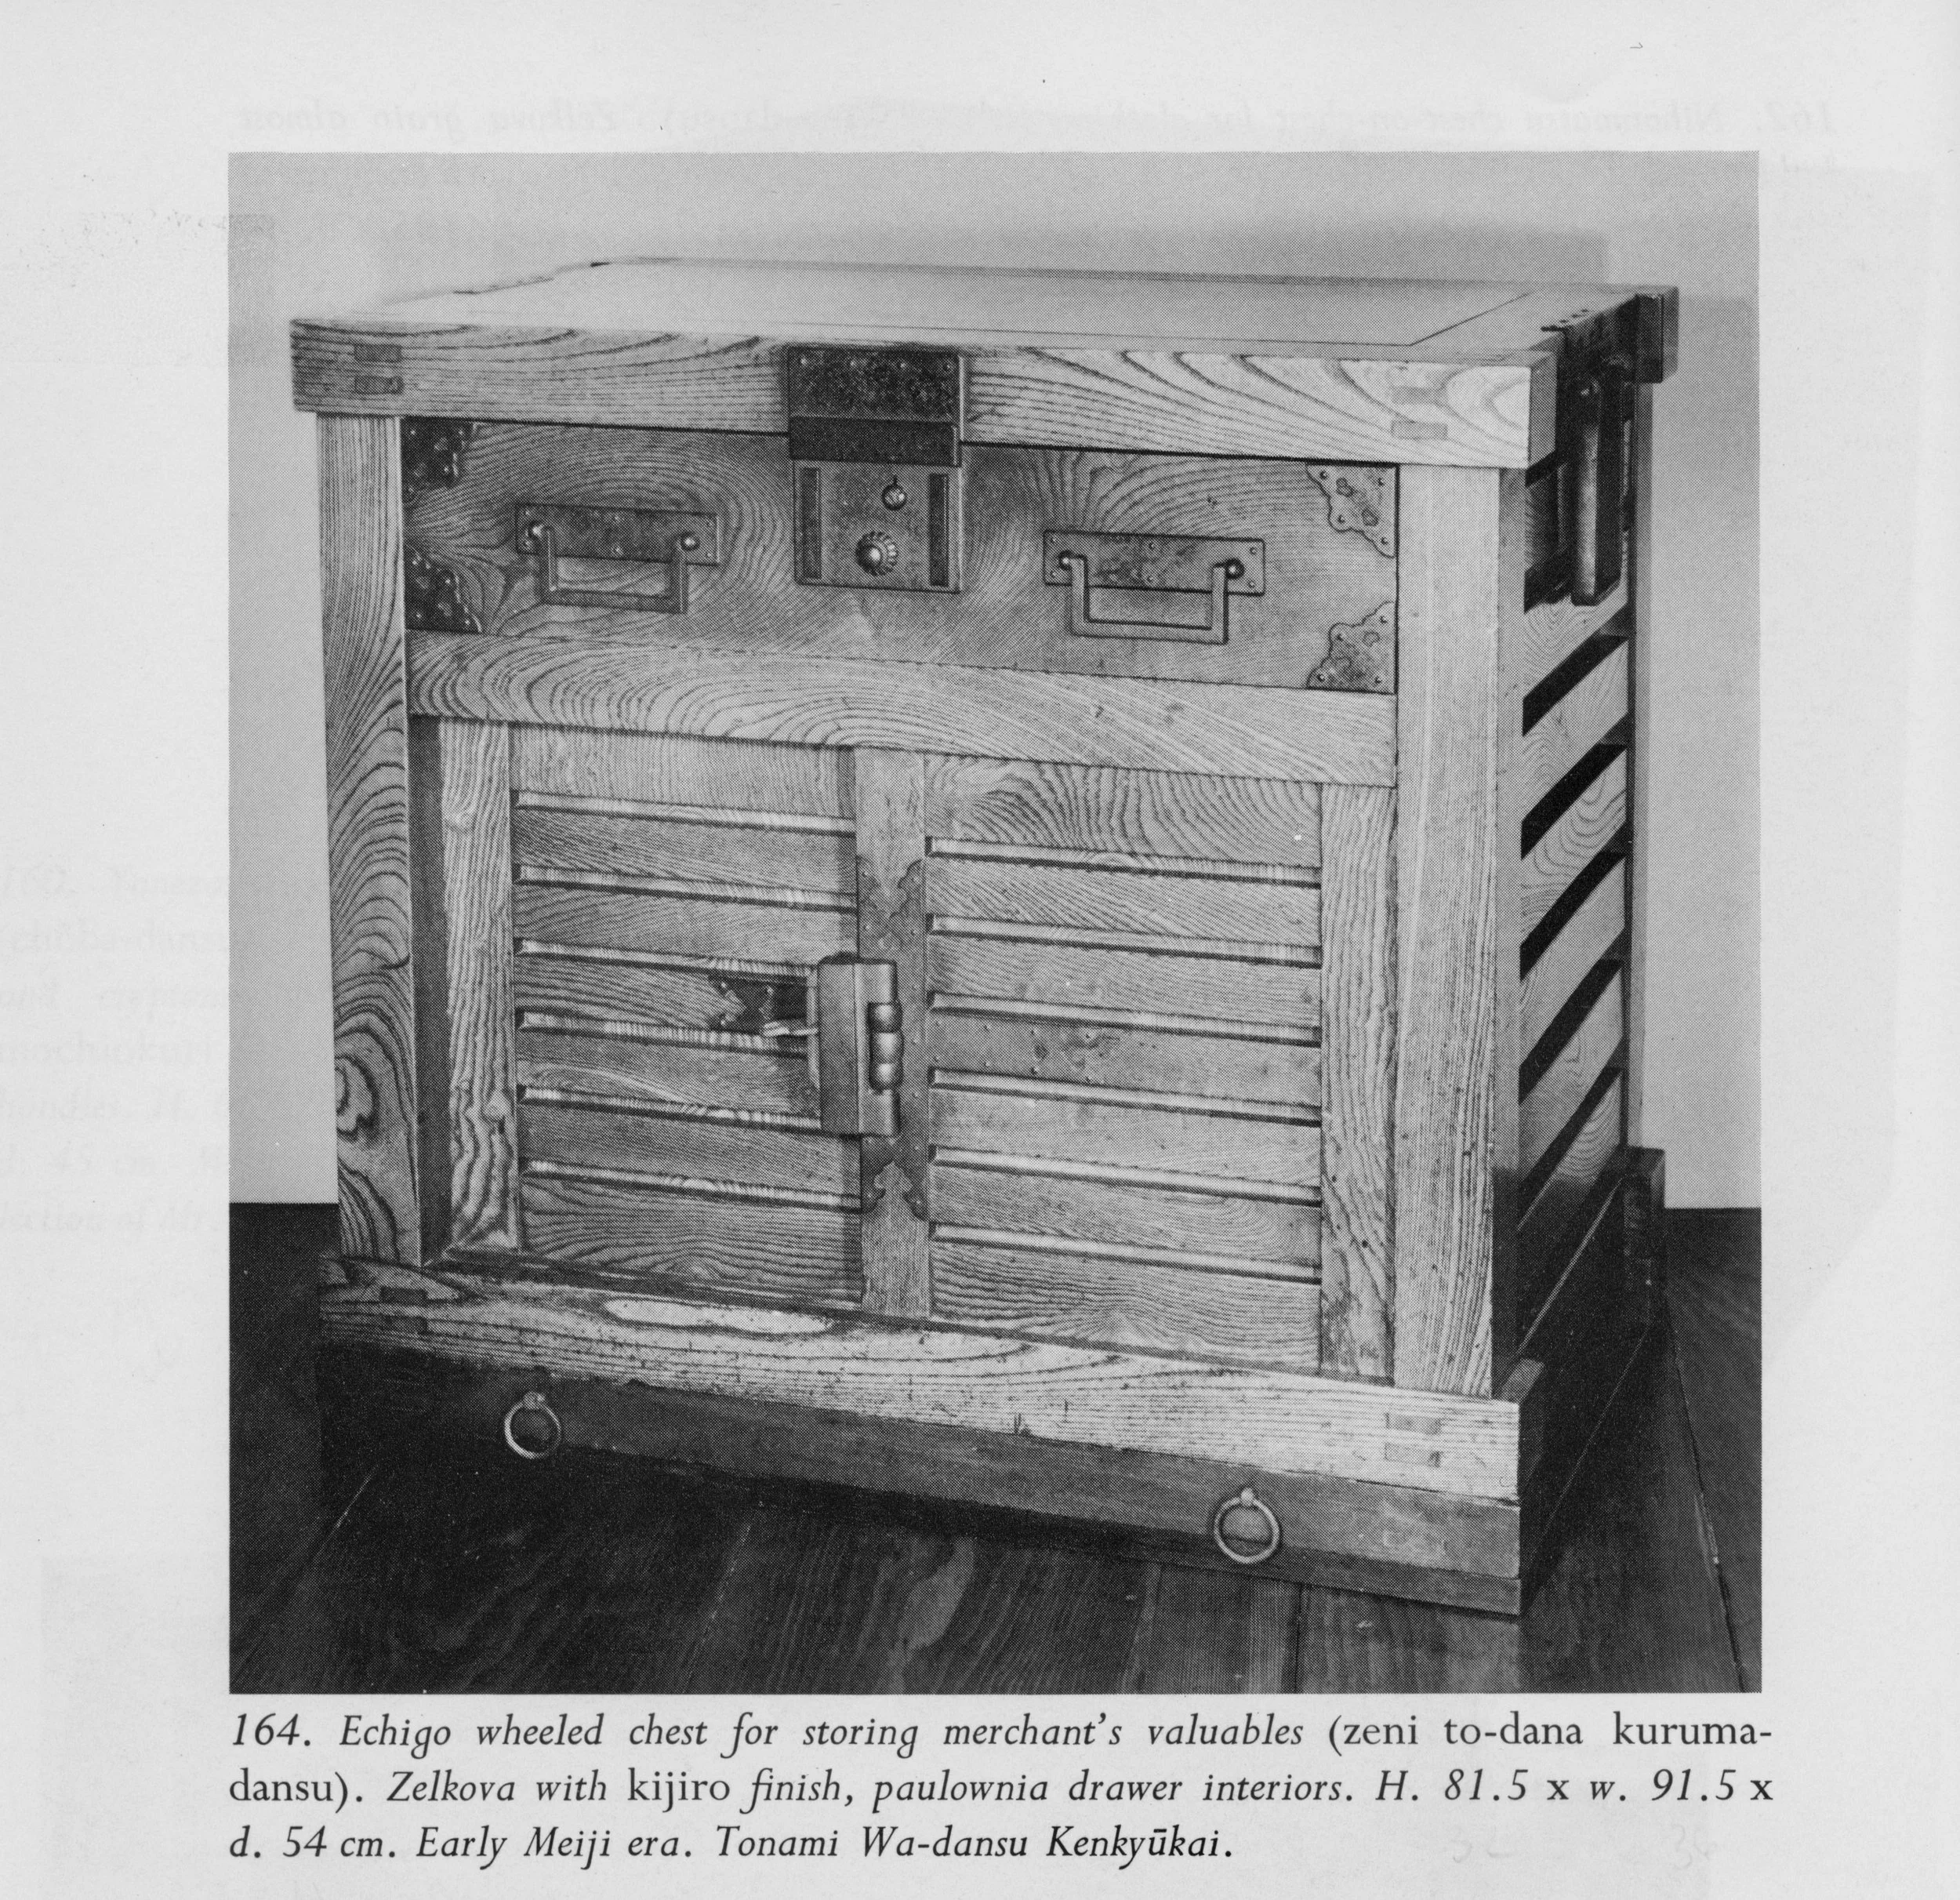
Zeni to-dana exemplar from: Tansu: Traditional Japanese Cabinetry, by Ty and Kiyoko Heineken.
Behind the locked sliding doors of this chest there are a set of drawers that could be further locked for security. We liked this “compartment within a compartment” feature, but would dispense with the locks. The plan for ours would be for one side of the cavity to contain drawers while the other would have open, adjustable shelving. The large, upper drawer might also be compartmentalized. In this first episode we will complete the carcass, saving the doors and drawers for later.

Coin chest, rough plan
Materials
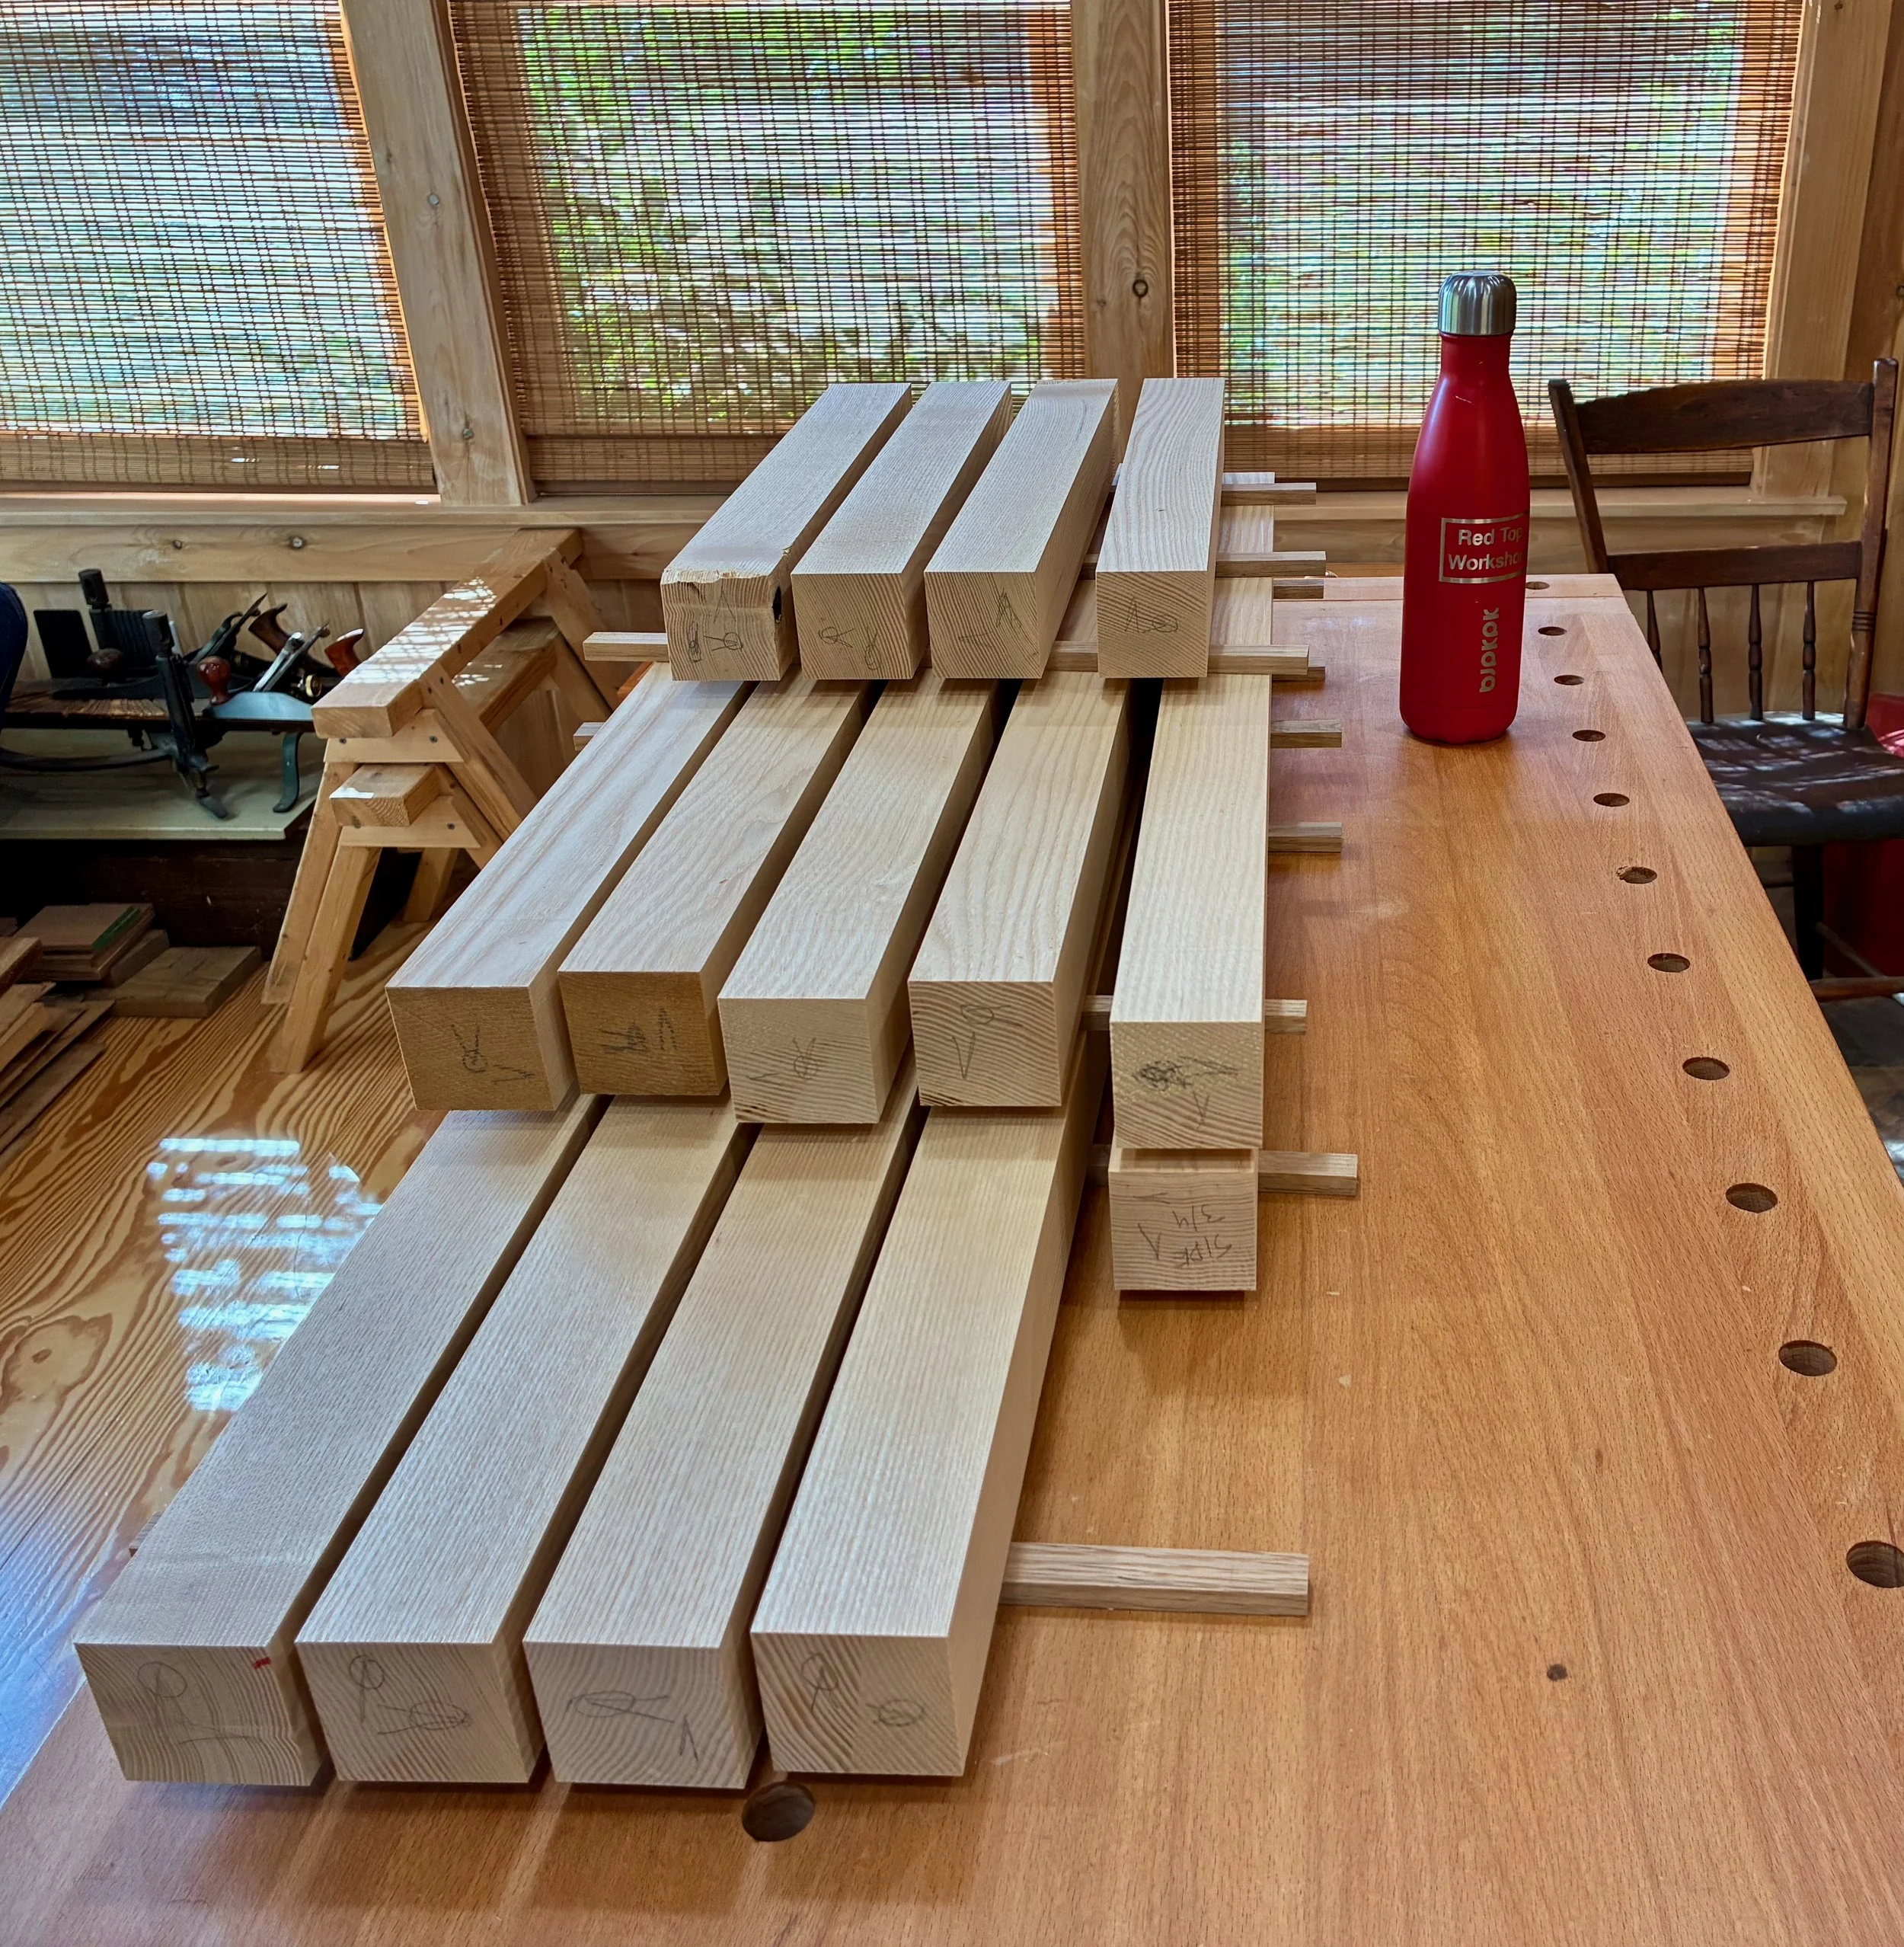
That original zeni to-dana was made from zelkova, a member of the elm family native to East Asia. Zelkova was a popular furniture wood in Japan and I find the grain character of this species to be most fetching. It is not readily available as lumber in the West, however, but there is elm and ash and those were my quarry as I entered Reader’s Harwood Supply, my new go to yard for quality boards. Elm comes in two varieties at Reader’s: red and gray. On the day of my visit they had much more of the red in stock and so I picked through their 4/4 boards and got a few of the best ones. I needed bulkier material for much of the carcass and so an 8/4 (2 inch thick) ash board was selected as well as some 4/4 quarter sawn ash for the slats. The plan was to construct the framework from ash and the mirror boards and drawer fronts from elm. Should look nice!
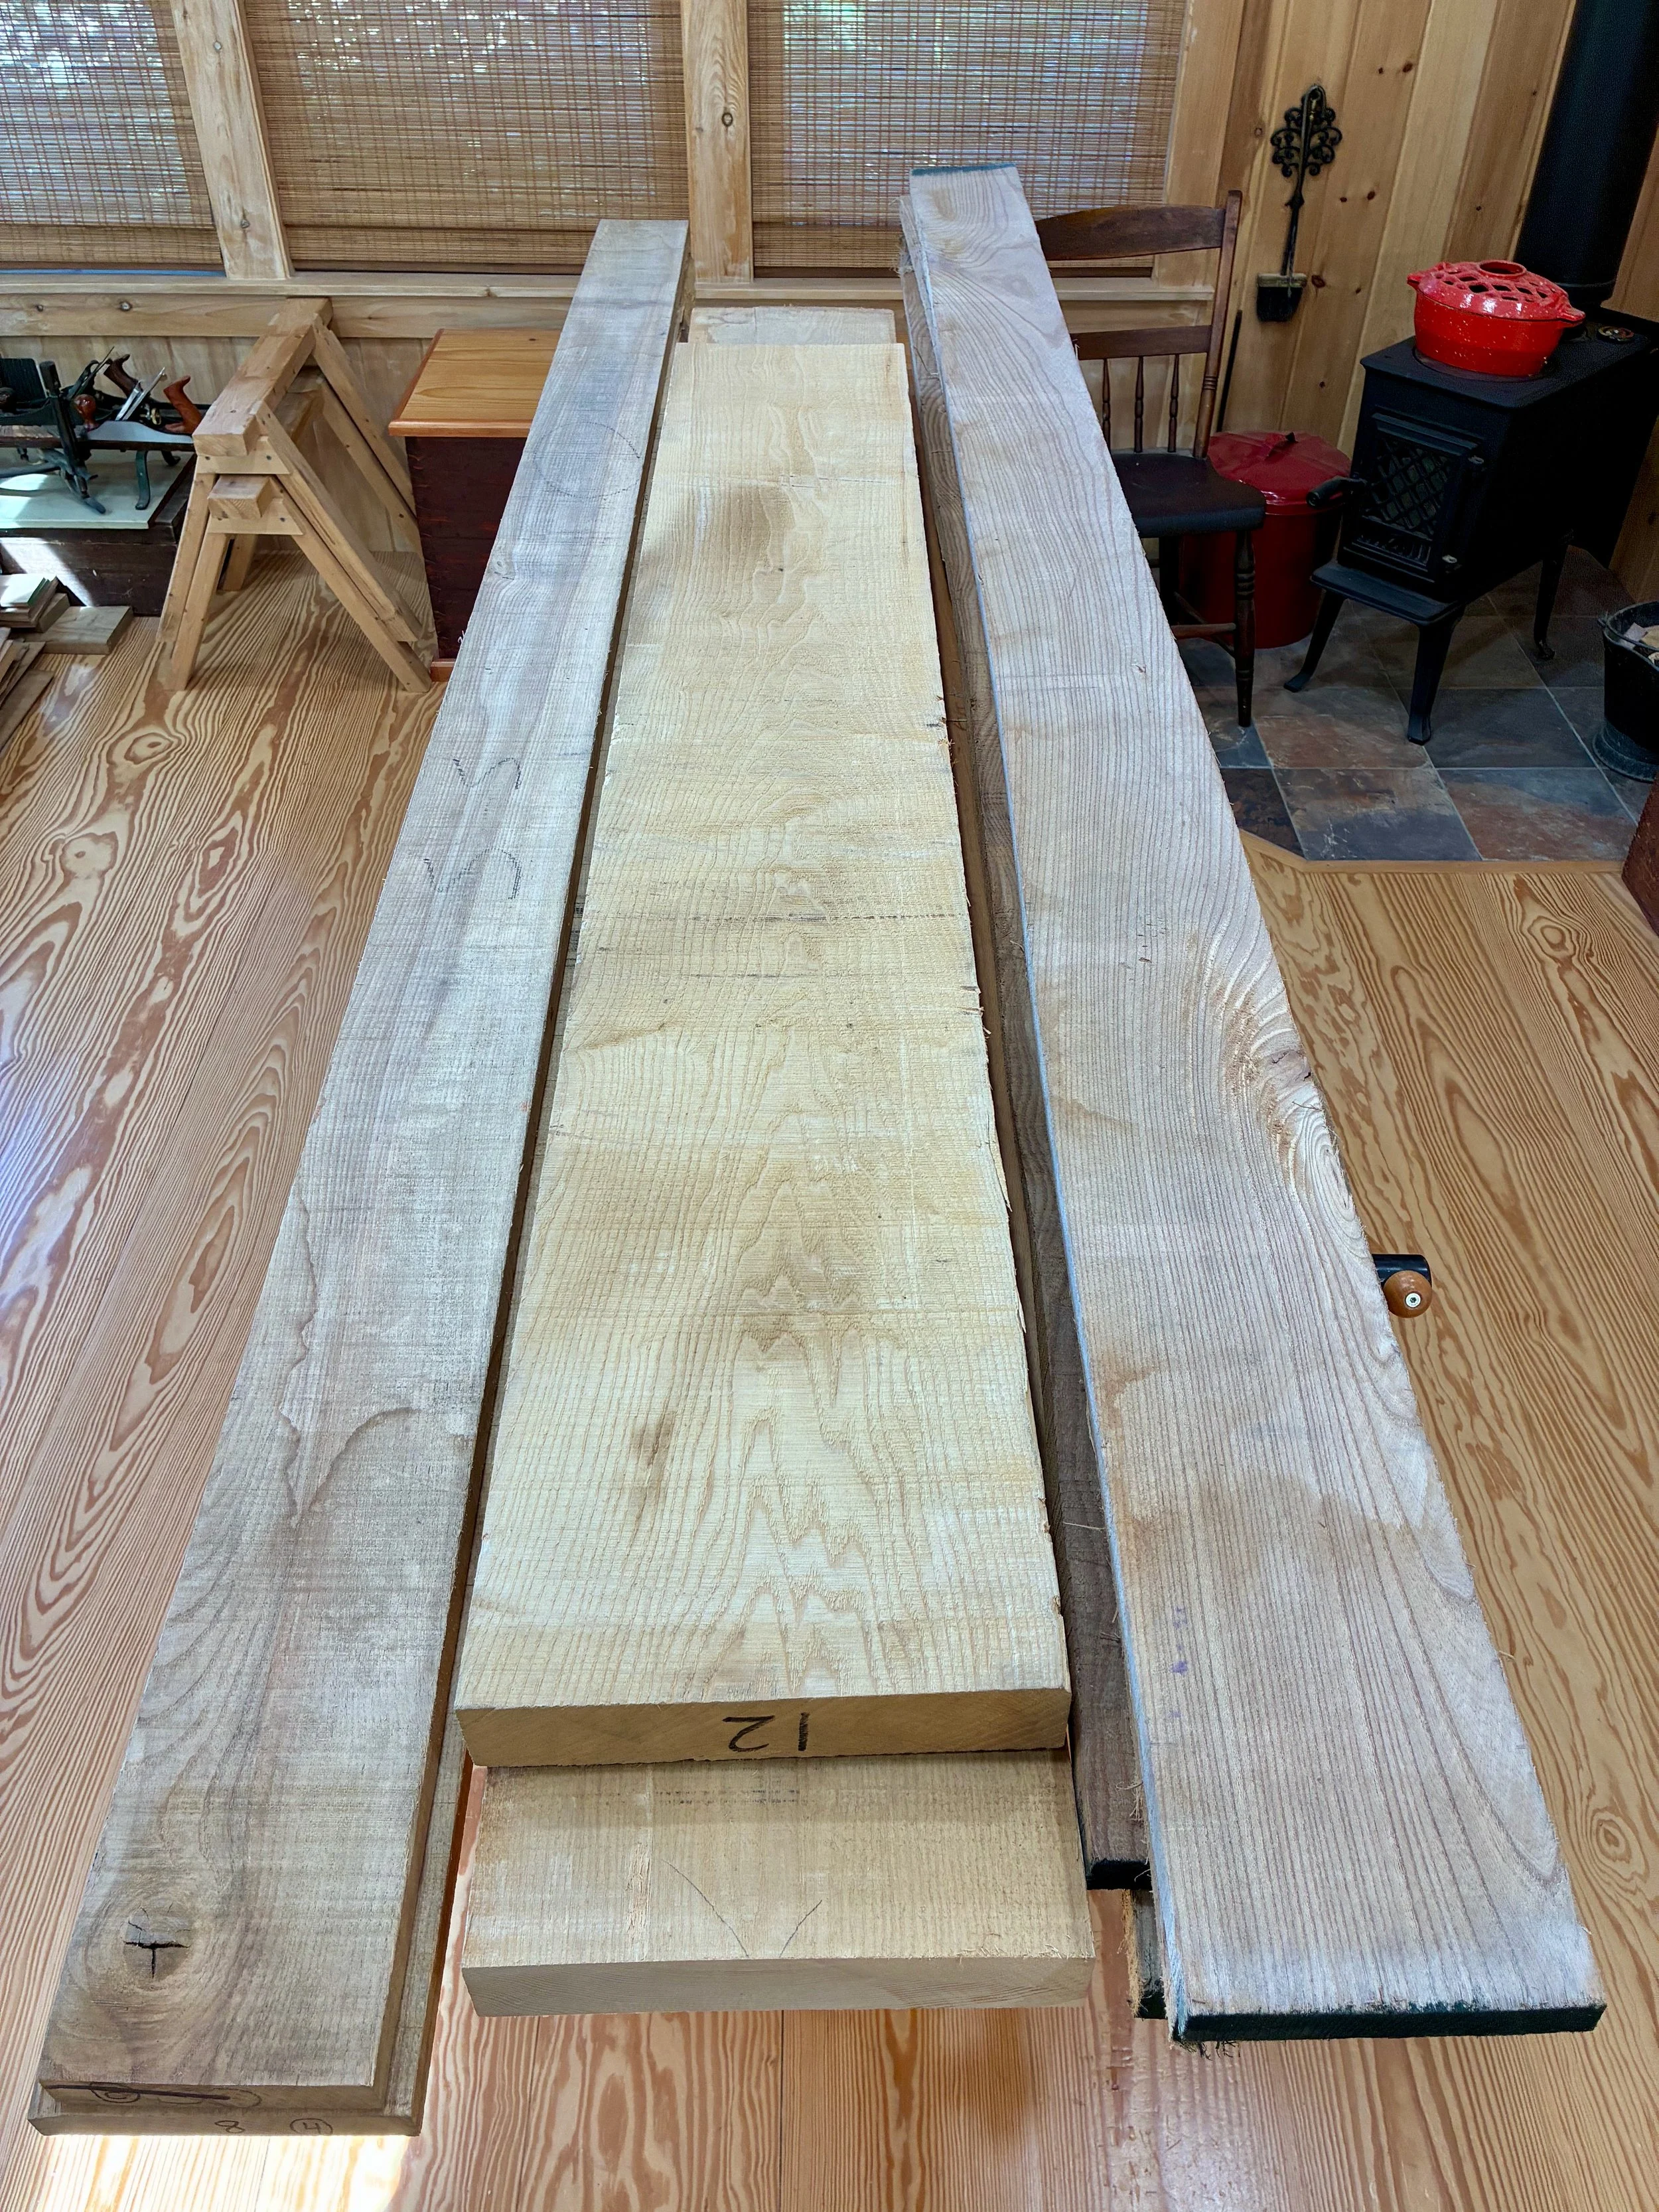
Lumber (L to R): quater sawn ash, plain sawn ash, red elm
Dimensioning
The bulky frame for this chest is constructed of 2 x 2 in. ash material, and to create these that large 8/4 plank was cross cut into rough lengths, ripped at the band saw and then made square at the jointer and thickness planer. This produced a stock of 14 poles for further modification.
Frame stock
From here it was a matter of cutting everything to final length and then fashioning the tenons, mortises and grooves of the joinery. Everything starts with the top and bottom rails and the mortises within these that would hold the side posts and cross rails. Ash is a tough wood to mortise and I needed to bore sixteen 1 in. square holes that were 3/4 in. deep. To make the experience pleasurable, I hollowed out the centers of these sockets with a Forstner bit at the drill press before squaring them off at the mortiser - much easier this way! A simple slot jig was constructed by clamping a few boards onto the drill press table to allow for quick and uniform production.
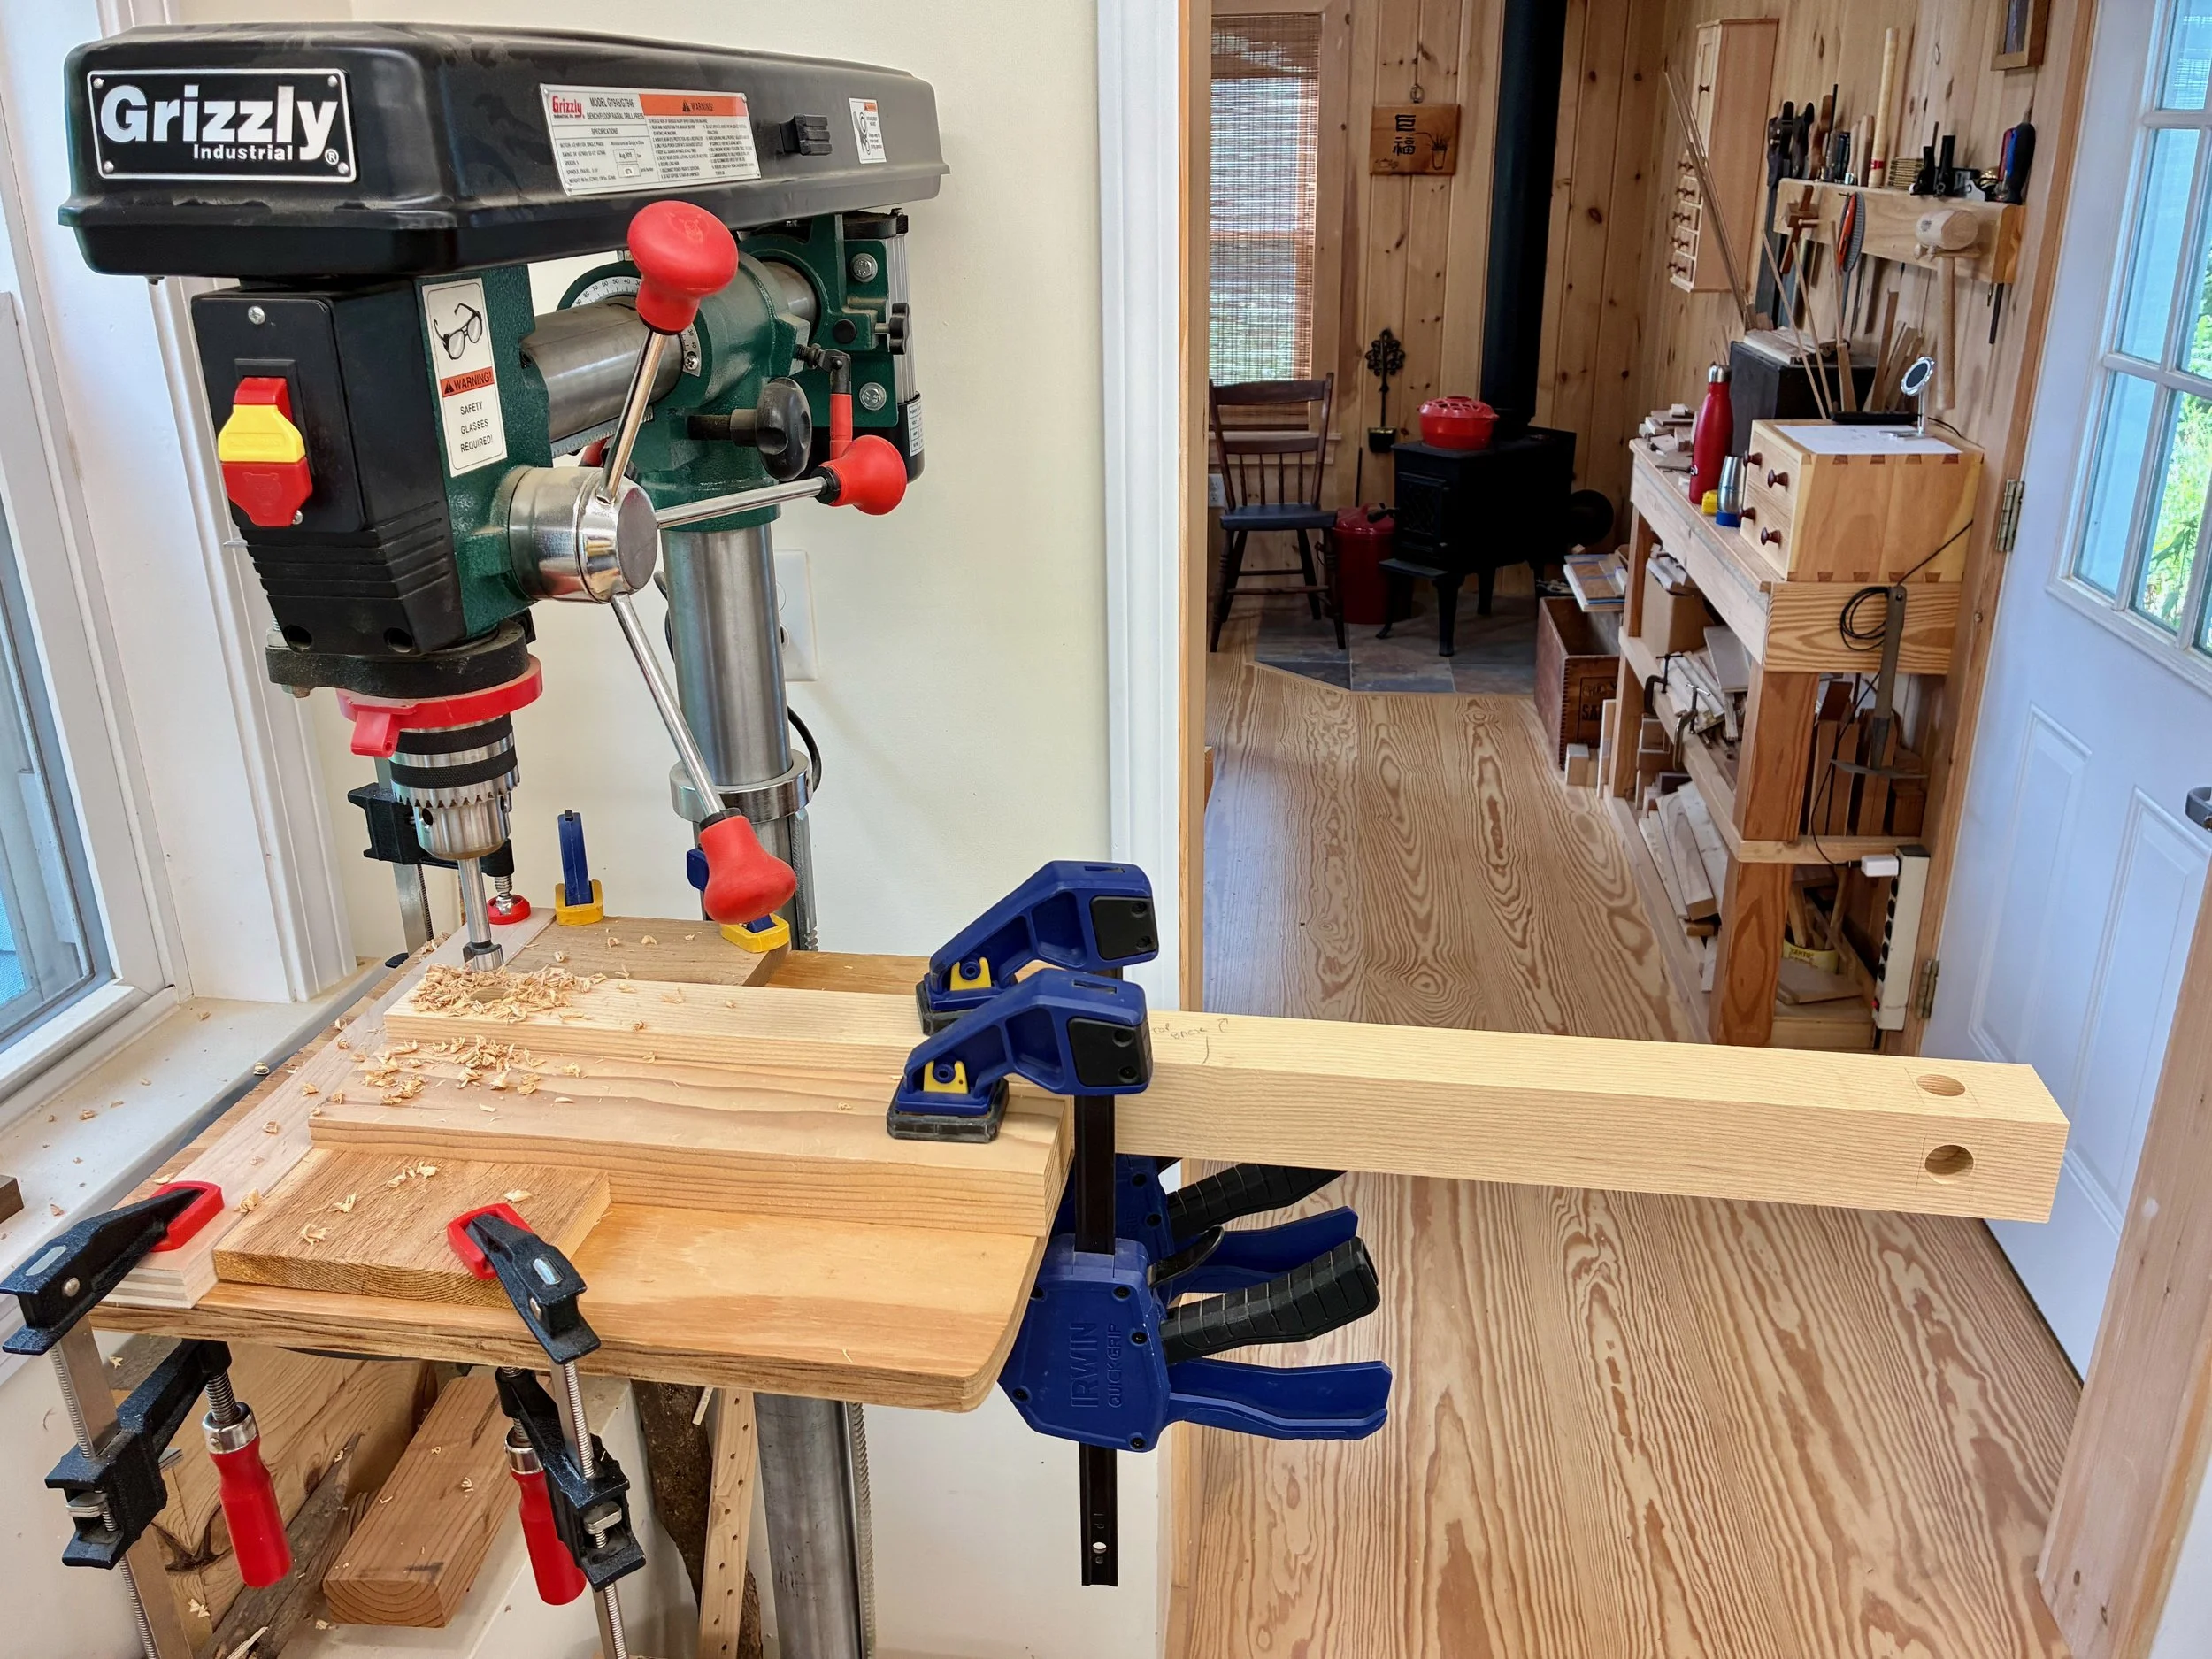
Drilling out the mortise centers
Following a bit of chisel clean-up the mortises were complete. These were then used to define the tenons to be fashioned at the ends of the rails and posts. After cutting the members to final length the tenons were formed in a two step process. First, the shoulders were defined at the sliding miter saw, where a shallow cut was made on all four sides of the post to create a joining edge. Next, the cheeks were cut at the table saw using a tenoning jig - four passes per tenon. Creating tenons by this manner is a bit more involved than using a dado stack and cross cut sled, but the result is a clean joint element that is easy to fit.
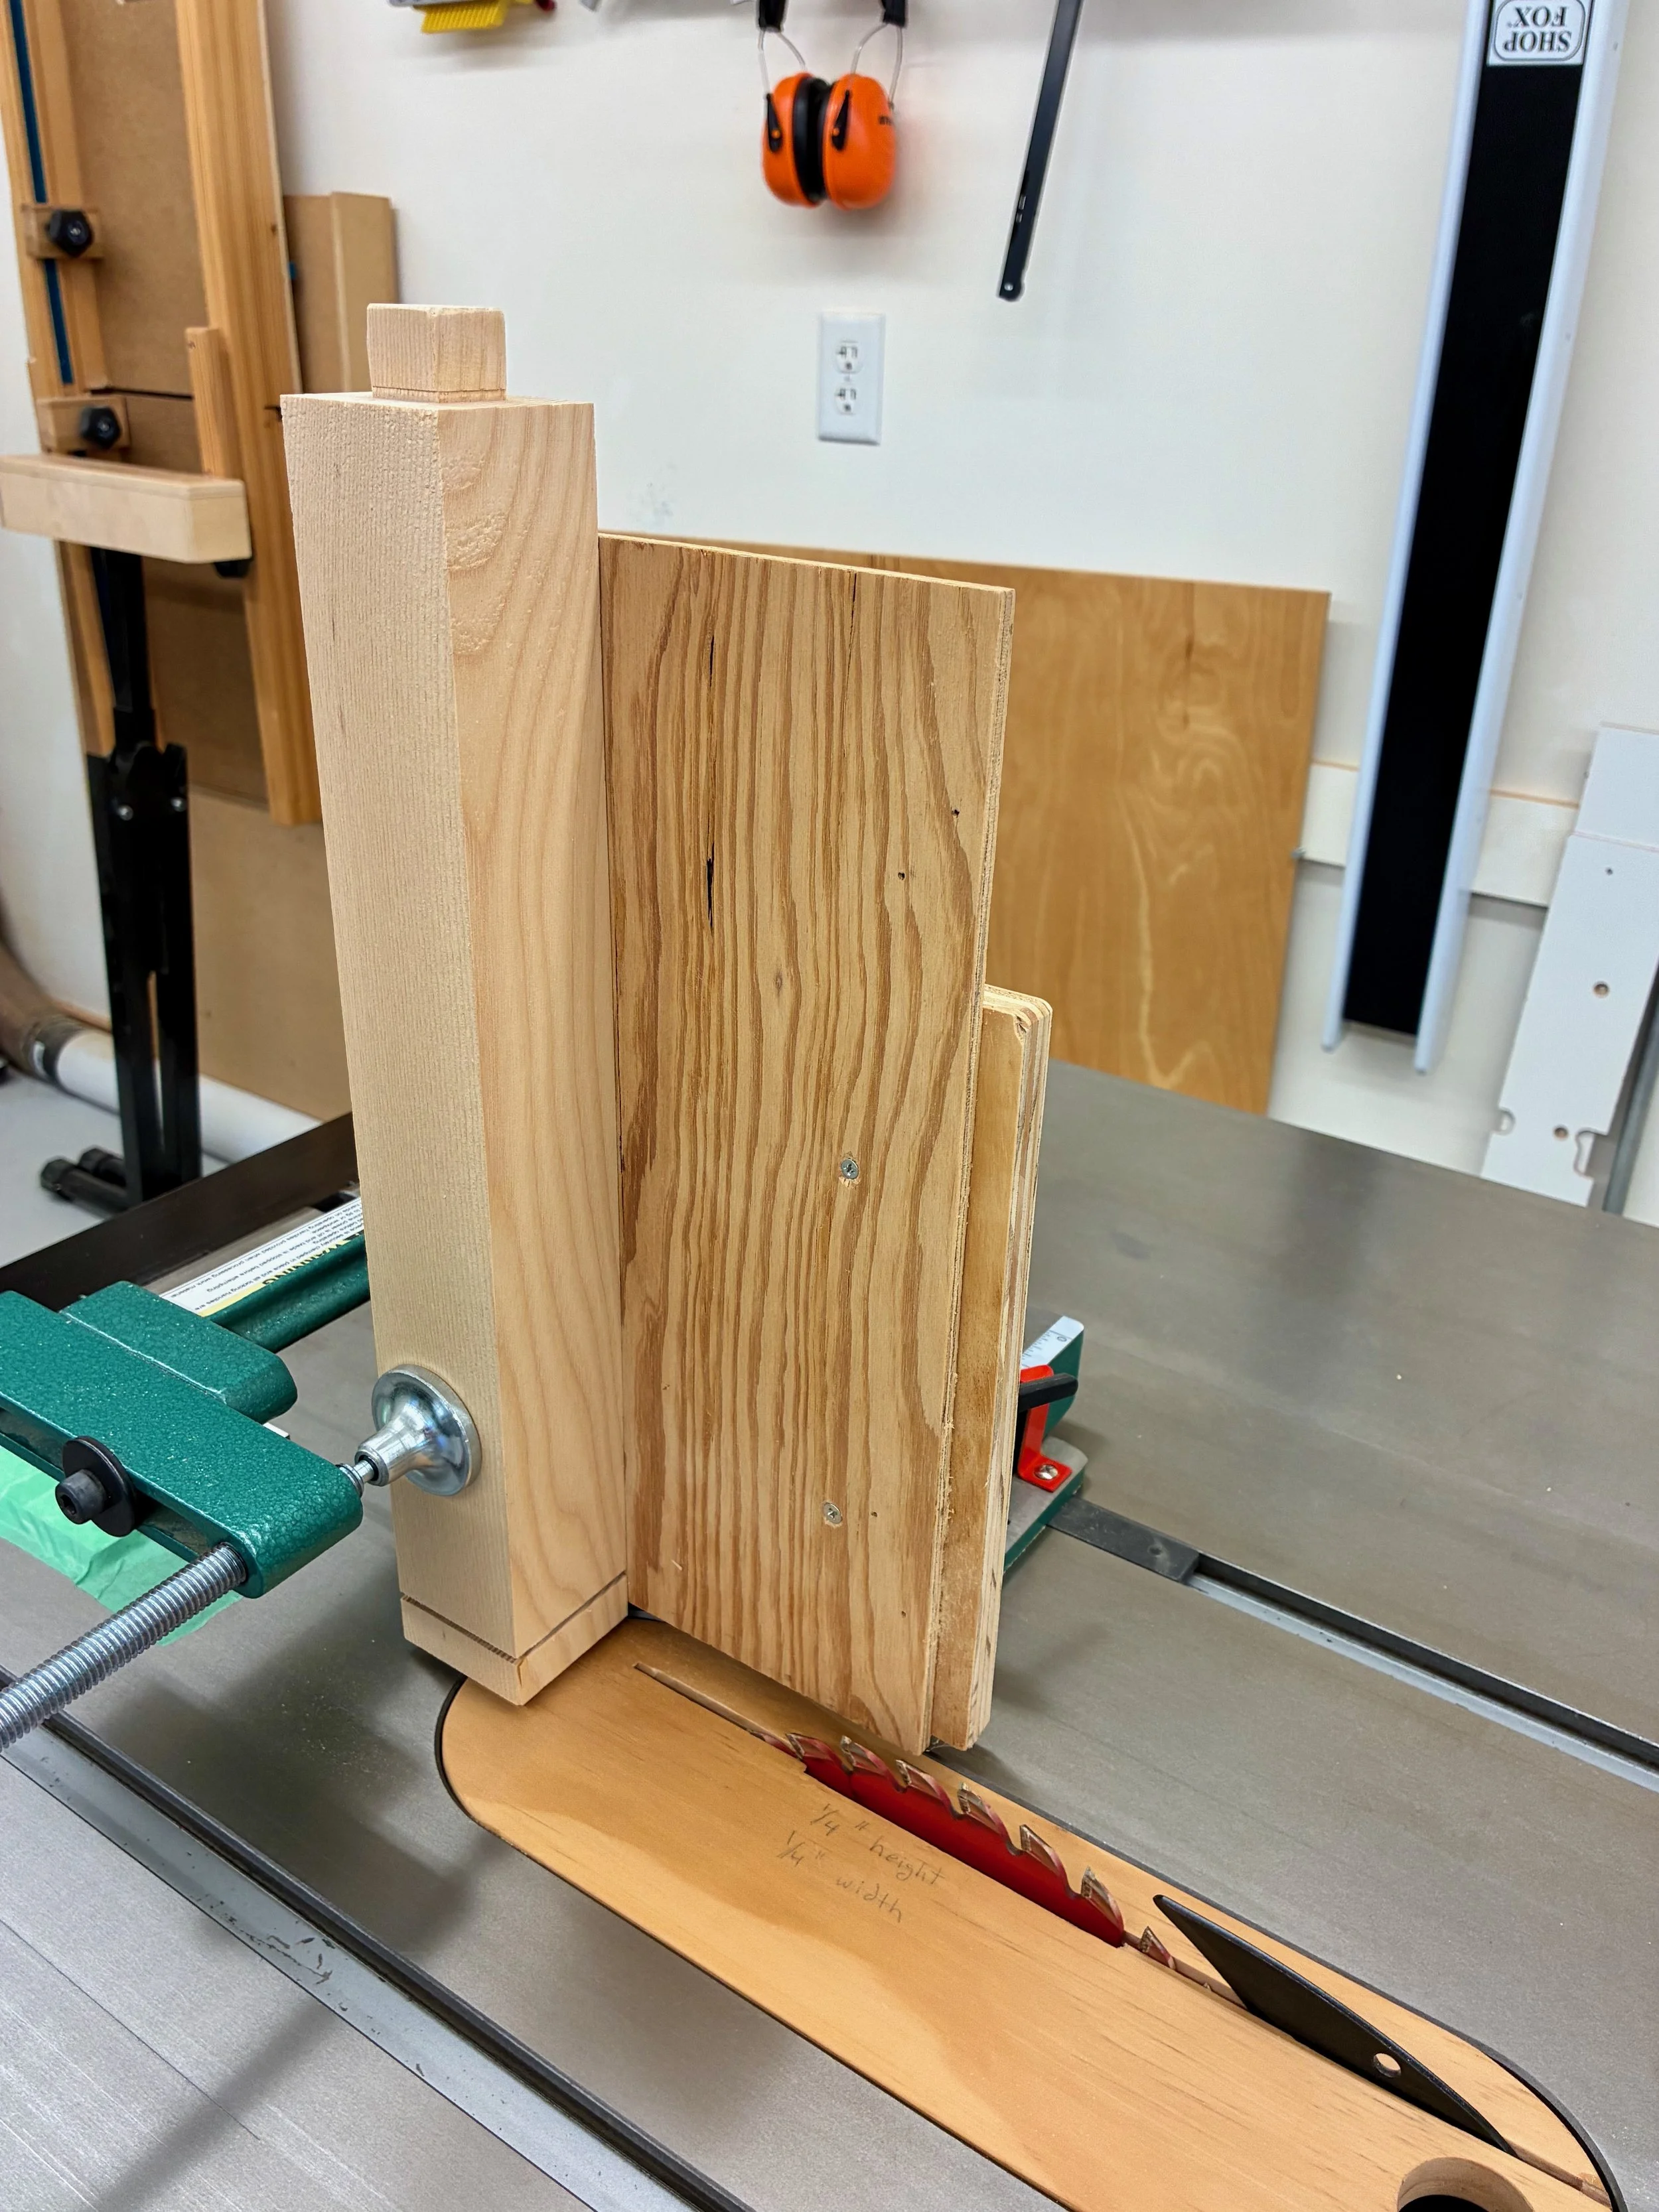
Making the first of four cuts with a tenoning jig to create the cheeks (note the finished tenon at top of rail)
After a bit of chisel work, the parts were made to fit snugly at each joint, but in order to dry-fit the entire frame I needed to shave a corner off of most tenons to accommodate their perpendicular mating within adjacent mortises. This was done by marking and then slicing-off these corners with my dovetail saw.
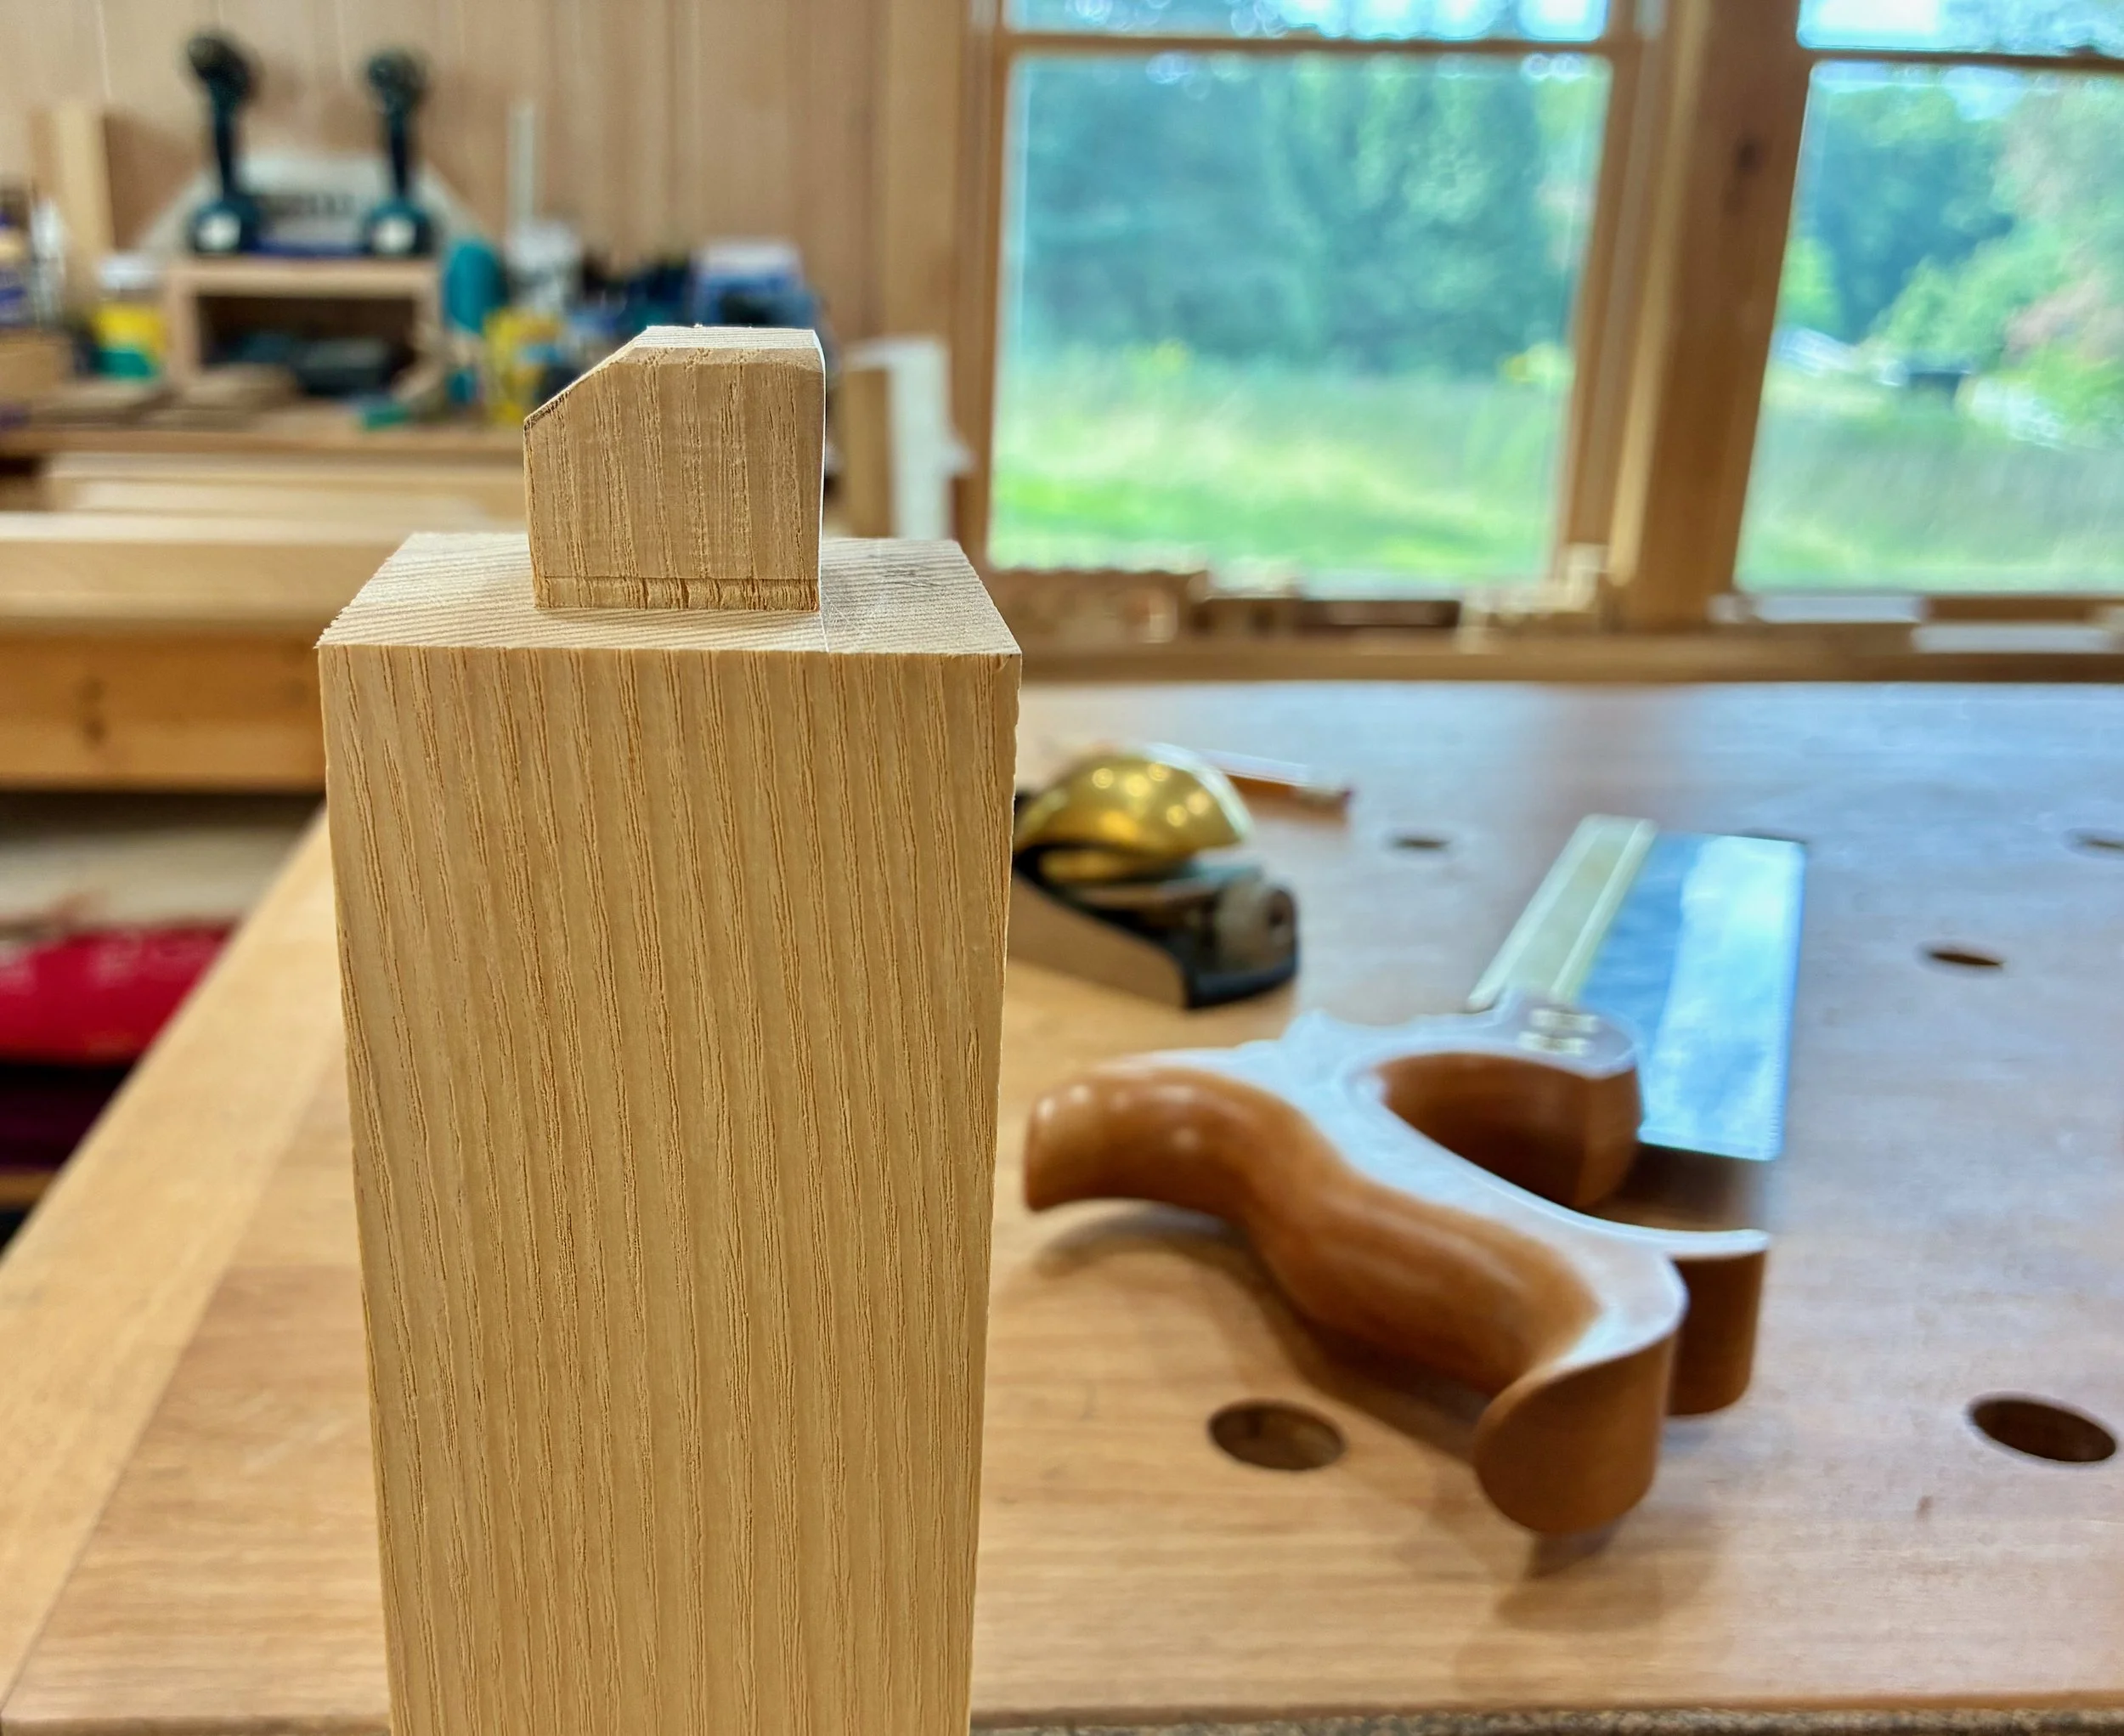
Paring a corner off of the tenons
With the tenons pared, the frame came together during a maiden dry-fit. From here, the positions of all subsequent grooves and mortises could be marked in pencil to ensure their accurate formation. It is easy to get the ends and faces of 14 frame parts confused when disassembled into a pile of poles, so this marking step is key!

Dry-fit frame
Every frame member would receive at least one groove to house a sliding door or panel. Each side post also required a series of seven mortises to secure the tenoned slats. Lots of secondary joint work to do here. Variously employing the table saw, mortiser and router table, each series of cuts were set up and then executed as a batch to maintain uniformity. Two side panels called “mirror boards” were also prepared from red elm, whereas plywood was used for the out-of-sight back and bottom. Steadily, over a weeks’ time, the carcass came together component-by-component.
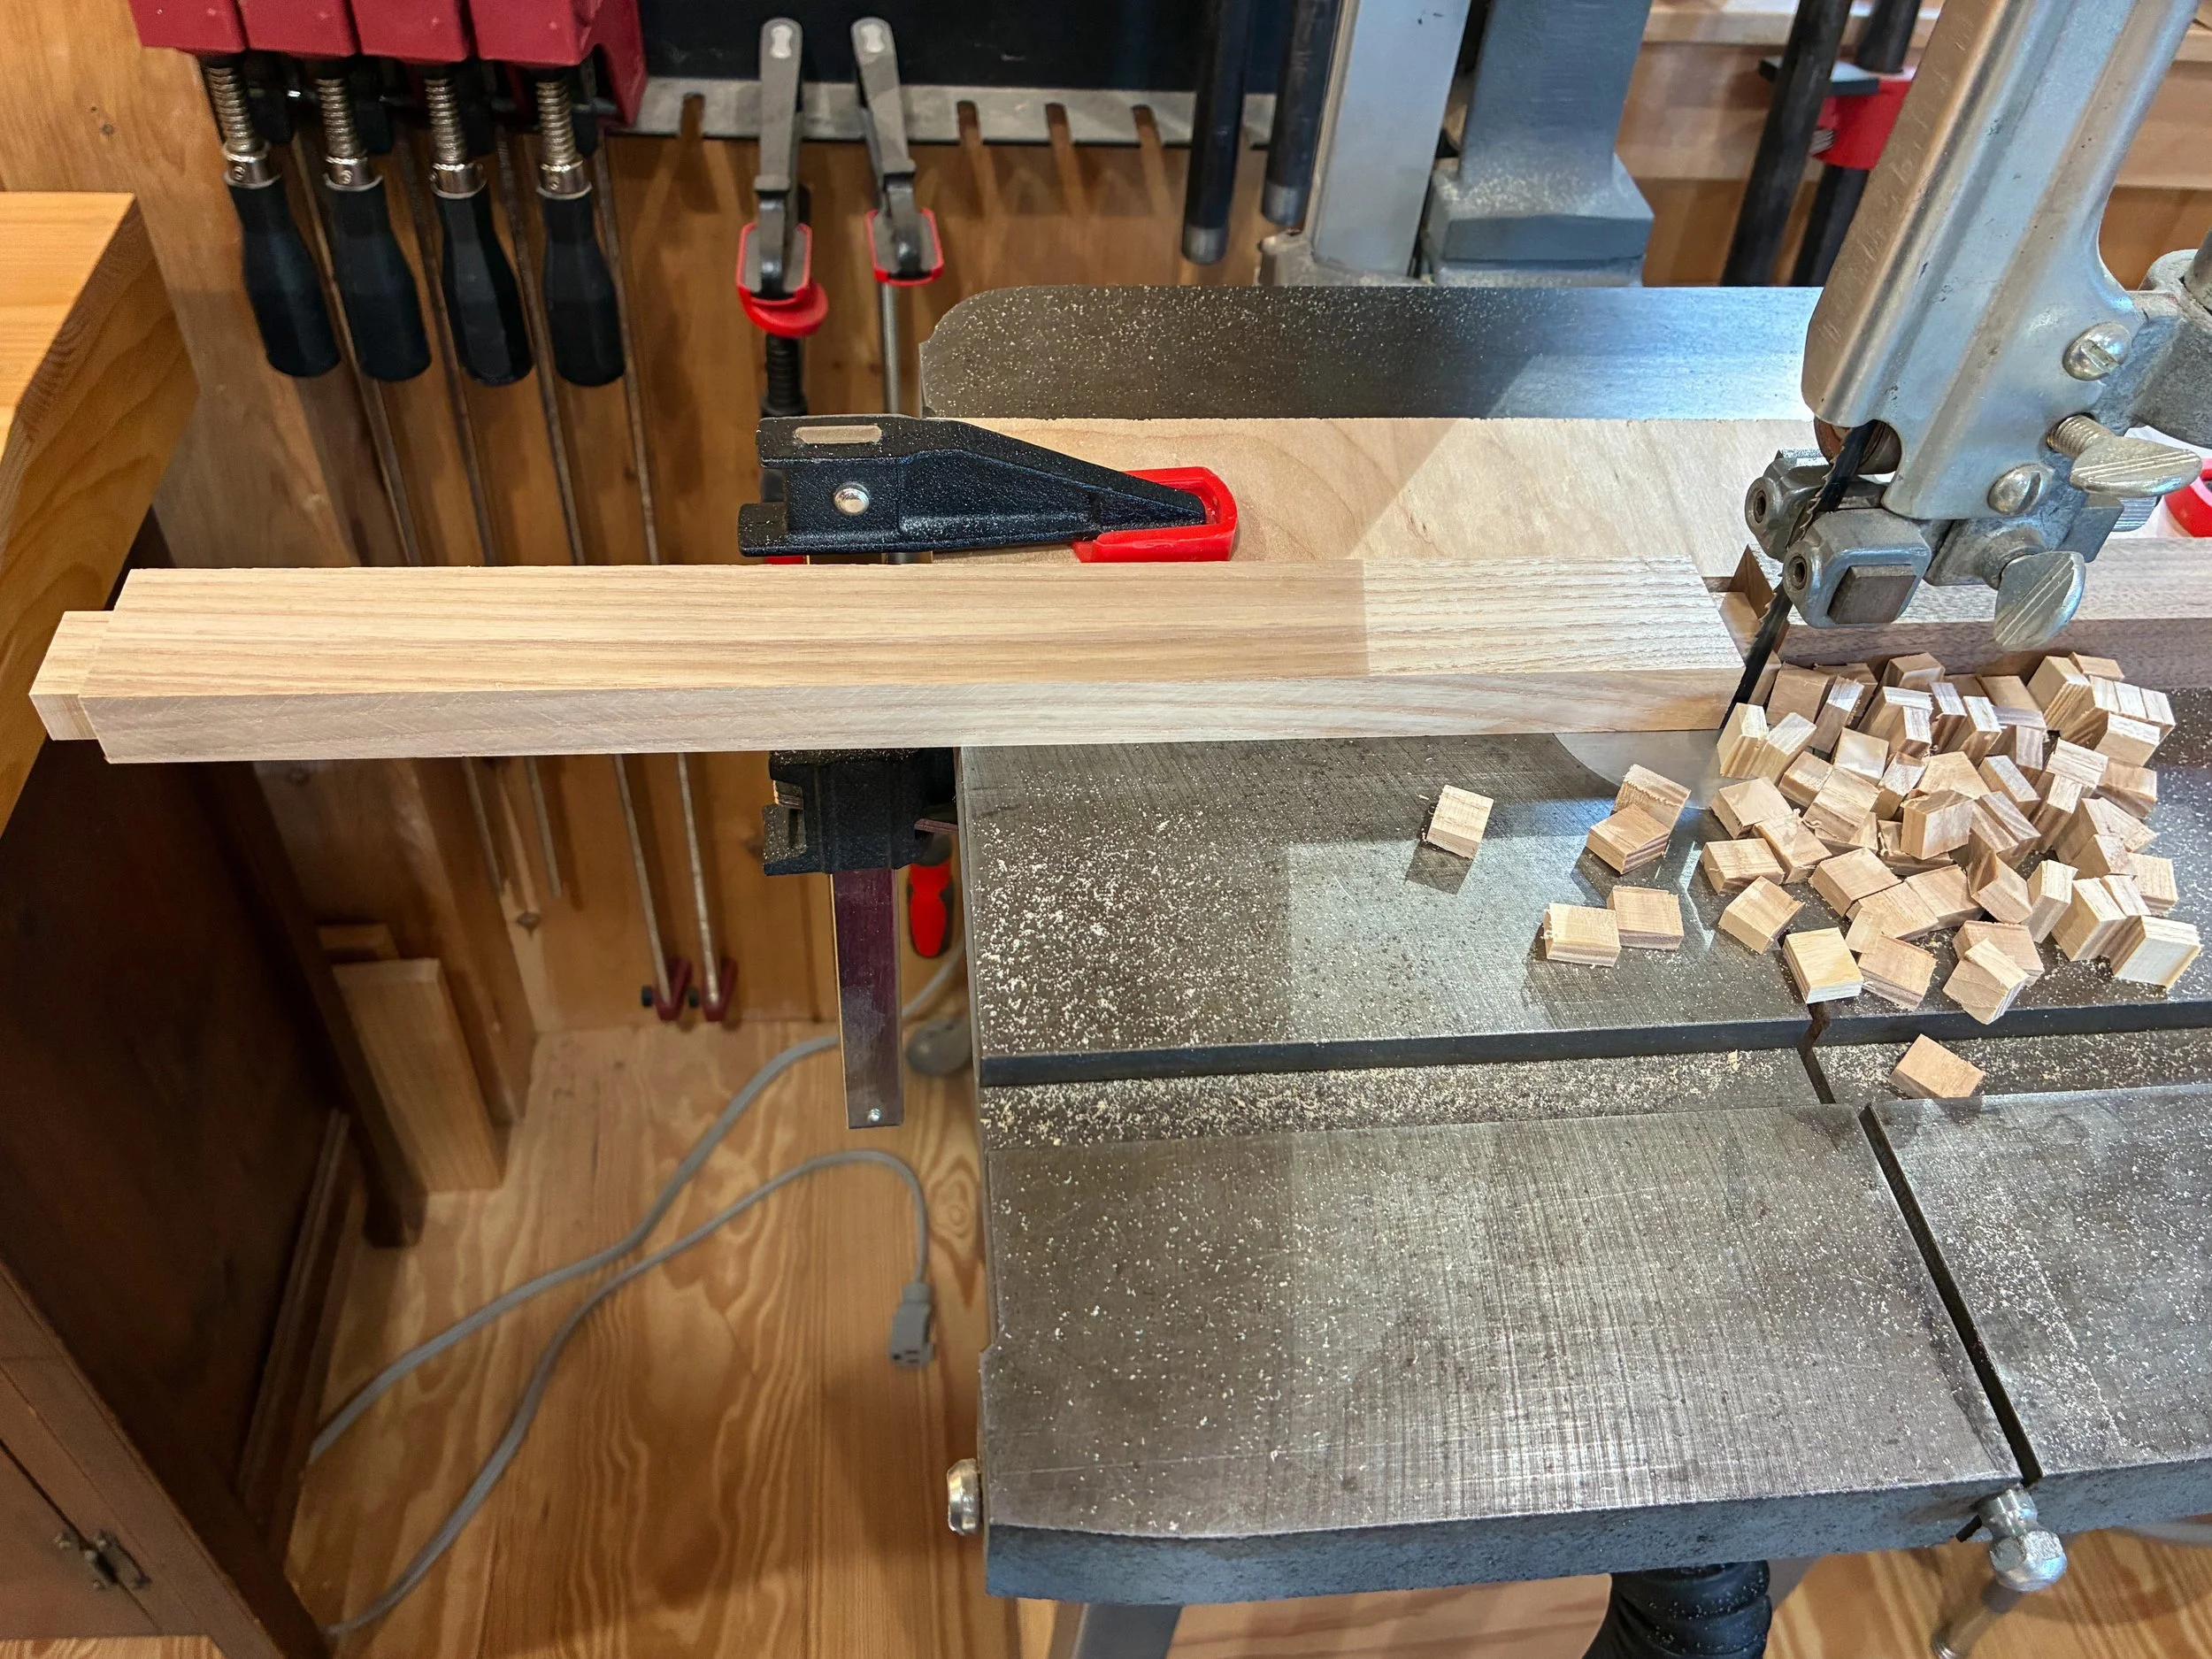
Clipping the edges off of 28 slat tenons at the band saw
Gluing-up the elm mirror boards
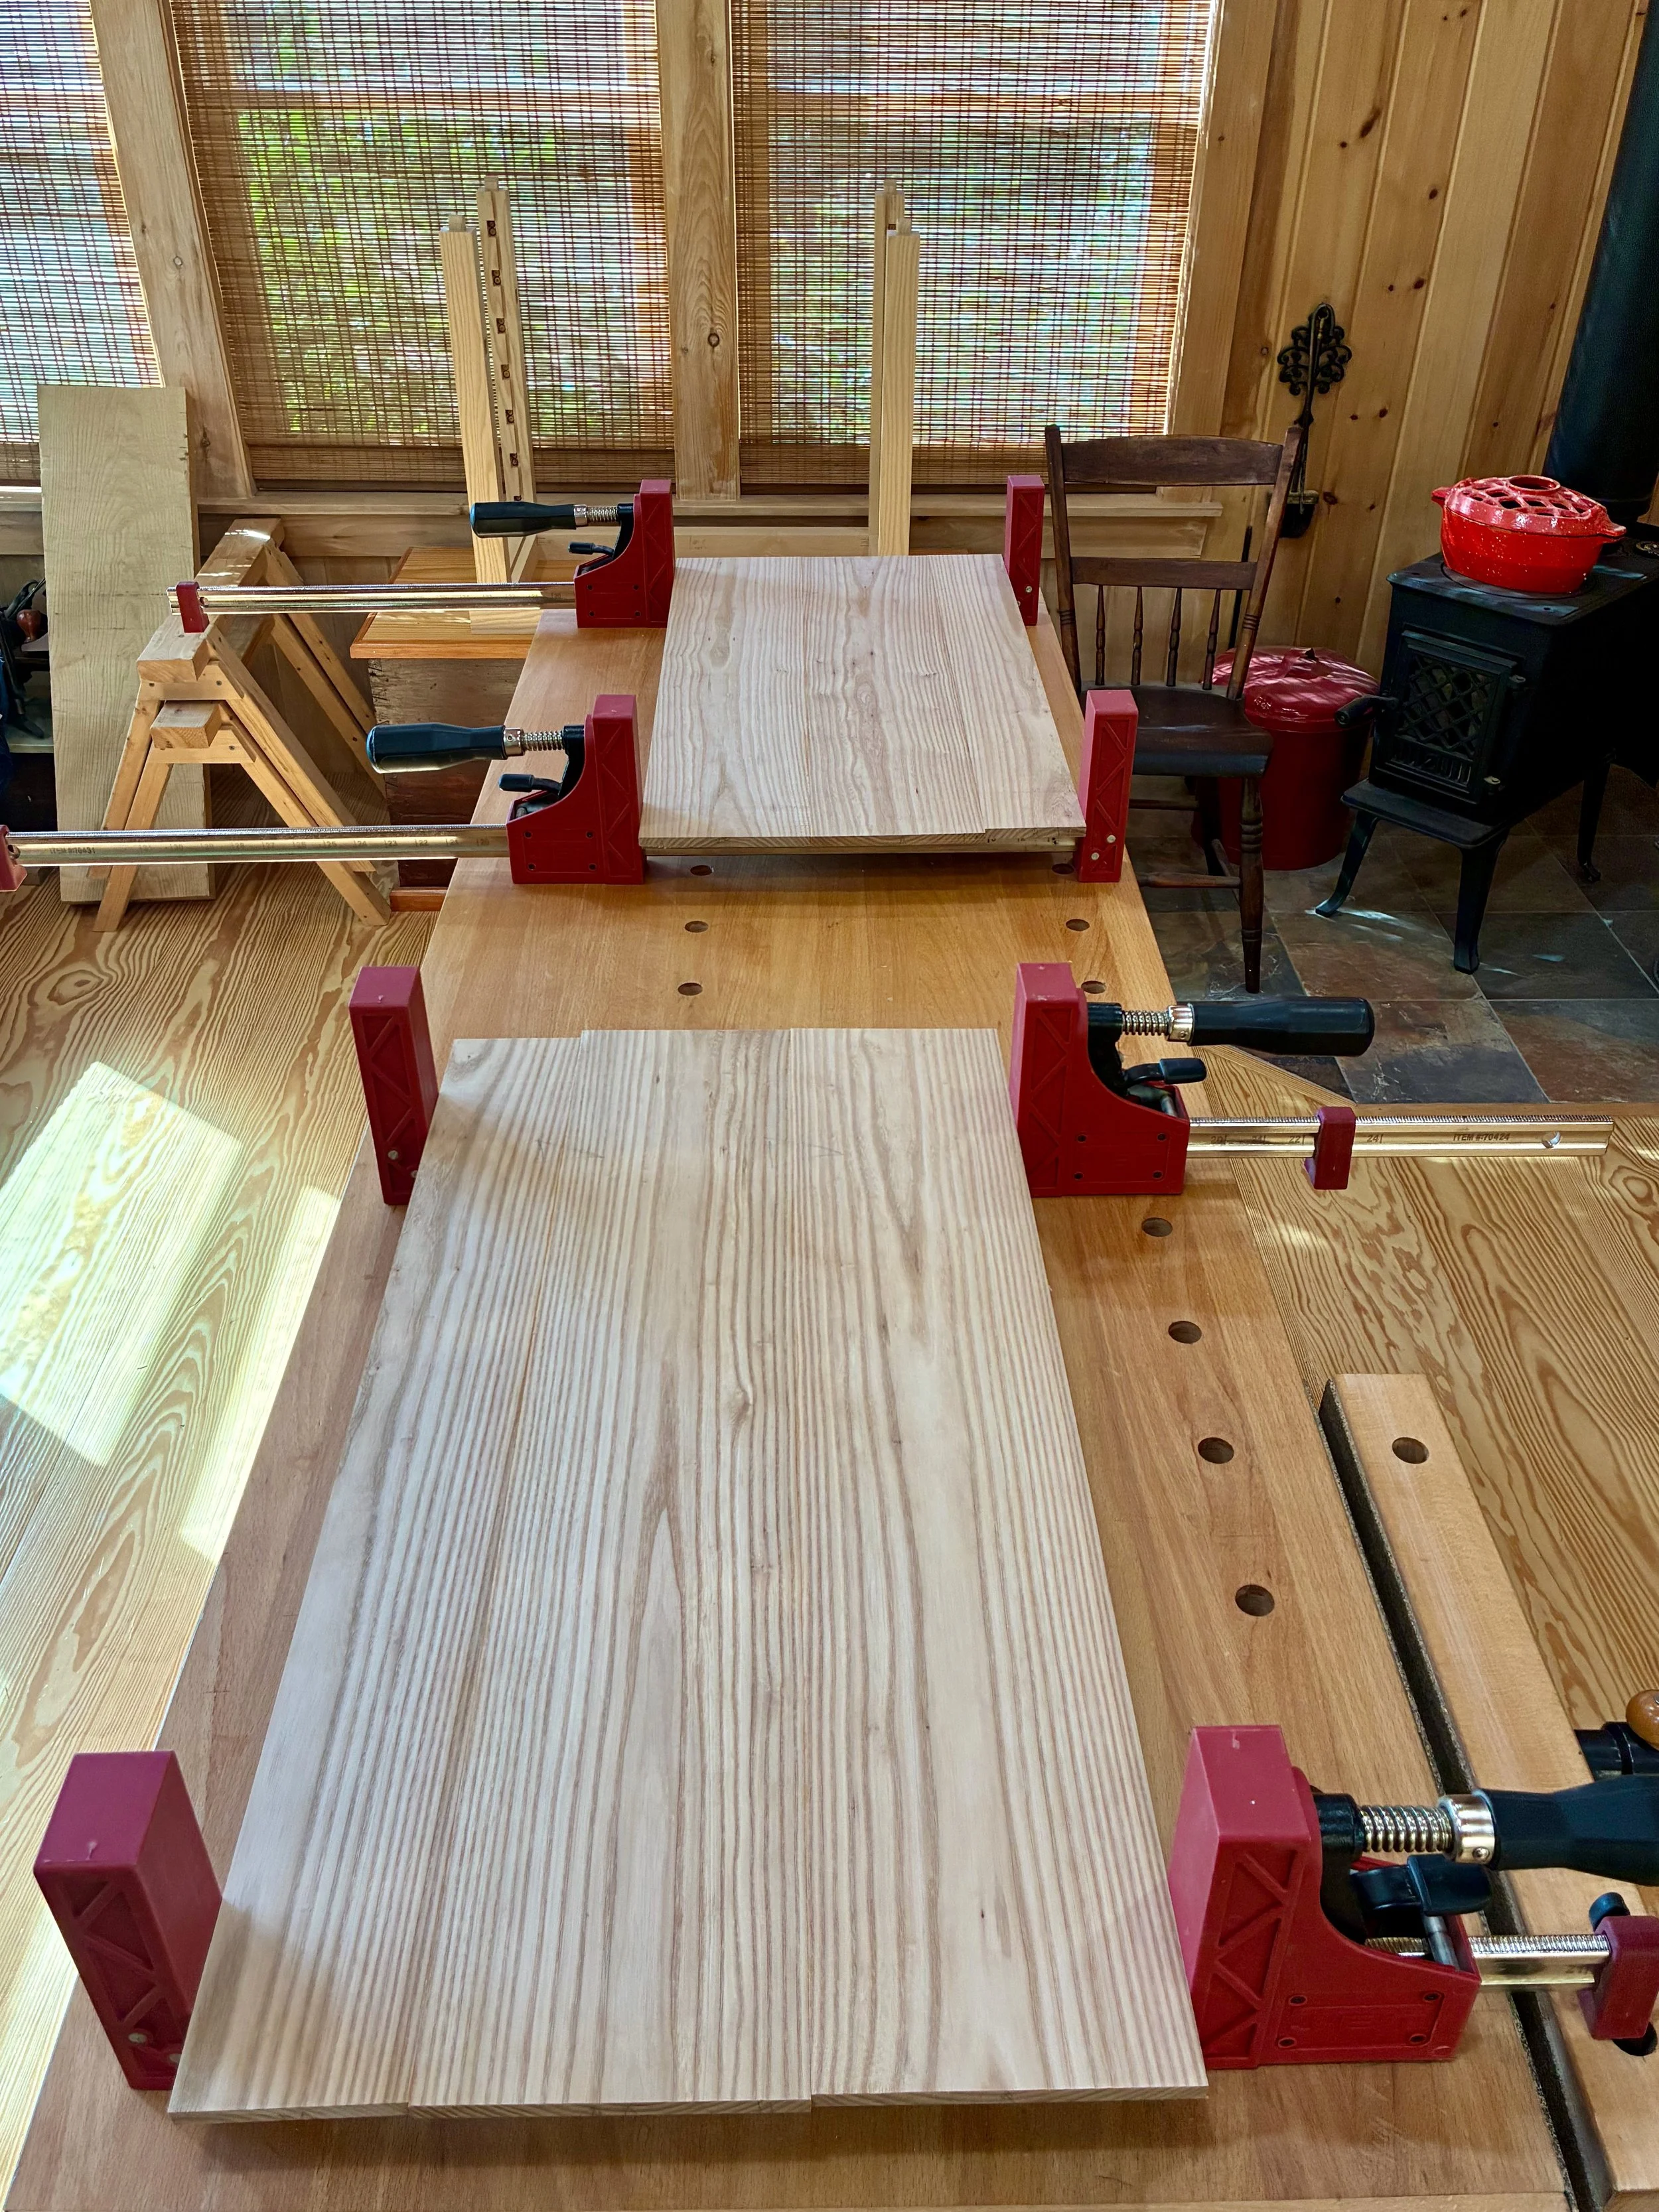
Test fitting the sides

Back and bottom fashioned from plywood
The top came last. Construction-wise it is identical to the bottom, but instead of 3/4 in. plywood for the panel I used red elm. One of the elm boards selected at the lumberyard possessed a wild and flowing grain pattern which I thought would make for a lively top. That untamed grain was also responsible for the undulating surface, which twisted and warped its way along the entire 7 foot length.

Red elm “diamond” in the rough
After lopping-off 14 inches of “whip tail” from both ends, the remaining board was cut in two. Even after surgery, both sections were twisted by up to 3/8 of an inch along their 28 in. length and this would need to be remedied before processing further. I decided to use the thickness planer for the job, but first needed to create a new jig to assist the operation. The trick is to first make one side of each board perfectly flat. That flat side can then be placed on the thickness planer’s bed (sans jig) and the uneven, opposite side made parallel by repeated passes through the planer. A “sled” jig to enable the operation was made from a sheet of mdf and a scrap piece of oak. In the event, an elm board was laid onto the sled surface and shimmed underneath to create a stable situation with no rocking action. The sled-mounted elm was then repeatedly passed through the planer, making light cuts, until the entire upper surface was flat and smooth.

Twisted elm board mounted on the planer sled
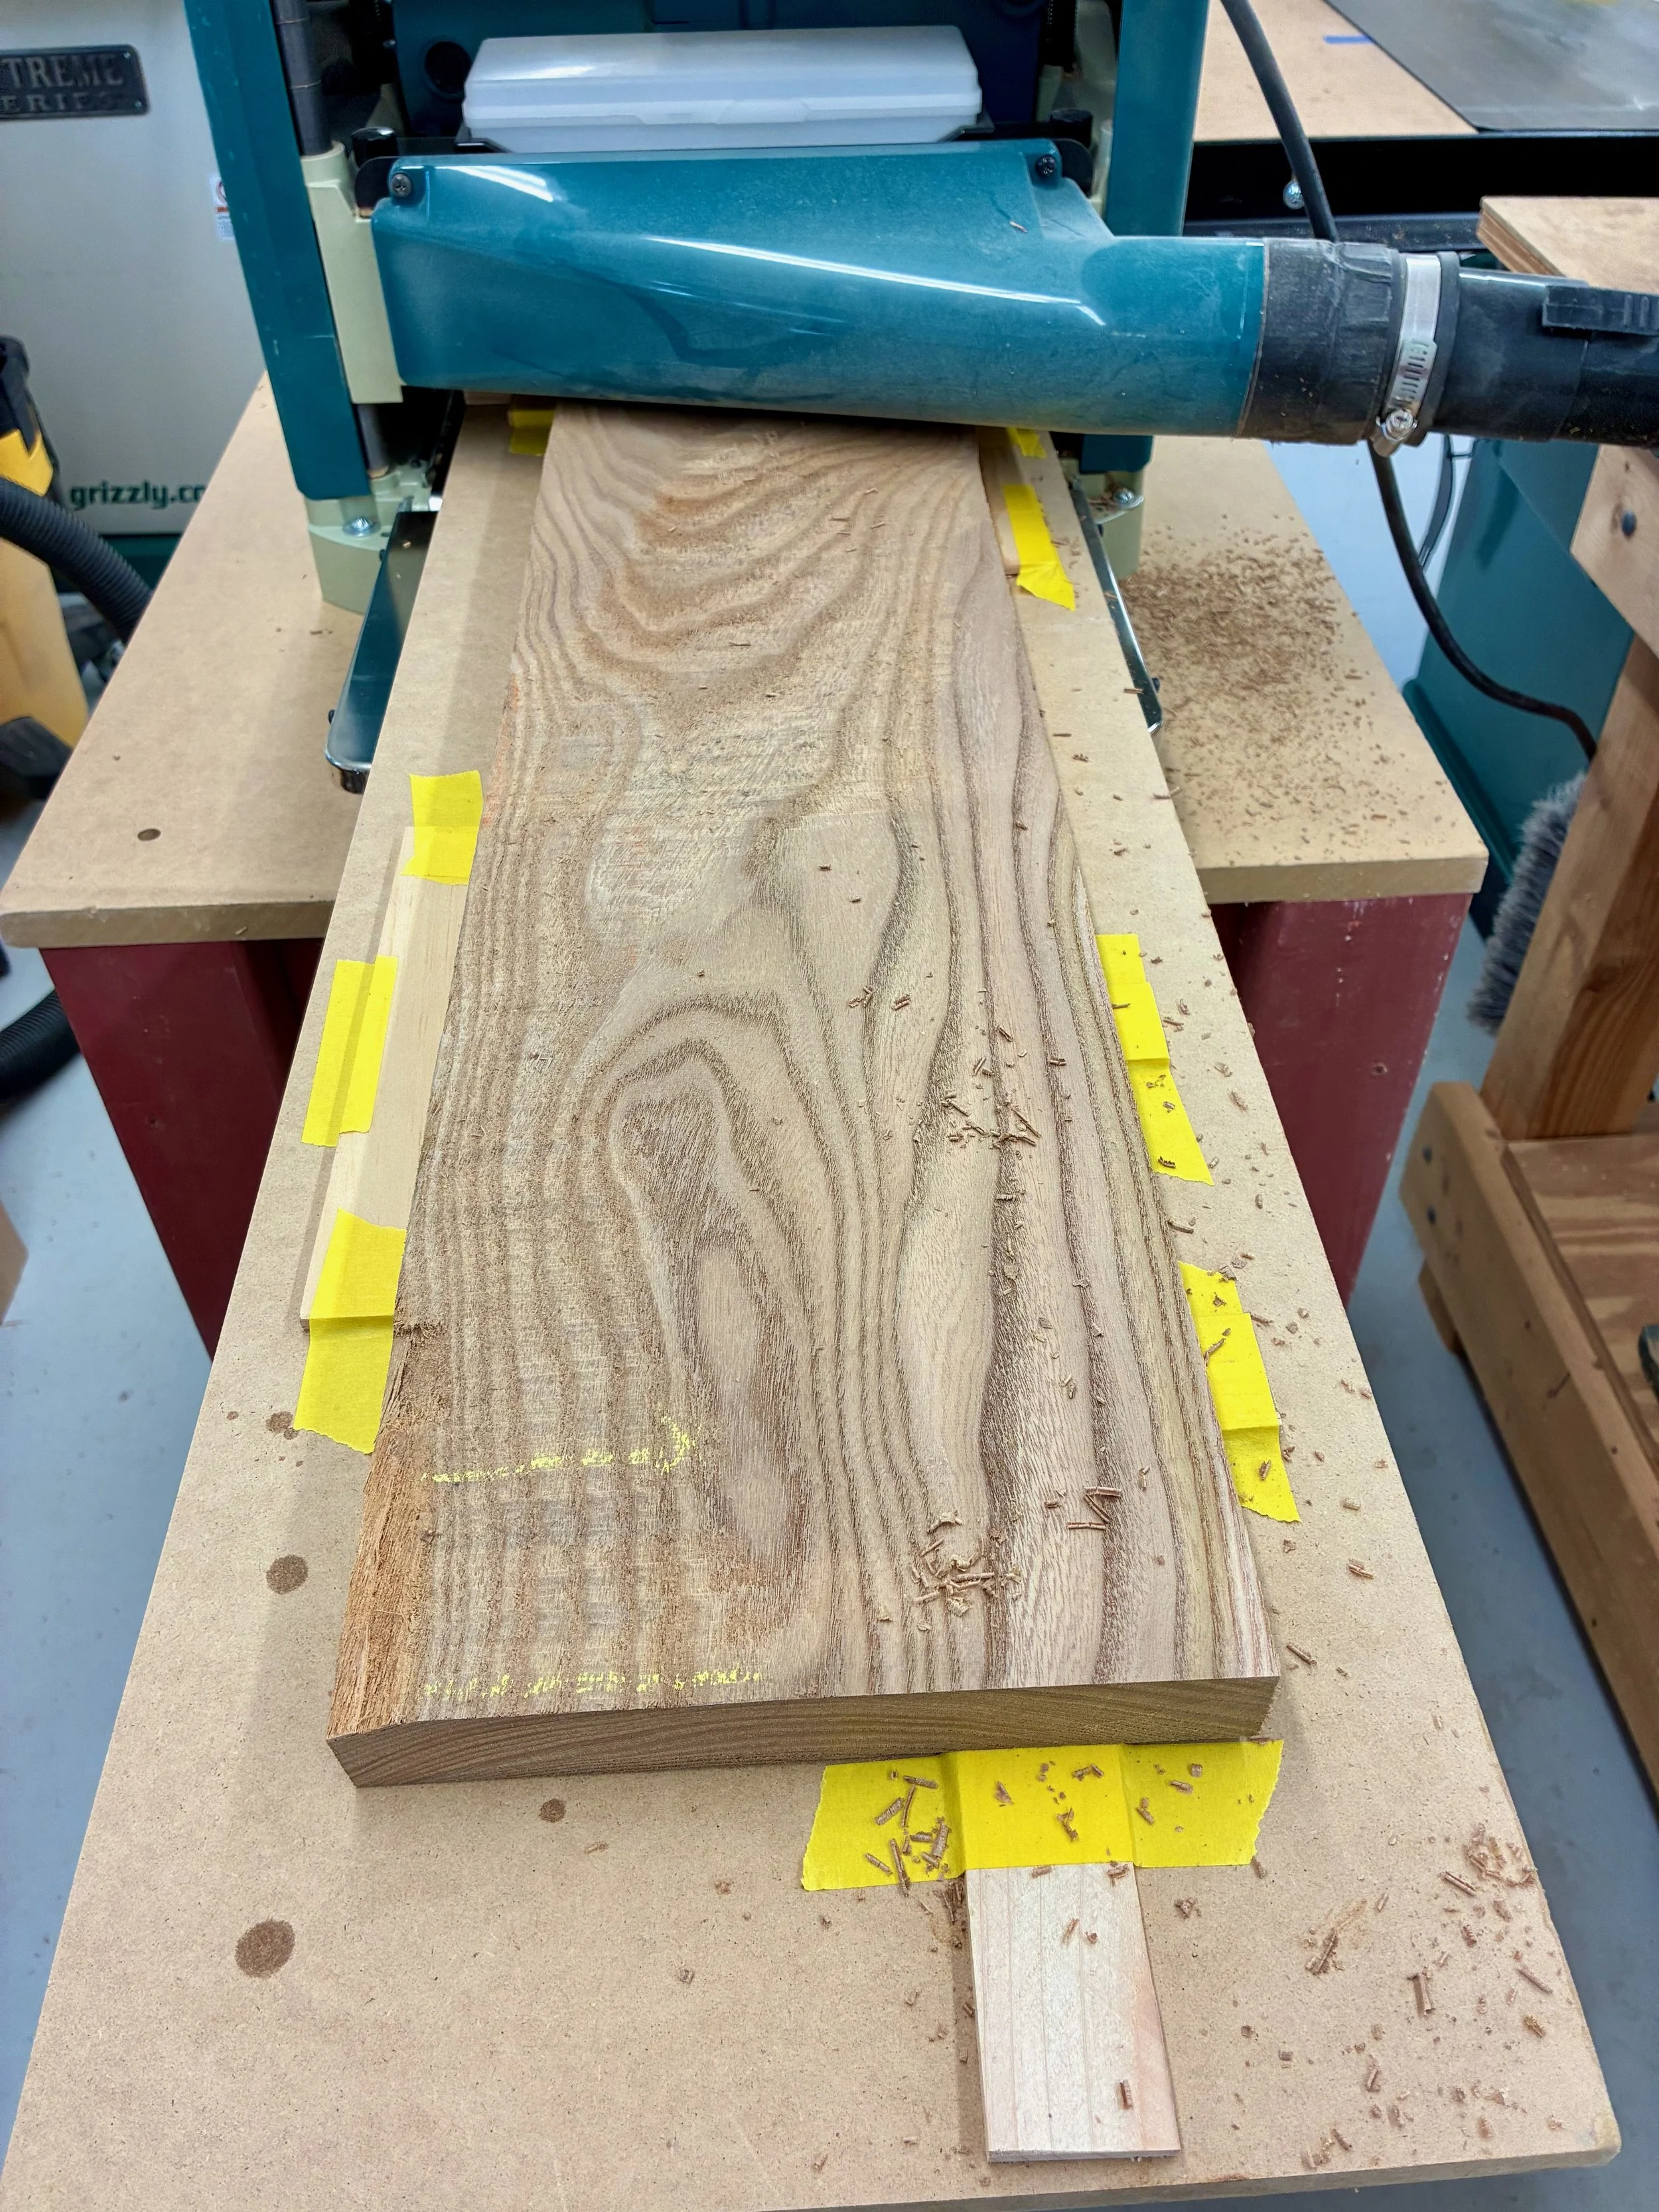
Elm and sled exiting the planer on its way to becoming flat
With a bit of care and patience, the elm/sled/planer combo produced two flat boards ready for mating together. Biscuit slots were cut into jointed edges and the boards were glued-up to make a full-sized panel. After trimming to final dimensions, filling some crack defects with epoxy, and then smoothing the surfaces, the underside was rabbeted at the table saw to fit within a groove in the top frame.
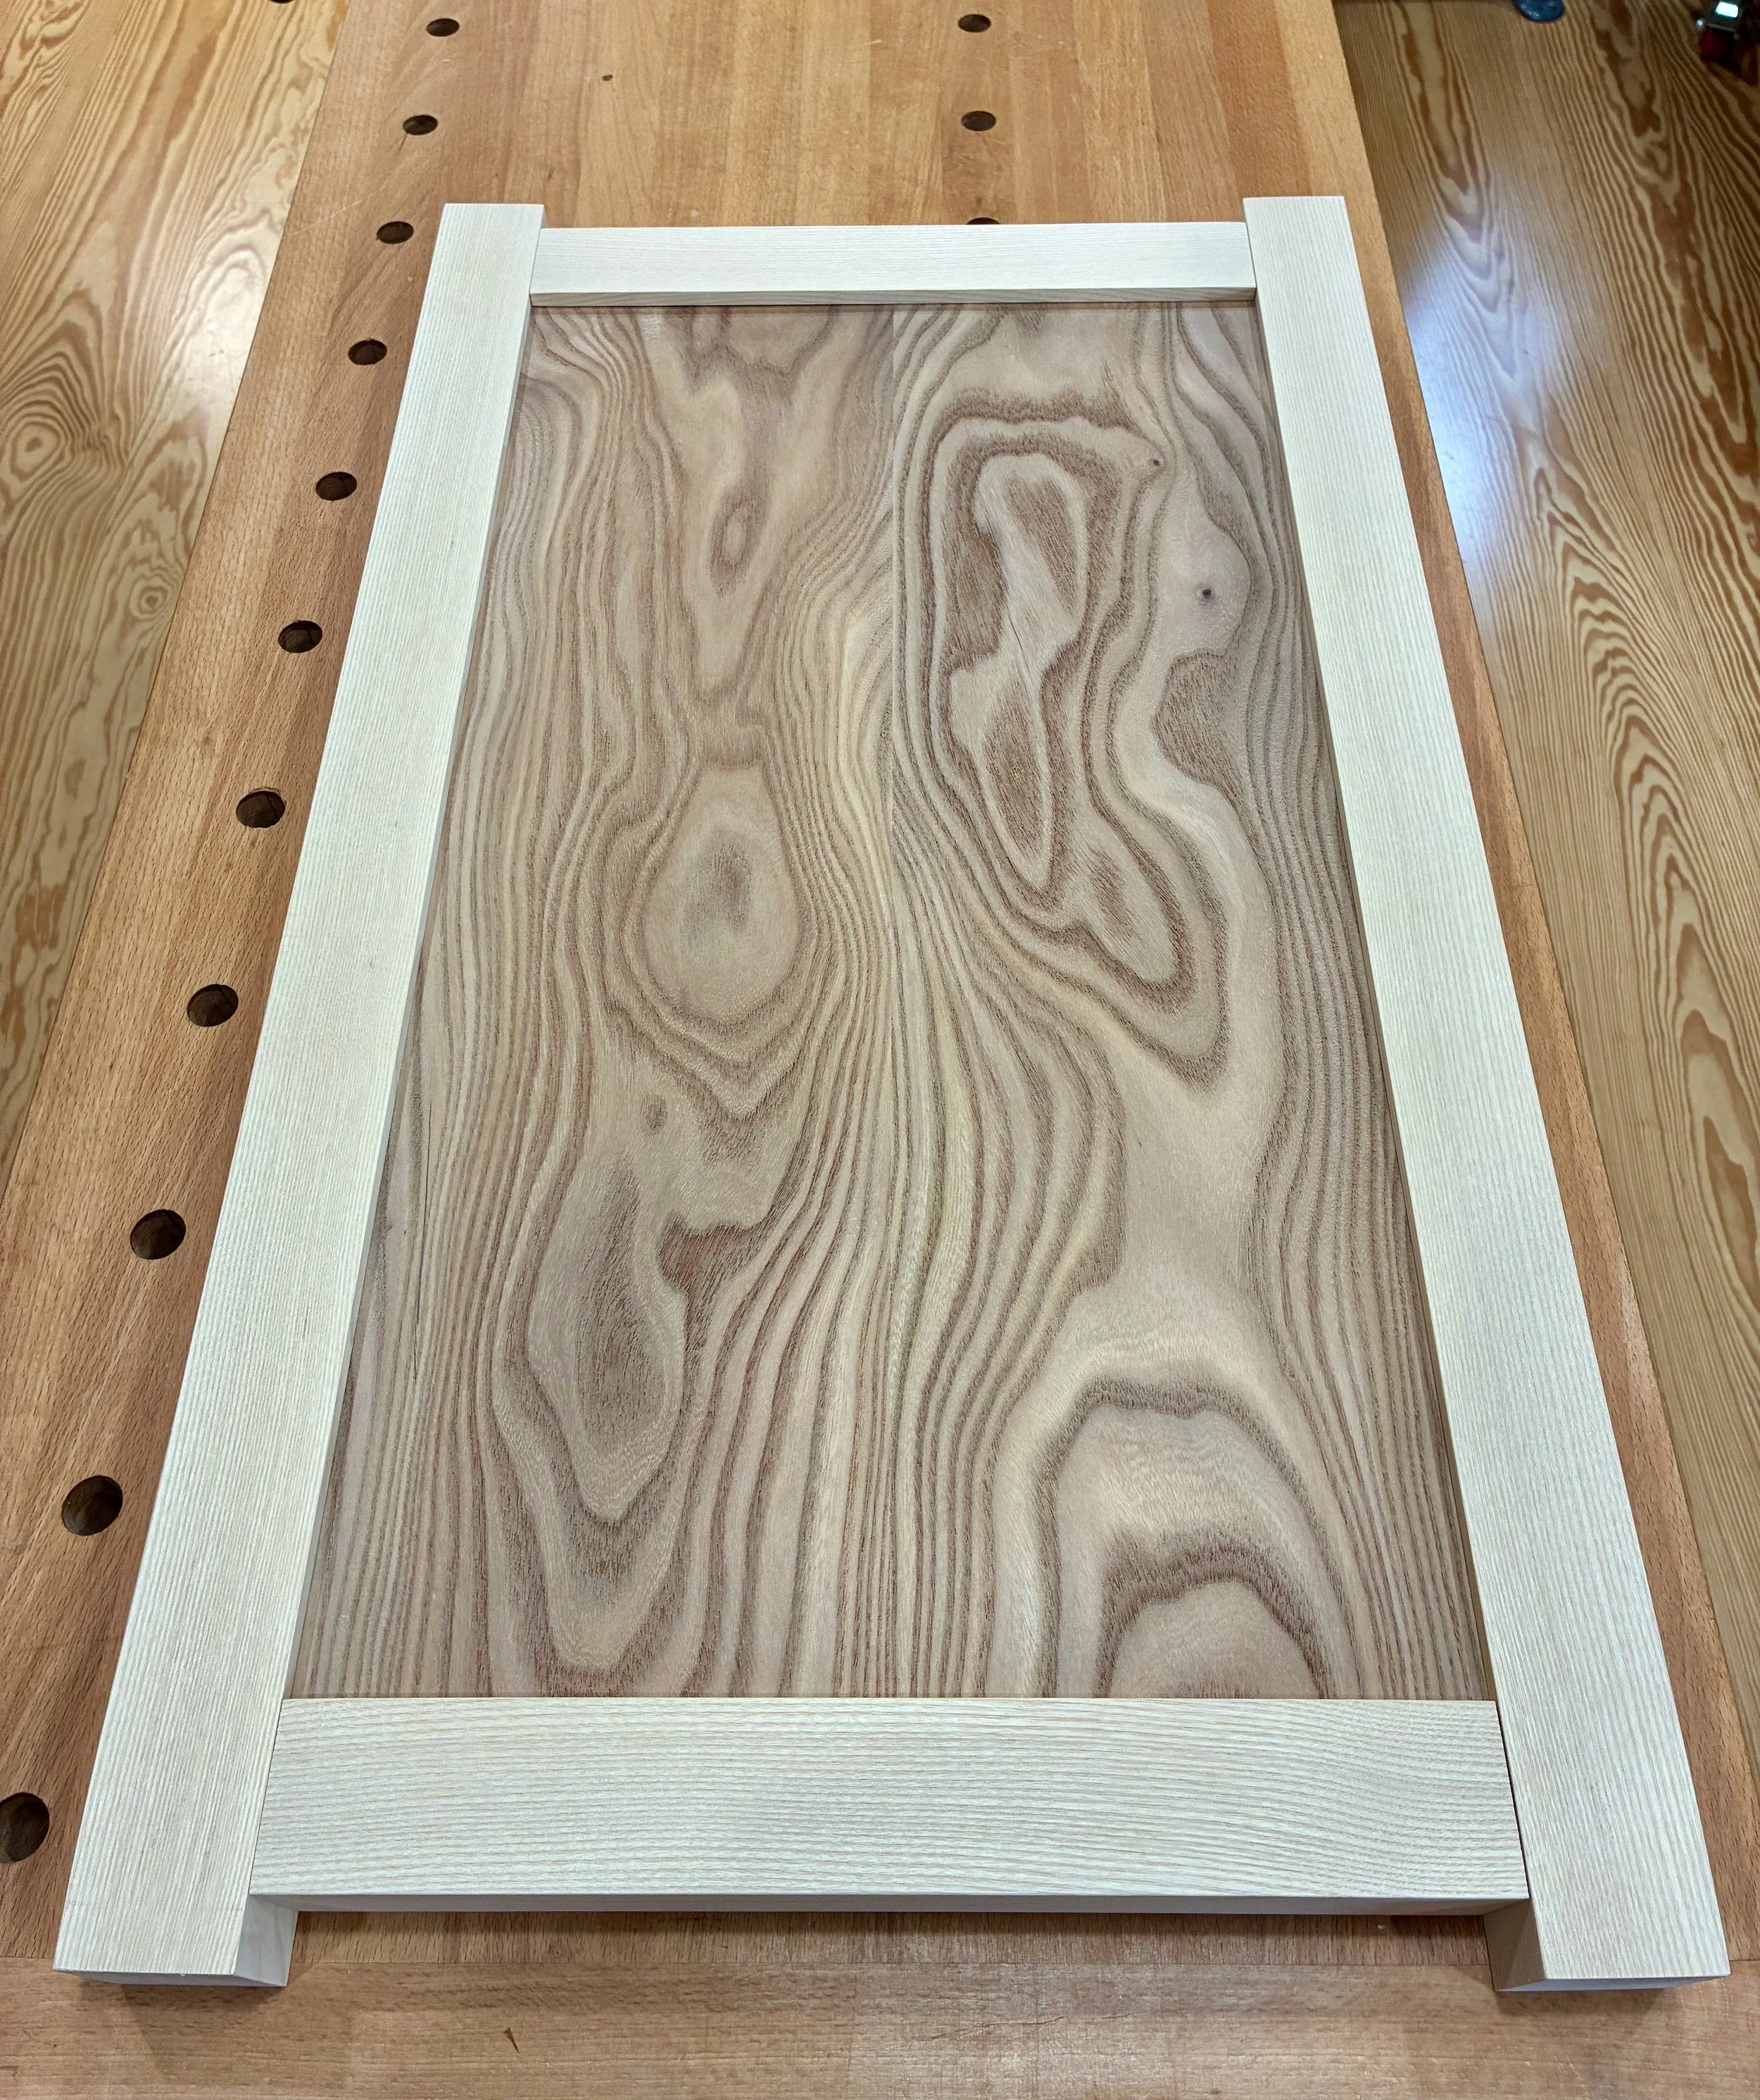
Elm panel dry-fit into the frame
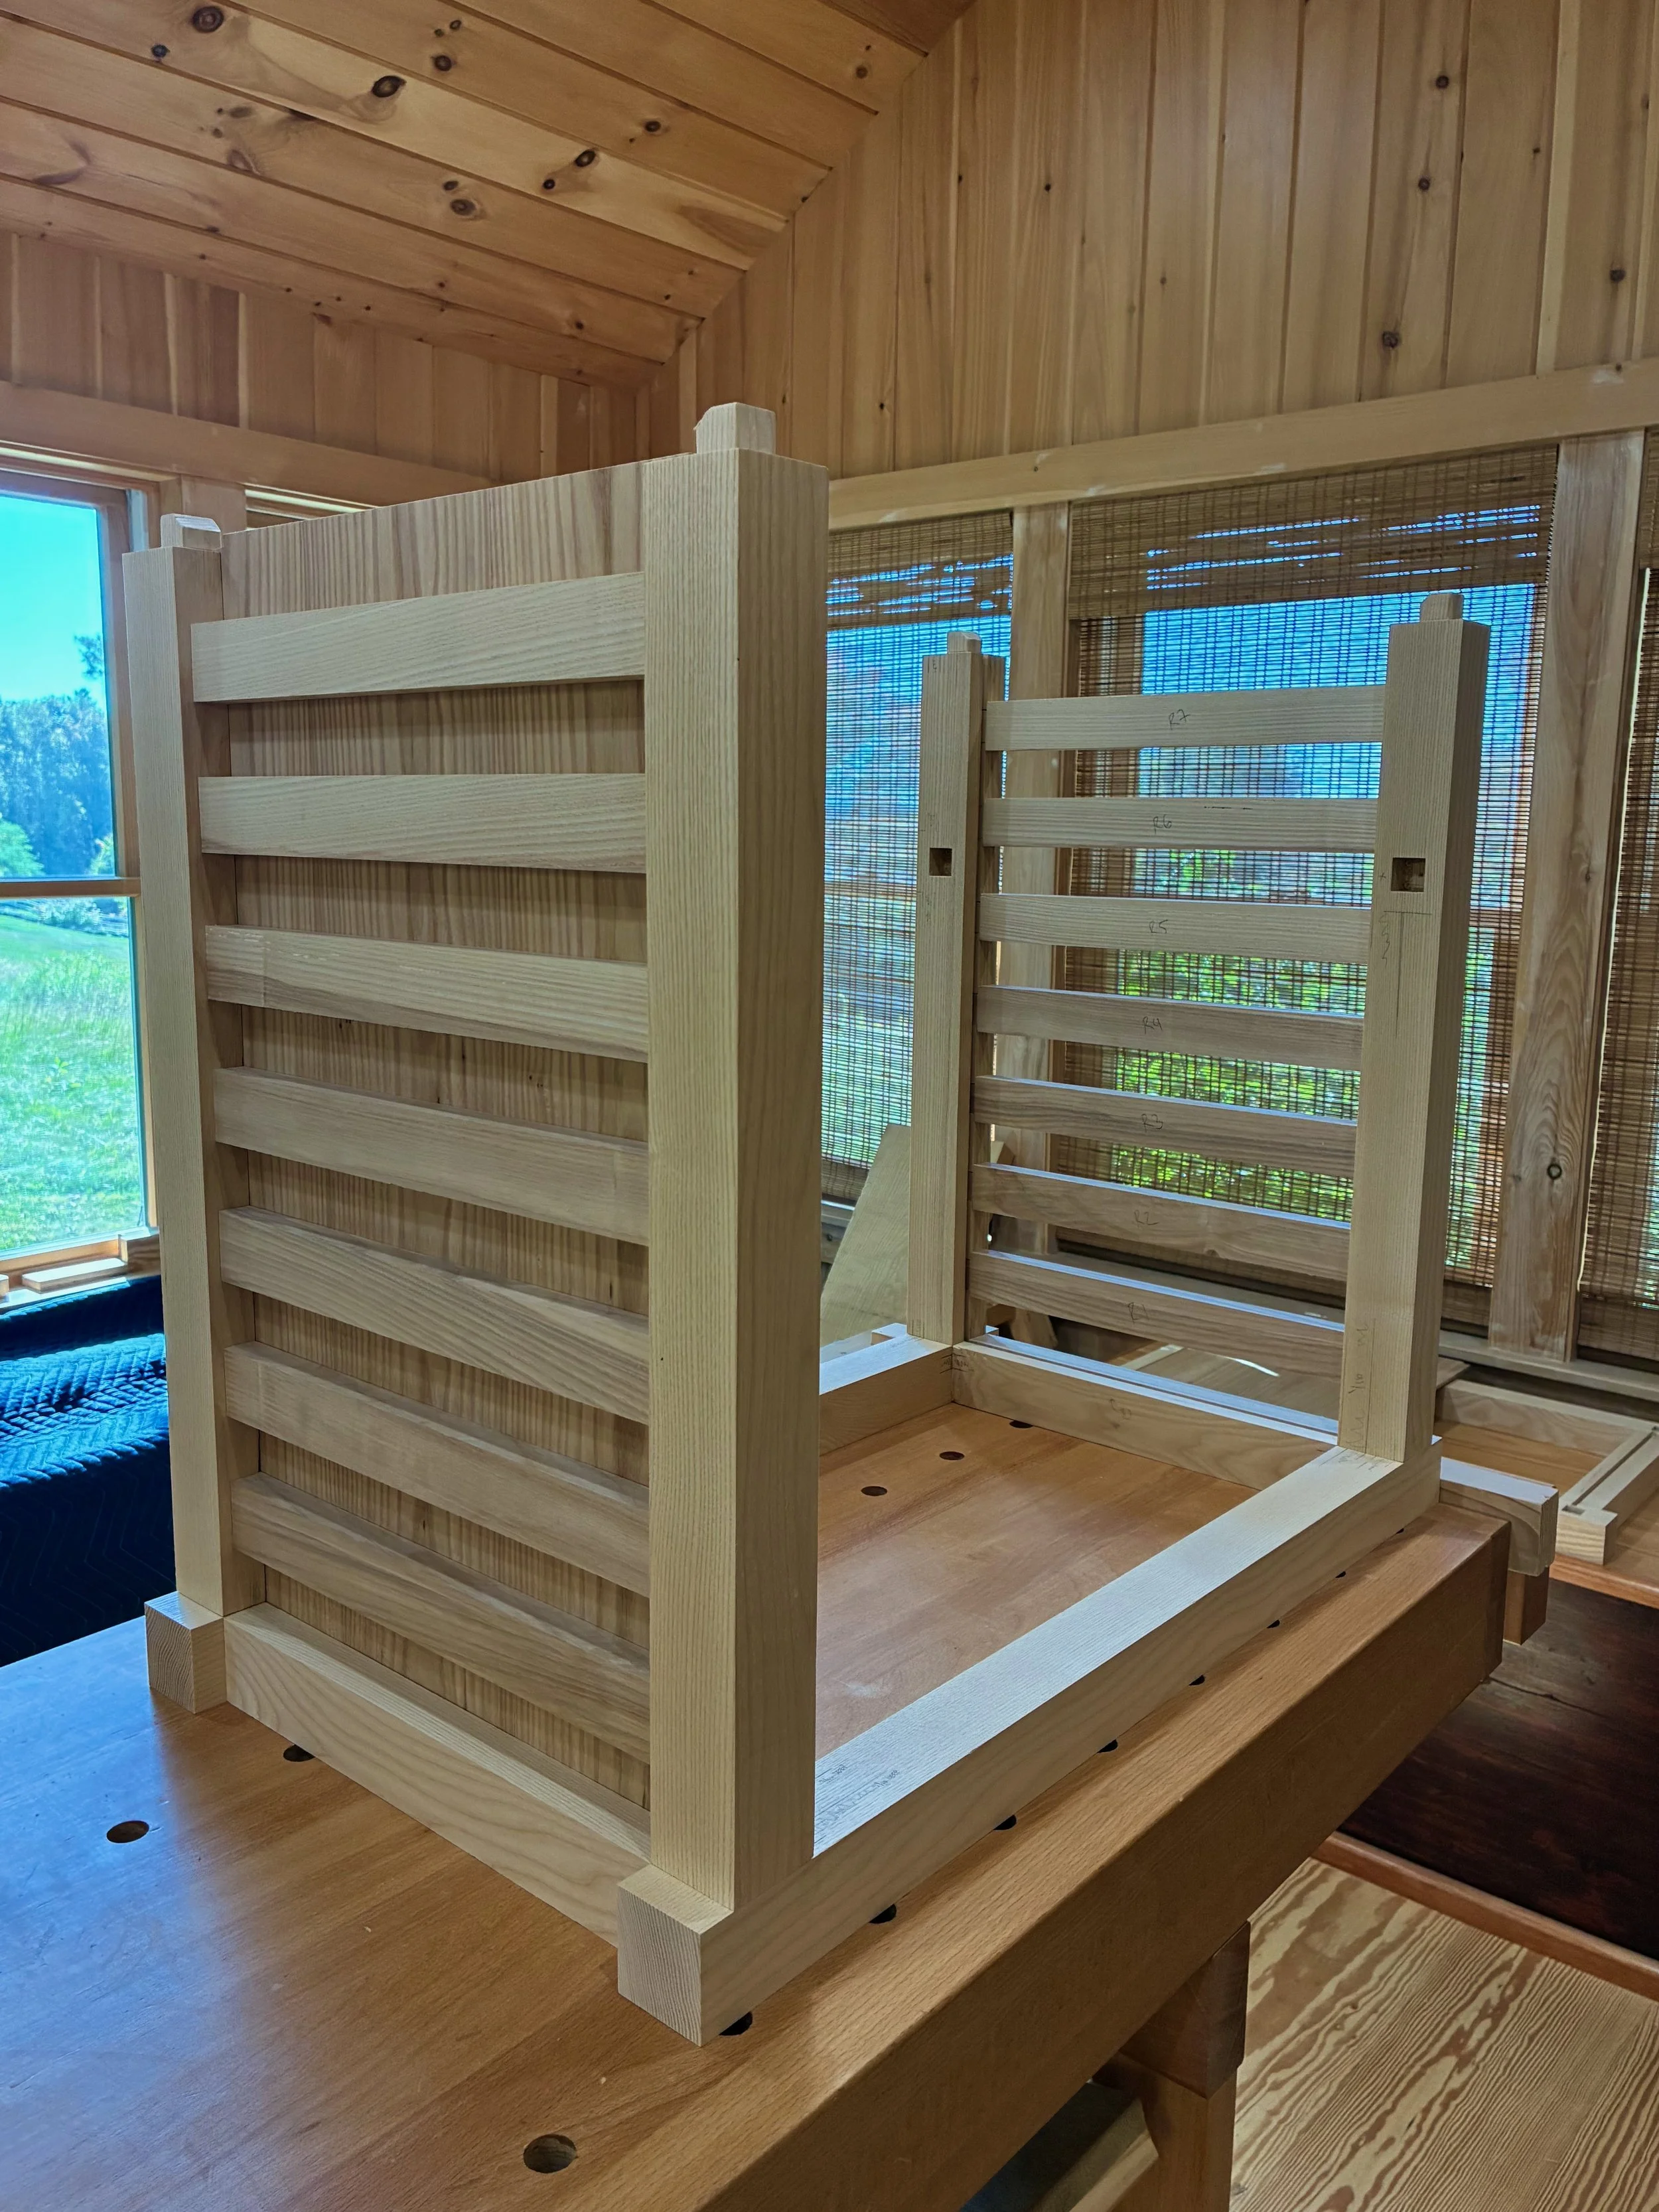
Finally, I routed some grooves into the front framework to serve as sliding door channels and then the entire carcass was assembled in a dry-fit - 34 parts, in all. The next steps are to create: 1. the sliding doors and drawer for the chest; 2. a case for the interior drawers; and then 3. the interior drawers themselves. I believe I’ll need to squeeze that drawer case into the carcass frame prior to a final glue-up and so I am leaving the Project at this stage for now. Please stay tuned for the completion story in episode 2.
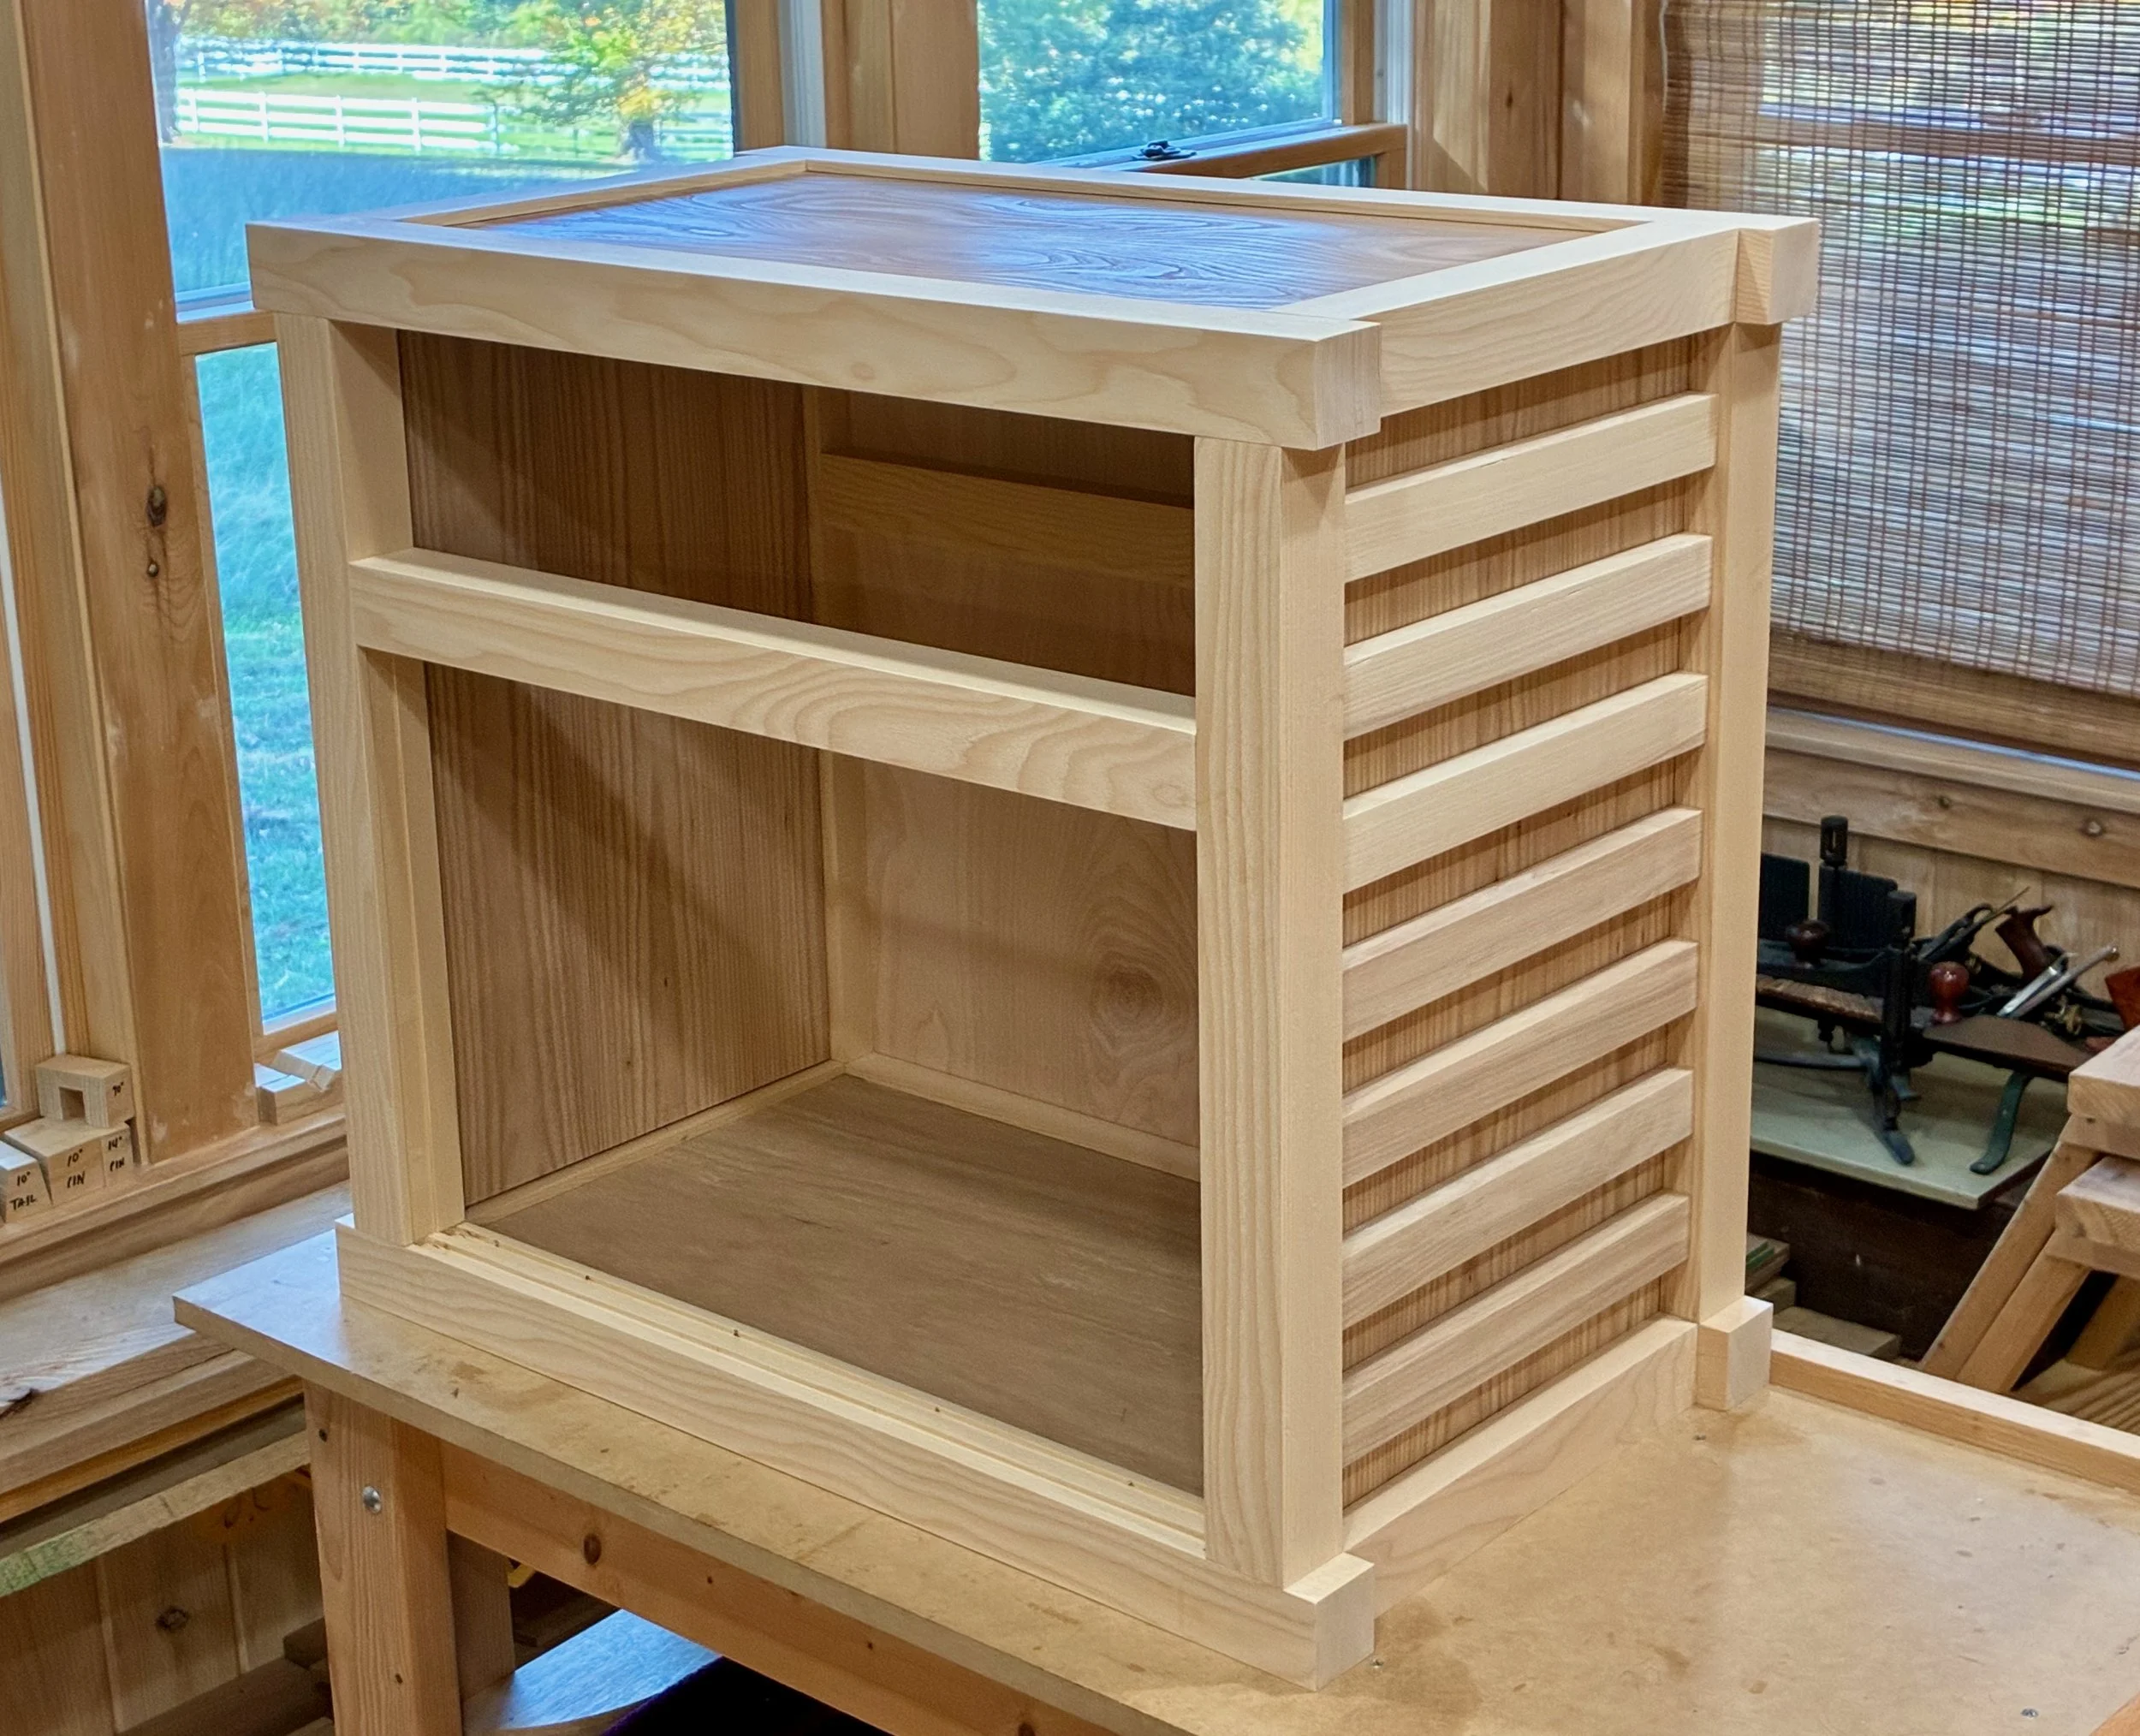
Coin chest carcass